Not everyone wants gore for Halloween. Some of us just want a little ghost with a smile and a pumpkin that looks like it’d give you a hug. If that’s you, these cute Halloween nails are exactly your speed — 25 sweet, soft, kawaii-leaning ideas that feel like October without the scary part.
Every one is something you can recreate at home, no salon needed. And they genuinely shine on short and medium nails — the little characters actually look cuter when they’re chubby and close together.
I’ve grouped them into five bundles so you can jump straight to your thing: ghosts, candy corn, pumpkins, bats and monsters, and black cats. This is a softer companion to my bigger Halloween nail ideas roundup, so if you want the full spooky range, that’s there too. Ready? Let’s get adorable.
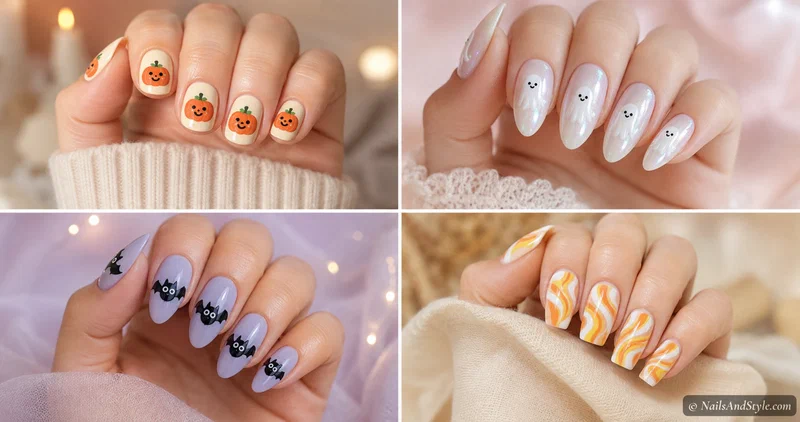
Why Cute Halloween Nails Just Hit Different#
Here’s my honest take: scary nails are fun for one night, but cute Halloween nails you’ll actually smile at every time you reach for your coffee. They soften the whole season. Little characters, rosy cheeks, pastel twists on the usual orange-and-black — it’s Halloween for people who also decorate with tiny felt pumpkins.
And they go everywhere. School runs, pumpkin patches, office Mondays, a friend’s costume party where you didn’t want to commit to full vampire. Sweet reads friendly. That’s the point.
A Few Things to Keep in Mind Before You Start#
- Go soft on your base. Warm nude, cream, milky white, or pastel purple instantly makes any design read cute instead of creepy.
- Rounded shapes = cuter. Chubby ghosts, round pumpkins, and fat little bats look sweeter than sharp, detailed ones. Don’t overthink the neatness.
- Keep art to one or two nails. Let the rest stay solid so the cute nail is the star, not a crowded mess.
- Base coat and top coat, always. A base stops staining, and a glossy top coat is what makes the little faces look shiny and alive.
Quick Pick: Which Design Should You Try?#
| If you’re looking for… | Try these designs |
|---|---|
| Total beginner | Smiley Pumpkin Nails, Candy Corn Polka Dots |
| Short nails | Mini Pumpkin Accent, Peeking Cat Nails |
| The “aww” factor | Sleepy Ghost Nails, Chubby Bat Nails |
| A little color pop | Little Monster Nails, Orange Tabby Nails |
Cute Ghost & Boo Nails#
Ghosts are the gateway drug of cute Halloween nails. Easy to paint, impossible not to love, and endlessly remixable. Here are five that skip the spooky and go straight for sweet.
1. Glazed Ghost Nails#
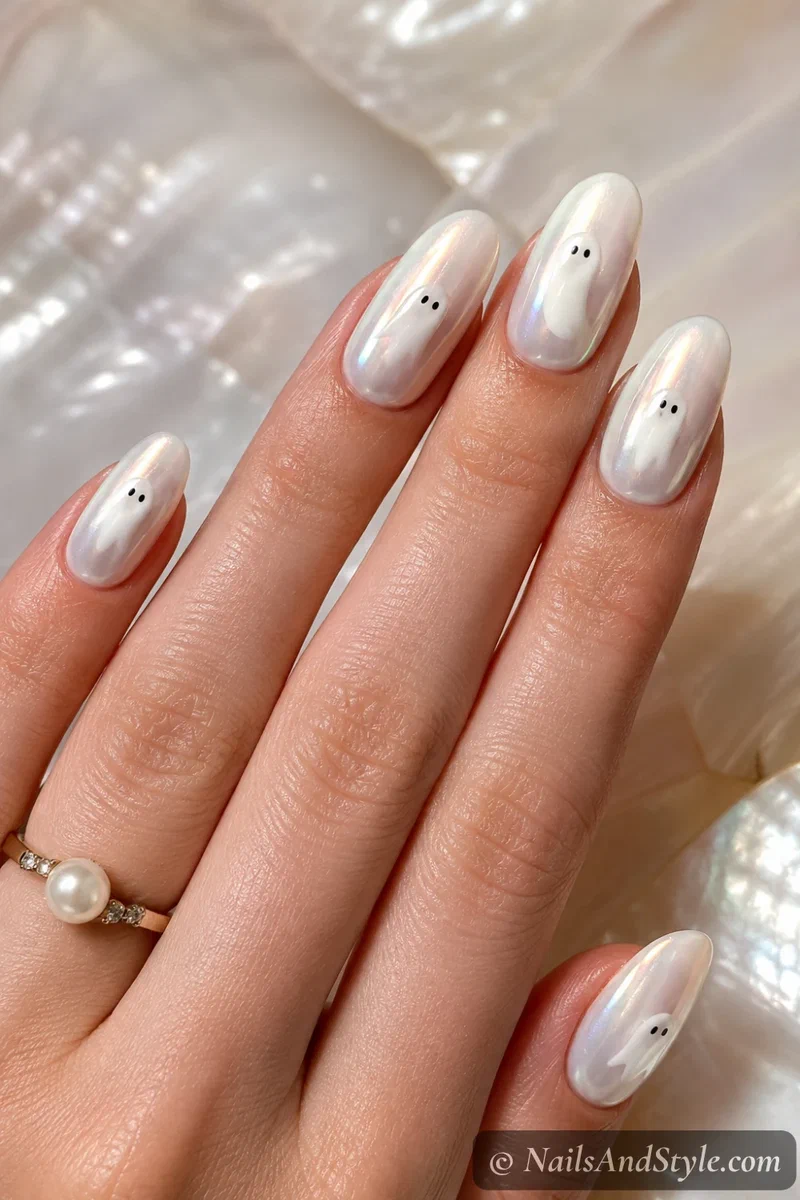
The glazed-donut trend, but make it Halloween. A milky white ghost under a pearly iridescent shimmer looks soft and lit-from-within — barely-there and so pretty. Paint a sheer white base, add a simple ghost shape, then swipe a fine pearl or opal chrome over a glossy top. It glows without trying.
2. Ghost French Tips#
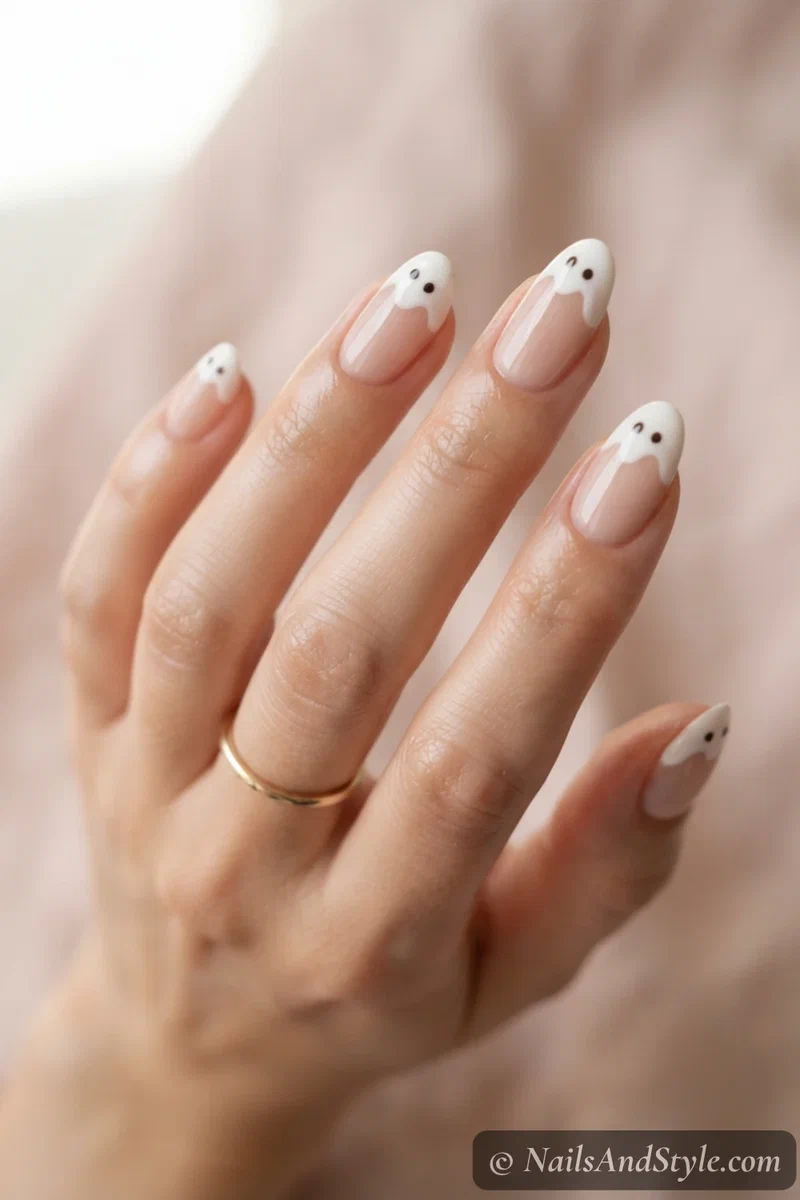
Your everyday French tip, if the smile line grew a little ghost tail. Instead of a straight white edge, the tip dips into a wavy ghost shape at the end of each nail. Use a thin brush over a nude base and keep the wave loose. Tiny black dot eyes on one or two, and you’re done. Office-safe, quietly festive.
3. Boo Crew Nails#
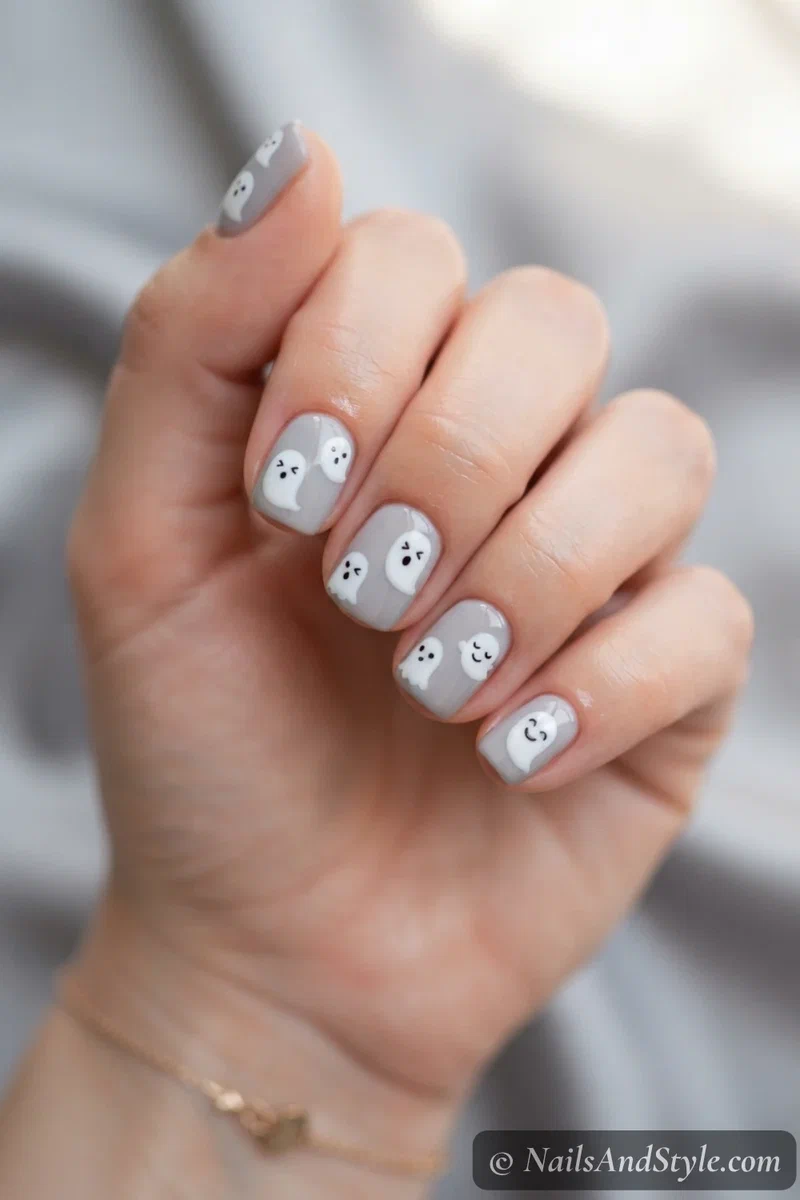
A whole little gang of ghosts, each with its own face — one grinning, one surprised, one just vibing. Paint three or four chubby white ghosts across a soft grey base, then give each a different dot-and-line expression. The personalities are what make people zoom in. New to freehand? A toothpick for nail art is perfect for the little faces.
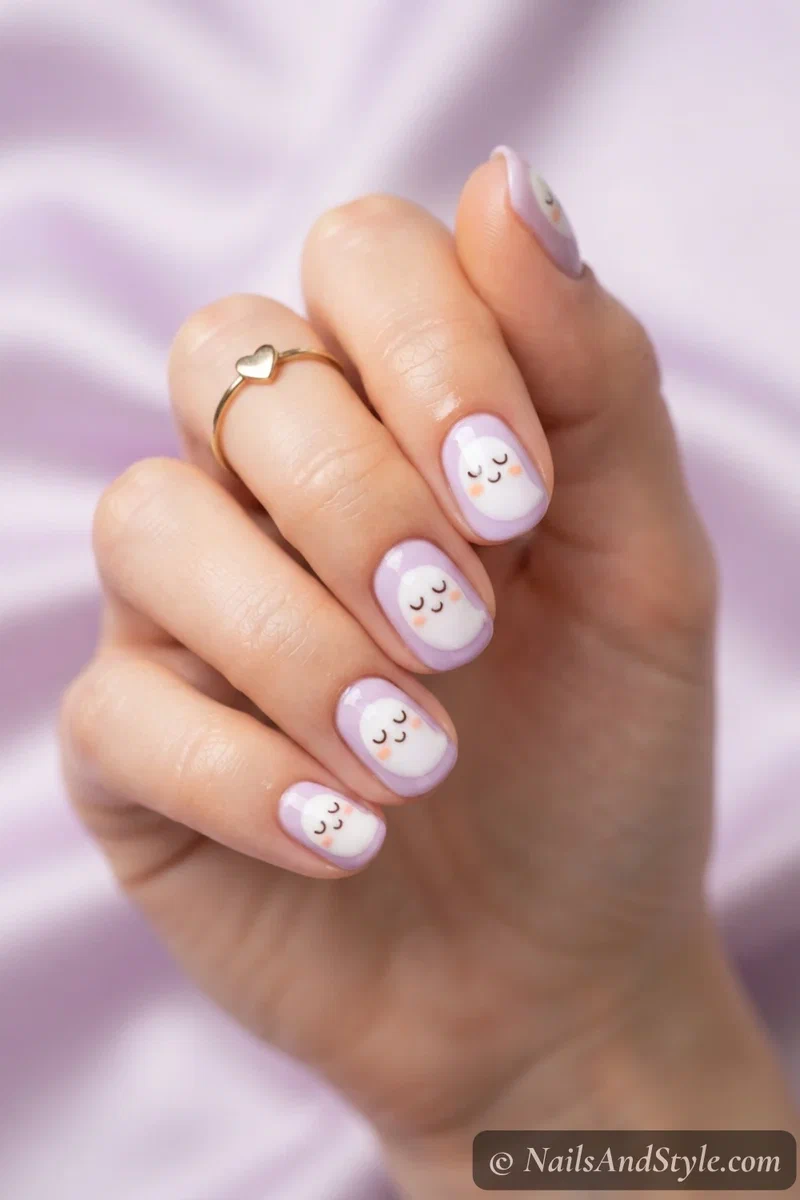
4. Sleepy Ghost Nails#
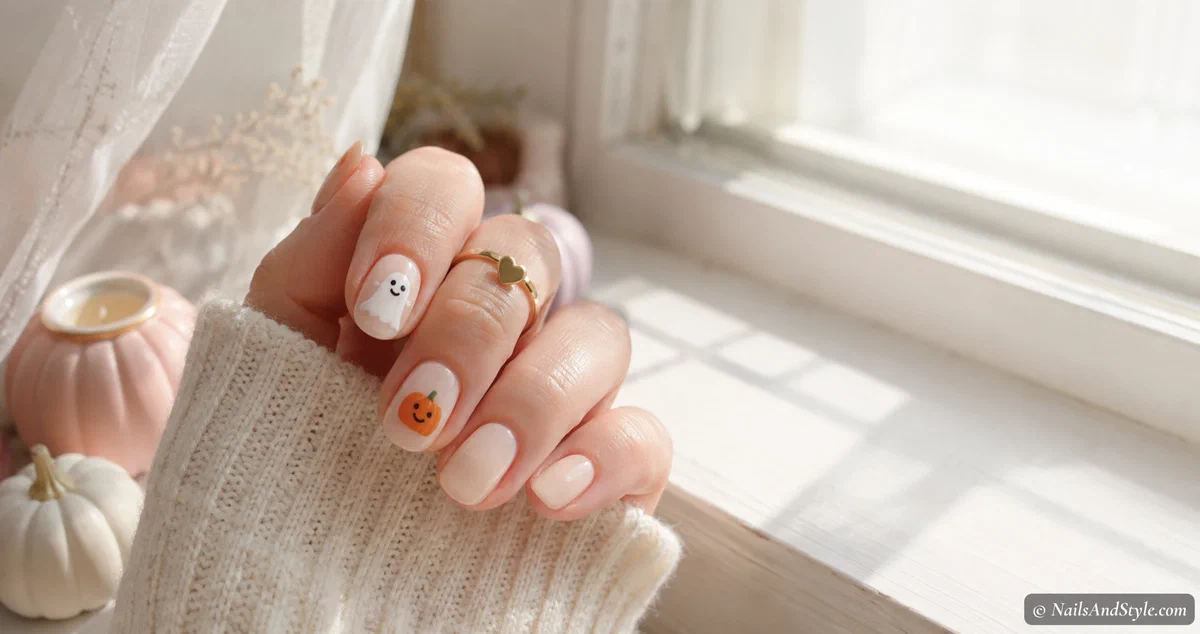
The softest one on the list. These ghosts have closed, curved little eyes like they’re mid-nap, plus tiny rosy cheeks. Over a pastel lilac base, paint a rounded white ghost, then two small closed-eye curves and a peach cheek dot. Genuinely so cute it’s a little ridiculous.
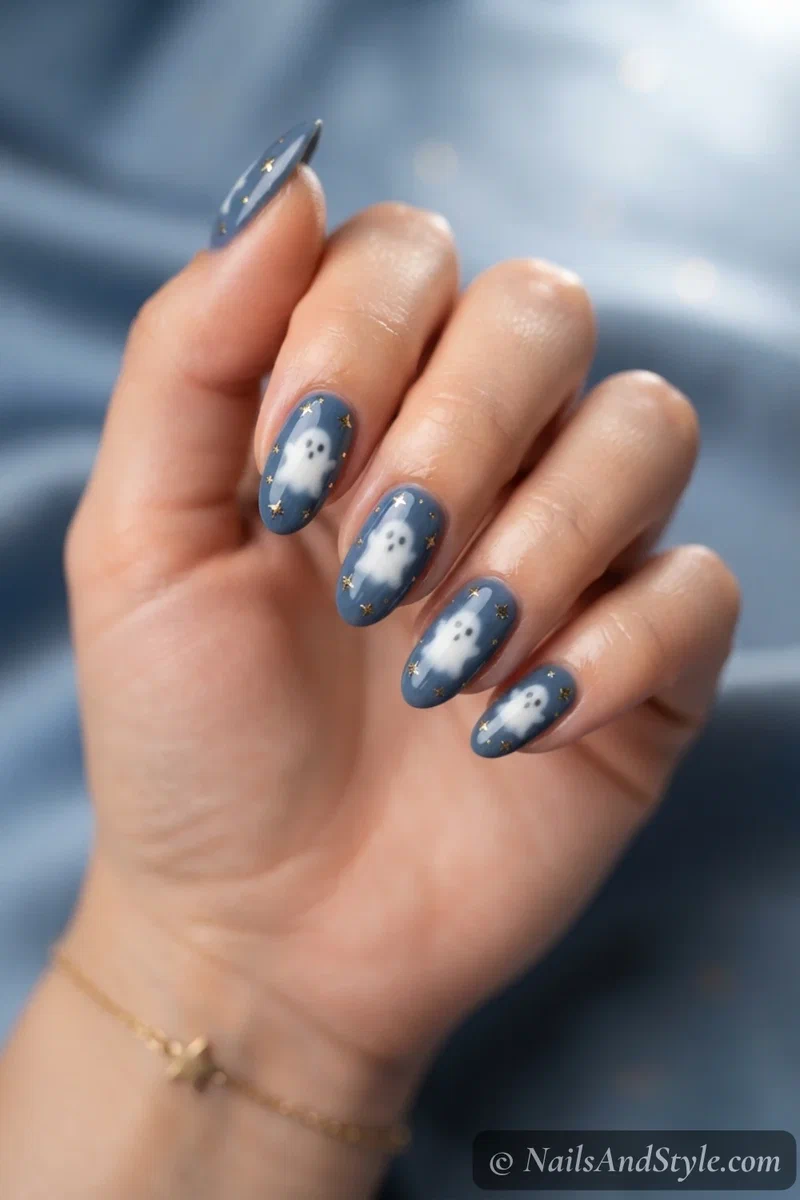
5. Ghost & Star Nails#
Dreamy and a bit celestial. One floaty ghost surrounded by a scatter of tiny gold stars on a dusk-blue base — like it’s drifting through a night sky. Paint the ghost first, then dot little gold stars around it with a fine liner or a nail-art pen. Glossy top coat for that twinkly finish.
Candy Corn Nails#
Love it or hate it as a candy, candy corn makes the cutest nails — those three cheerful stripes just work. Here are four ways to wear it without it looking like a craft project.
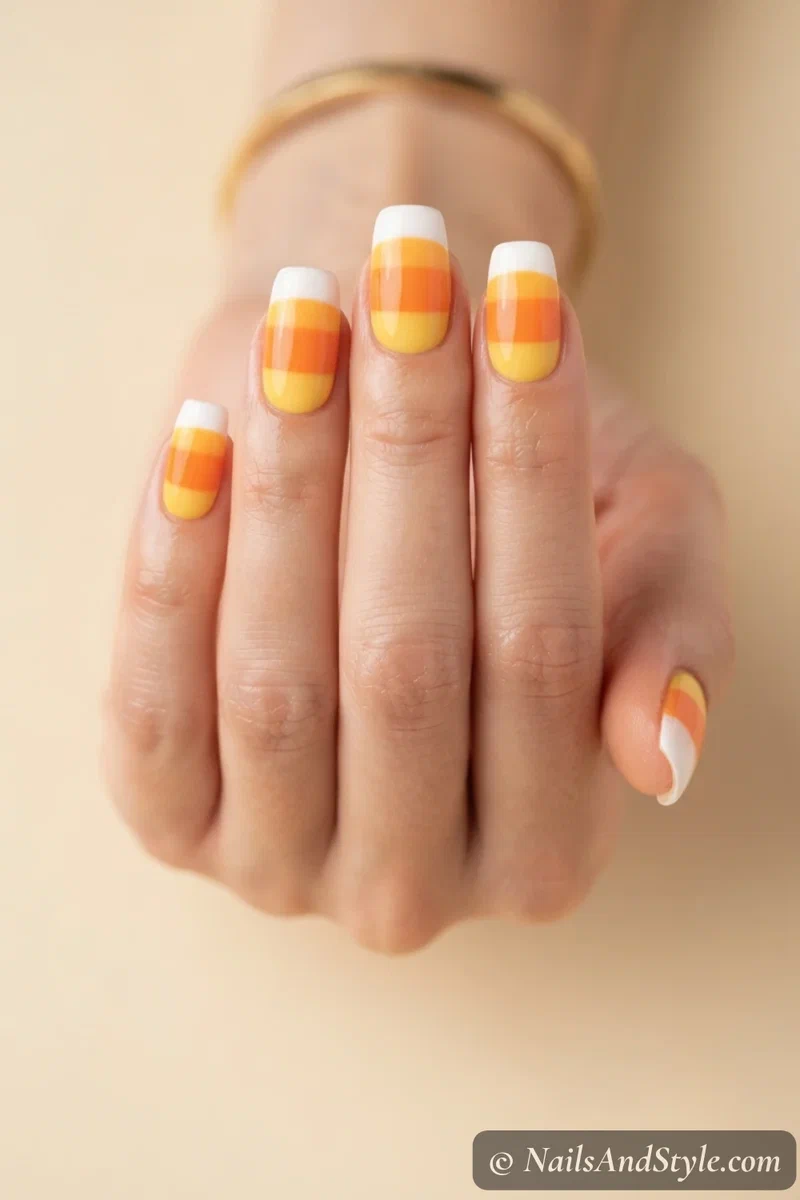
6. Classic Candy Corn Tips#
The OG. A yellow base, orange middle, and white tip stacked up each nail like the candy itself. Striping tape is your best friend here — lay it down, paint the blocks, peel while wet for crisp lines. Keep it glossy so it looks like a little sweet.
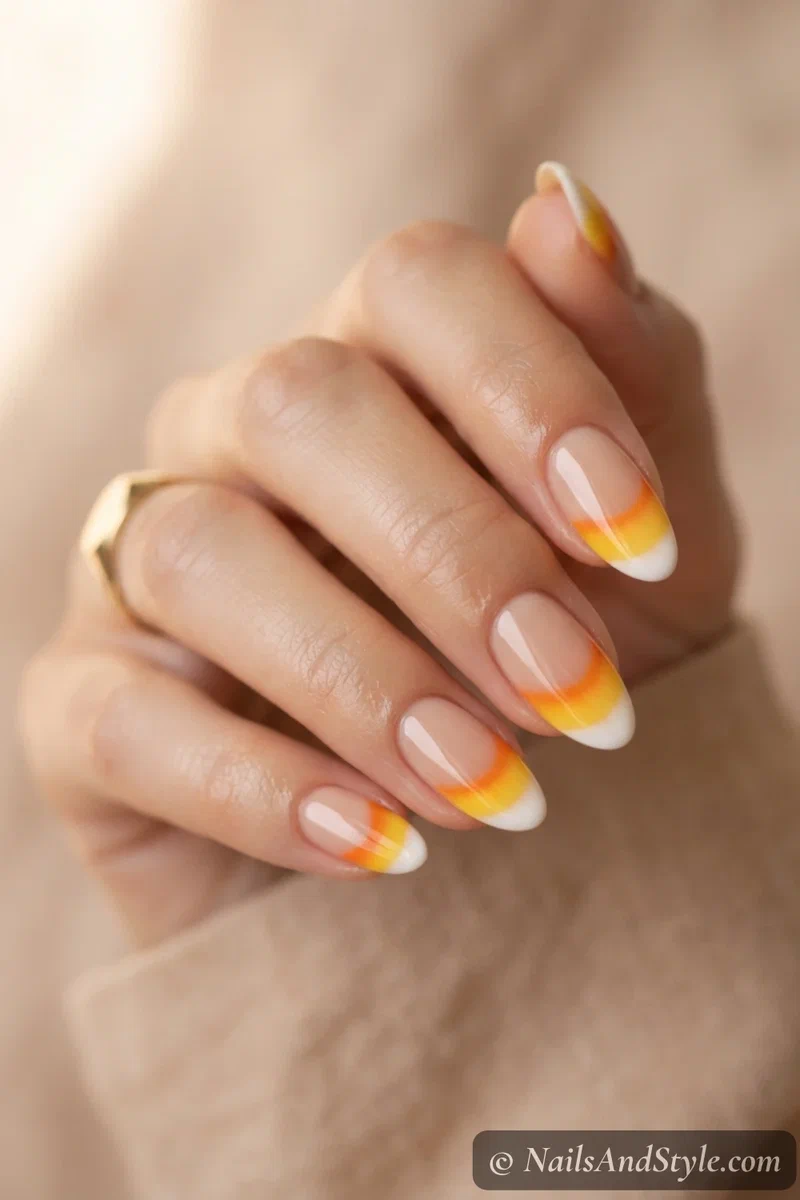
7. Candy Corn French#
Softer and more wearable — the candy corn colors as a little French smile at the tip instead of the whole nail. Paint a nude base, then a thin band of yellow-into-orange-into-white right at the edge. Reads as a color-melt French from a distance, candy corn up close. My favorite grown-up version.
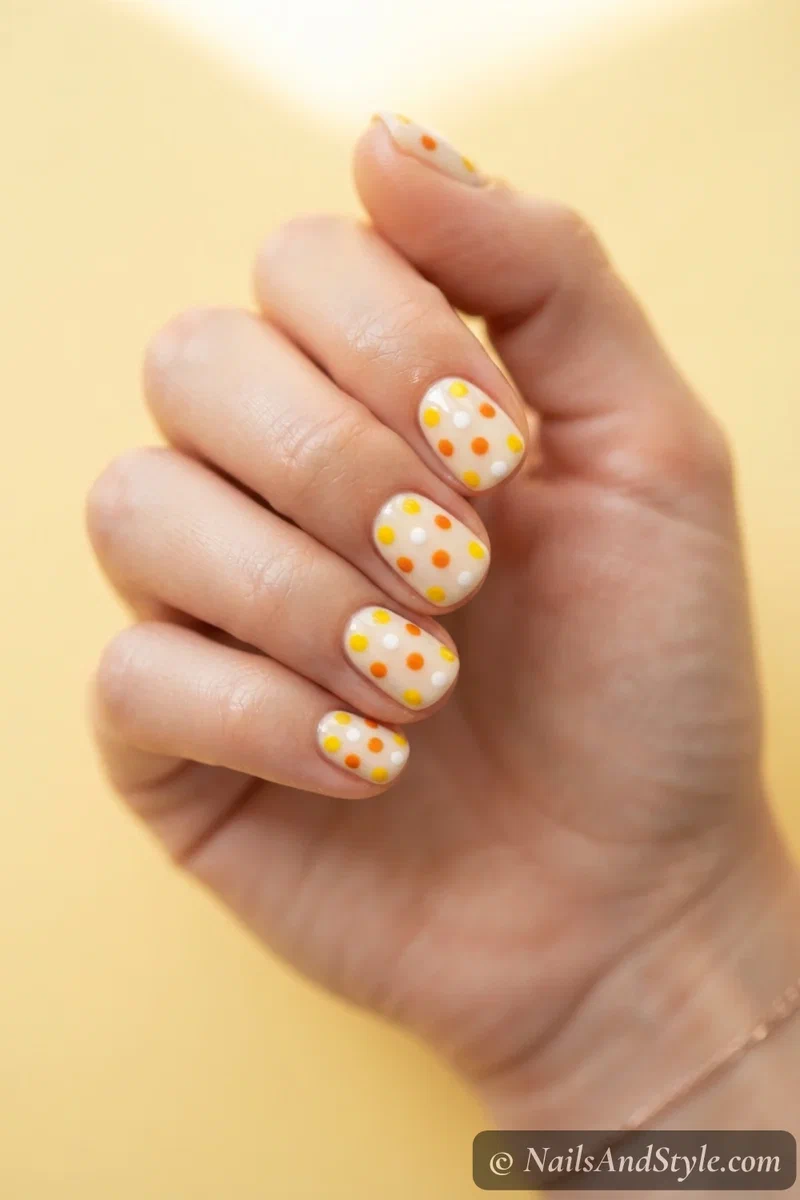
8. Candy Corn Polka Dots#
The lazy-Sunday option, and honestly maybe the cutest. Just scatter yellow, orange, and white dots over a cream base with a dotting tool — no straight lines to stress about. Space them a little unevenly so it feels playful. Five minutes, tops.
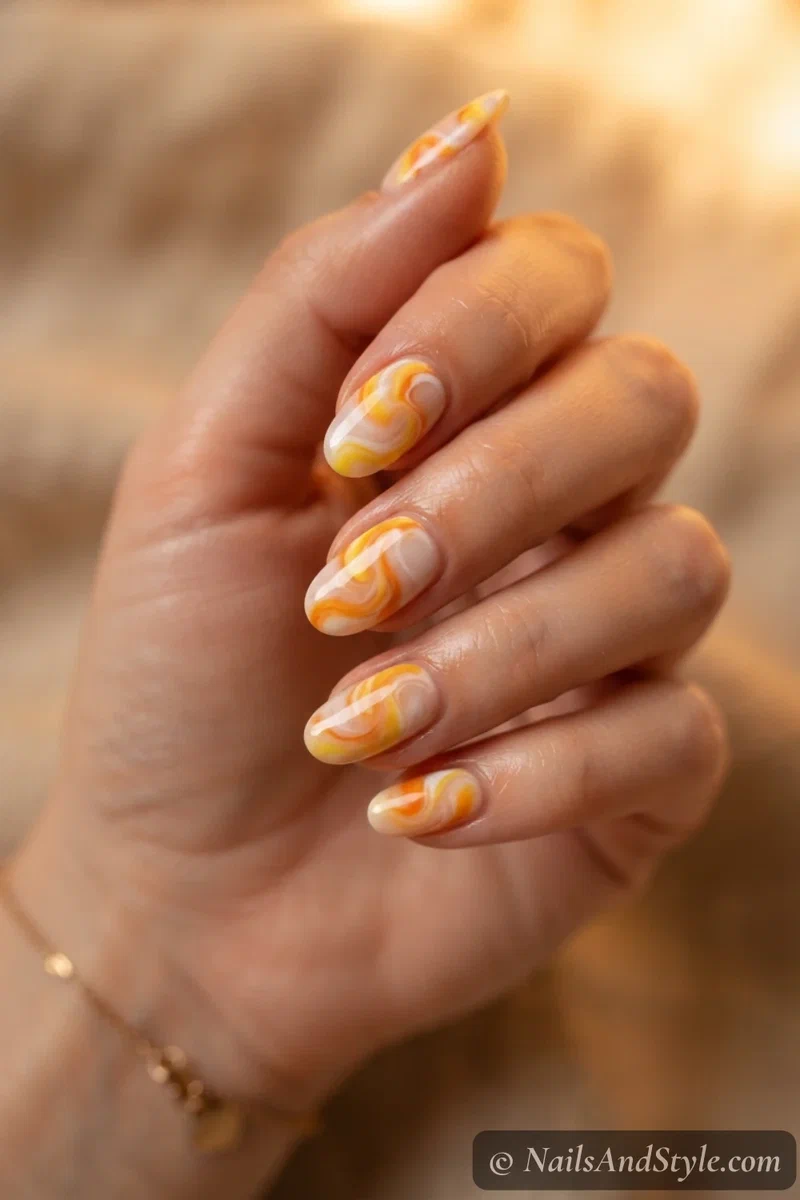
9. Candy Corn Swirl#
A little artsier. The three colors swirled together into a soft marble instead of neat stripes. Drop yellow, orange, and white onto the wet nail and drag a toothpick through gently — two passes, then stop. If you like a blended look, my guide on ombré nails at home uses the same soft-blend idea. Glossy seals the swirl.
Cute Pumpkin Nails#
No cute Halloween set is complete without pumpkins — the happy, chubby, rosy-cheeked kind. These lean cottagecore and cozy. For the full harvest version, my pumpkin patch nails post has even more.
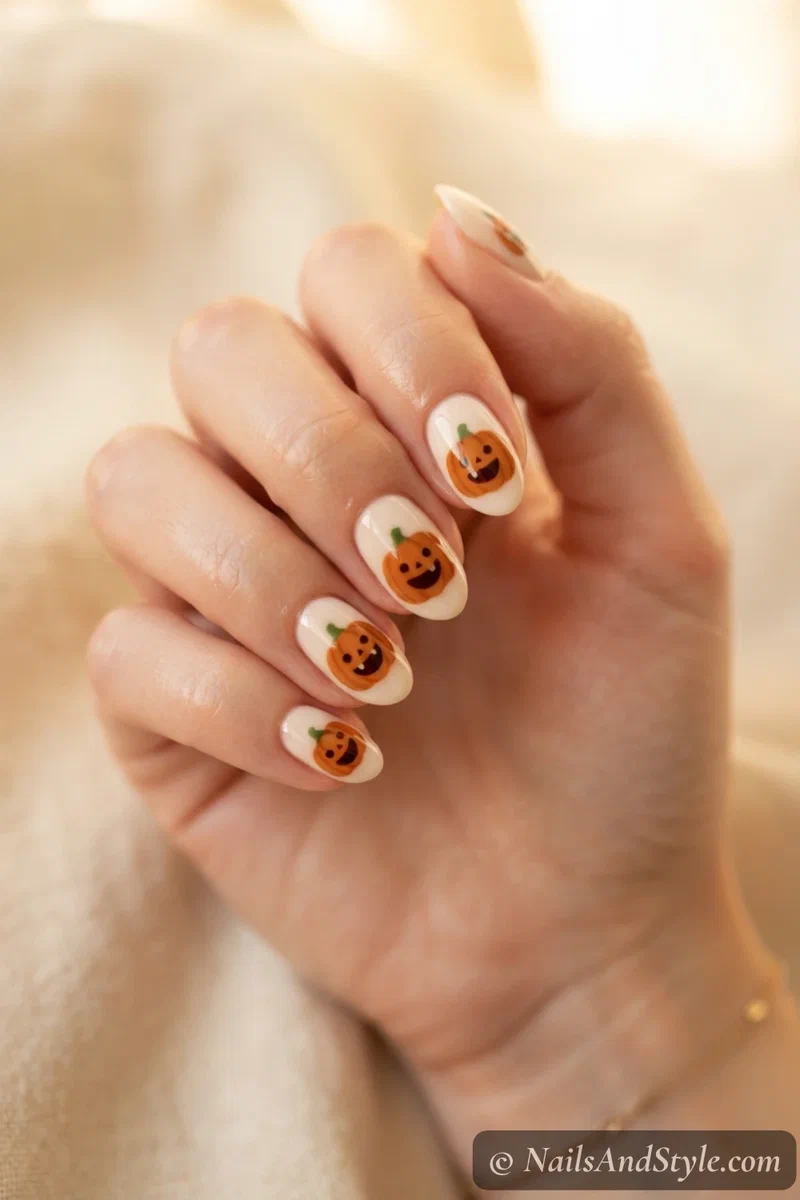
10. Smiley Pumpkin Nails#
A round orange pumpkin with a big goofy smile — that’s the whole vibe, and it’s foolproof. Dot a fat orange pumpkin onto a cream base, add a green stem, then a little curved smile and dot eyes. Keep it wonky. Perfect first-timer design, and it makes people grin.
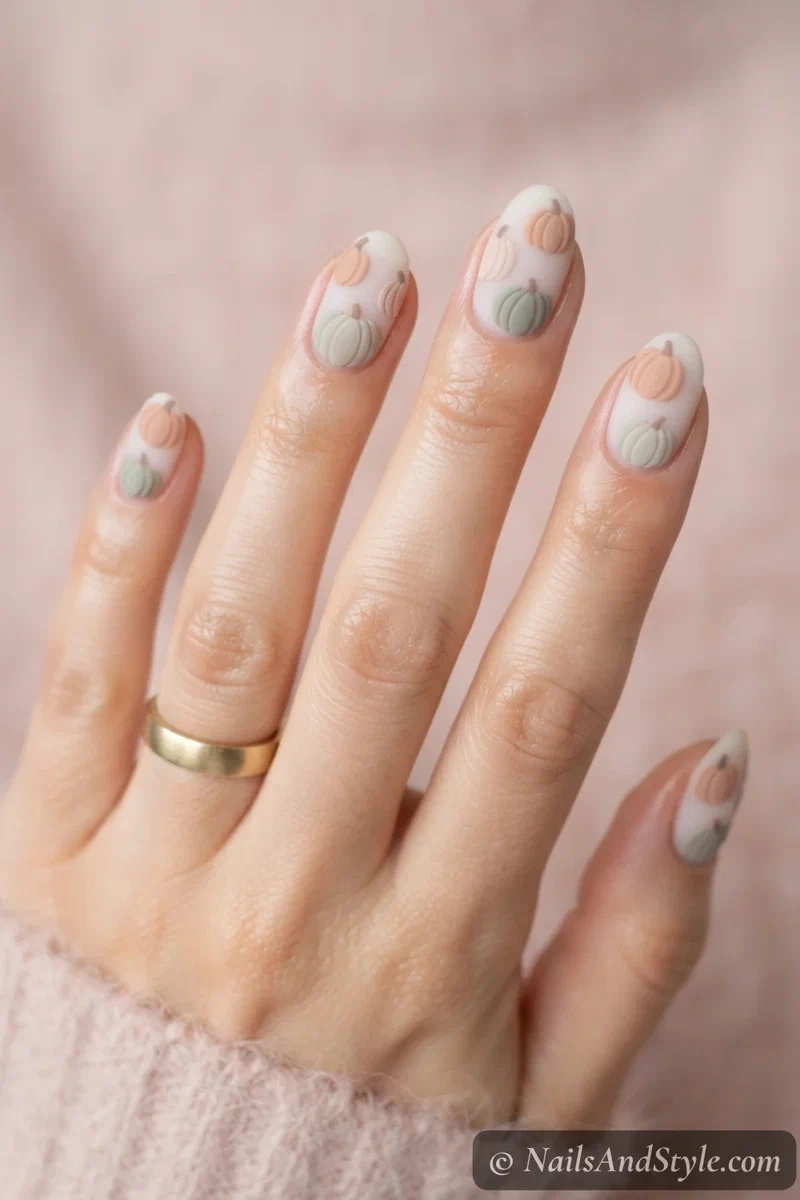
11. Pastel Pumpkin Nails#
For when orange isn’t your color. Soft dusty-peach and sage pumpkins over a milky base feel like a cozy autumn daydream. Paint the pumpkins in muted pastels, add tiny taupe stems, and finish matte for that handmade, storybook look. So soft.
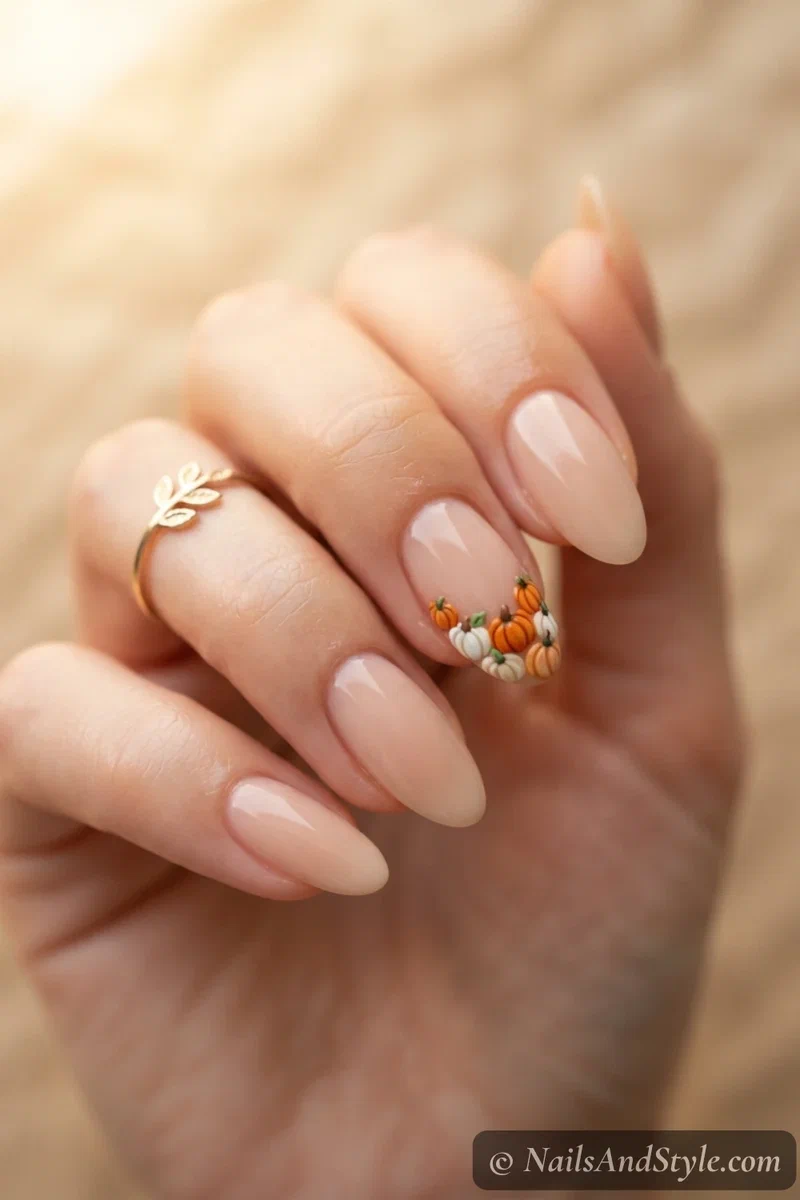
12. Pumpkin Patch Row Nails#
A little row of tiny pumpkins marching along the base of the nail, like a patch in a field. Paint three or four mini pumpkins in a line near the cuticle on an accent nail, mixing orange, white, and green. Fiddly but worth it — it’s the kind of detail people don’t expect.
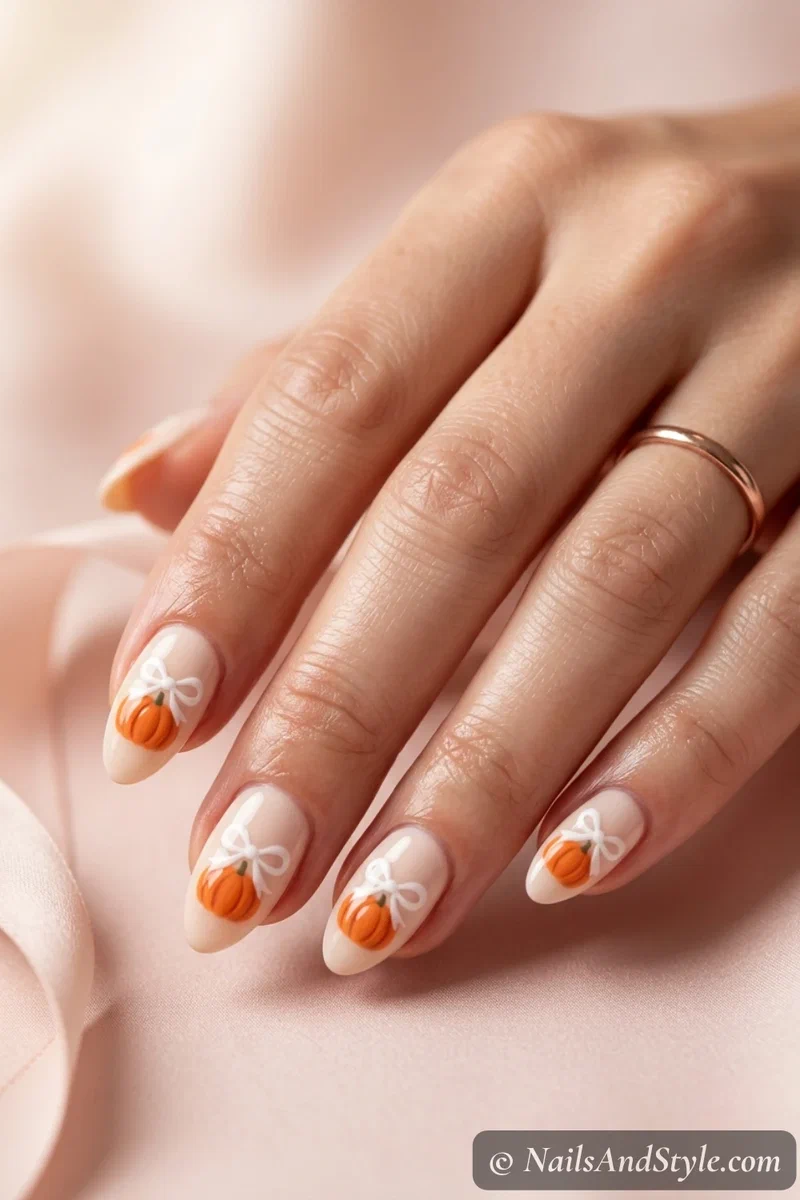
13. Pumpkin & Bow Nails#
Coquette meets Halloween. A little orange pumpkin next to a dainty ribbon bow — sweet, girly, and very Pinterest right now. Paint the pumpkin, then add a small bow in white or pastel beside it with a thin brush. One accent nail is plenty. It’s the bow that makes it.
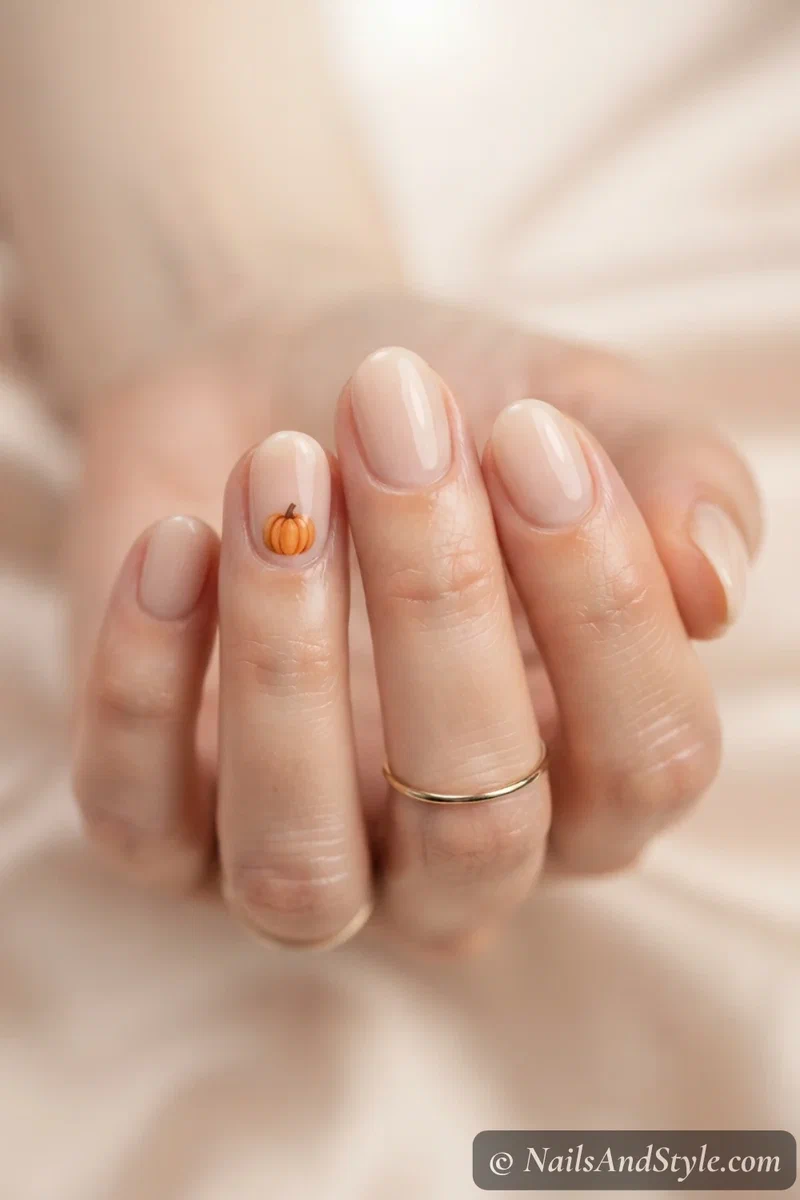
14. Mini Pumpkin Accent#
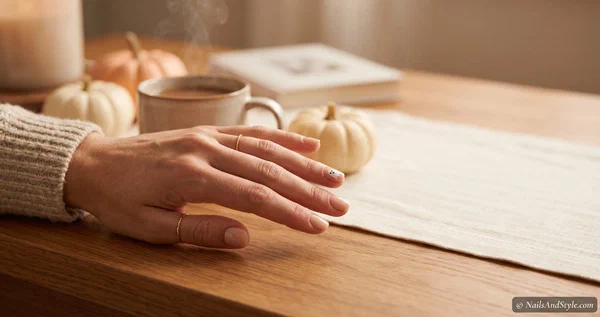
The most low-key entry, for anyone who wants just a whisper of Halloween. Four clean nude nails and one tiny pumpkin on a single accent. Paint your neutral base, then dot one small pumpkin near the tip. Subtle, chic, done in a couple of minutes.
Kawaii Bat & Monster Nails#
This is where cute gets a little weird — in the best way. Chubby bats, one-eyed monsters, friendly Frankensteins. Nothing here will scare a toddler.
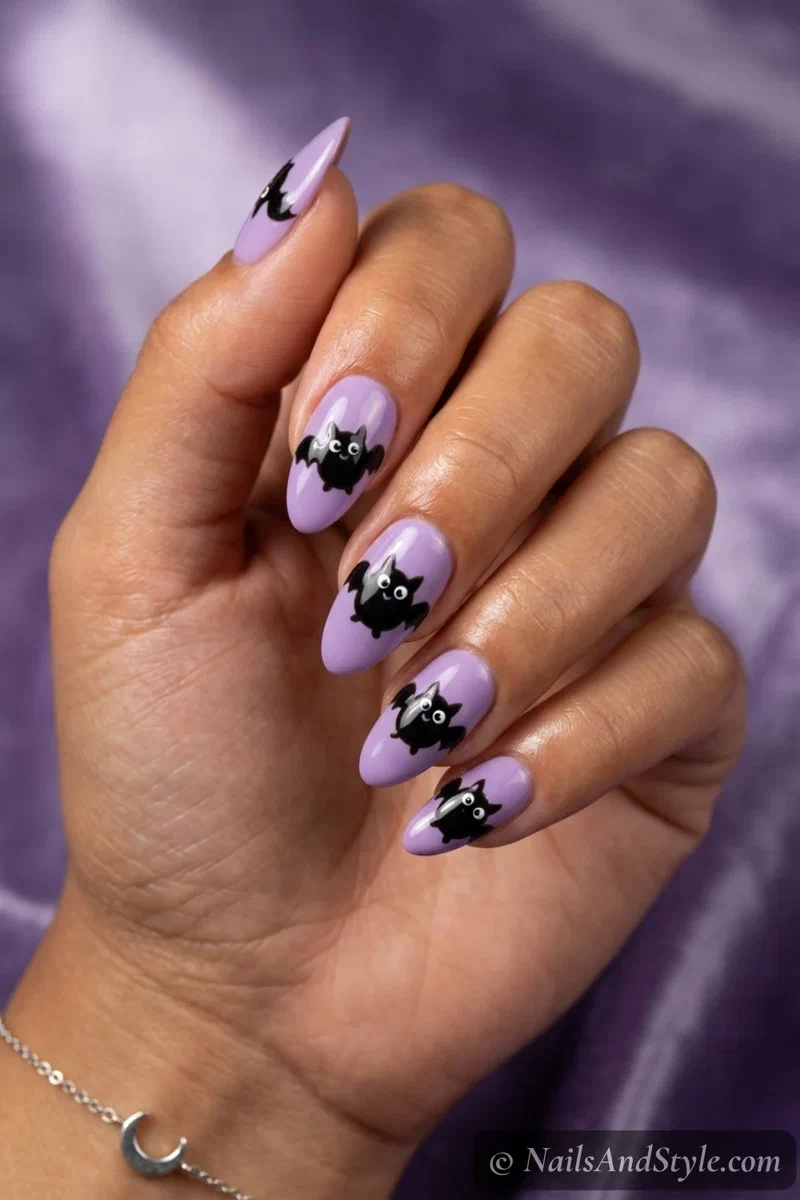
15. Chubby Bat Nails#
Bats, but make them round and huggable. Little black bats with rounded wings and big cartoon eyes over a soft purple base. Paint a rounded body, two curved wings, then two white dot eyes. The rounder you make them, the cuter they get. Trust me on that.
16. Little Monster Nails#
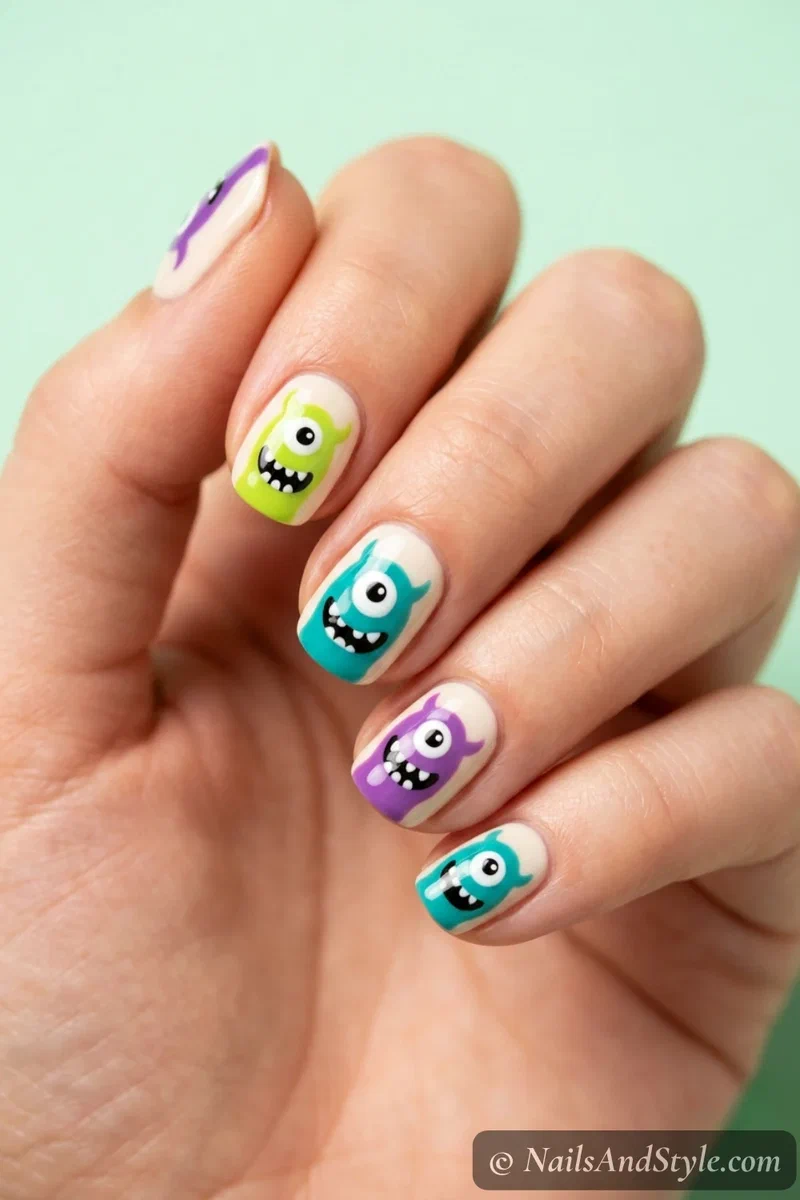
Bright, fuzzy, one-eyed monsters — think colorful and goofy, not gross. Each nail gets a different monster in lime, teal, or purple with a single googly eye and a toothy grin. Paint blobby shapes, add one big eye each, then little white teeth. Kids love these, and so do I.
17. Frankie Face Nails#
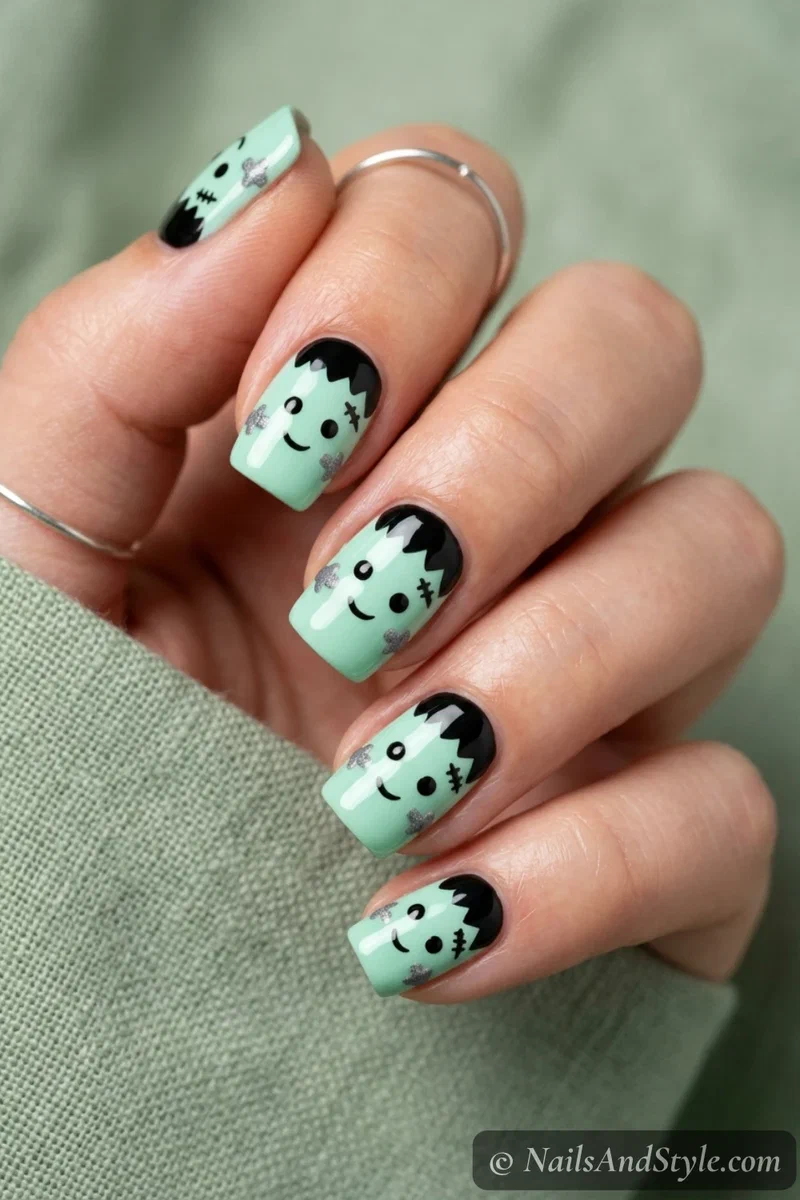
A friendly little Frankenstein — mint-green face, flat black hair, two tiny bolts. Way cuter than it sounds. Paint a green square-ish face on an accent nail, a strip of black “hair” at the top, then dot eyes and two grey bolts on the sides. Give him a small smile so he’s clearly the nice kind.
18. Googly Eye Nails#
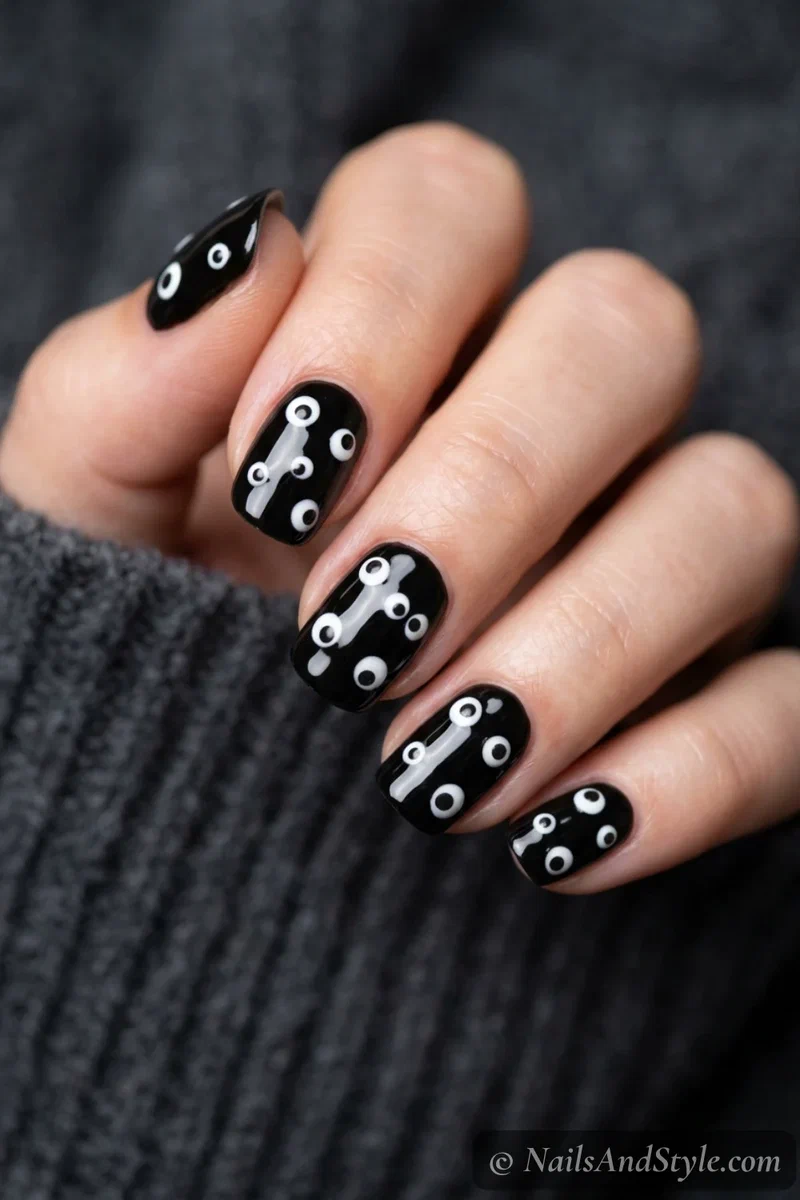
Silly and so easy it barely counts as nail art. Scatter little cartoon eyes — different sizes, looking every which way — over a black or nude base. Paint white circles, add off-center black dots for that googly, wobbly look. The mismatched directions are the whole joke.
19. Cute Mummy Nails#
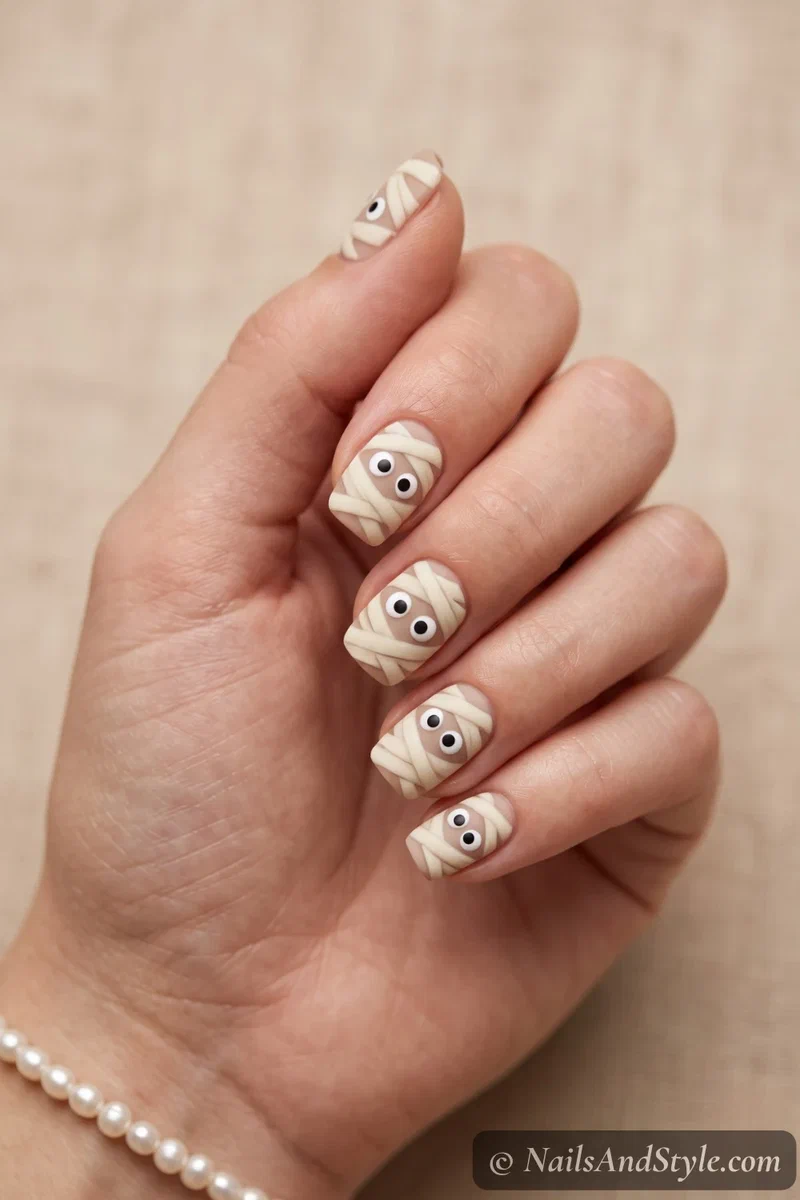
The mummy, softened. Cream bandage wraps over a beige base with two big sweet eyes peeking through — more plushie than monster. Layer uneven cream stripes with a striping brush, leave a gap, and dot two round eyes in the space. Matte top coat sells the cozy bandage look.
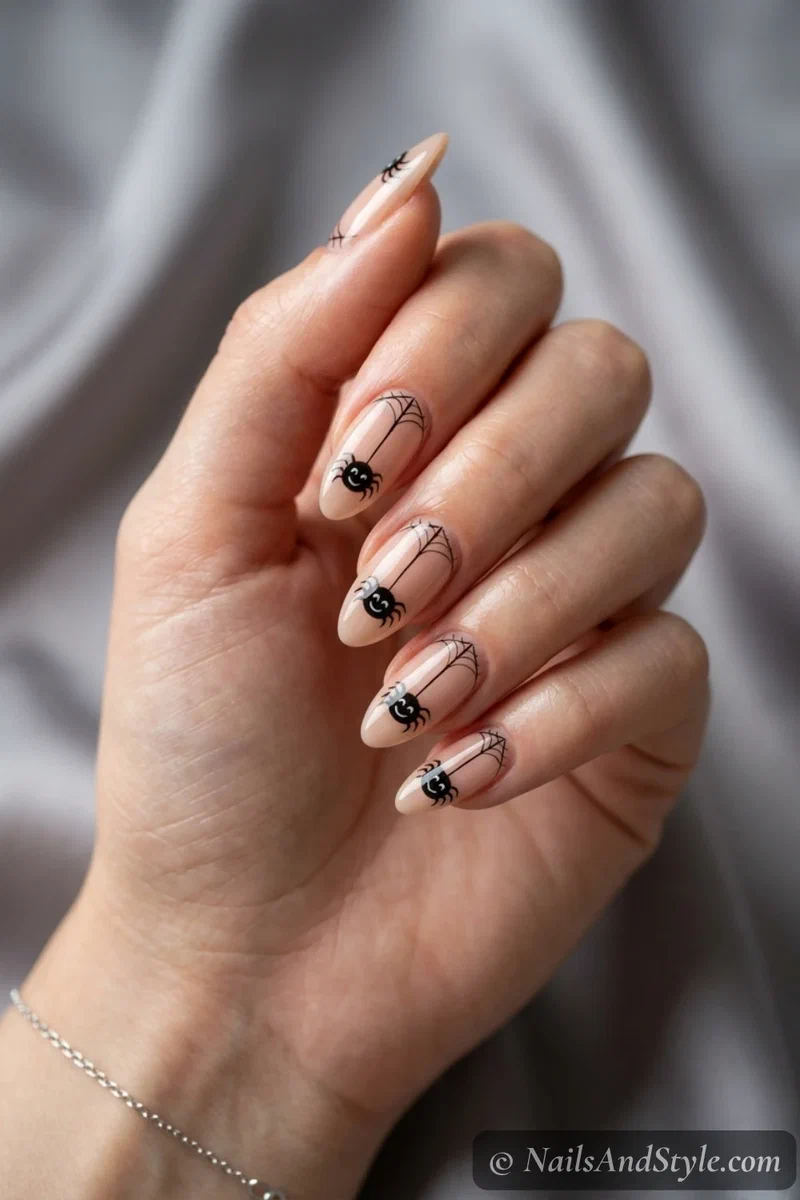
20. Happy Spider Nails#
A cartoon spider that’s clearly having a great day. One round smiling spider hanging from a little web thread on an accent nail. Paint a fat black body, eight quick legs, two white eyes and a smile, then a thin web line up to the tip. Friendly, not freaky.
Cute Black Cat Nails#
Black cats close us out, and there are more cute ways to do them than you’d think — peeking, snoozing, or just showing you their little behind.
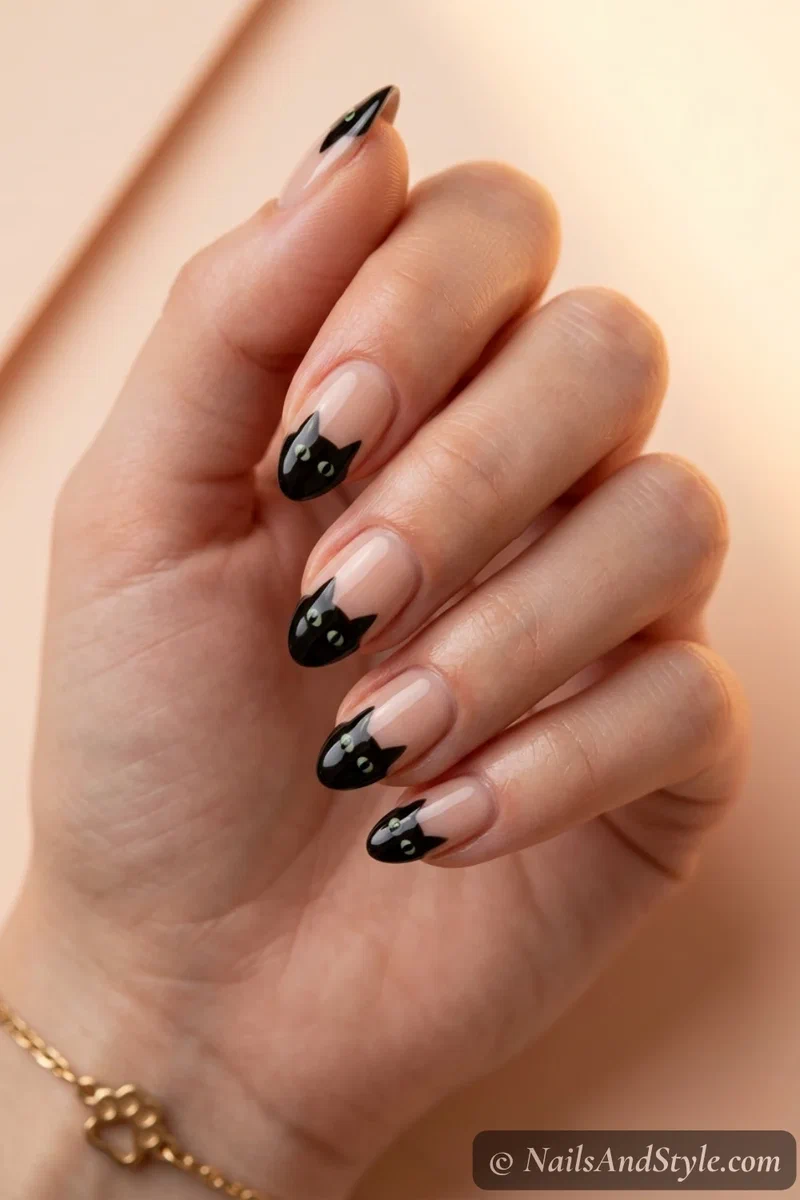
21. Peeking Cat Nails#
A black cat peeking up over the tip of the nail, just two ears, two green eyes, and a curious little face. Paint the top edge of the nail black in a curved cat-head shape, add pointy ears and green dot eyes. Reads adorable on short nails especially — it’s basically a cat hiding behind a wall.
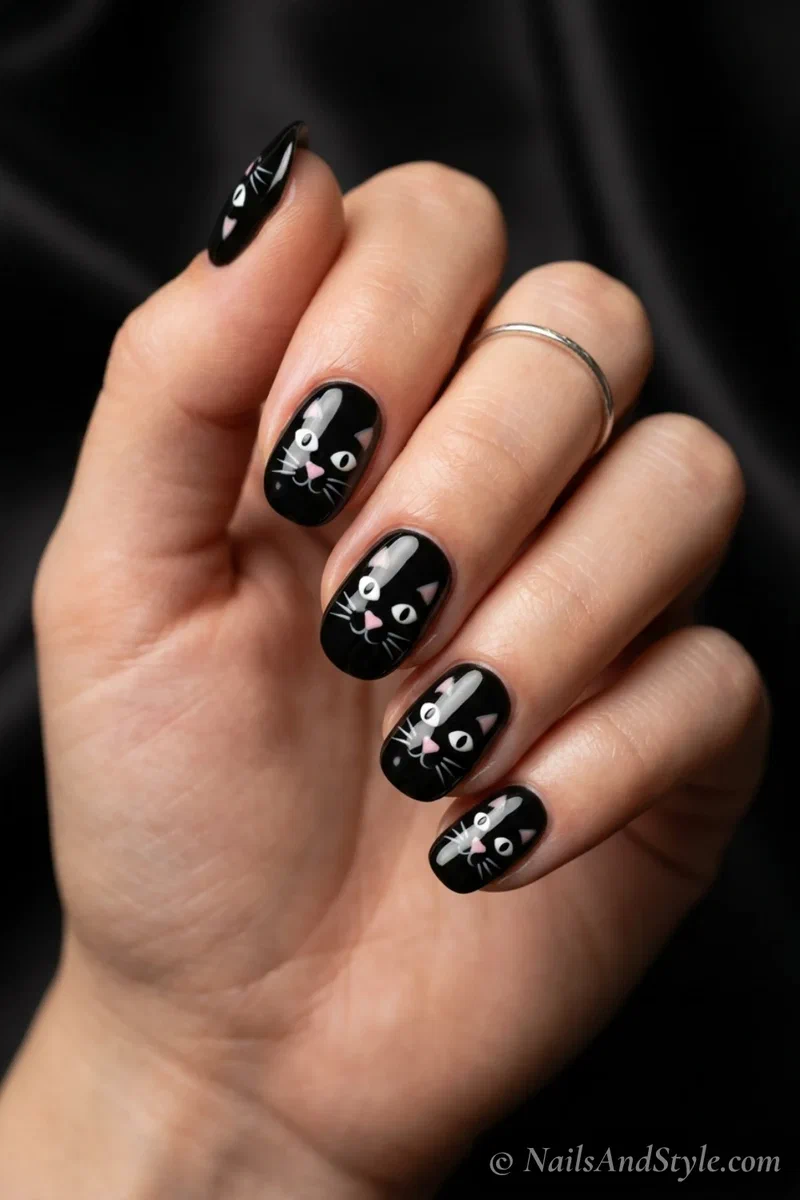
22. Cat Face Nails#
A full cute cat face filling the whole nail — round cheeks, a tiny triangle nose, whiskers, the works. Base the nail black, then paint white eyes, a pink nose, and thin whiskers over it. One cat face per hand keeps it from getting busy. Big cheeks, big charm.
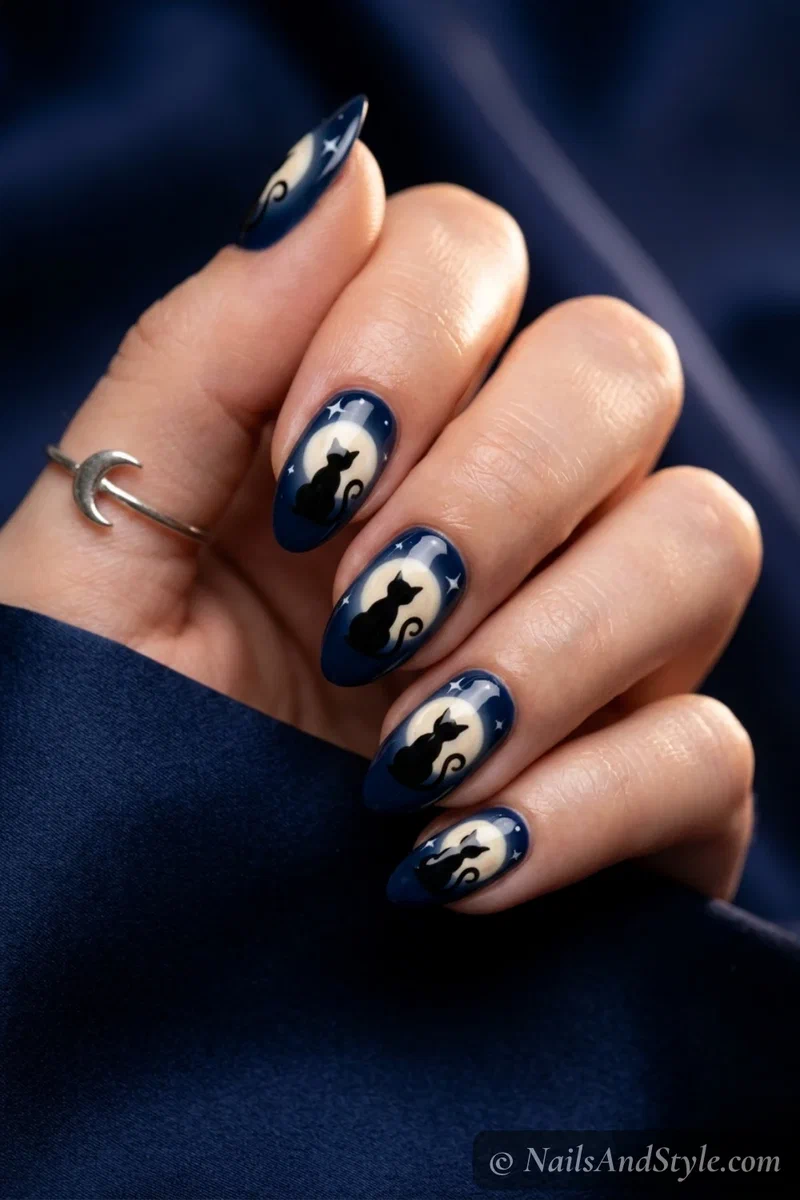
23. Cat & Moon Nails#
A classic silhouette with a soft twist — a little black cat sitting in front of a big cream moon. Sponge a soft glowing moon onto a navy nail, then paint a small seated cat silhouette on top with a curled tail. Sweet, a touch witchy, and it photographs beautifully.
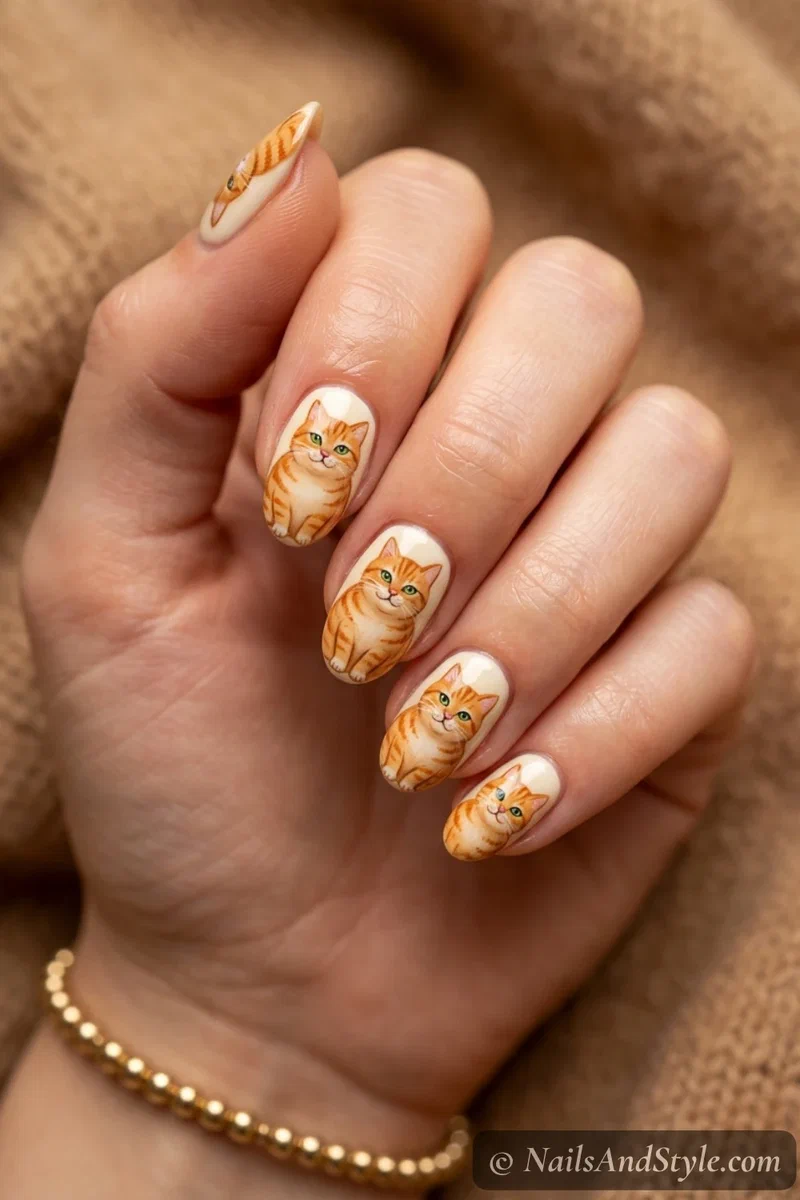
24. Orange Tabby Nails#
Because not every Halloween cat has to be black. A chubby orange tabby with little stripes, green eyes, and a smug expression brings warmth to the set. Paint a rounded orange cat, add darker orange stripes, white eyes with green dots, and a tiny pink nose. He knows he’s cute.
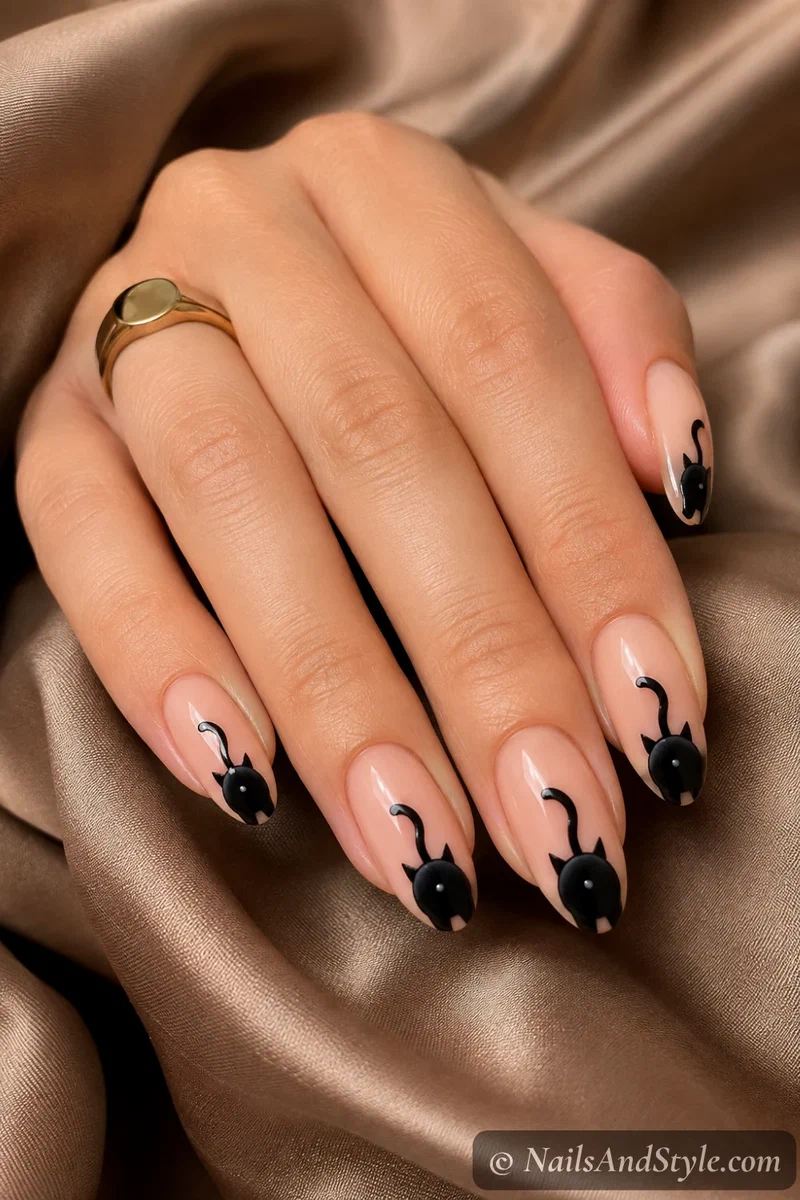
25. Cat Butt Nails#
Yes, really — and it’s one of the most-saved cute cat designs out there. Just a little black cat from behind, tail up, sitting pretty. Paint a rounded black body with two ears at the top and a curved tail standing straight up. Cheeky, simple, and it always gets a laugh.
Cute Halloween Nails on Short Nails#
If you’ve got short nails, good news — this whole list is basically made for you. Small, rounded characters look chubbier and cuter with less nail around them, and there’s no long canvas to fill or smudge. A tiny pumpkin on a short nail looks like a little button. On a long nail it can look lost.
Keep the art to one or two nails and let the rest stay a soft solid shade. Vertical little details — a peeking cat, a single ghost — also trick the eye into seeing a bit more length. And short nails just survive candy bowls and costume glue way better.
A Few More Short Nail-Specific Ideas#
- One smiley pumpkin, four nude nails — maximum cute, minimum effort, and it never looks crowded.
- Peeking cat on the tips — the cat “hides” perfectly on a short nail.
- Candy corn dots — tiny dots suit a short surface better than full stripes.
- Single sleepy ghost — one soft ghost on an accent is plenty of sweetness.
- Mini bat trio — three little bats read as cute even at the smallest size.
Simple Step-by-Step: How to Do This at Home#
- Prep your nails. Wipe them clean, trim and file to a soft rounded shape, and gently push back your cuticles.
- Buff lightly. A quick soft buff helps the polish grip — go easy.
- Apply a base coat. It stops staining and gives your cute base color something to hold onto.
- Lay down your soft base. Two thin coats of nude, cream, milky white, or pastel — smooth beats thick every time.
- Paint the character. Use a dotting tool for pumpkins and eyes, a thin brush for ghosts and cats, or striping tape for candy corn lines.
- Add the little details. Rosy cheeks, dot eyes, tiny stems, whiskers, stars — the small touches are what make it cute.
- Clean up the edges. Dip a small brush in remover and tidy any color off your skin.
- Seal and dry. Glossy top coat for shiny characters, matte for the cozy ones — then let it dry fully before you touch anything.
How to Ask Your Nail Artist for Cute Halloween Nails#
Not a DIY person? No shame in that. A little prep helps your artist nail the sweet version instead of the spooky one, because “Halloween nails” can go very different directions.
- Bring 2-3 reference photos. Say clearly you want cute and soft, not gory — pictures of the exact ghost or pumpkin style settle it instantly.
- Ask for a soft base color. Nude, cream, or pastel keeps it sweet; mention it so you don’t end up on a harsh black.
- Suggest a short round or almond shape. Rounded shapes suit these chubby little characters best.
- Flag that it’s hand-painted. Faces, cheeks, and tiny details take freehand time, so make sure they book enough of it.
- Gel is worth it for the details. Gel keeps fine little faces crisp and chip-free longer than regular polish, especially on accent nails.
Tips to Make Your Nails Last Longer#
- Keep every layer thin — thick coats dent and smudge your cute faces for hours.
- Seal the free edge by swiping polish along the very tip of each nail.
- Skip hot water and long showers right after painting.
- Wear gloves for dishes so you don’t scrub a ghost’s face off by Tuesday.
- Refresh your top coat every couple of days to keep the shine.
- Use cuticle oil daily so nails bend instead of snapping.
- Don’t pick at the art — once you start peeling a little ghost, it’s over.
Quick FAQ#
Are cute Halloween nails easy to do at home?#
Most are genuinely beginner-friendly. Ghosts, candy corn dots, and little pumpkins are simple shapes you can do with a dotting tool and a thin brush. Get your base color smooth first — the cute part goes on top and hides small mistakes anyway.
What colors make Halloween nails look cute instead of scary?#
Soft ones. Trade jet black for warm nude, cream, or pastel purple, and use orange, mint, peach, and lilac for the characters. Rounded shapes and rosy cheeks do the rest — it’s the softness that reads sweet.
Can I do these on short natural nails?#
Absolutely, and they often look better. The little characters look chubbier and cuter on a shorter nail. Keep the art to one or two fingers, use a base coat under everything, and you’re good.
Final Thoughts#
The best thing about cute Halloween nails is that they carry the whole season with zero stress — no fake blood, no fussy detail, just little ghosts and pumpkins that make you smile every time you glance down. Pick one bundle, do a single accent, and you’re festive.
Save the ones that made you go “aww,” pin them for your next lazy Sunday, and mix and match — a sleepy ghost here, a smiley pumpkin there. And when you’re ready to add a little edge, my full Halloween nail ideas roundup has the spookier looks waiting whenever you want them.