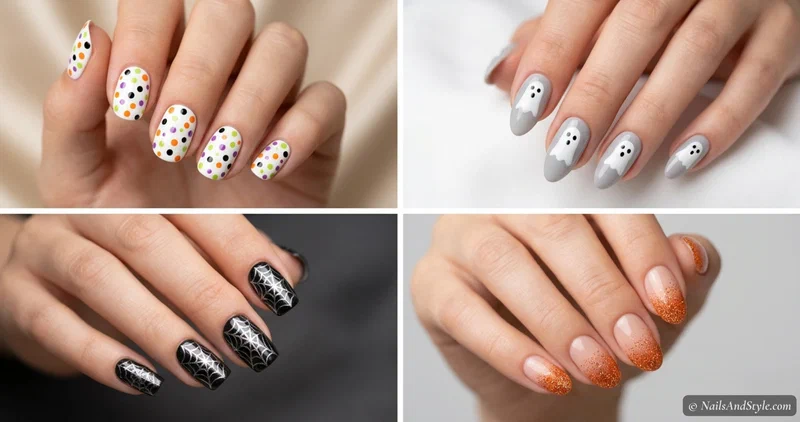
Let’s be real: most of us aren’t out here painting tiny haunted houses on our nails. We want something that looks Halloween-y, takes fifteen minutes, and doesn’t need a fine-art degree. That’s the whole point of these easy Halloween nails — 22 simple ideas built around dots, tape, stickers, and press-ons.
Everything here is genuinely beginner-friendly and 100% doable at home, even if you’ve never done nail art in your life. And they look great on short and medium nails, which is honestly where simple designs shine anyway.
I’ve sorted them by method, so you can pick based on what you’ve got in a drawer: a dotting tool, some tape, a sheet of stickers, whatever. If you want the fancier looks too, they’re waiting in my full Halloween nail ideas roundup. Otherwise — let’s keep it easy.
Why Easy Halloween Nails Beat the Complicated Ones#
Here’s my honest opinion after way too many nail fails: simple almost always looks better than “ambitious but messy.” A clean row of dots or one crisp ghost reads intentional. A shaky attempt at a full skeleton hand reads… like you gave up halfway. Easy Halloween nails let you actually finish, and finish clean.
They’re also faster to fix, quicker to redo, and way less stressful on a Sunday night. Pumpkin patch, class party, office, handing out candy — these carry you through all of it without a two-hour commitment.
A Few Things to Keep in Mind Before You Start#
- Pick your method to match your supplies. Got a dotting tool? Do dots. Got tape? Do lines. No tools at all? Grab stickers or press-ons.
- Nail the base first. A smooth base color hides a lot. Two thin coats, fully dry, before any art goes on.
- Fewer nails, less pressure. You do not need art on all ten. One or two accent nails with the rest solid looks clean and cuts the work.
- Base coat and top coat, every time. Base stops dark shades staining; top coat blends your dots and lines into one smooth finish.
Quick Pick: Which Design Should You Try?#
| If you’re looking for… | Try these designs |
|---|---|
| Absolute beginner | Confetti Halloween Nails, Halloween Nail Stickers |
| No tools at all | Halloween Press-On Nails, Glitter Tip Nails |
| Five-minute look | Polka Dot Spider Nails, One-Stroke Ghost Nails |
| Clean and graphic | Halloween Color Block Nails, Diagonal Stripe Nails |
Easy Dot Halloween Nails#
Dots are the easiest nail art on earth. A dotting tool, the end of a bobby pin, even a toothpick — anything round works. Here are five looks that are basically just dots in a costume.
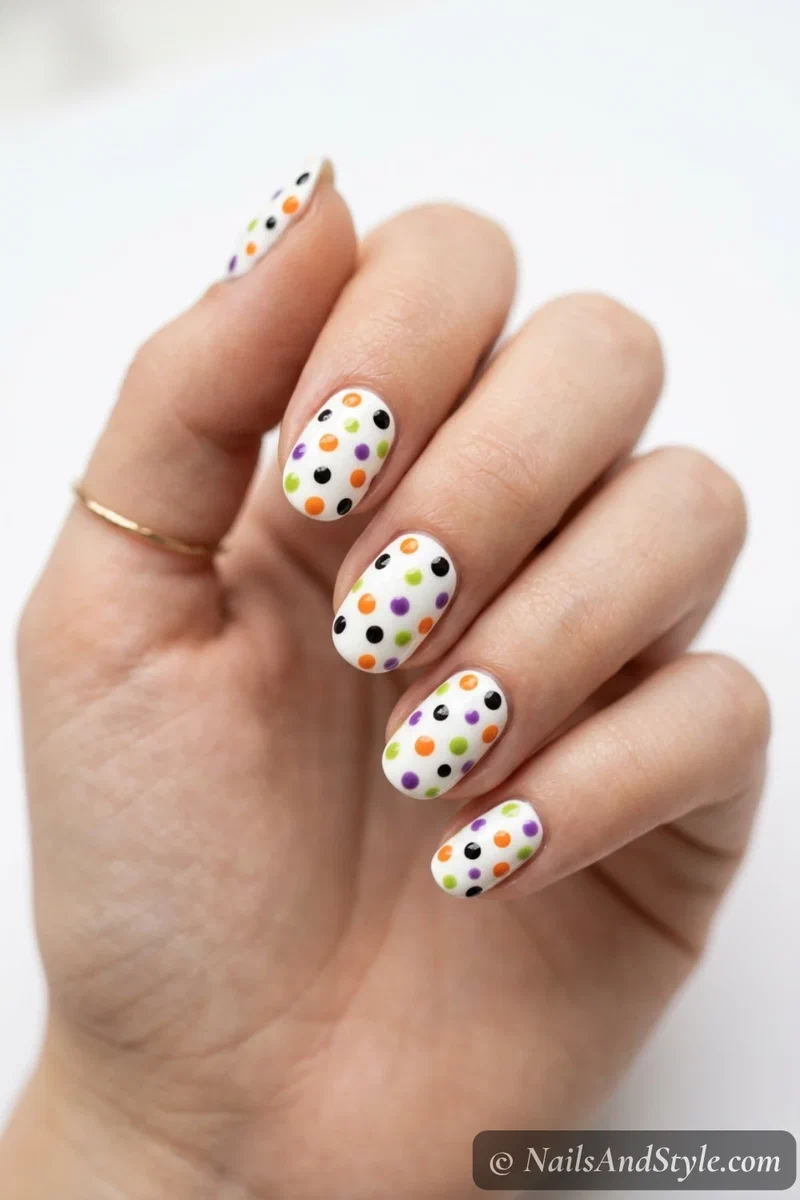
1. Confetti Halloween Nails#
If you do one thing on this list, make it this. Scatter little dots in orange, black, purple, and lime over a white base and you’re done — no shape to get right, no lines to keep straight. Load a dotting tool and just tap them on, spacing a little unevenly so it looks fun and not clinical. Glossy top coat to finish.
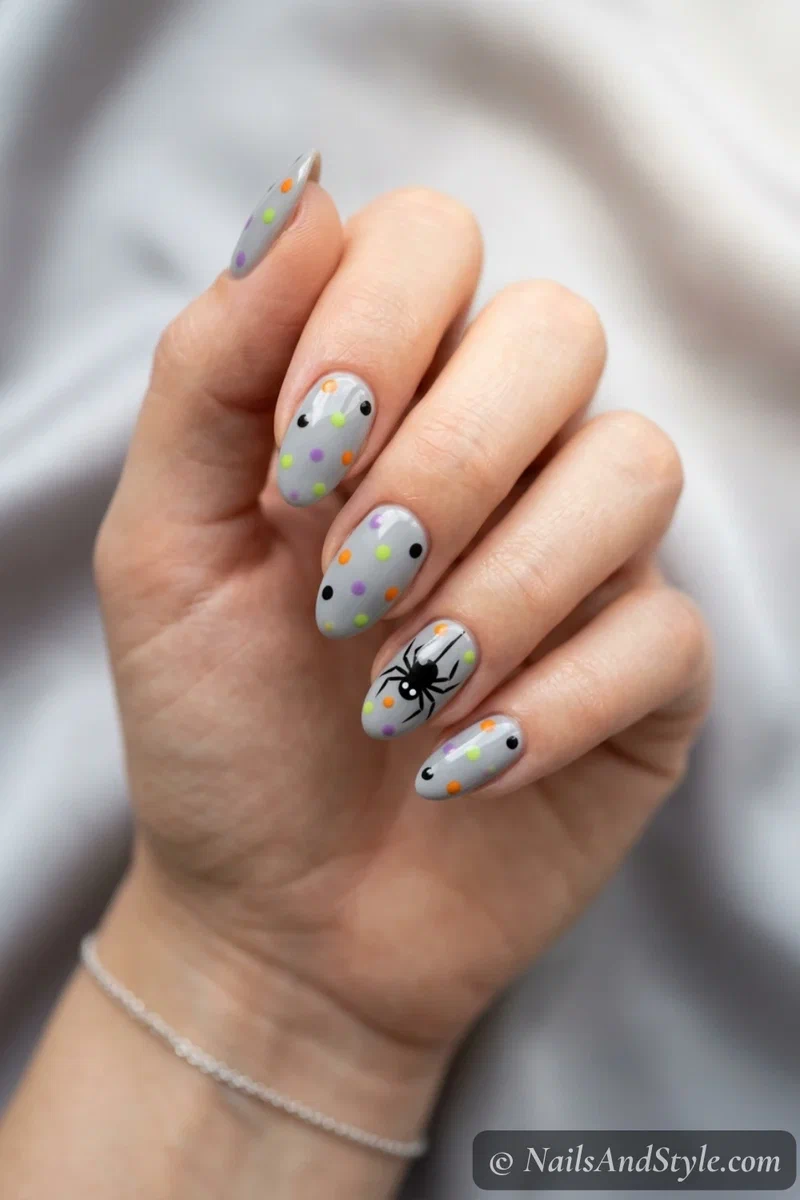
2. Polka Dot Spider Nails#
A spider is just one fat dot with legs — that’s the secret. Press a big black dot for the body, then use a toothpick to drag out eight quick legs. Two tiny white dots for eyes if you want. Put one spider on an accent nail over a soft grey base and leave the rest plain. Takes five minutes and looks way harder.
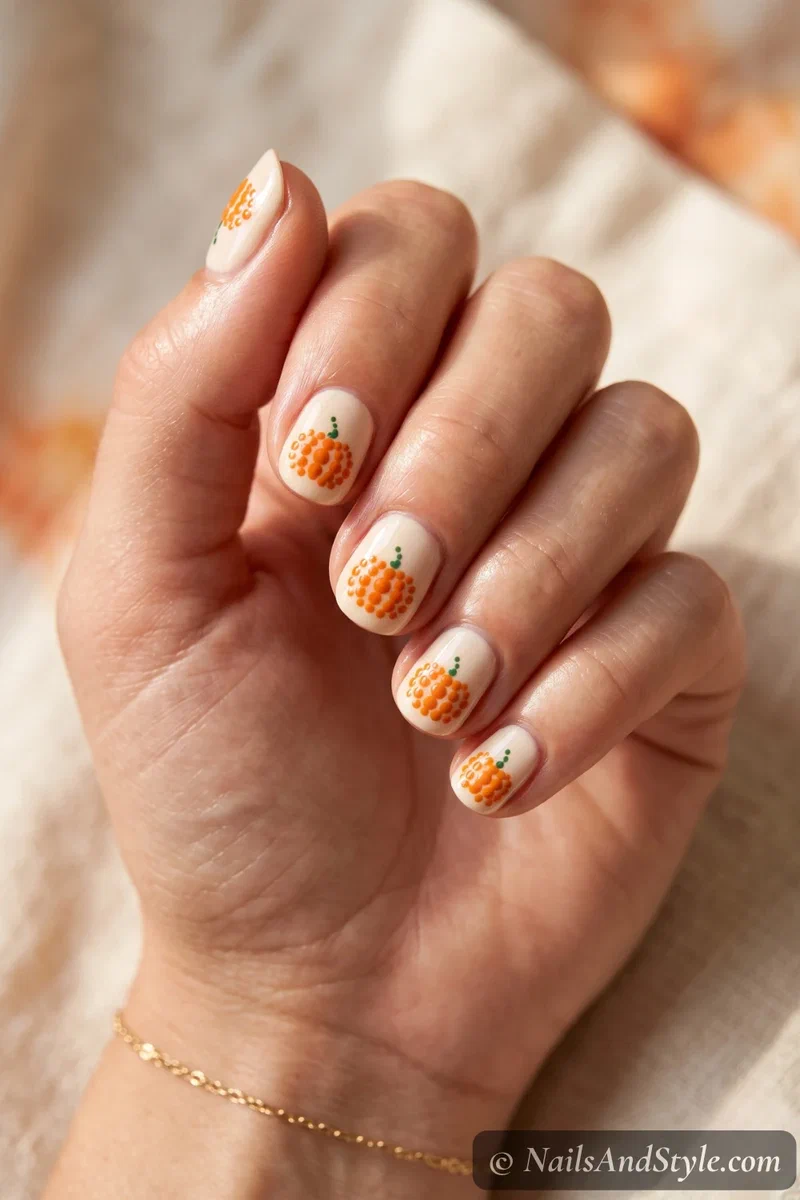
3. Dotted Pumpkin Nails#
Pumpkins made entirely of dots, no painting skill needed. Cluster a few orange dots into a rounded pumpkin shape, add a tiny green dot on top for the stem, and that’s the whole thing. Do one on a cream base and keep it chunky. New to dotting? A toothpick works great for nail art if you don’t have a proper tool.
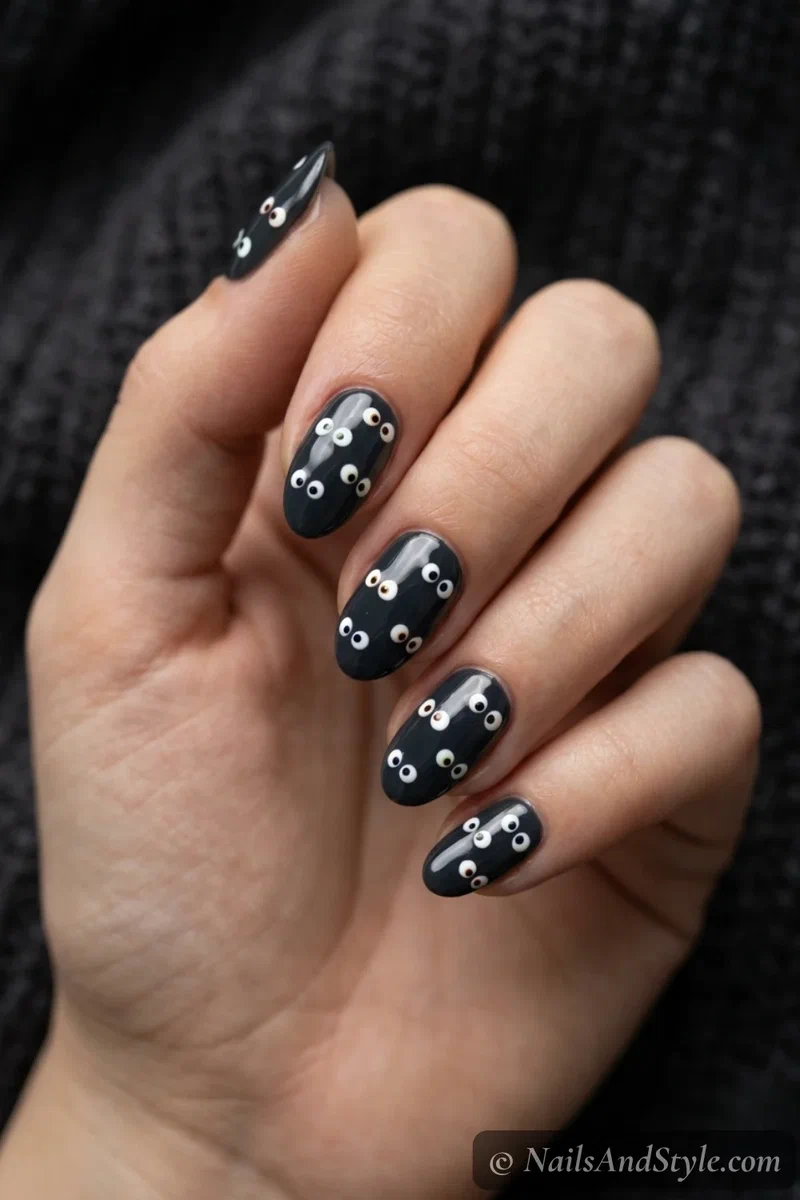
4. Peeking Eyes Nails#
Creepy-cute and stupidly easy. Just clusters of little eyes peeking out of a dark base, like something’s hiding in the shadows. Dot small white ovals, then a smaller colored dot and a black pupil on each. Scatter them in pairs at different heights. The mismatched staring is the whole effect.
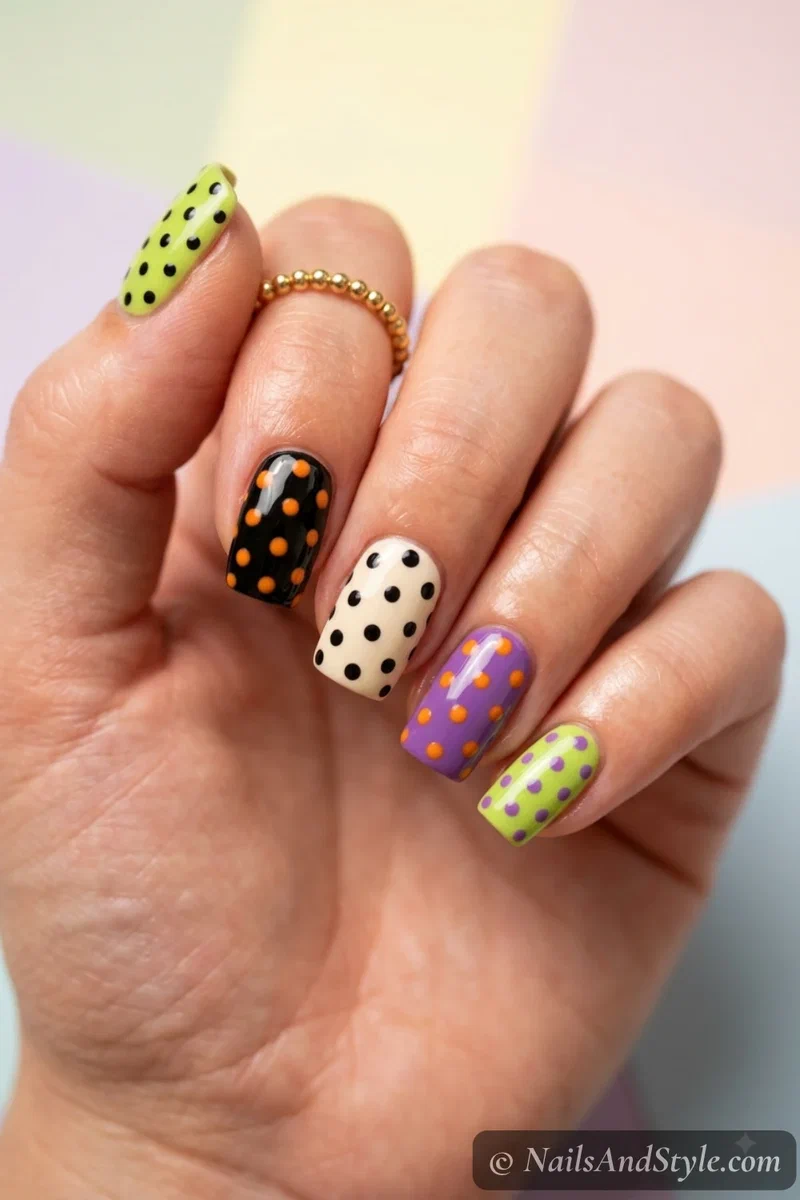
5. Color Dot Mix Nails#
For when you can’t decide — every nail gets a different dot combo. One orange-on-black, one black-on-cream, one purple-on-lime, all mismatched on purpose. It’s the low-effort way to use up all your Halloween shades at once. Just dot and go; there’s no wrong pattern here.
Simple Spider Web Nails#
Webs look intricate but they’re really just a few lines meeting in a corner. Once you get the “spokes then curves” trick, you’ll want one on everything. Thin brush or a striping brush, that’s it.
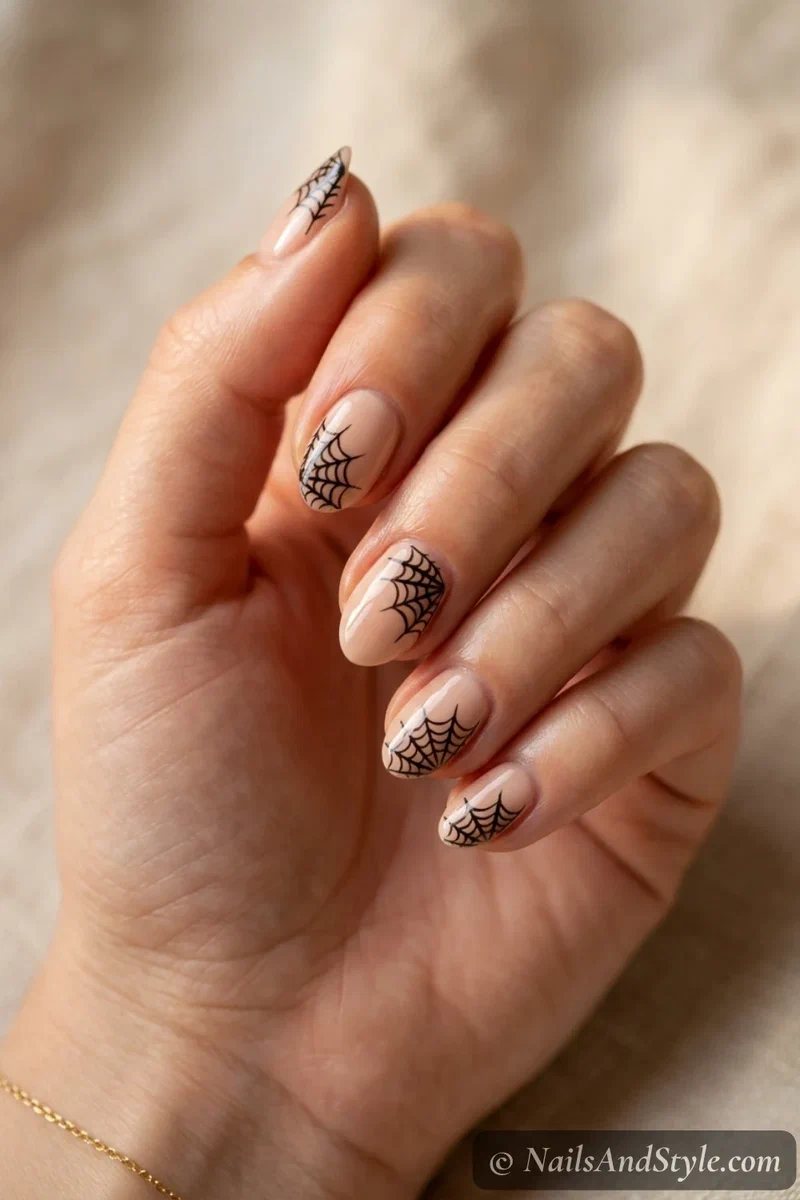
6. Corner Spider Web Nails#
The easiest web there is — it only lives in one corner. Draw two or three thin lines fanning out from the top corner of the nail, then connect them with little curved lines. Done. Because it’s just a corner, there’s way less to keep neat than a full-nail web. Black web on a nude base is the classic.
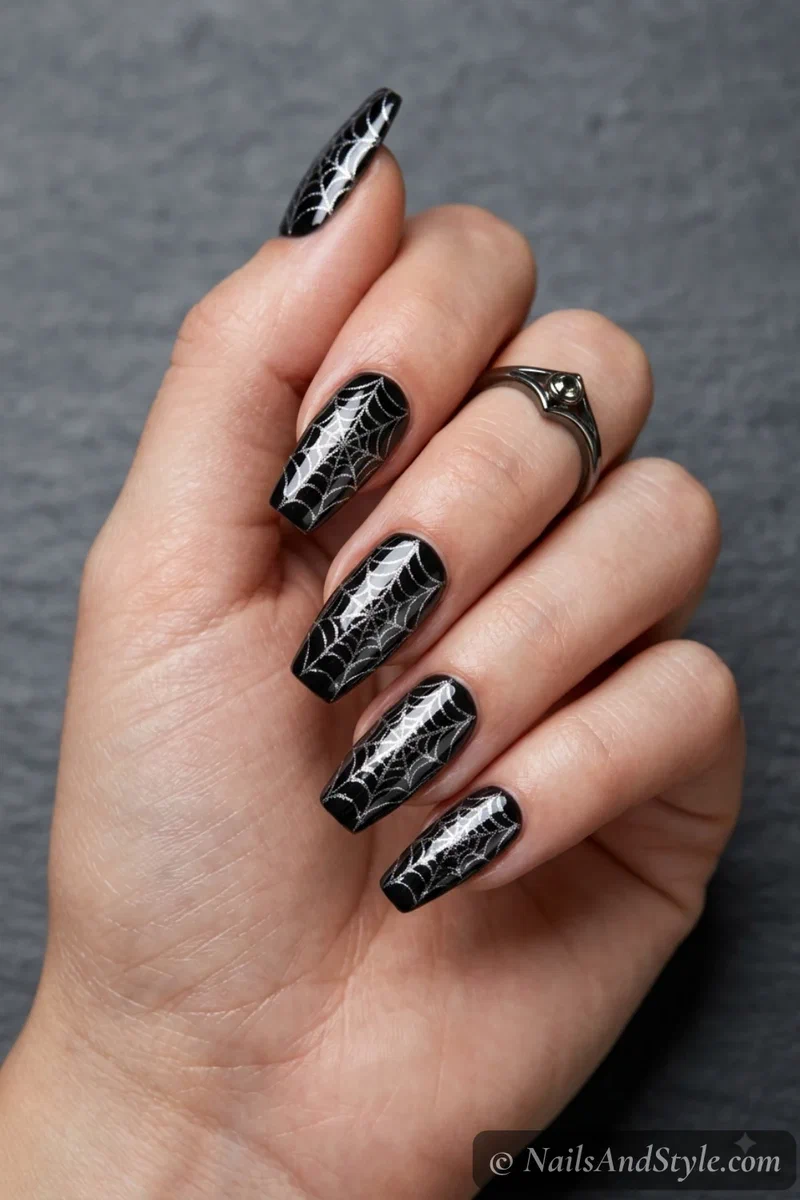
7. Silver Web Nails#
Same easy web, glammed up. A metallic silver web over a black base catches the light and looks a little more “going out” than spooky. Use a silver striping polish or a fine metallic liner for the lines. The shimmer hides wobbly lines too, which is a nice bonus for beginners.
8. Dangling Spider Nails#
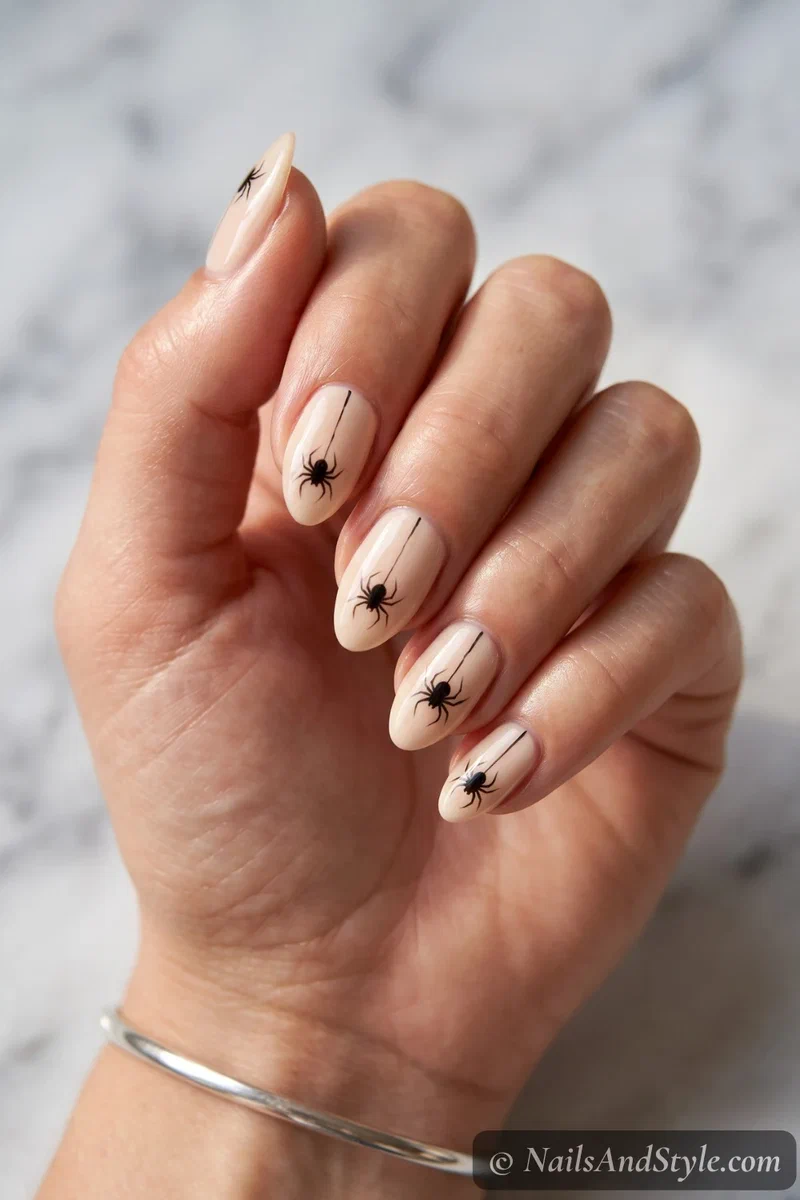
A single spider dropping down on a thread — minimal and a bit dramatic. Draw one thin straight line down from the tip, then a little dot spider at the end of it with a few leg flicks. One nail is plenty; leave the others solid black or nude. It’s the negative space that makes it look clean.
9. Web Tip Nails#
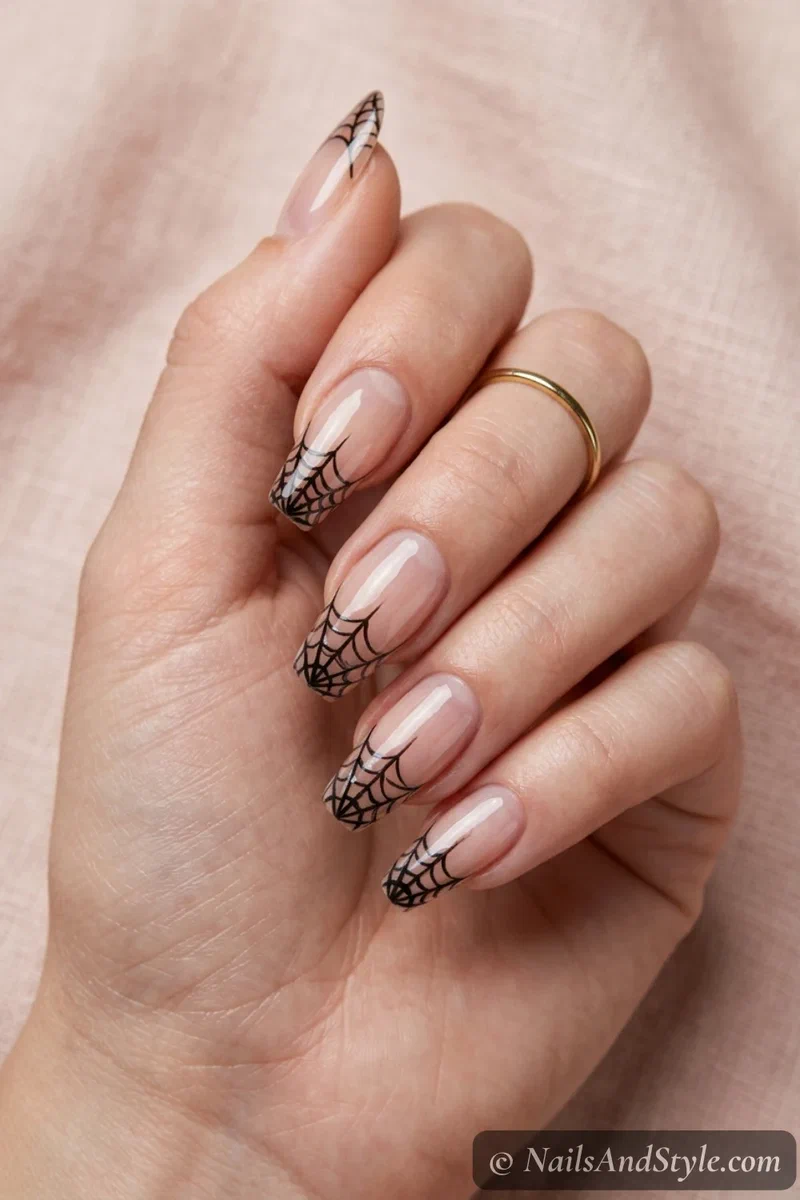
A French tip’s spooky cousin. Instead of a solid tip, you draw a light web just along the edge of each nail. Thin black lines curving across the tips over a sheer base — soft, not heavy. Keep the base bare so the web is the only thing happening. Understated and office-friendly, honestly.
Easy Ghost & Beginner Shapes#
Little characters that are mostly one shape and a couple of dots. If you can paint a blob, you can do all of these. Promise.
10. One-Stroke Ghost Nails#
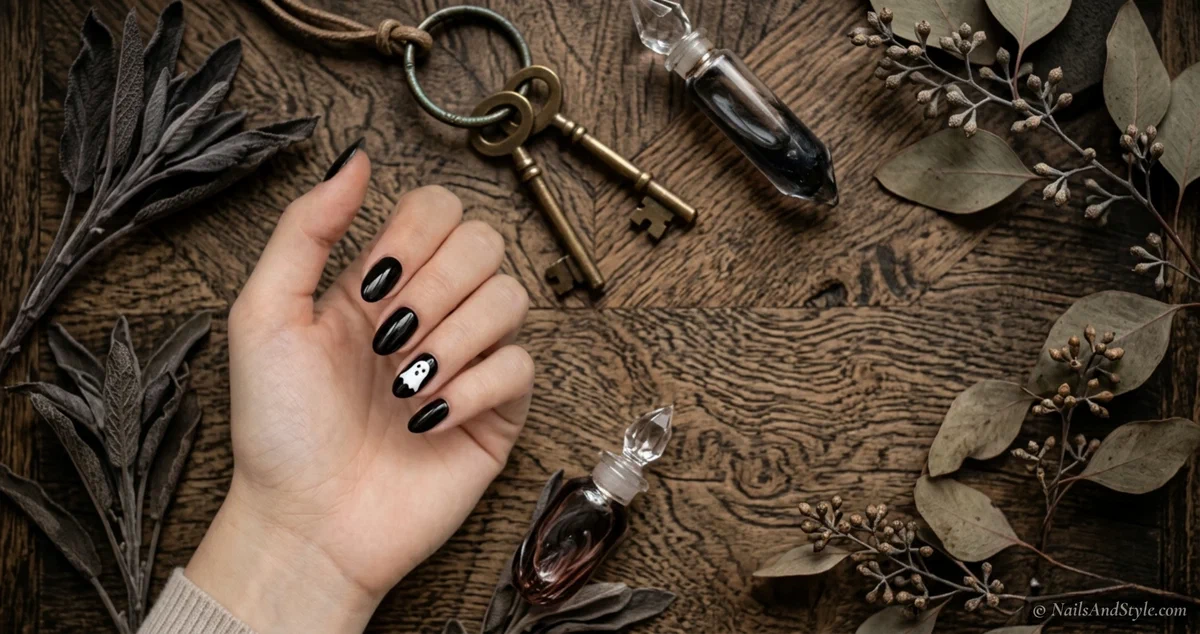
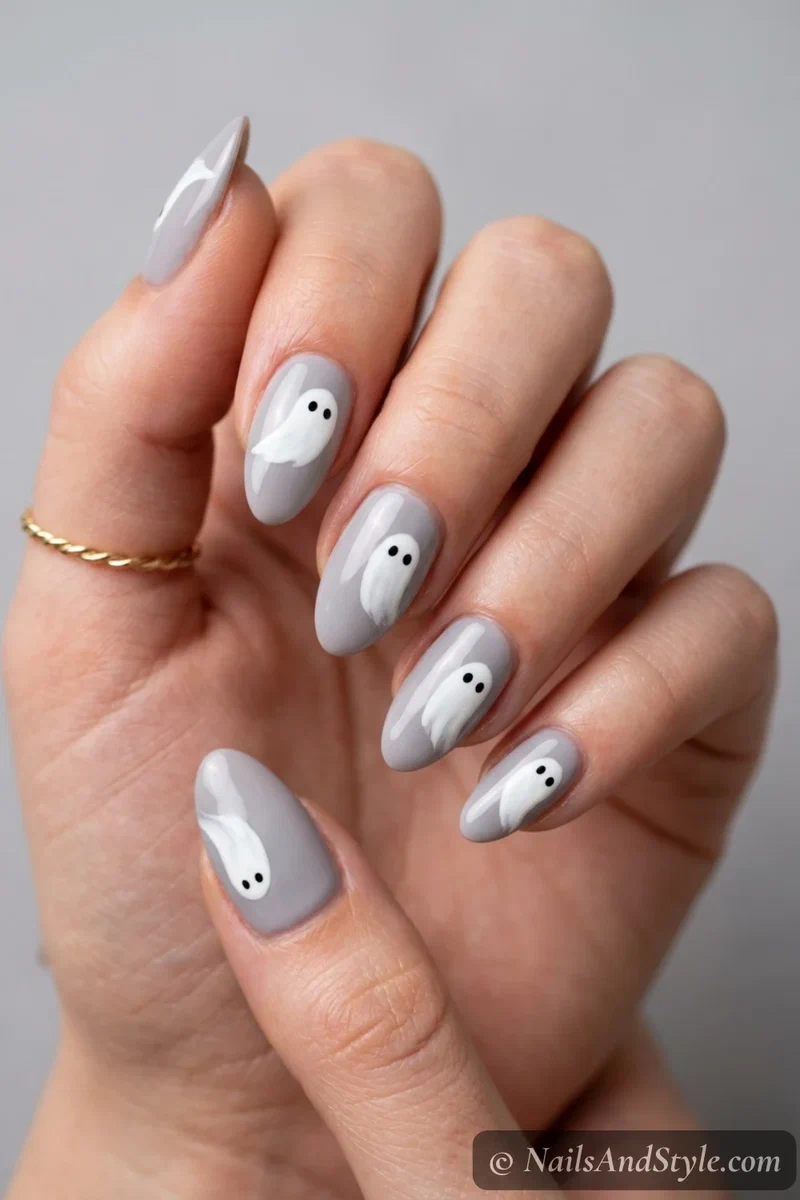
The fastest ghost alive. One swipe of white in a rounded blob with a wavy bottom, two black dot eyes, and it’s a ghost. Don’t overthink the shape — ghosts are supposed to be a little lopsided. Do one or two over a soft base and skip the rest. This is the design I recommend to every single beginner.
11. Simple Witch Hat Nails#
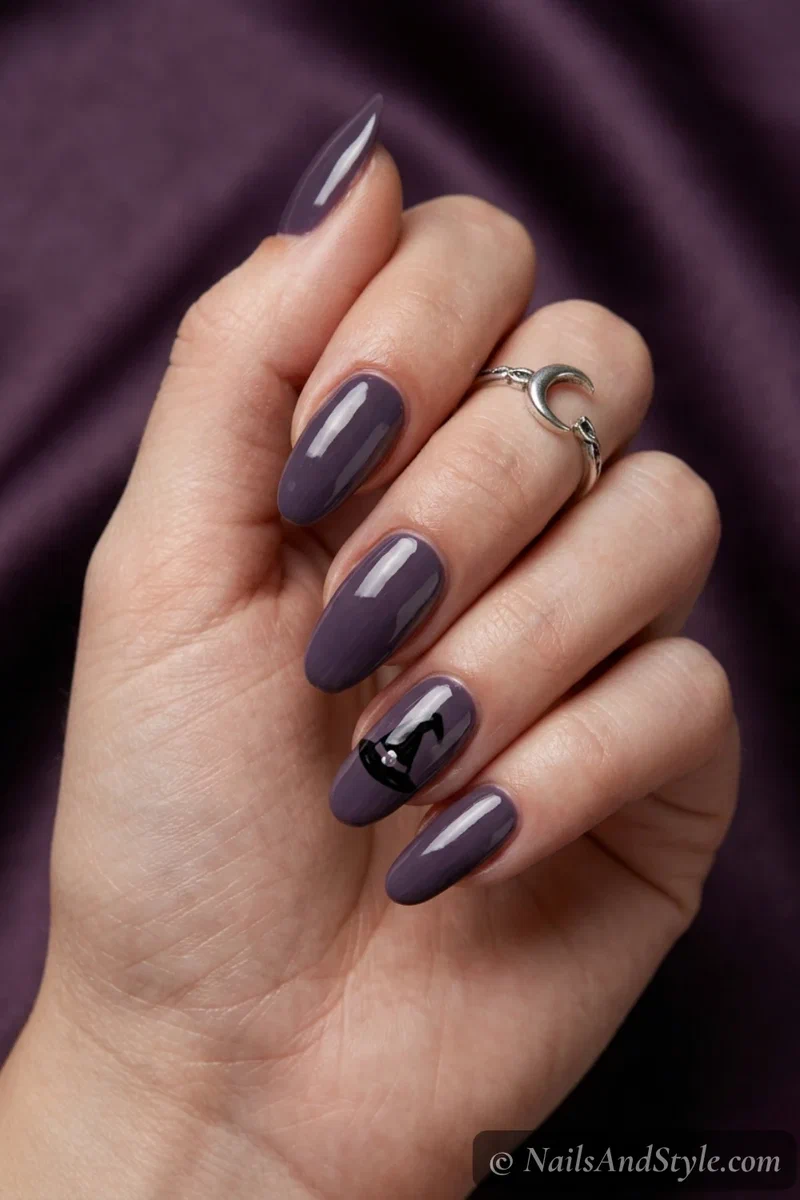
A witch hat is just a triangle on a curve — that’s it. Paint a black triangle with a little brim underneath on an accent nail, add a dot for a buckle if you’re feeling fancy. Over a dusky purple base it instantly says Halloween. No tiny details to sweat, which is exactly why I love it.
12. Easy Bat Nails#
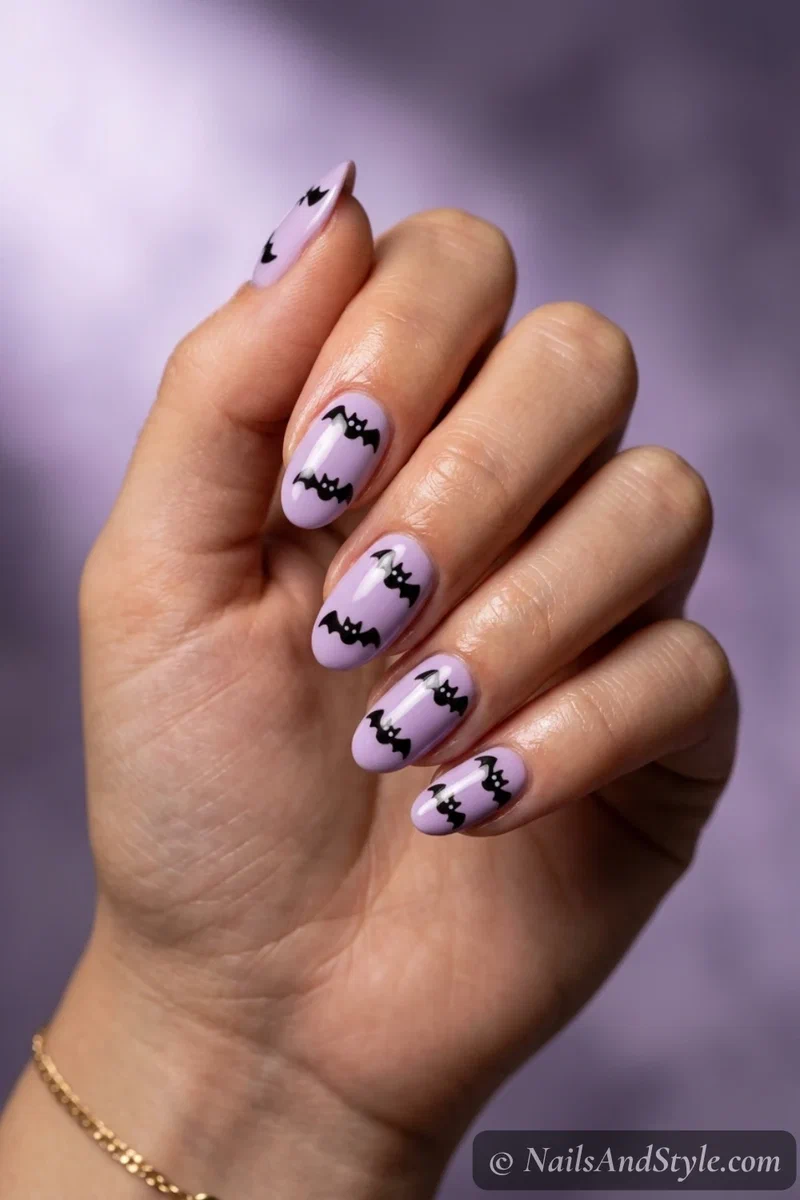
Bats are basically a wide “M” with rounded corners. Paint little black M-shapes across a lavender base, round the wing tips, and you’ve got a sky full of bats. The smaller and simpler you keep them, the cuter and easier they are. A dotting tool adds tiny eyes if you want.
13. Frankenstein Color Block Nails#
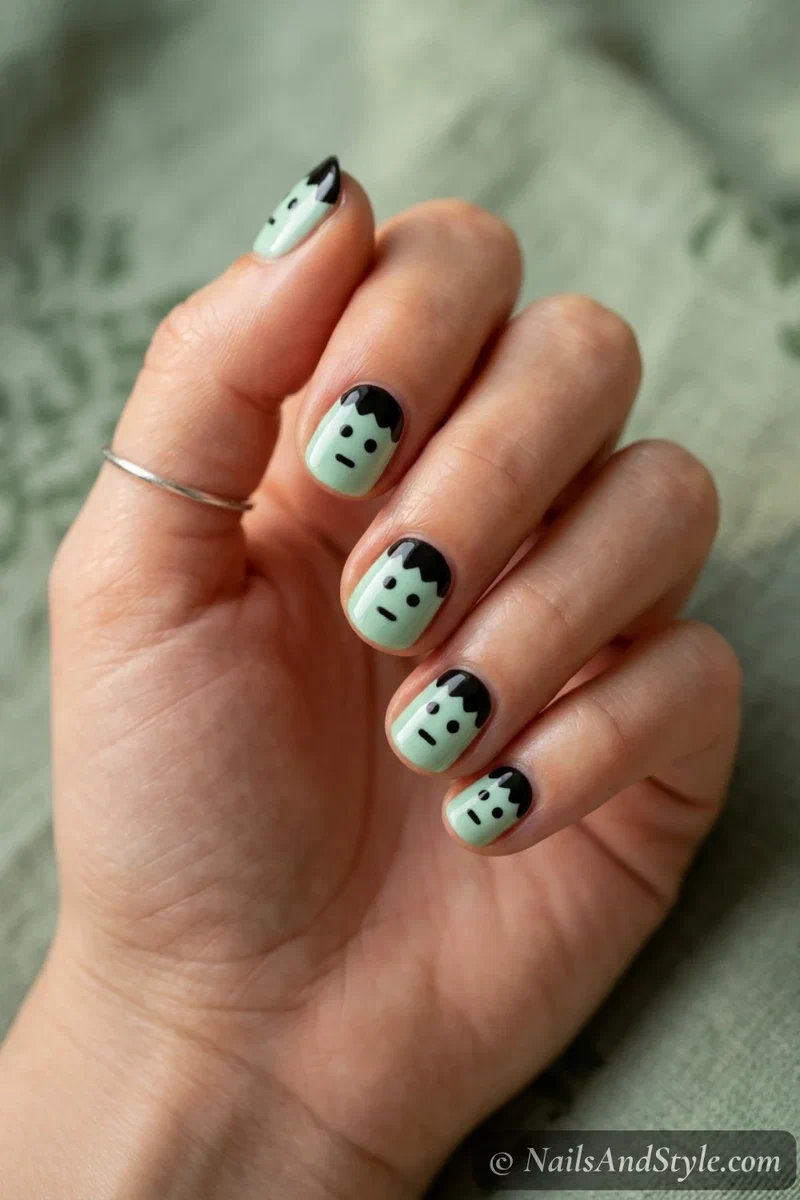
Frankenstein, minus the fiddly face. Paint the nail mint green, add a chunky strip of black across the top like his hair, then two tiny dot eyes and a small line mouth. It’s really just two colors and three dots. Way easier than it looks, and it gets a laugh every time.
14. Simple Tombstone Nails#
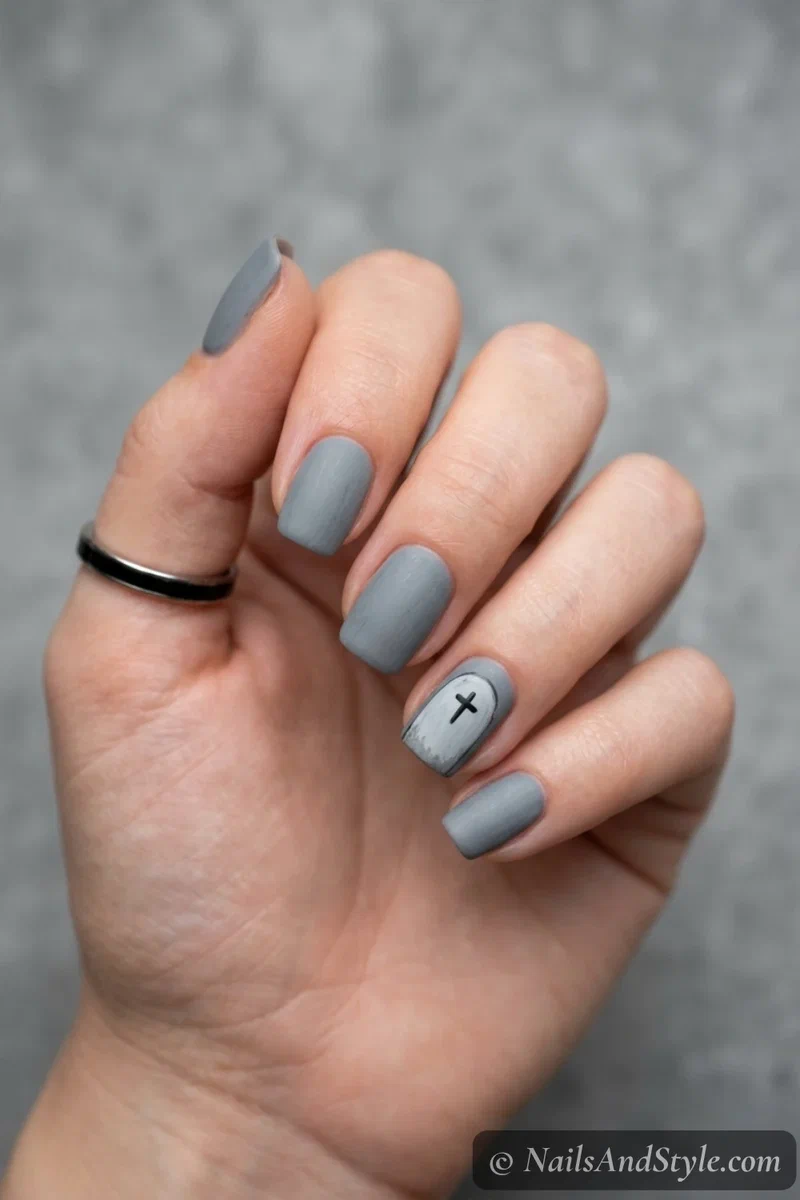
The easiest graveyard look going. Over a dusty grey base, paint one rounded-top gravestone on an accent nail — it’s really just a rectangle with a domed top — then add a tiny black cross and a little sprig of grass at the bottom. Skip any lettering; the cross alone reads “cemetery” instantly. A matte top coat gives it that weathered-stone finish.
Tape & Line Halloween Nails#
Striping tape (or any tape you’ve got) is the beginner’s cheat code for crisp lines. Lay it down, paint, peel while wet, and suddenly you have edges you could never freehand.
15. Halloween Color Block Nails#
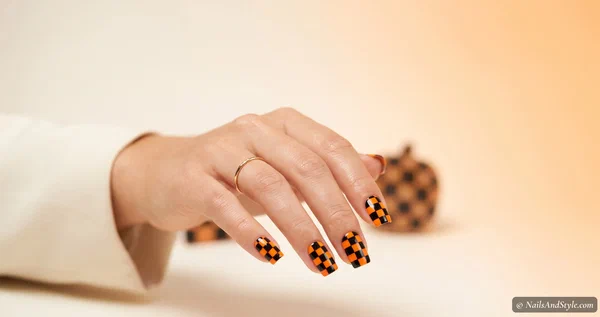
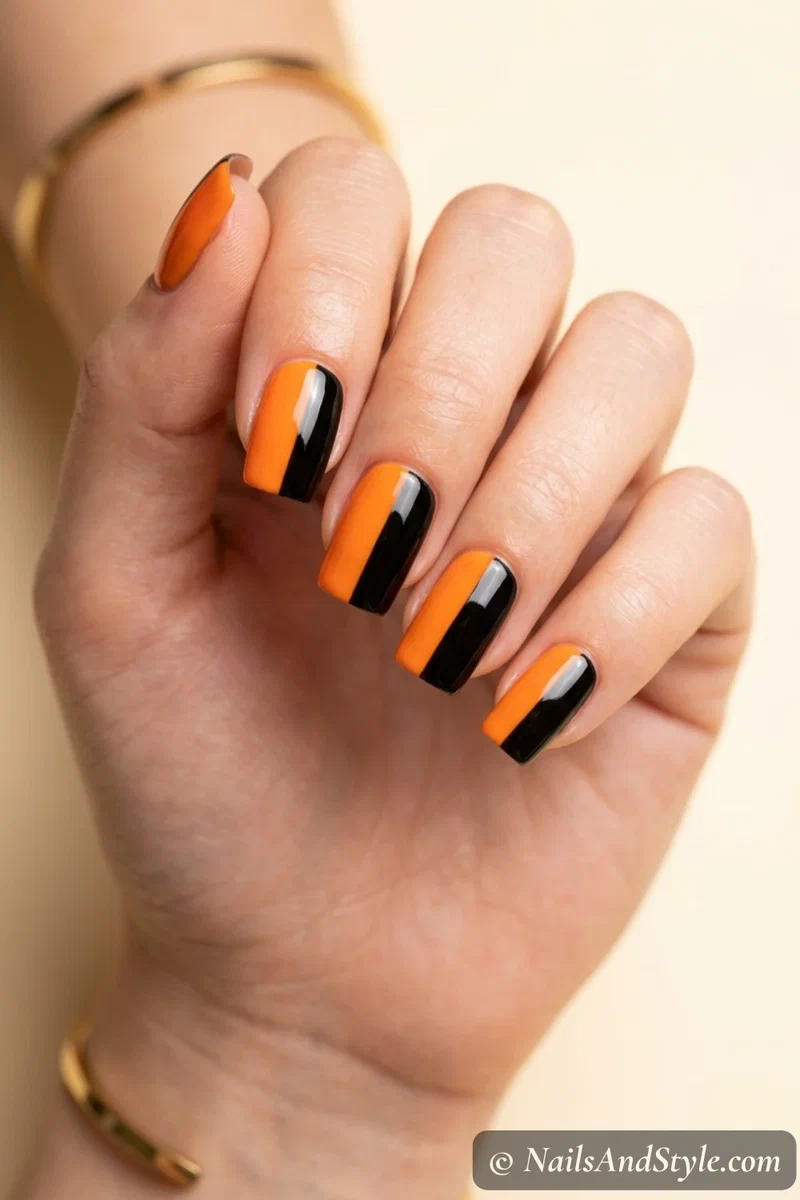
Split each nail into blocks of orange and black — clean, graphic, so simple. Stick a piece of tape down the middle or diagonally, paint one side, peel, let dry, then do the other side. The tape does all the neat work for you. Glossy top coat pulls the halves together.
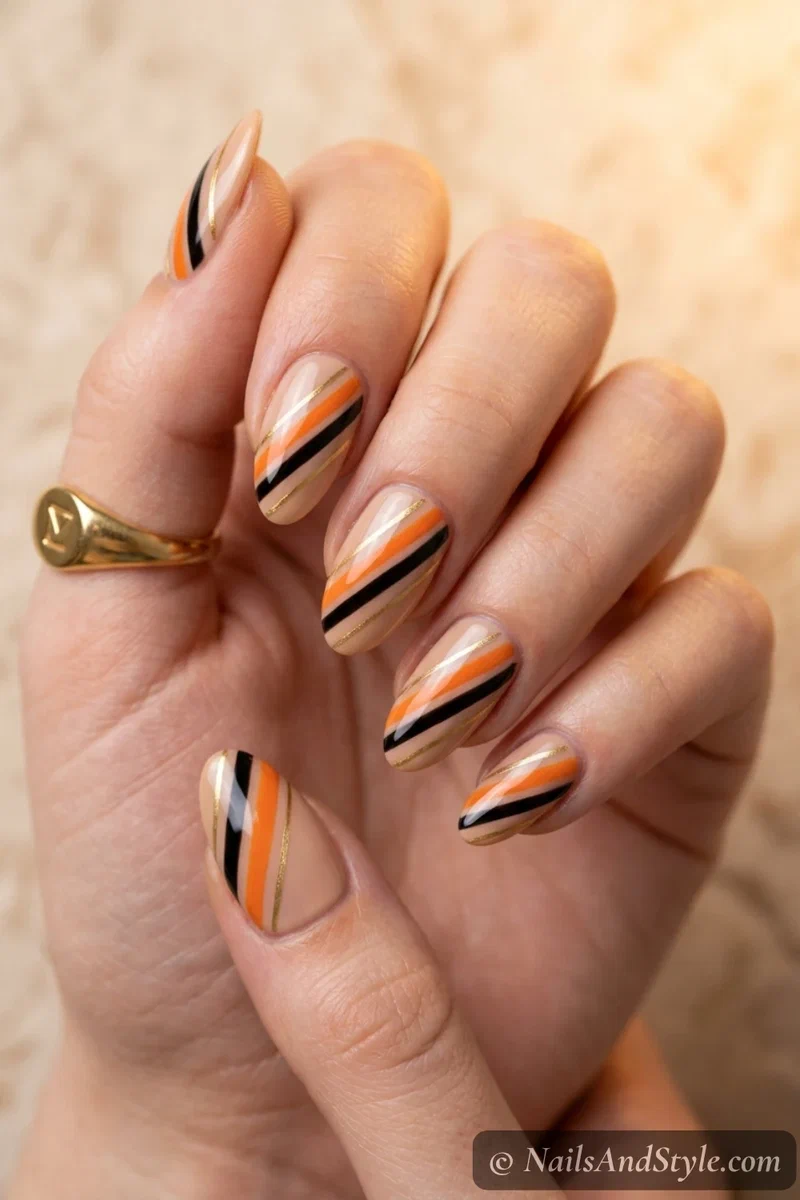
16. Diagonal Stripe Nails#
A little more movement, same easy tape trick. Lay two or three strips of tape at an angle, paint over the gaps in Halloween shades, and peel for sharp diagonal stripes. Mix orange, black, and a thin metallic line for something a bit fancier. The angles make it feel designed, not basic.
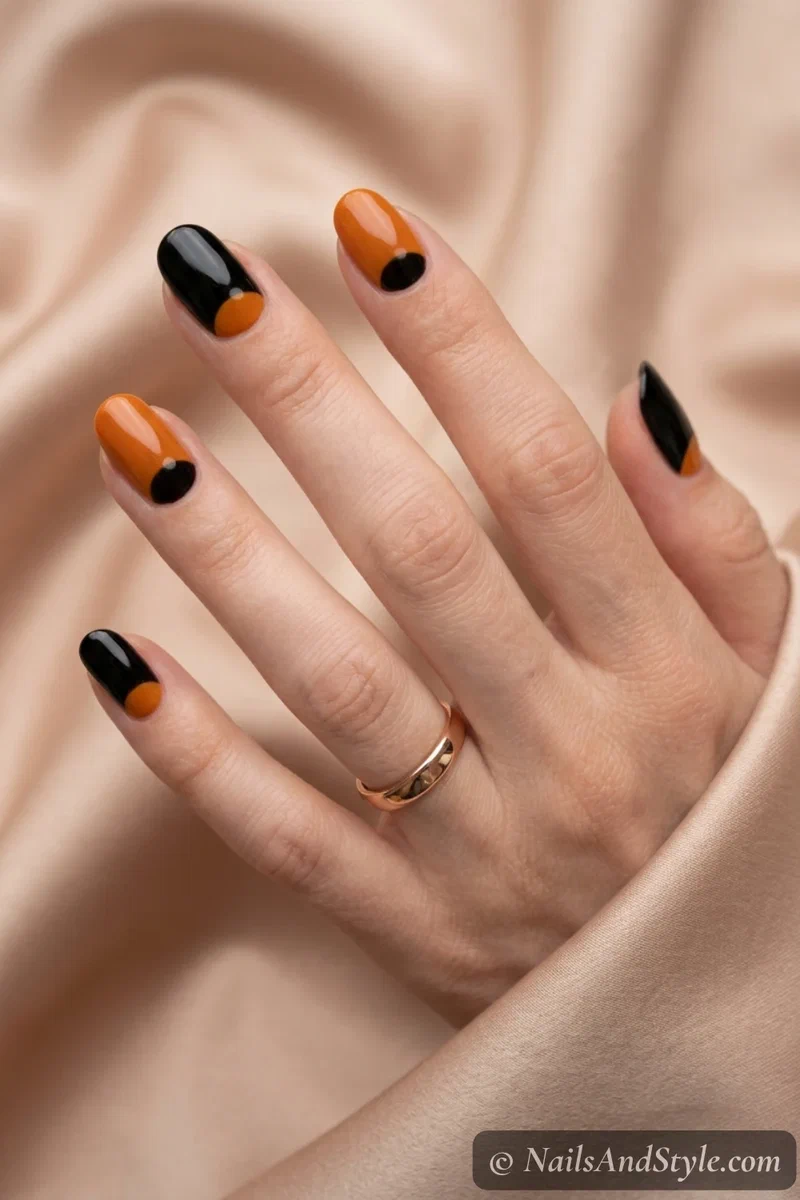
17. Half-Moon Halloween Nails#
A retro half-moon mani, Halloween edition. Use a little curved sticker or the round end of tape to mask the base of the nail, paint the rest black or orange, and peel to reveal a clean moon at the cuticle. Two colors, one curve, very chic. Reads expensive for basically no effort.
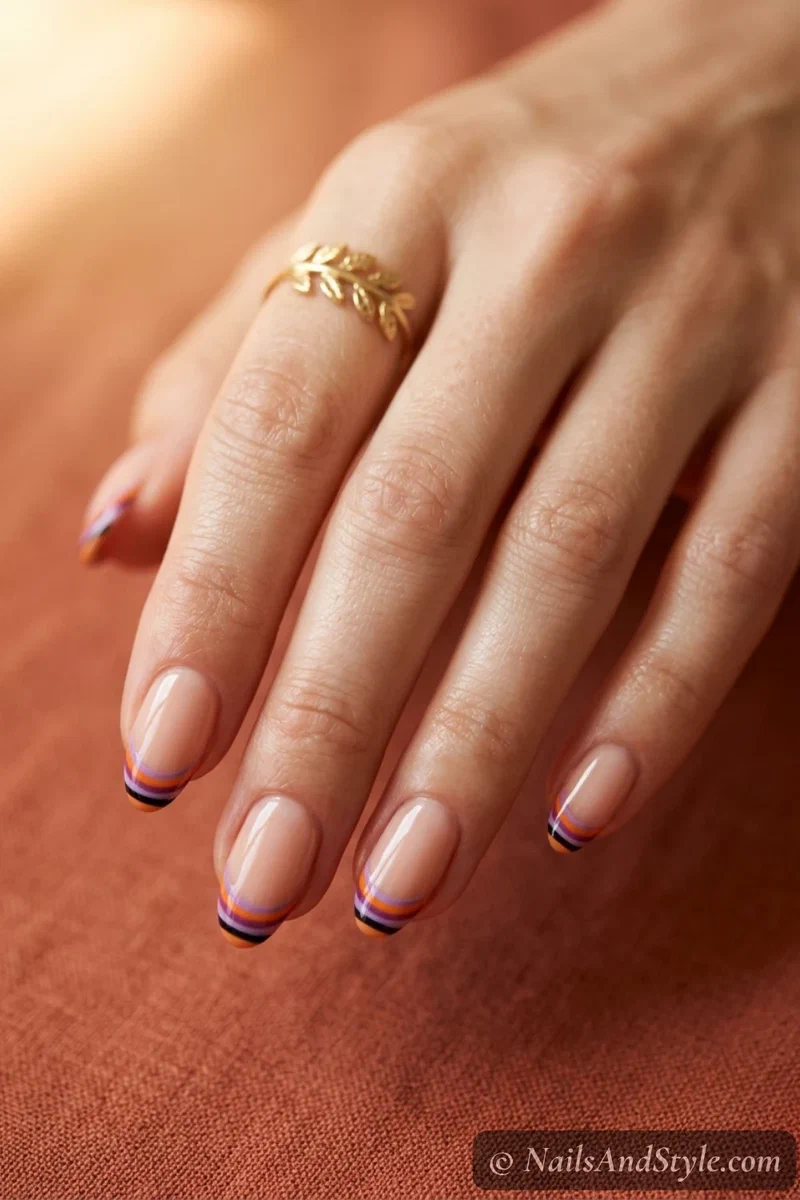
18. Striped Tip Nails#
French tips, but stripey and spooky. Tape off the tip line, then paint quick little stripes of orange, purple, and black right at the edge of each nail. Peel, seal, done. Because the color only lives on the tips, there’s barely anything to mess up. Great for short nails especially.
No-Skill Press-On & Sticker Nails#
Zero painting. This bundle is for when you want the look without any of the work — and honestly, no shame, these can look incredible.
19. Halloween Press-On Nails#
The ultimate shortcut. Pre-designed Halloween press-ons give you full spooky art in about ten minutes, no brush required. Buff your natural nail, add a dot of glue or the sticky tab, press, hold. If you want yours to actually survive the night, here’s how to make press-ons look natural and last. Peel-friendly and reusable if you’re gentle.
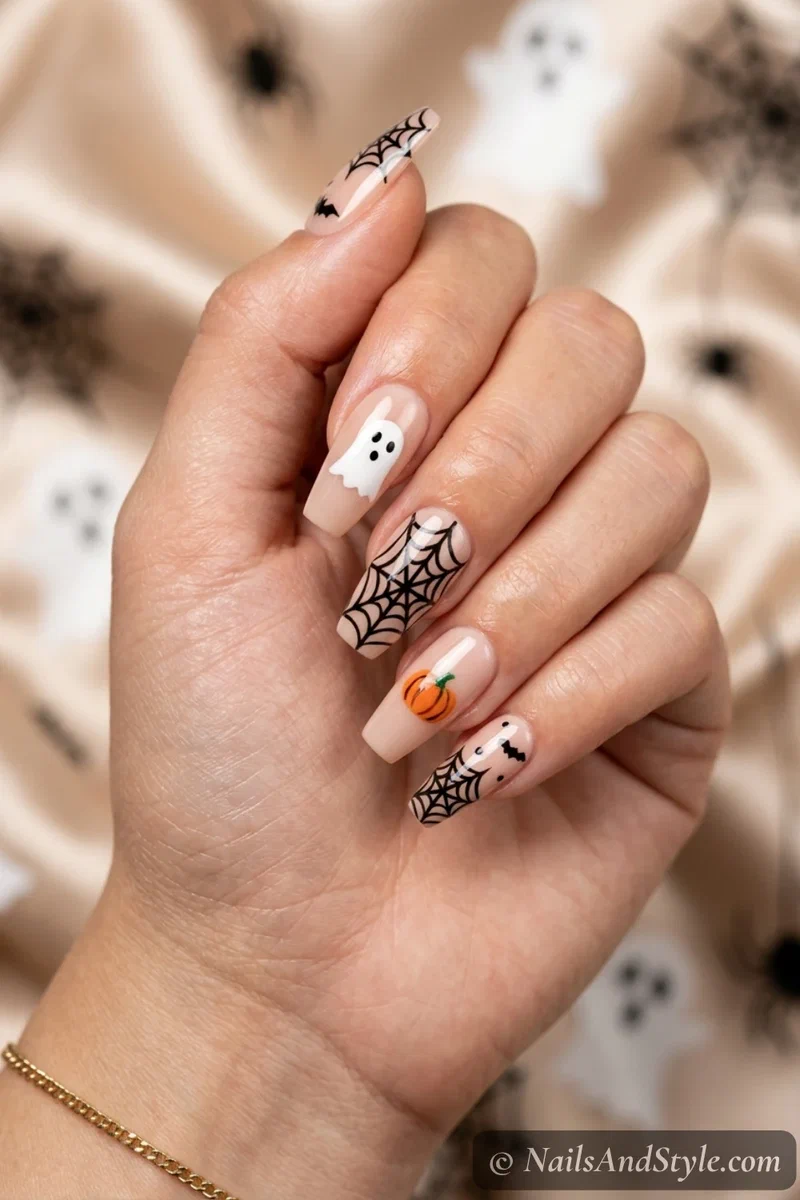
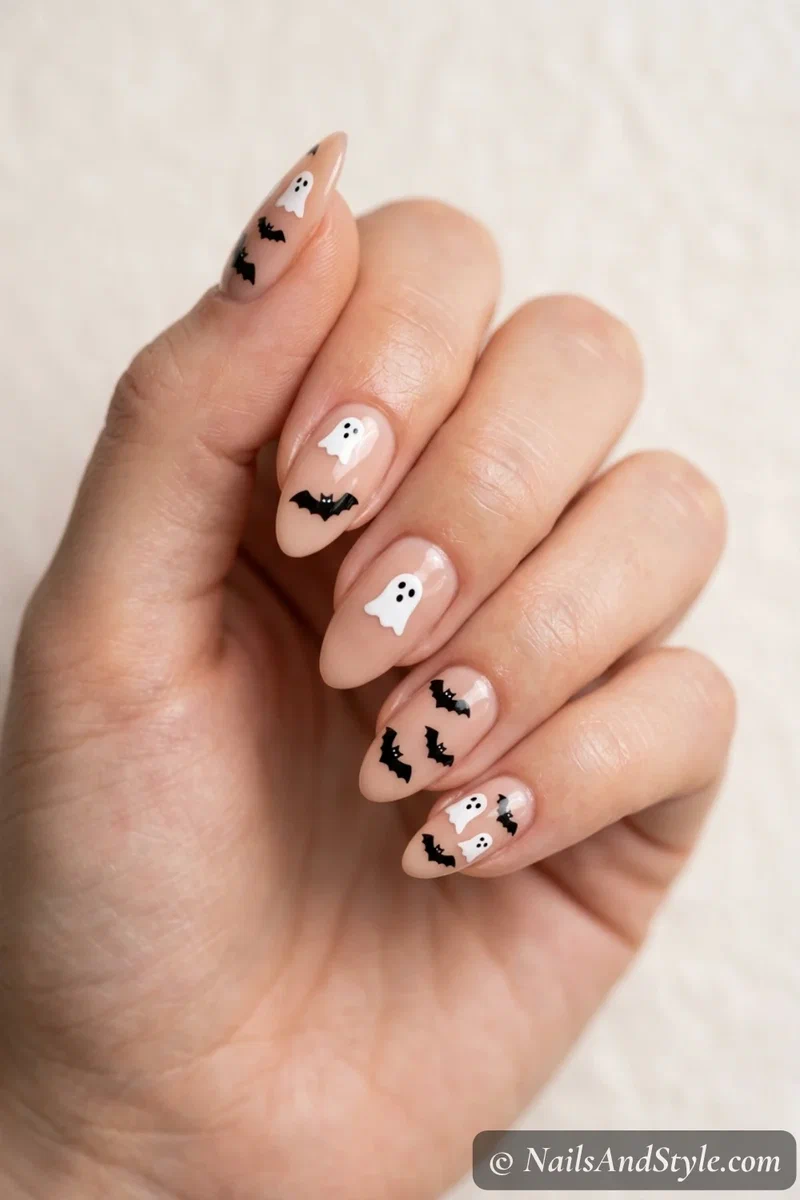
20. Halloween Nail Stickers#
Somewhere between painting and press-ons. Paint a plain base, let it dry, then press on little Halloween decals — ghosts, bats, webs, whatever — and seal with top coat. The top coat is key; it locks the stickers down so they don’t peel at the edges. Genuinely foolproof and endlessly mix-and-match.
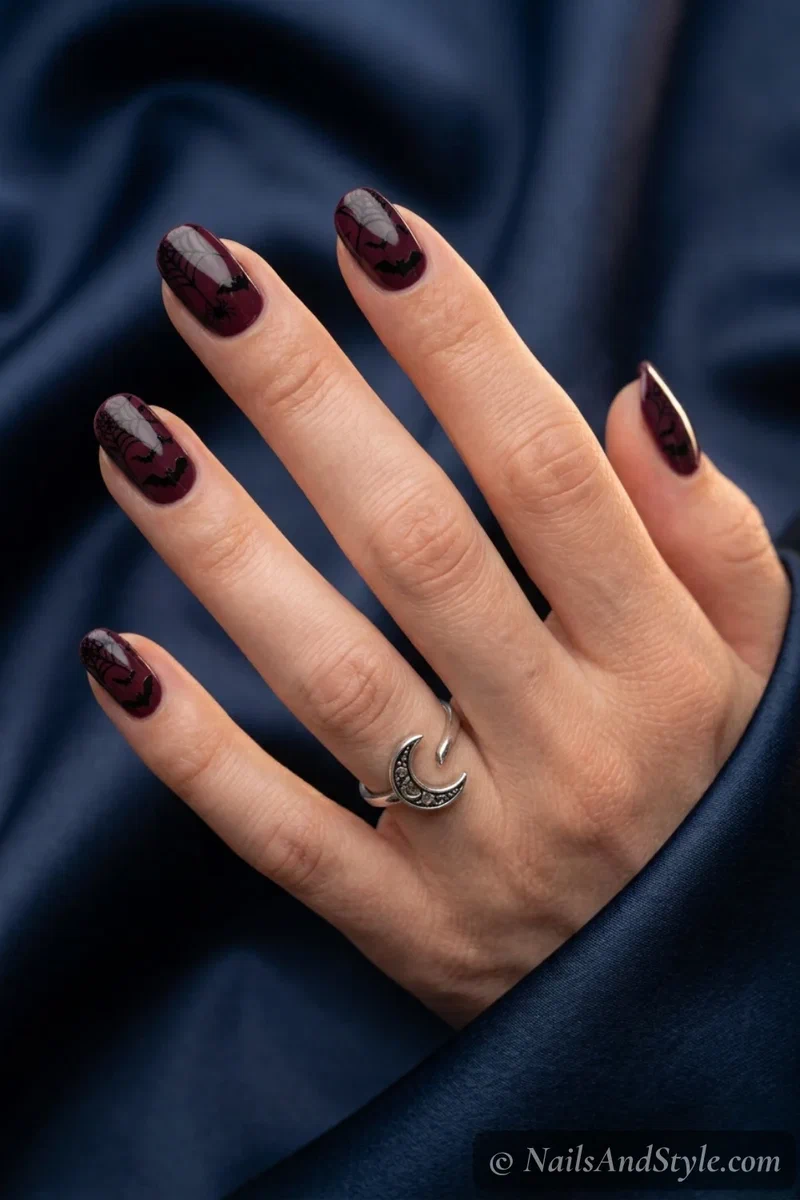
21. Stamped Halloween Nails#
Stamping plates do the hard part for you. Scrape polish over an etched Halloween plate, lift it with the stamper, and roll it onto your nail — instant detailed art, no drawing. Bats, webs, and skeletons all come out crisp. If it’s new to you, my nail stamping tutorial for beginners walks through the whole thing.
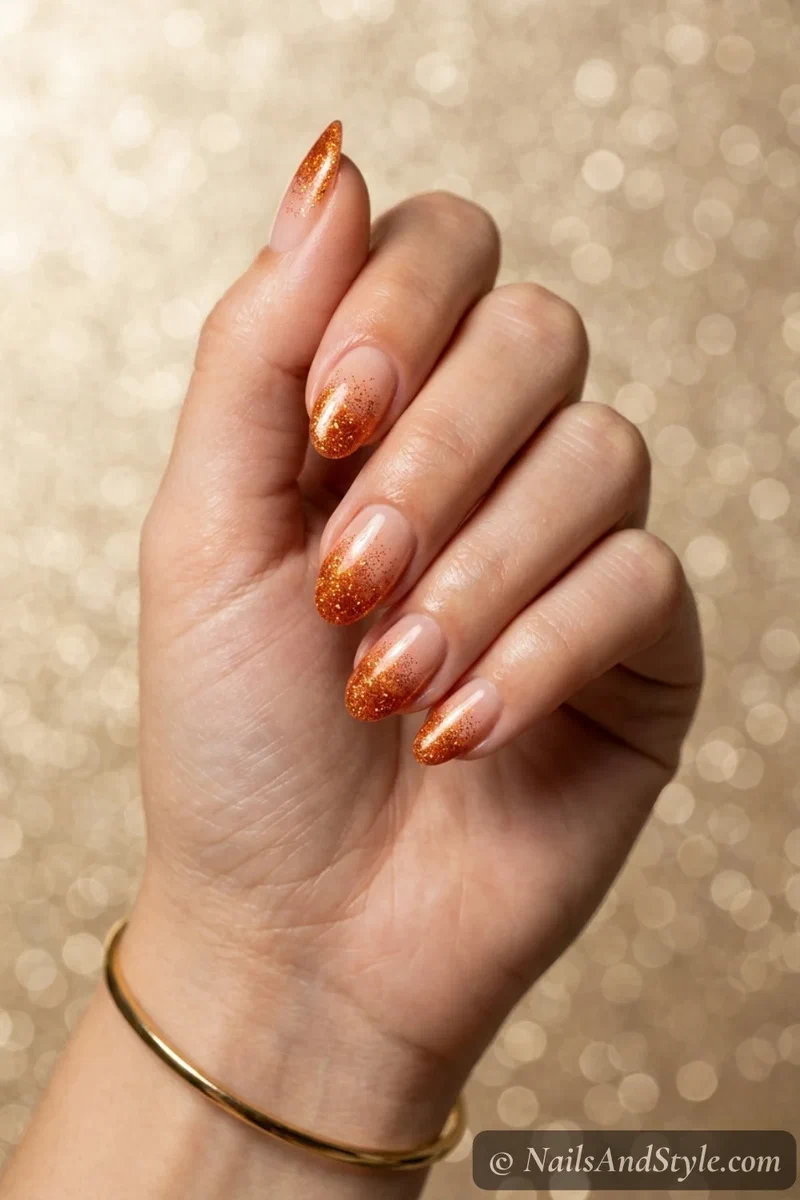
22. Glitter Tip Halloween Nails#
The no-art option that still looks like effort. Just dip or sponge the tips of your nails in orange or black glitter over a nude base. No shapes, no lines, no steady hand — glitter is forgiving by nature. Build it dense at the tips and fade it up. A clear top coat smooths the texture.
Easy Halloween Nails on Short Nails#
Good news if your nails are short — these were basically designed for you. Small dots, single ghosts, and tip designs sit perfectly on a short nail, and there’s less surface area to keep steady. A confetti dot look or a corner web takes seconds on short nails and never looks crowded.
Keep any lines or stripes vertical or diagonal to add a little length illusion, and stick to one accent nail so the design pops. Short nails also handle the candy-bowl-and-costume chaos of Halloween way better than long tips do.
A Few More Short Nail-Specific Ideas#
- Single confetti dots — scatter a few on each short nail; instant festive, zero fuss.
- One-stroke ghost accent — a little ghost fills a short nail perfectly.
- Glitter tips — a shimmer edge makes short nails look longer and needs no skill.
- Half-moon in orange — the curve draws the eye up and looks intentional.
- A sticker or two — the fastest festive short-nail fix there is.
Simple Step-by-Step: How to Do This at Home#
- Prep your nails. Clean them, trim and file, and gently push back your cuticles.
- Buff lightly. A soft buff helps polish and press-ons grip — don’t overdo it.
- Apply a base coat. It protects against staining and helps everything last.
- Paint your base color. Two thin coats of your main shade, fully dry before you add art.
- Do the easy art. Dots with a dotting tool, lines with tape, or press on stickers or press-ons — whatever method you picked.
- Add any tiny details. Dot eyes, a stem, a spider leg — small touches, done last.
- Clean up the edges. A small brush dipped in remover tidies any color off your skin.
- Seal with top coat. It blends dots and stickers into one smooth finish and locks the whole thing down. Let it dry fully.
How to Ask Your Nail Artist for Easy Halloween Nails#
Rather have someone else do it, even the simple stuff? Totally fair, and simple designs are usually cheaper and quicker in the chair too. A little direction helps you get exactly what you pictured.
- Bring one or two reference photos. Show the simple version you want — say “just a couple of dots” or “one ghost,” so it doesn’t turn into an elaborate (pricier) set.
- Ask for minimal art. Tell them you want one or two accent nails, not full designs on all ten — it’s faster and reads cleaner.
- Mention the finish. Glossy for most of these; matte if you’re after the tombstone or a moody look.
- Say if stickers or stamping are fine. Many salons will stamp or apply decals, which keeps it quick and low-cost.
- Regular polish is usually enough. For simple accents you don’t need gel unless you want them to last for weeks — say so either way.
Tips to Make Your Nails Last Longer#
- Keep every layer thin so your dots and lines don’t stay soft and smudge.
- Seal the free edge by swiping polish and top coat along the tip of each nail.
- Give stickers and press-ons a top coat over the edges so they don’t lift.
- Skip hot water and long showers right after painting.
- Wear gloves for dishes and cleaning.
- Refresh your top coat every couple of days to keep the shine.
- Don’t pick at a lifting sticker — reseal it or swap it instead.
Quick FAQ#
What are the easiest Halloween nails for beginners?#
Dot designs win, hands down. Confetti dots, a polka-dot spider, or a single ghost only need a dotting tool and a couple of minutes. If you want the absolute easiest, press-ons and stickers skip painting altogether.
Can I do Halloween nails without any tools?#
Definitely. The end of a bobby pin makes dots, a toothpick draws spider legs and thin lines, and regular tape gives you clean color blocks. You can do most of this list with stuff already in your bathroom drawer.
How do I keep easy Halloween nails from smudging?#
Let each layer dry fully before the next one — that’s the real trick. Keep your base color thin, add the art once it’s set, and finish with a top coat. With these looks, patience matters way more than skill.
Final Thoughts#
The best part of easy Halloween nails is that “easy” never has to mean boring. A few well-placed dots, one crisp ghost, or a set of glitter tips looks just as festive as the elaborate stuff — and you’ll actually finish it without losing your evening. Start with one accent nail and build from there.
Save the ones that look doable to you, pin them for your next quiet night in, and don’t be afraid to mix methods — dots on one nail, a sticker on another. And if you catch the bug and want to level up to something sweeter, my cute Halloween nails are the natural next step.