So your nail just cracked. Maybe it caught on something, maybe it bent backward (the worst), or maybe you noticed a split creeping down from the free edge and now you’re just staring at it. I get it. That moment where you’re deciding between chopping it all down or quietly panicking? Been there more times than I’d like to admit.
But here’s the thing — you don’t have to cut it off. If you want to know how to fix a broken nail with a tea bag, this is the method that actually works, and it’s been a quiet beauty hack for years. All you need is a tea bag, some nail glue, and about ten minutes.
This works on natural nails, short nails, medium nails, splits, cracks, and even tears that haven’t fully broken through. And honestly? You probably have everything you need at home right now.
Why the Tea Bag Method Actually Works#
This isn’t just some random internet hack. The mesh fibers in a tea bag act like a tiny bandage for your nail. When you glue them over the crack, they create a reinforced layer that holds everything together as it grows out. It’s basically the same concept as a silk wrap — which salons charge real money for — just way cheaper and completely DIY.
The fibers are thin enough to disappear under polish but strong enough to keep the crack from spreading. And because the tea bag material is slightly porous, the nail glue soaks into it and bonds really well with the nail surface. Pretty clever for something you’d normally toss in the bin, right?
If you’re using gel to seal the repair, my gel nails at home complete guide walks through proper curing and application for the strongest hold.
What You’ll Need#
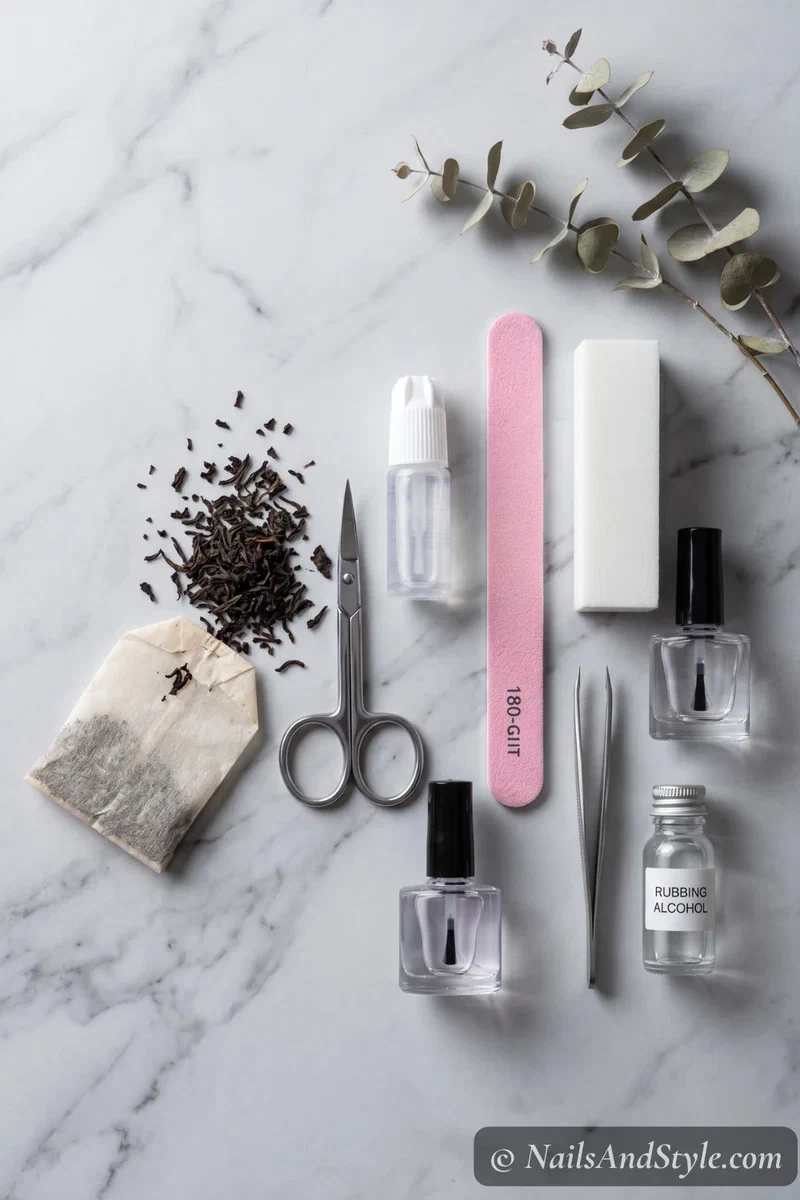
Good news — this list is short. Most of it’s probably in your bathroom drawer already:
- Nail glue — or a clear gel base coat if you have a UV lamp
- An empty tea bag — any brand — cut it open and dump the tea out
- Small sharp scissors — to cut the patch to size
- Nail file — 180 grit is ideal for shaping and smoothing
- Nail buffer — buff the patch until it's flush with the nail
- Base coat — grip layer under your color
- Glossy top coat — seals the repair completely invisible
- Rubbing alcohol or nail cleanser — degrease so the glue actually grips
- Tweezers — optional — makes placing the patch easier
No fancy nail repair kit required.
How to Fix a Broken Nail with a Tea Bag at Home#
Let’s walk through this step by step. Take your time — rushing here means redoing it later.
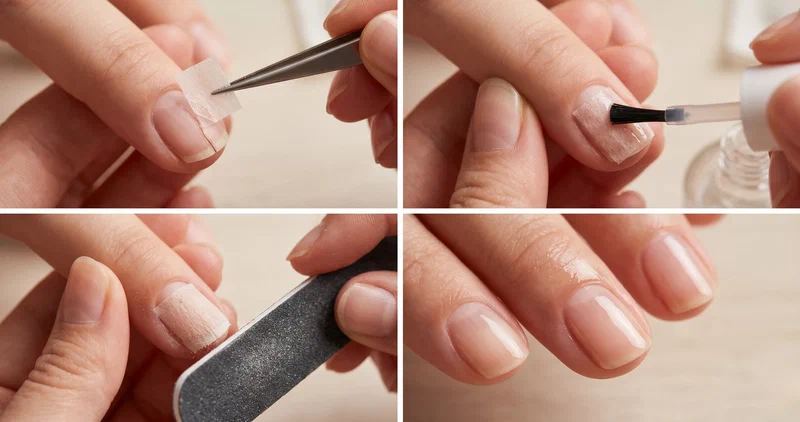
Step 1 — Clean your nail. Remove any polish. Wipe the nail with rubbing alcohol so there’s zero oil or residue left. The glue won’t stick to a dirty nail. Boring step? Sure. But it’s the difference between a repair that lasts and one that pops off in the shower tomorrow.
Step 2 — Cut a small piece of the tea bag. Open up the bag, dump the tea, and cut a piece slightly bigger than the crack. You want it to cover the damaged area with a little overlap on each side. Don’t cut it too big or it’ll bunch up.
Step 3 — Apply a thin layer of nail glue over the crack. Just enough to coat the area. If you’re using gel base coat instead, apply a thin layer but don’t cure yet.
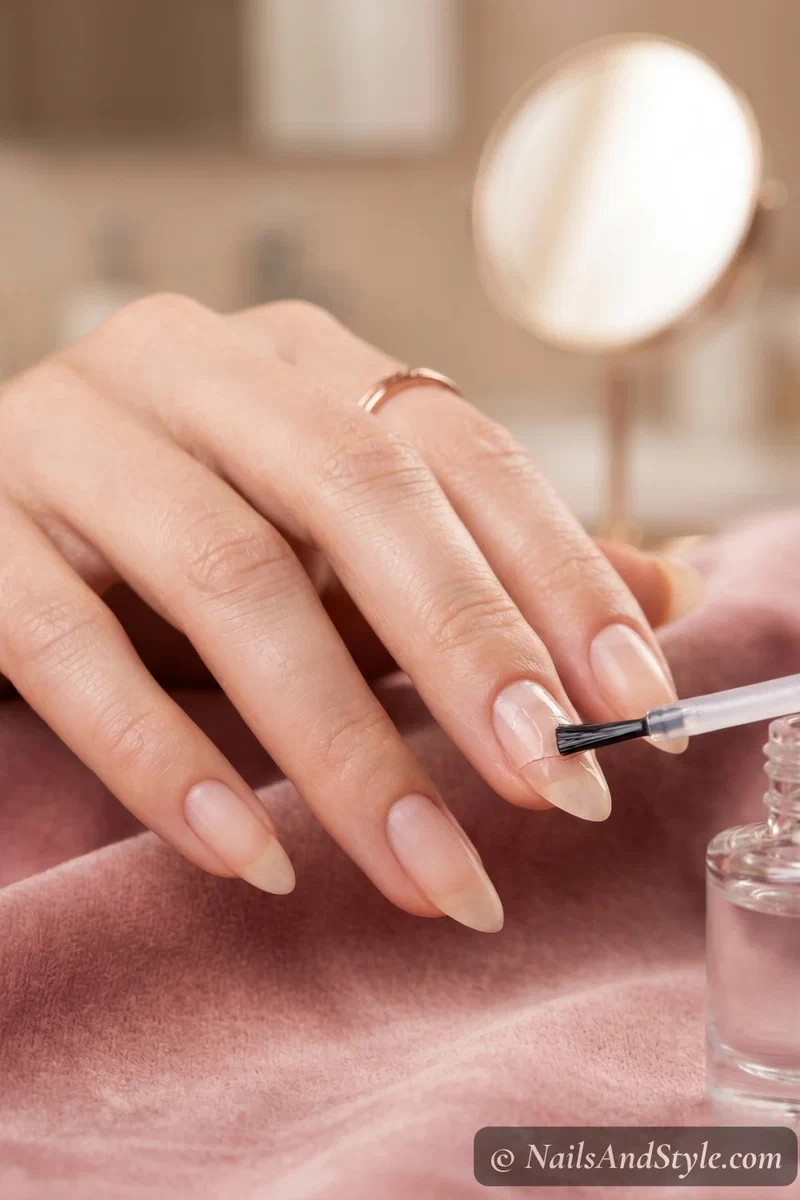
Step 4 — Place the tea bag piece over the wet glue. Press it down gently with tweezers or your fingers. Smooth it flat — no wrinkles, no air bubbles. Press the edges down firmly. This part matters. The flatter it lays, the smoother your nail looks when you’re done.
Step 5 — Add another layer of glue on top. Brush a second coat of nail glue over the entire patch. Let it soak into the fibers. This creates the hard protective shell.
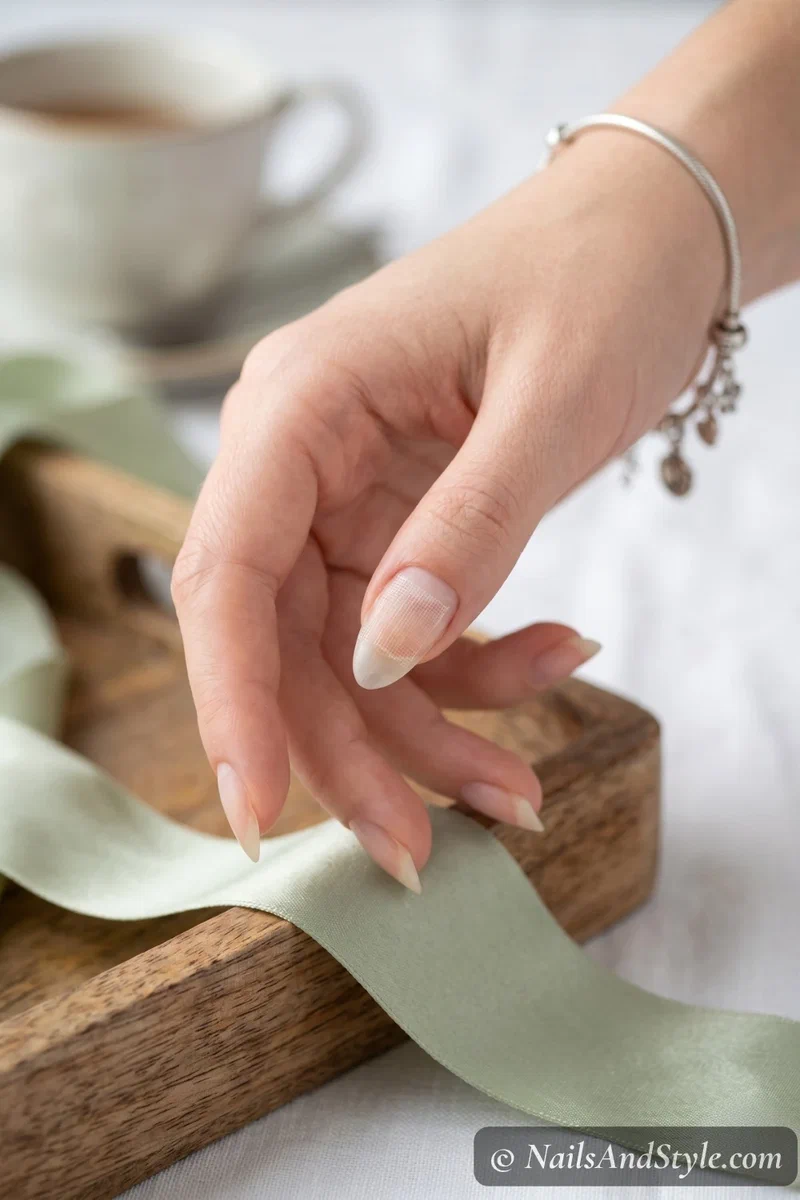
Step 6 — Dry, then buff smooth. Give it a solid 2-3 minutes to fully dry. Then gently buff the surface until it’s completely smooth. You shouldn’t feel the edges of the tea bag at all. If you can? Add a tiny bit more glue to those edges and buff again.
Step 7 — Polish over it. Apply base coat, your color (if you want one), and top coat. The repair disappears completely under polish. Gel polish adds extra strength, but regular polish works fine too.
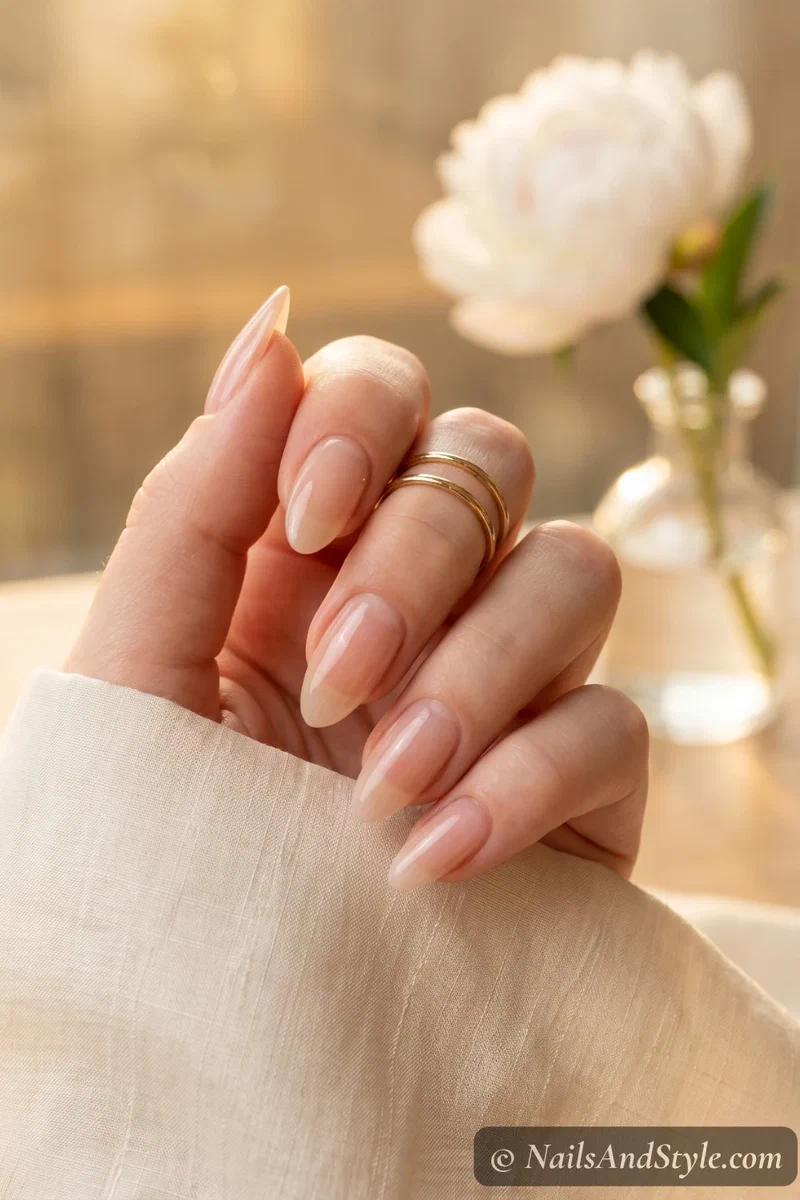
Done. Your nail is patched, reinforced, and ready to go. No salon. No cutting it down. No sad uneven nails.
Once your nail is patched, something like an ombre gradient hides the repair even better since the color blending camouflages any slight texture.
Tea Bag Repair with Different Finishes#
The beauty of this method? It hides under pretty much anything.
With gel polish — strongest option by far. Cure your gel base over the patch, add color, cure again, top coat. The gel adds another hard layer on top of the fibers, so the repair can last 2-3 weeks easily.
With regular polish — totally works. Just keep your layers thin. Thick polish over a repair tends to peel up faster, so two thin coats always beats one thick one.
With just nail glue and clear top coat — if you don’t want any color, a couple layers of glue plus a clear top coat gives you an invisible fix that still holds. This is my go-to when I break a nail midweek and can’t be bothered with a full paint session.
Ever tried the silk wrap method at a salon? Same idea, honestly. But this costs you nothing and you can do it at midnight in your pajamas. Hard to beat that.
Choosing the right polish matters here — my best nail polish brands for 2026 round-up has formulas that layer well over repairs without lifting.
Tips to Make Your Nail Repair Last#
- Apply thin coats of glue — globby layers take forever to dry and don’t bond as well
- Seal the free edge with your top coat so water can’t sneak under the patch
- Avoid soaking your hands in water for the first few hours
- Wear gloves when washing dishes or cleaning (just always, honestly)
- Reapply top coat every 3-4 days to keep everything sealed
- Use cuticle oil daily — healthy nails grow out stronger and the crack will eventually grow off completely
- Don’t pick at the repair. Seriously. Hands off.
Quick FAQ#
Is the tea bag method hard for beginners?#
Not even a little. If you can cut a small piece of material and press it onto your nail, you’ve got this. Whole thing takes maybe 10-15 minutes, and the results are honestly impressive for how simple it is.
How long does a tea bag nail repair last?#
Depends on how gentle you are with your hands. Under gel polish, I’ve had repairs hold close to three weeks. With regular polish, usually one to two weeks before you might need a touch-up. Either way — it buys you time while the crack grows out.
Can I do this on natural nails without any polish?#
Yes, and it looks totally fine. The tea bag fibers are so thin that once you buff and add a layer or two of clear glue, you can barely tell anything is there. Clean, natural-looking fix.
Once your nail is healed up, nail stamping is a great way to jump back into nail art — the stamper goes right over a repaired surface without any issues.
Final Thoughts#
So yeah — how to fix a broken nail with a tea bag is one of those tricks that sounds way too simple to actually work. But it does. I’ve saved more nails with this method than I can count, and it’s become my automatic reaction every time I hear that dreaded crack.
Next time a nail breaks on you — because it will, that’s just life — skip the panic, grab a tea bag, and patch it up. Ten minutes, no salon, and your nails stay intact. Can’t ask for more than that.