So fruit nails aren’t exactly new. But this summer the whole vibe has shifted — bold citrus patterns, juicy peach gradients, grape jelly finishes. Fruit nail designs have never been this fun or this wearable.
This post has 15 cute fruit nail ideas you can pull off at home on short and medium nails. Some are dotting-tool-only easy, others take a bit more patience (nothing here needs salon skills though, promise). Let’s get into it.
Why Fruit Nails Just Work in Summer#
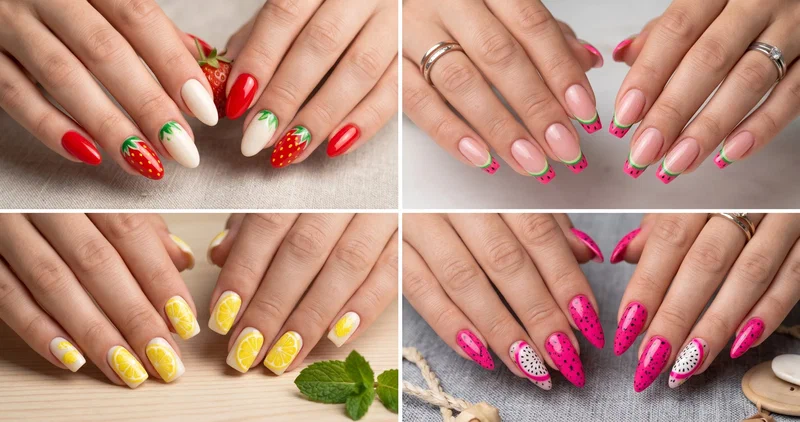
This trend used to mean one little watermelon on your ring finger. Not anymore. Now it’s full sets — matching citrus slices across every nail, or a different fruit on each finger for that salad-bowl energy. Colors run from soft peach to electric lime, finishes from glossy to jelly to matte. Beach days, brunch, festivals, a random Tuesday — they work for all of it. If bold summer color without the fruit theme is more your speed, check out my bright fun summer nails round-up.
A Few Things to Keep in Mind Before You Start#
- Match shades to your skin tone. Warm undertones glow in peach, mango, and red. Cool tones pop with cherry, grape, and lime.
- Short to medium nails work best. Almond or round shapes keep fruit art cute.
- Base coat first, always. Bright fruit pigments stain like nobody’s business.
- Top coat is everything. Glossy makes the colors look wet and juicy.
Quick Pick: Which Fruit Design Should You Try?#
| If you’re looking for… | Try these designs |
|---|---|
| Beginner-friendly | Blueberry Dots, Dragon Fruit, Strawberry |
| Short nails | Watermelon Tips, Cherry Bomb |
| Bold and playful | Mixed Fruit Salad, Pineapple Party |
| Subtle and soft | Peach Ombré, Grape Jelly |
15 Fruit Nail Designs to Try This Summer#
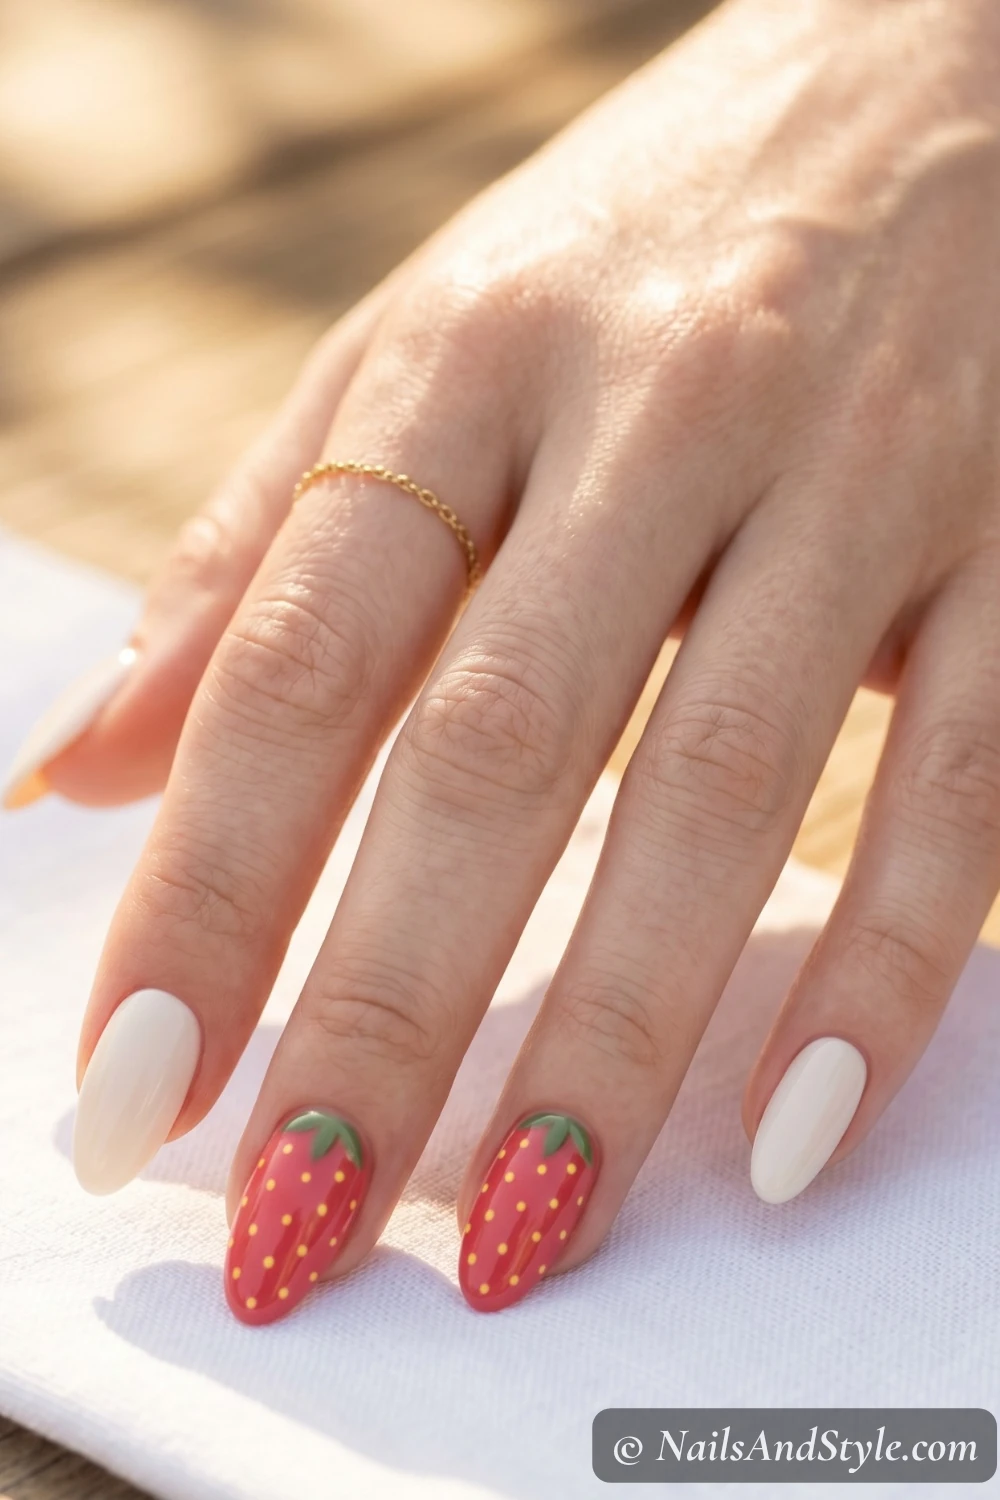
1. Strawberry Accent Nails#
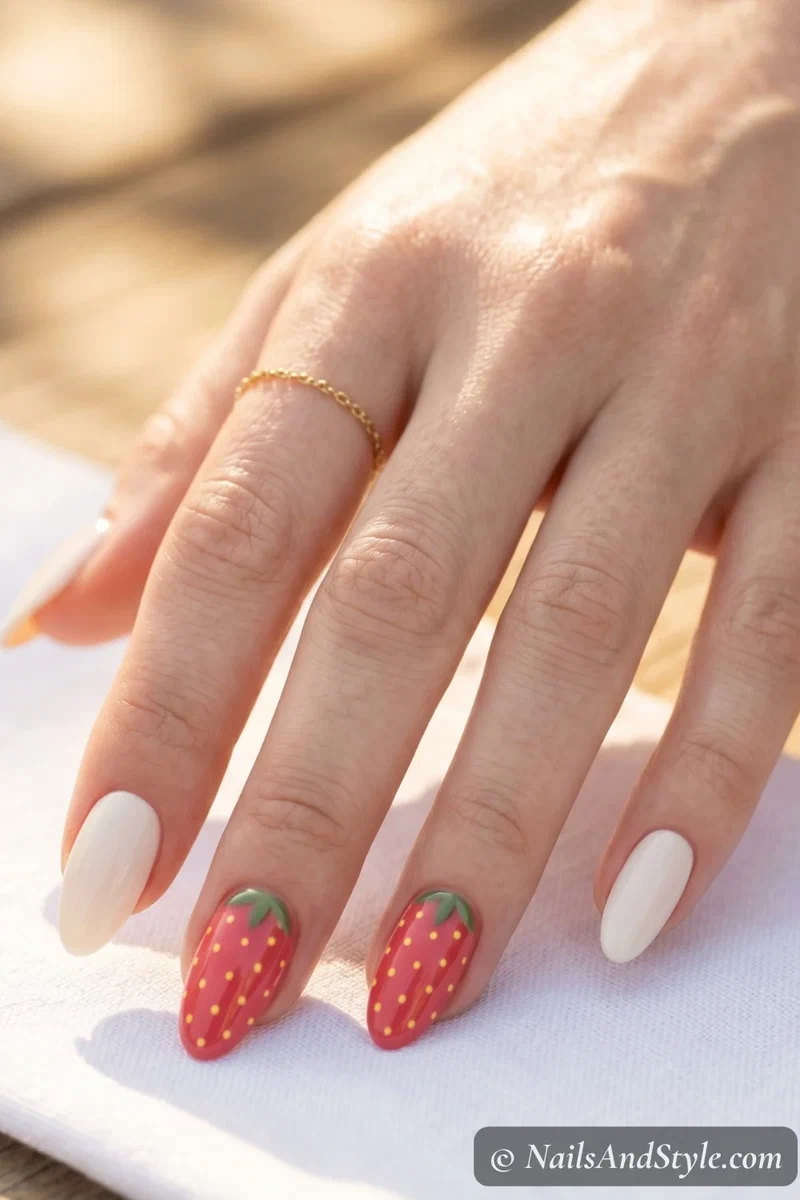
Soft red on a few accent nails with tiny yellow seed dots and a green leaf at the cuticle — keep the rest in creamy off-white. A dotting tool is literally all you need. Glossy top coat makes the red look fresh-picked.
2. Watermelon French Tips#
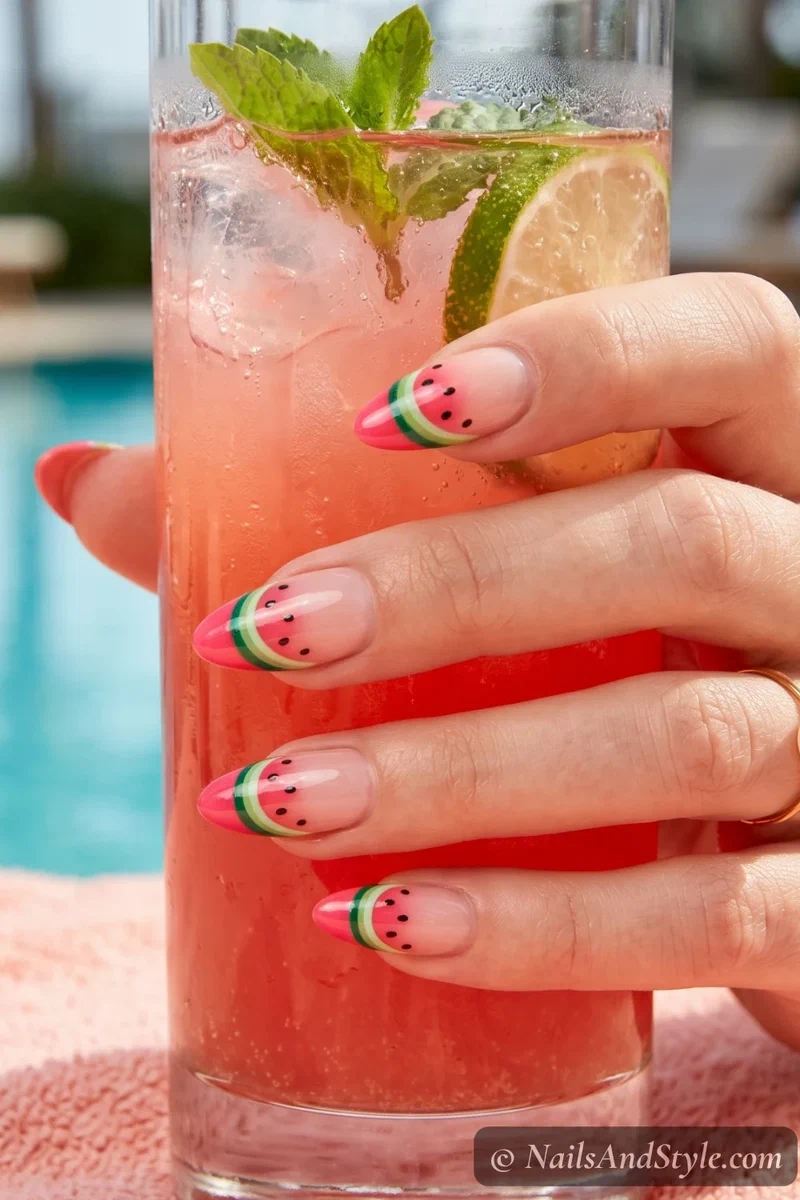
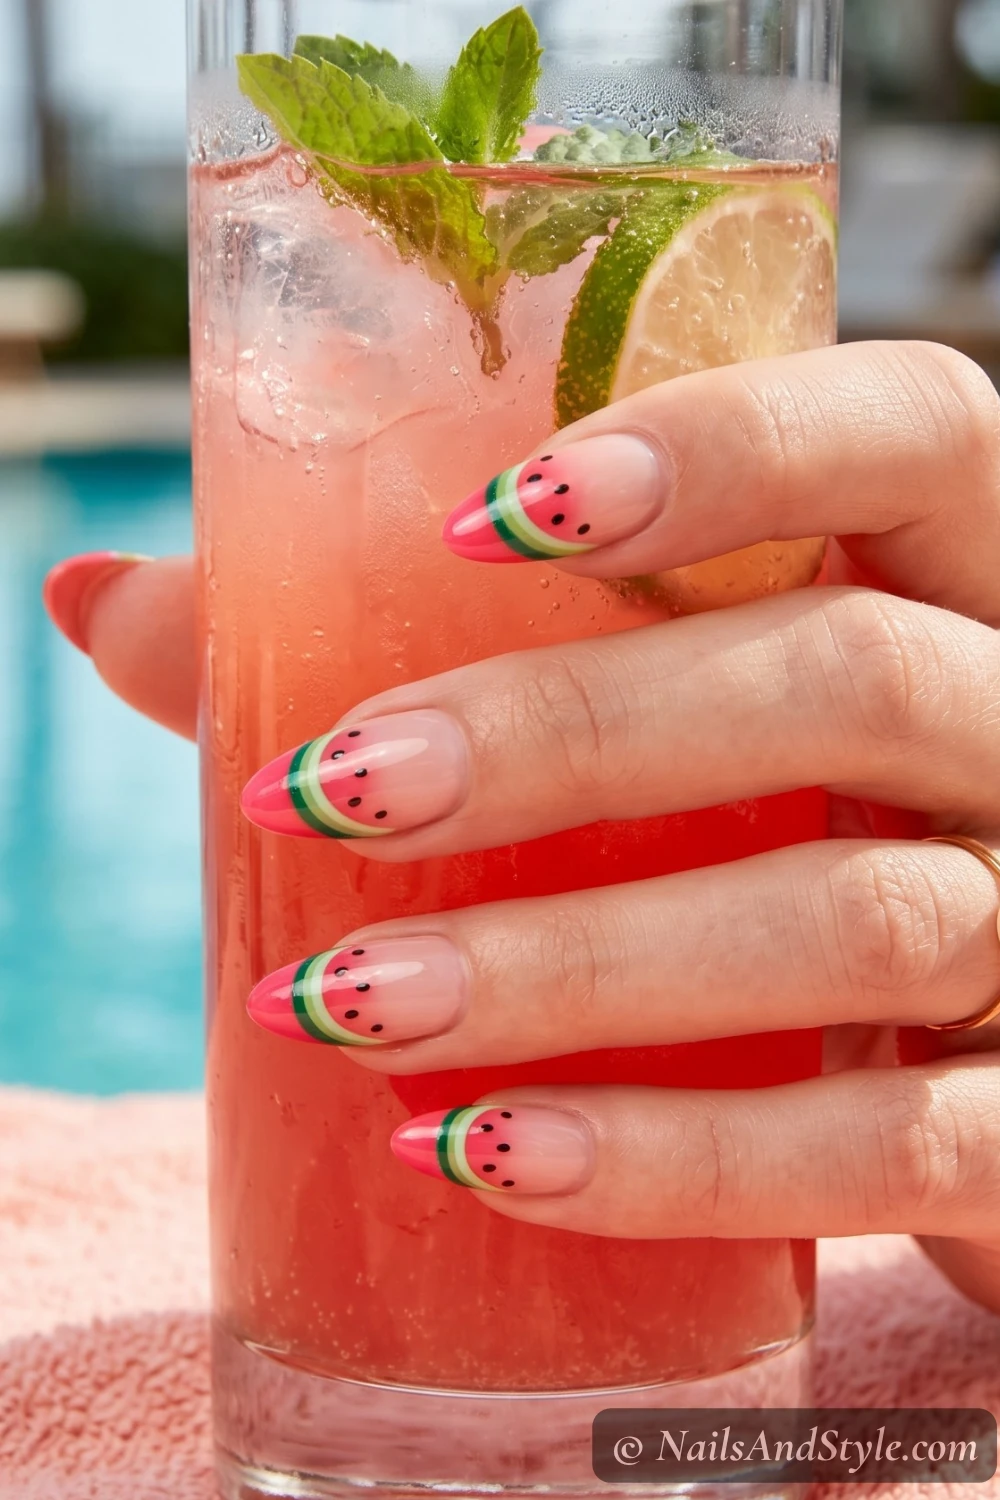
Bright watermelon pink for the tip, thin green stripe below for the rind, black dots for seeds. Freehand works fine — imperfections honestly make it more charming. Bold enough to pop even on the shortest nails.
3. Cherry Bomb Nails#
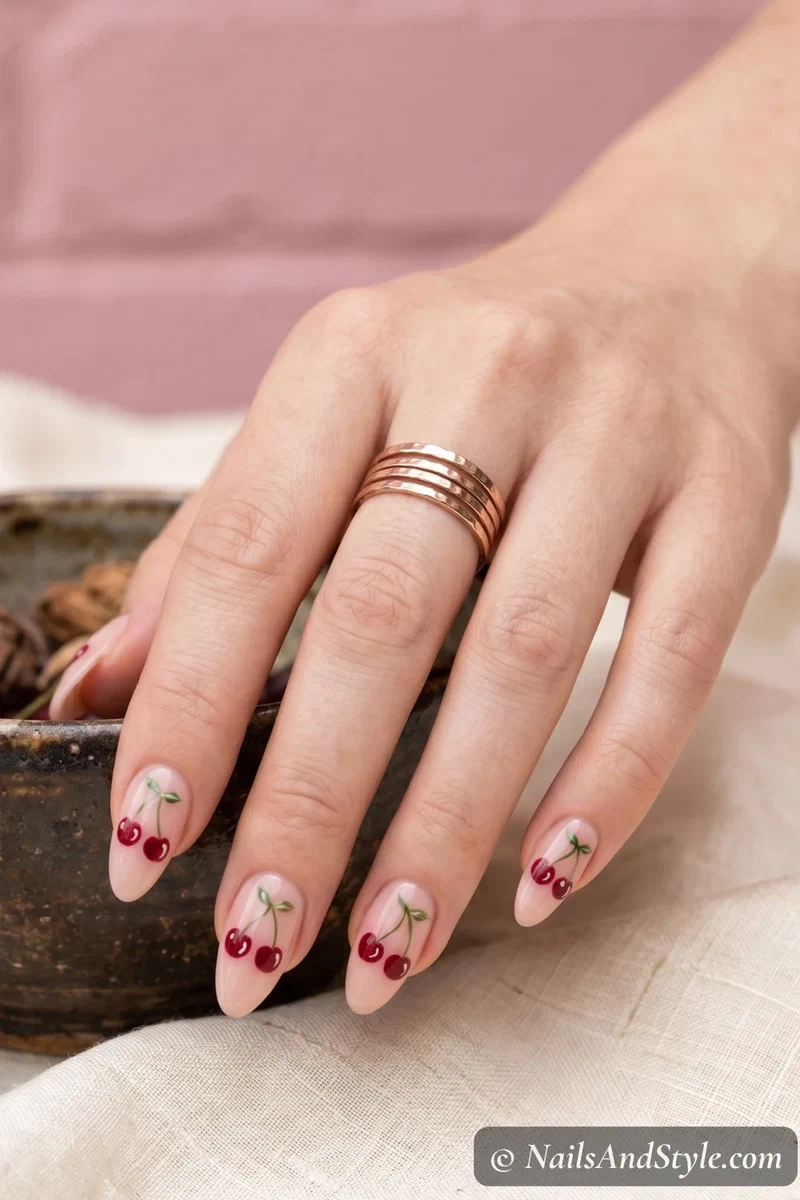
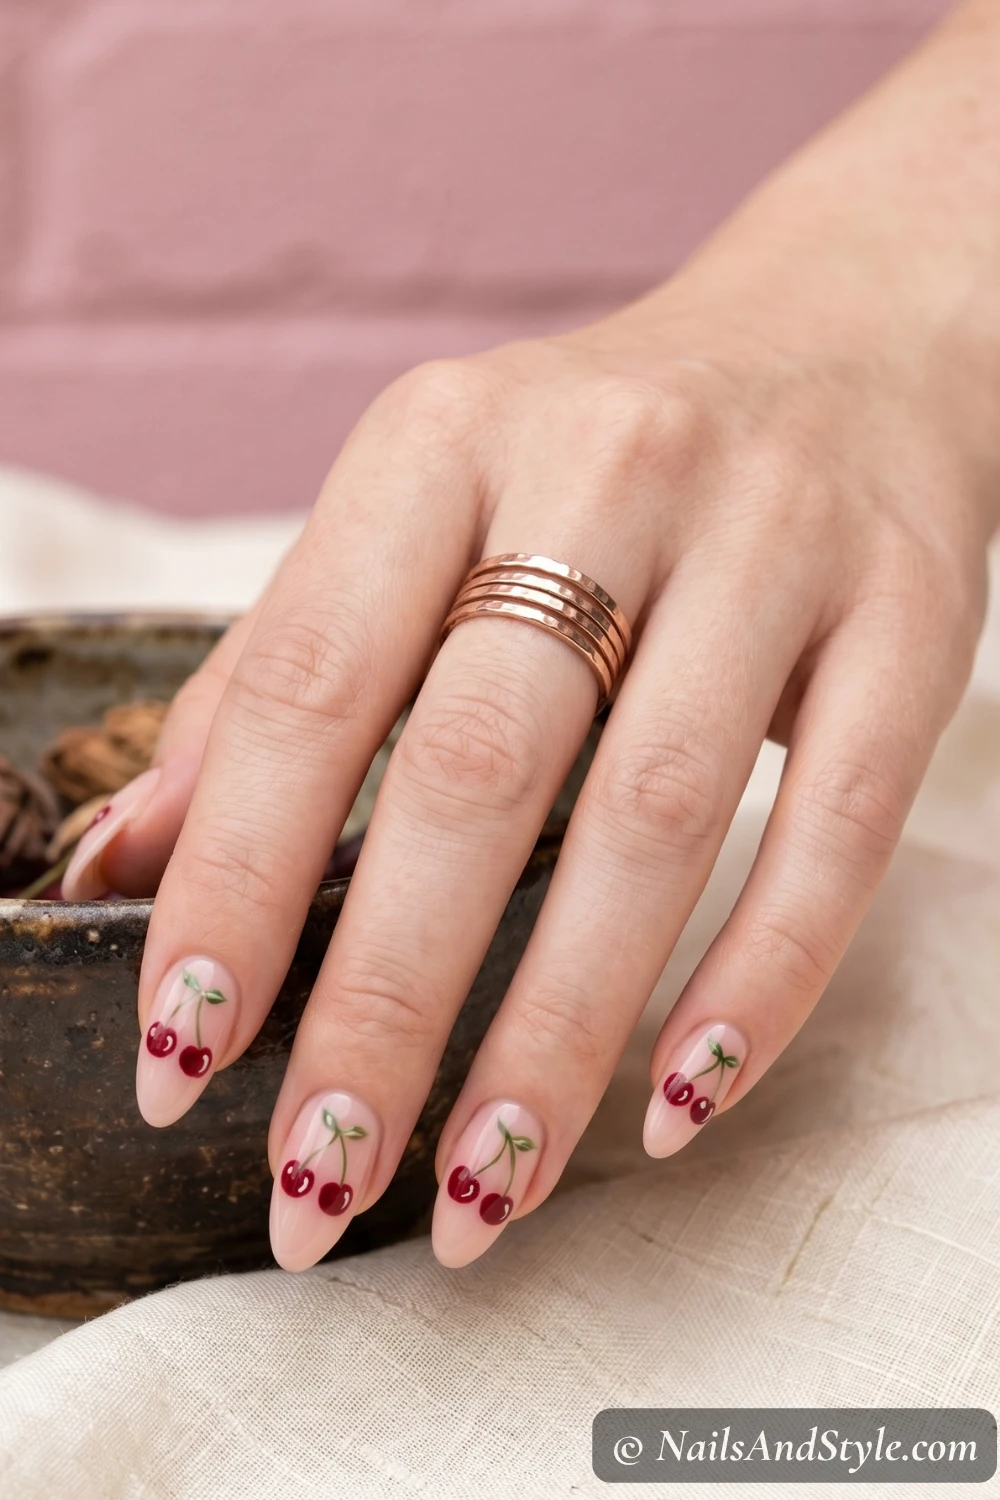
Deep red cherry pairs on a nude base — dotting tool for the circles, striping brush for stems and leaves. These look incredible on short nails because cherries don’t need much space. Always glossy. I’ve got more short-nail-friendly looks in my cute short summer nails post too.
4. Lemon Squeeze Nails#
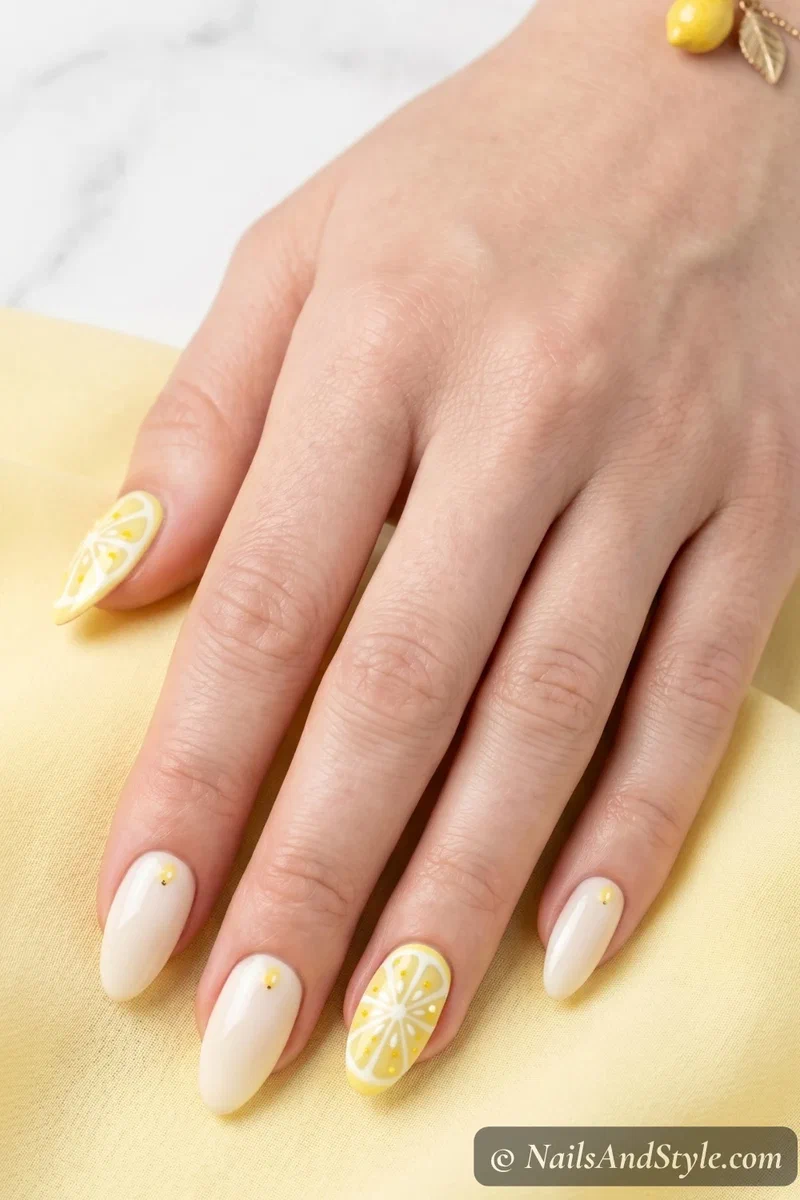
Warm white base with lemon slices on one or two accents — pale yellow circle, white segments, tiny seed dots. A striping brush makes the segment lines way easier. Fresh and summery without going too bold.
5. Peach Ombré Nails#
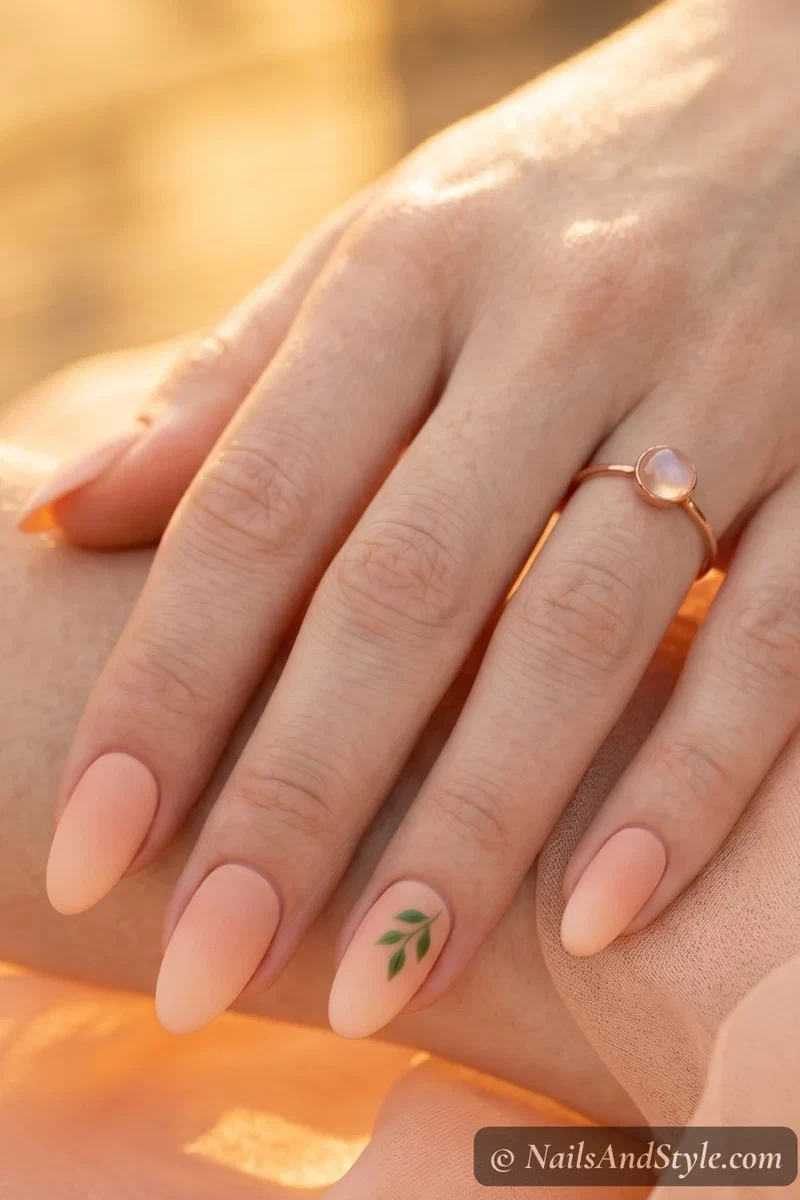
No freehand needed here. Sponge-blend a soft peach from the tip into a sheer nude. Add a tiny green leaf accent to make it read more fruity. Matte top coat gives this a velvety, fuzzy-peach finish — so dreamy for vacation days. If soft gradients are your thing, my pastel summer nails has even more.
6. Pineapple Party Nails#
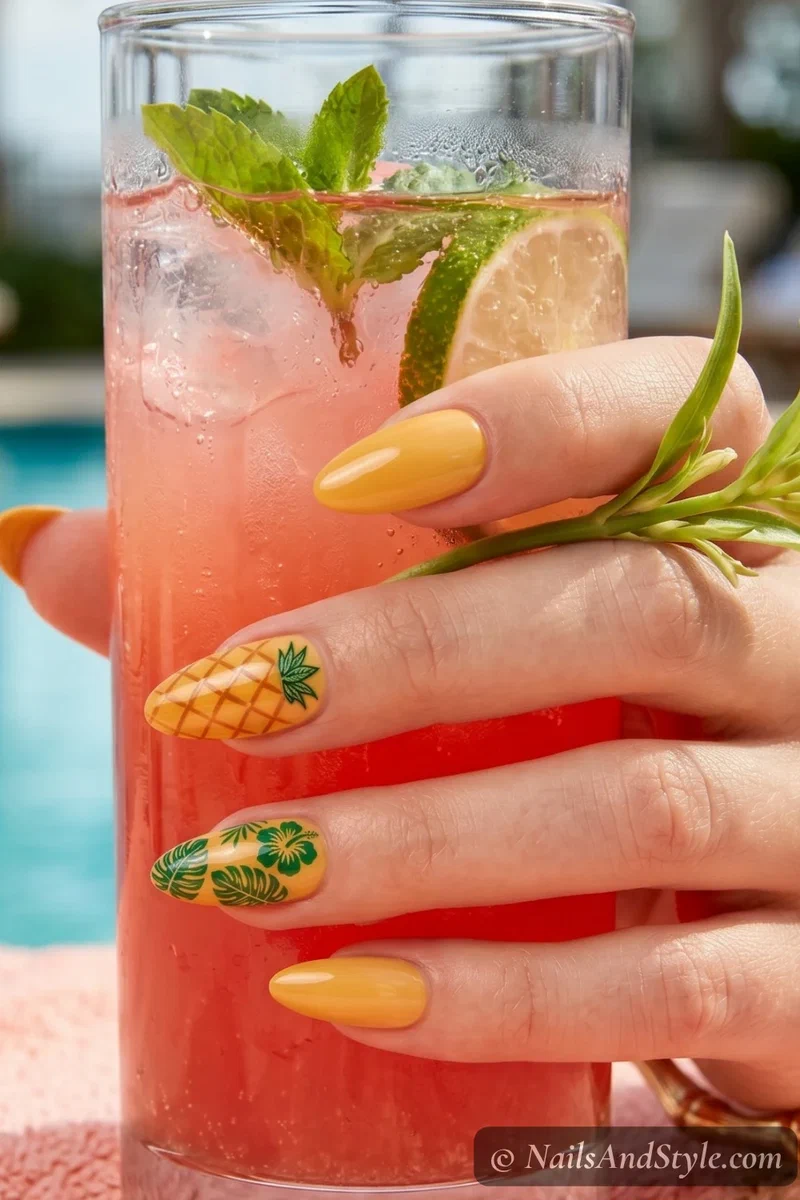
Golden yellow base with crosshatch lines and a green leaf crown at the cuticle. Fine striping brush — diagonal lines both ways, slightly darker amber over the yellow. Sounds harder than it is. Glossy finish.
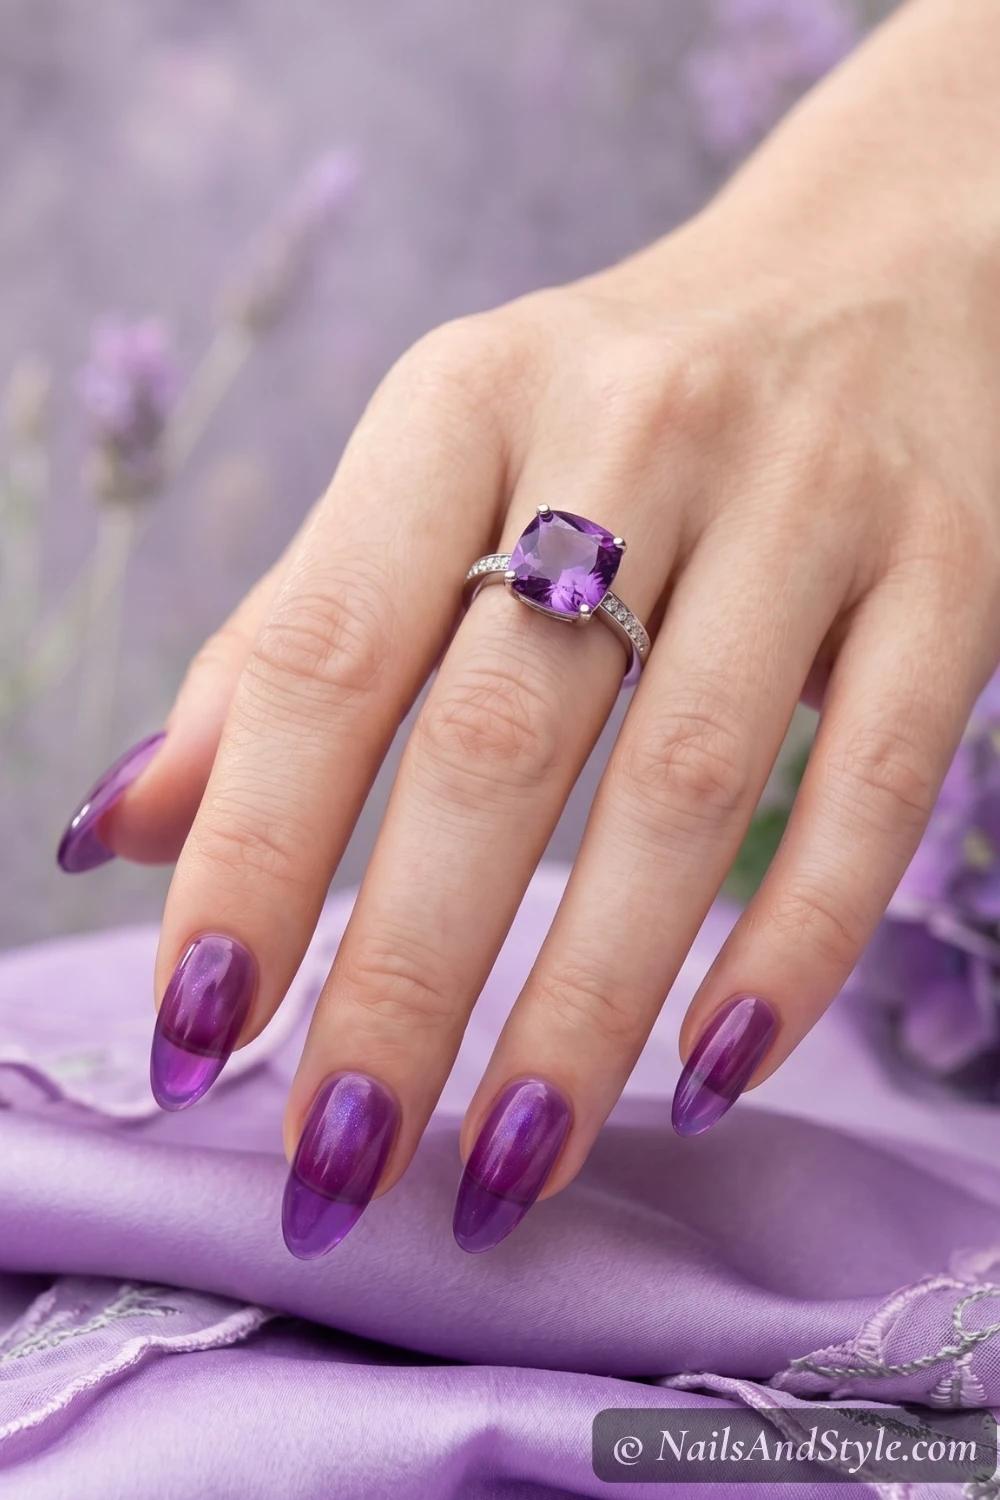
7. Grape Jelly Nails#
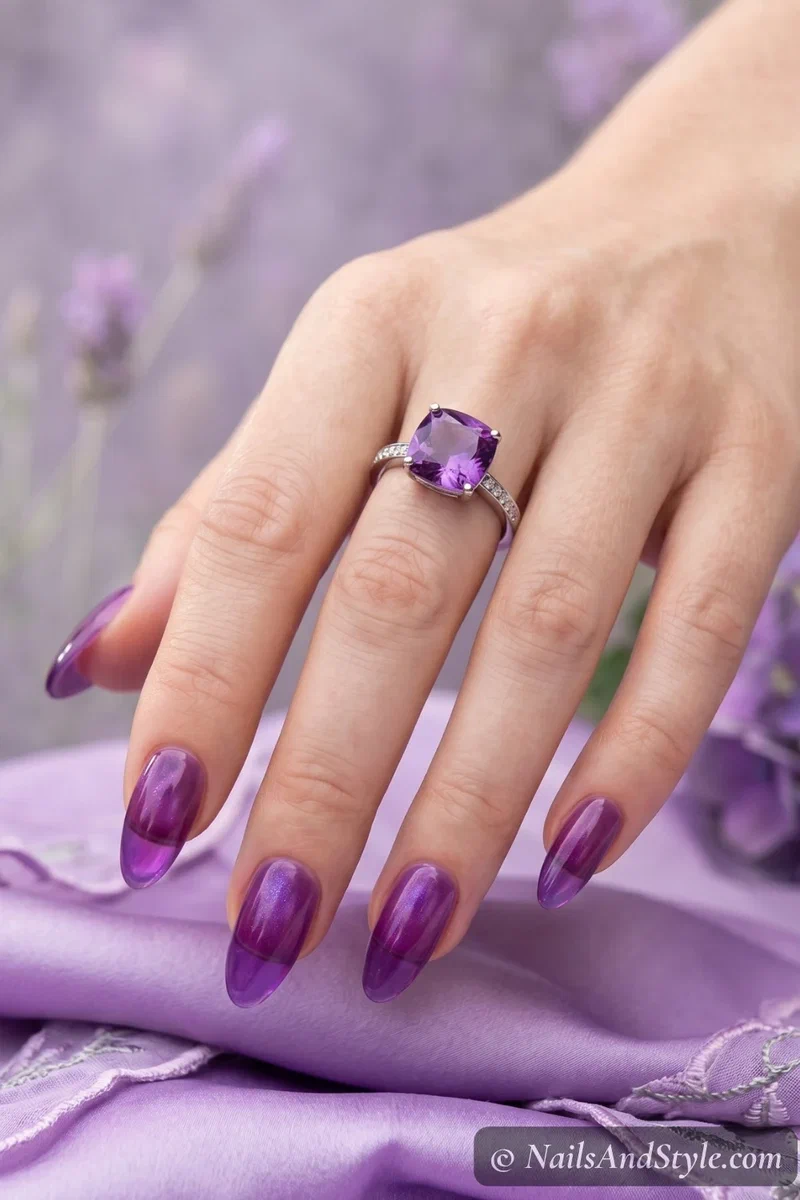
All about the polish here, not the art. Sheer purple jelly formula in three thin coats for that squishy, translucent grape candy look. No brushwork at all — the finish does everything. Add a shimmer top coat for dimension. Low effort, genuinely gorgeous.
8. Blueberry Dot Nails#
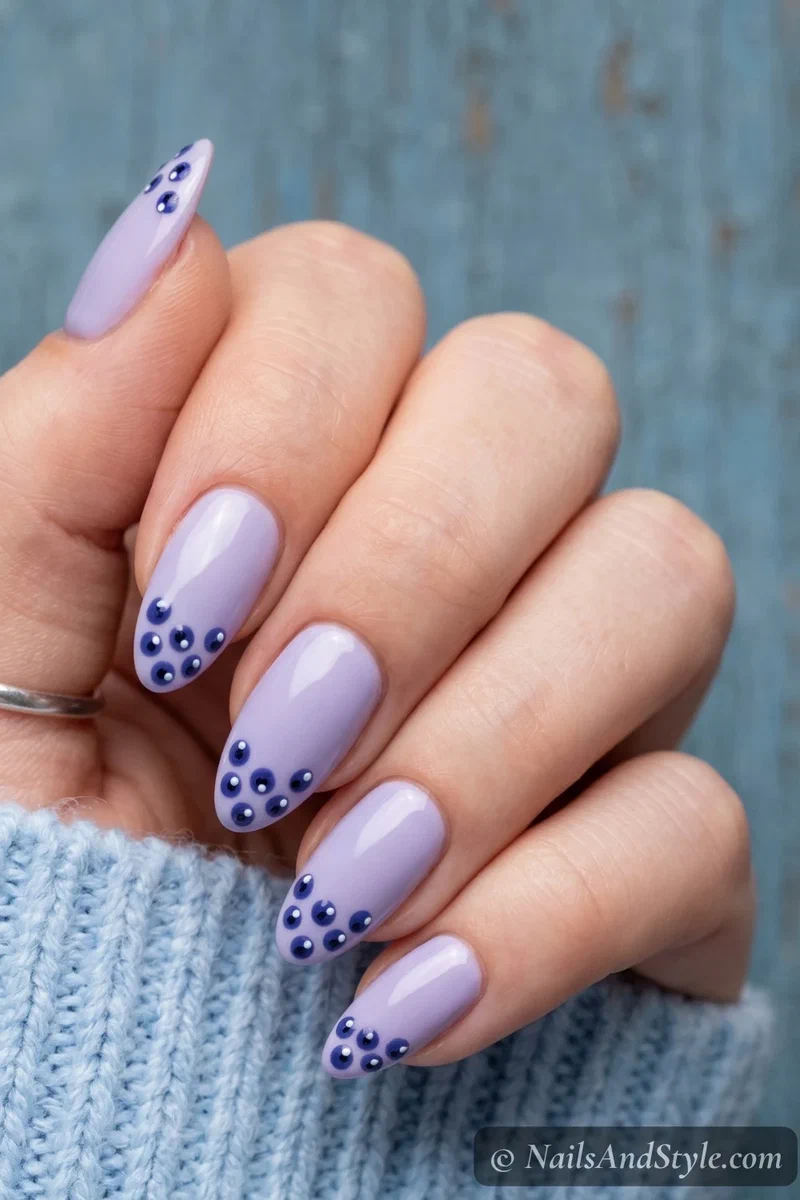
Tiny indigo clusters on a lavender base with a white highlight dot on each berry. Medium dotting tool, steady hand, done. Simple. Fast. Ridiculously cute on short nails.
9. Kiwi Slice Nails#
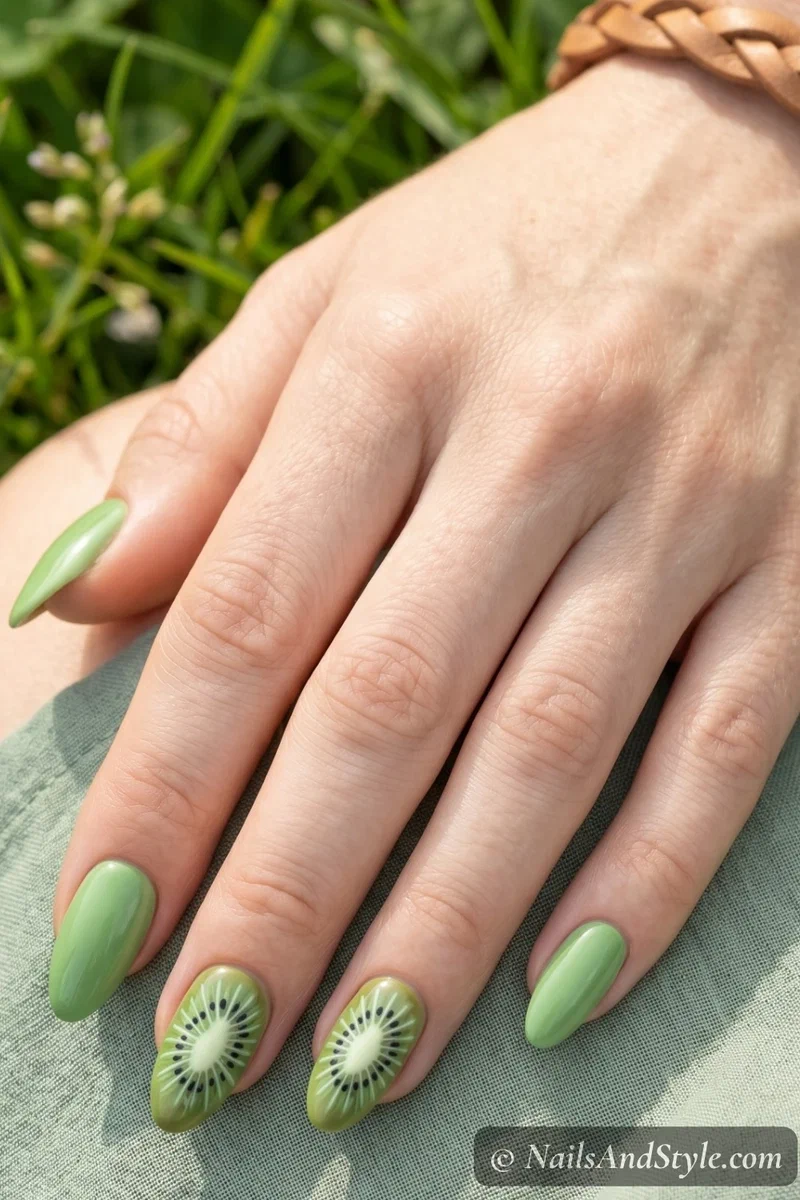
A kiwi cross-section right on your nail — green base, lighter center, black seeds radiating out. Best on one or two accents with the rest in solid green or white. Thin brush for seeds, glossy finish.
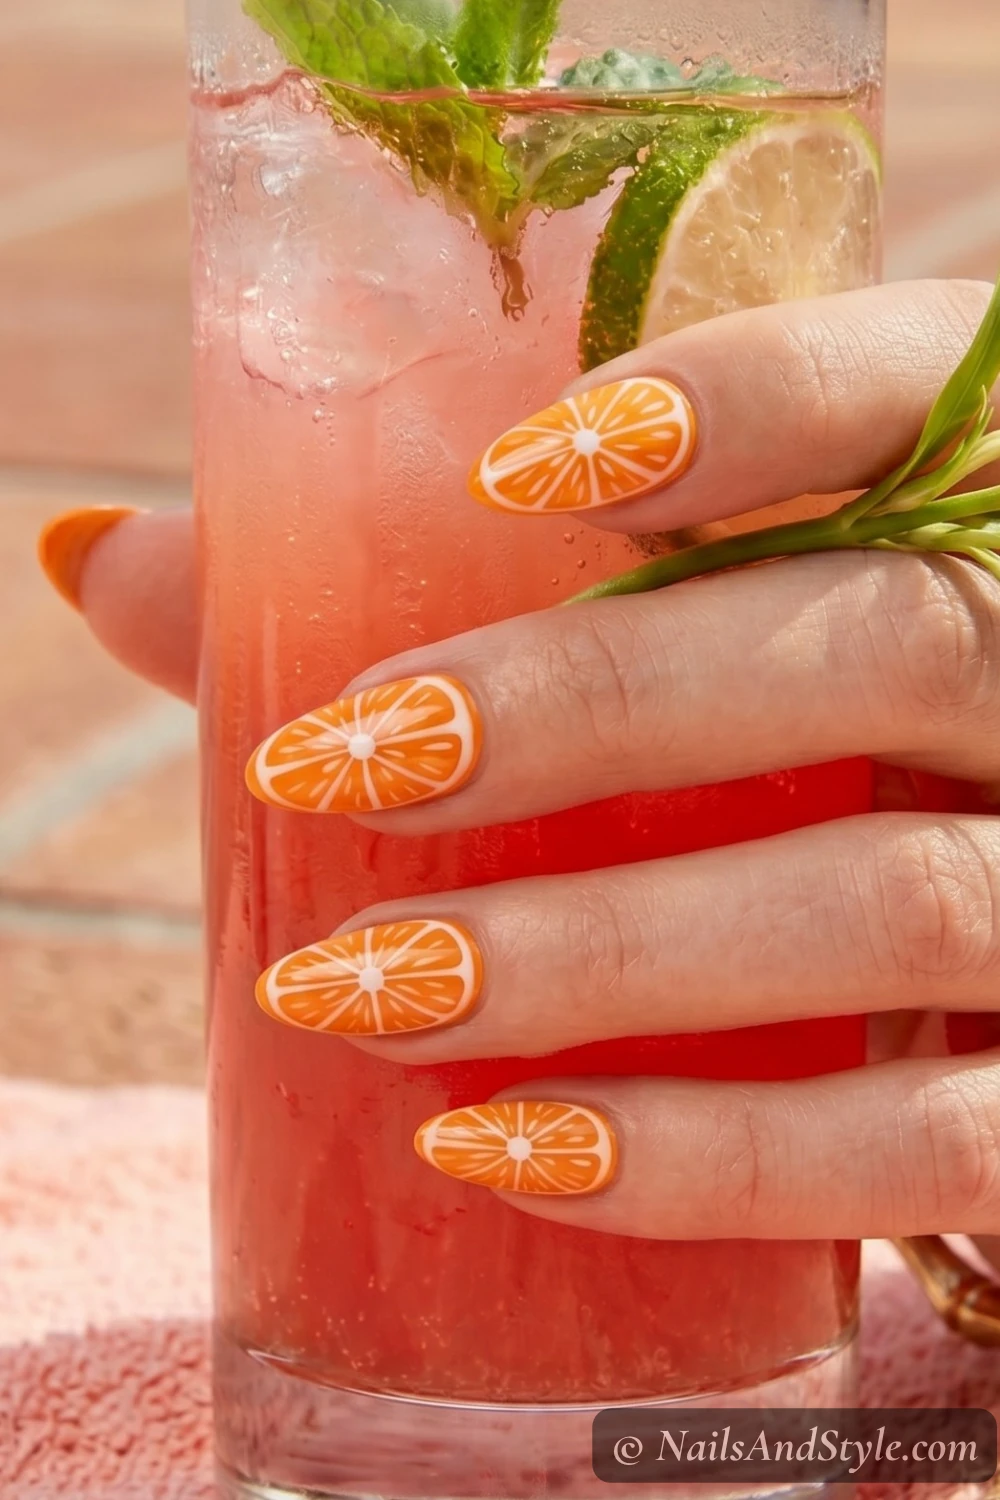
10. Orange Citrus Nails#
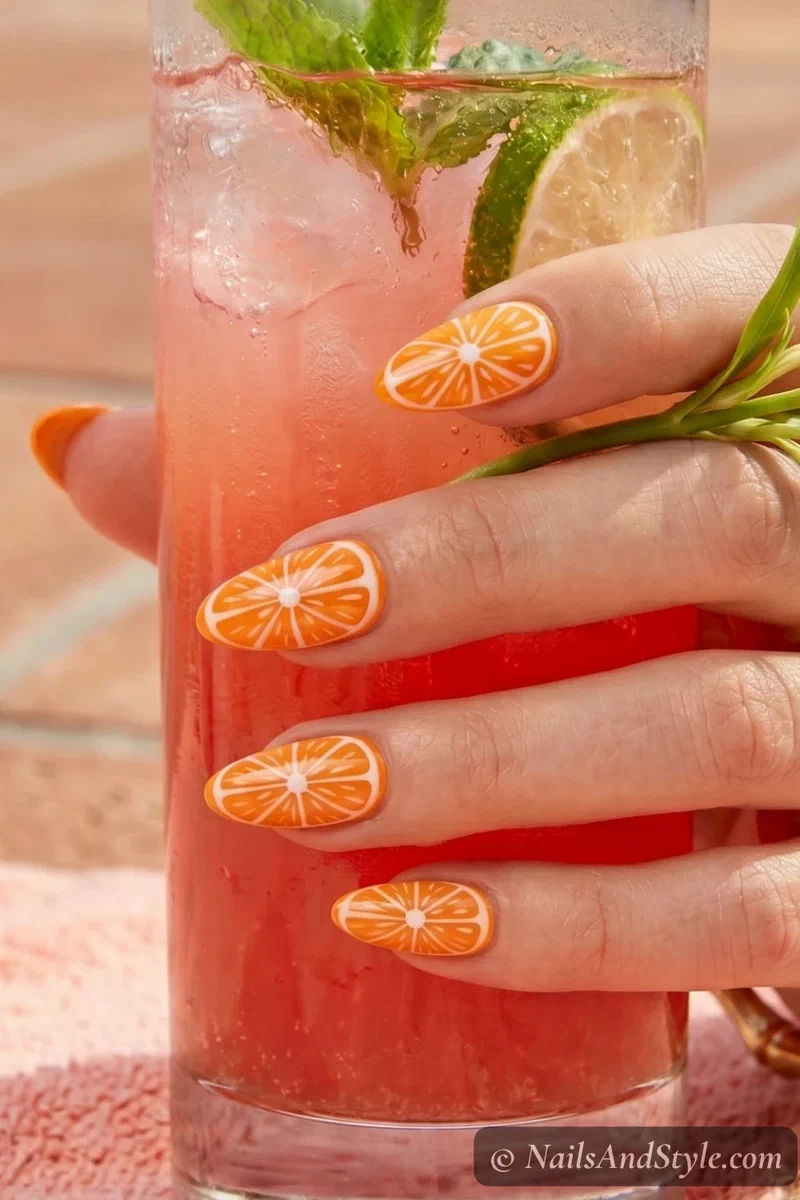
So satisfying to paint. Vibrant orange base, white segment lines, tiny center dot. These pop on short nails — the bold color does all the heavy lifting. Fine brush and mostly-steady hands, that’s it.
11. Dragon Fruit Nails#
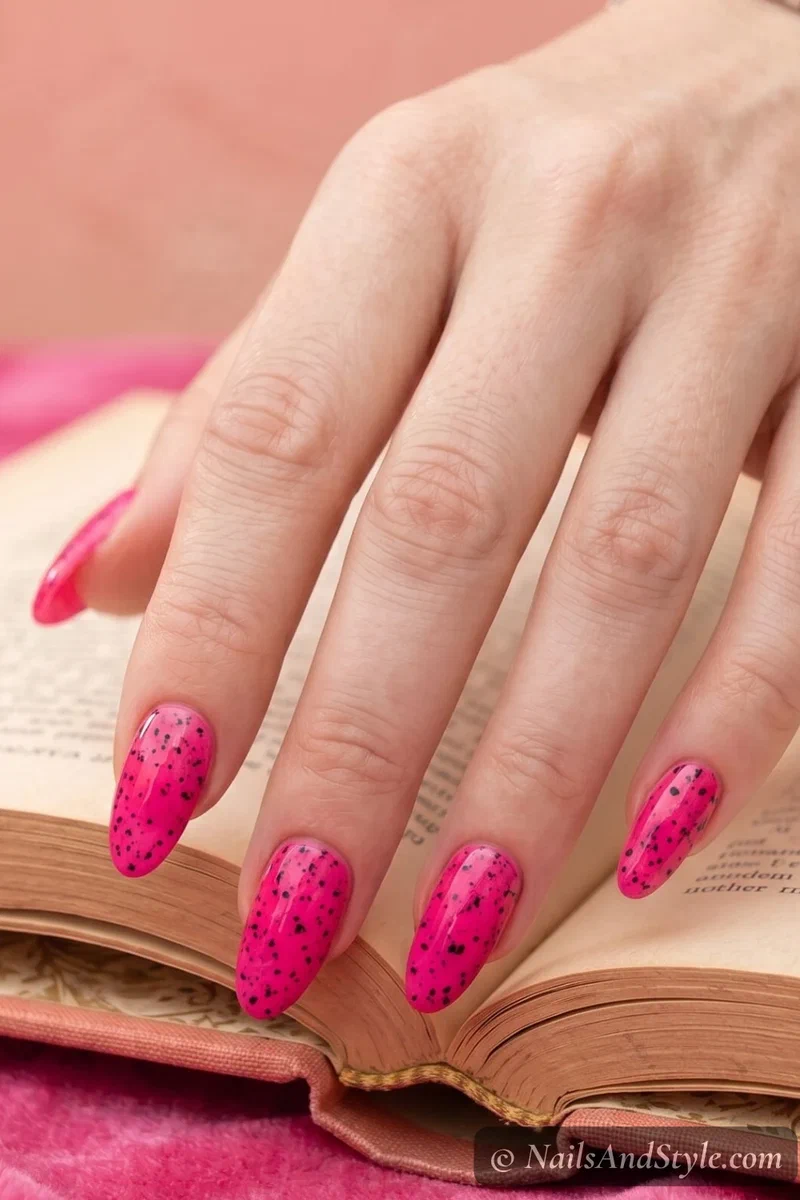
Hot pink base with scattered black speckle dots — instant dragon fruit vibes. Toothpick for the dots, glossy top coat to make it look juicy. Try white base with pink speckles for the other variety too. The whole thing feels tropical — more of that energy in my tropical nail designs for summer post.
12. Banana Pop Nails#
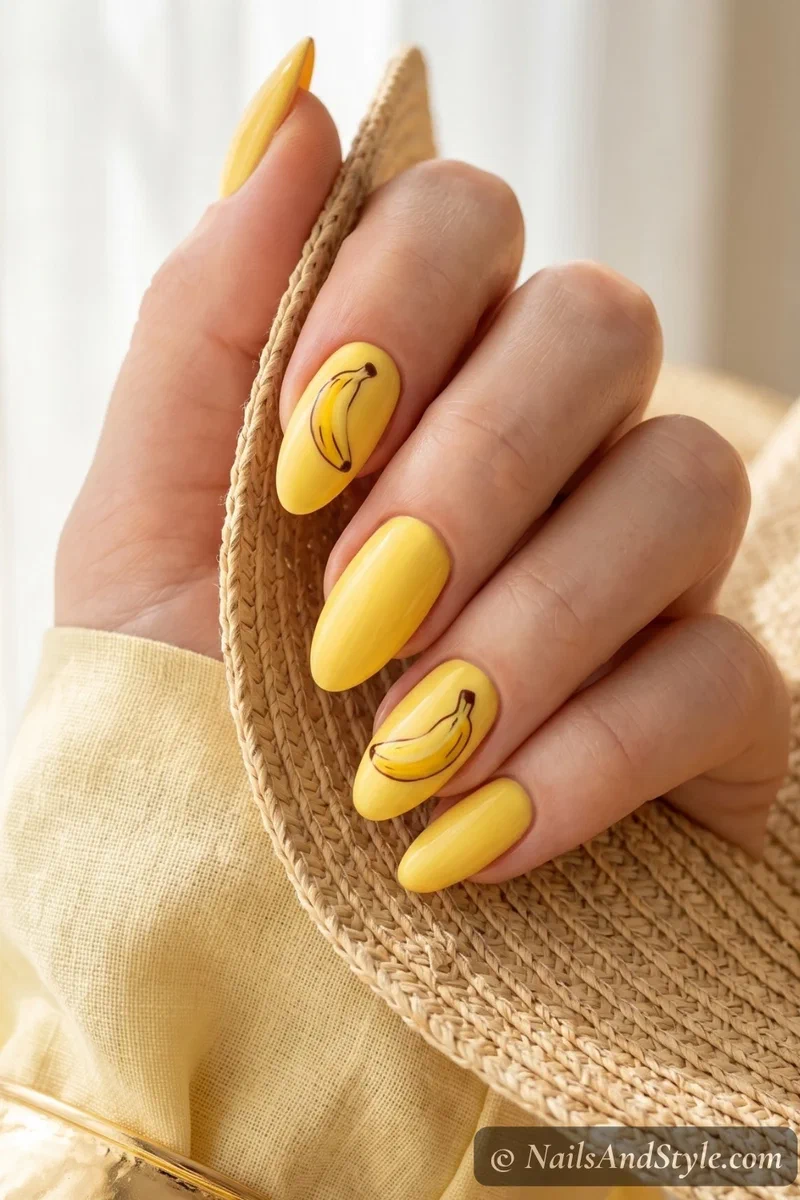
Cheerful yellow base with a hand-painted banana on one or two accents. Fine brush outline, brown tips. Yes it’s cartoonish — that’s the whole point. Playful summer nails don’t have to be serious.
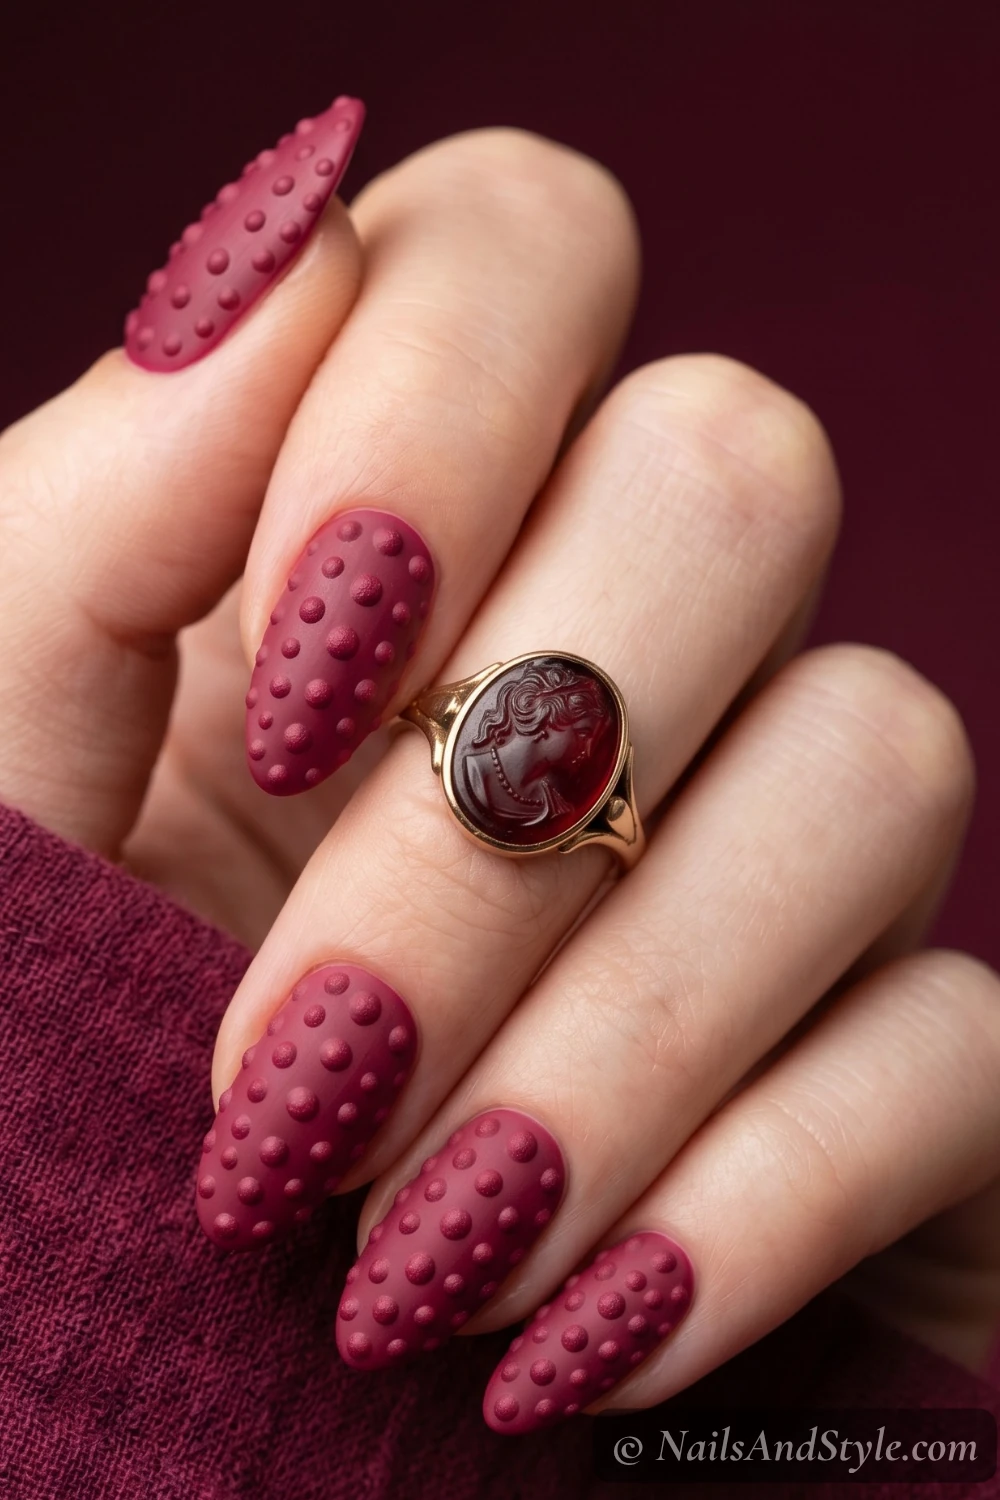
13. Raspberry Texture Nails#
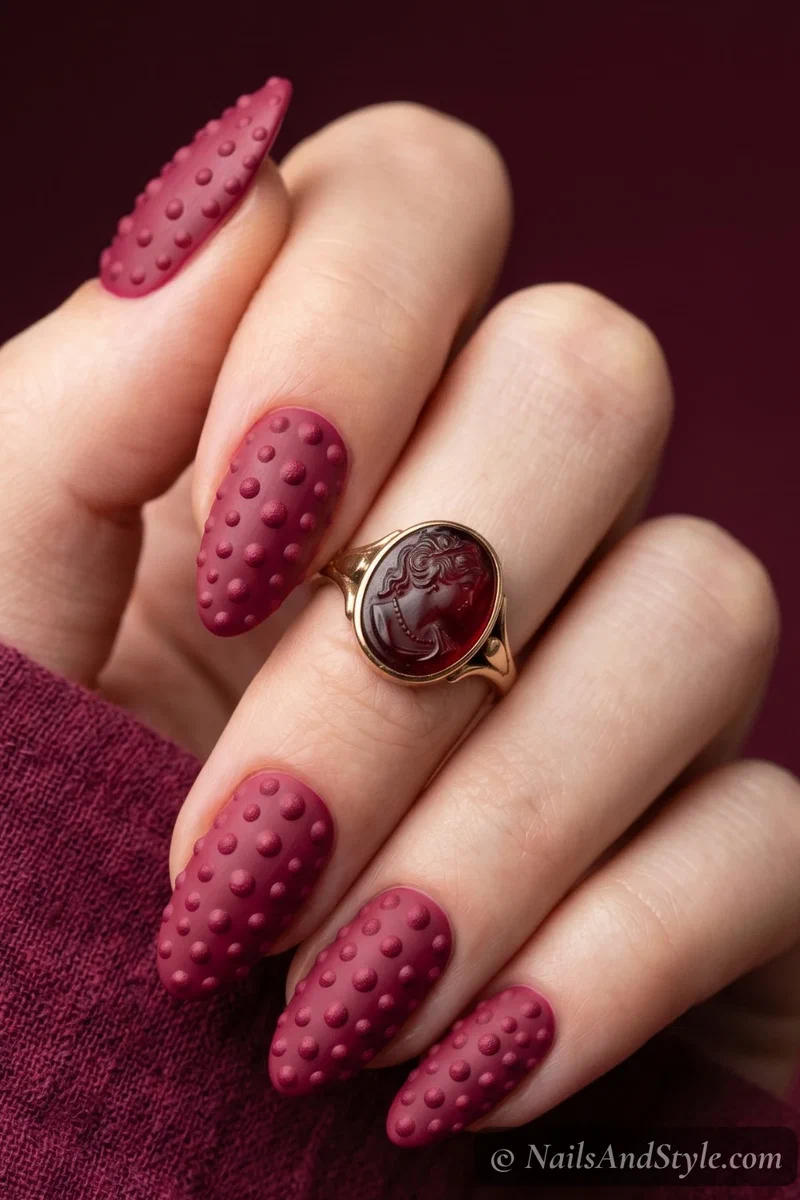
Here’s something different. Berry-toned polish, then raised dots in the same shade across the surface — creates that bumpy raspberry-skin texture (so satisfying to look at). Matte top coat sells the effect completely.
14. Pomegranate Seed Nails#
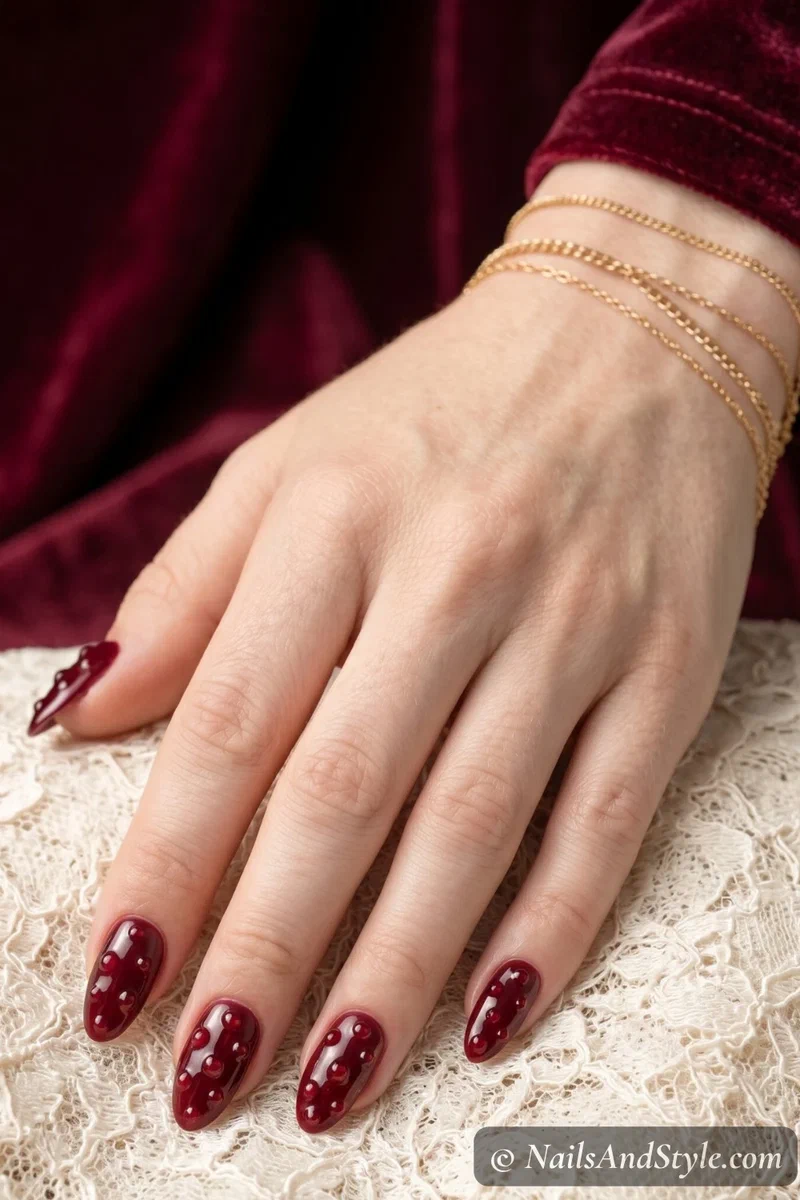
Deep wine-red base with glossy garnet dots scattered across — mimicking pomegranate seeds under glass. Clear top coat gives a dimensional, jewel-like effect. Sophisticated for evenings but still reads as fun fruit art.
15. Mixed Fruit Salad Nails#
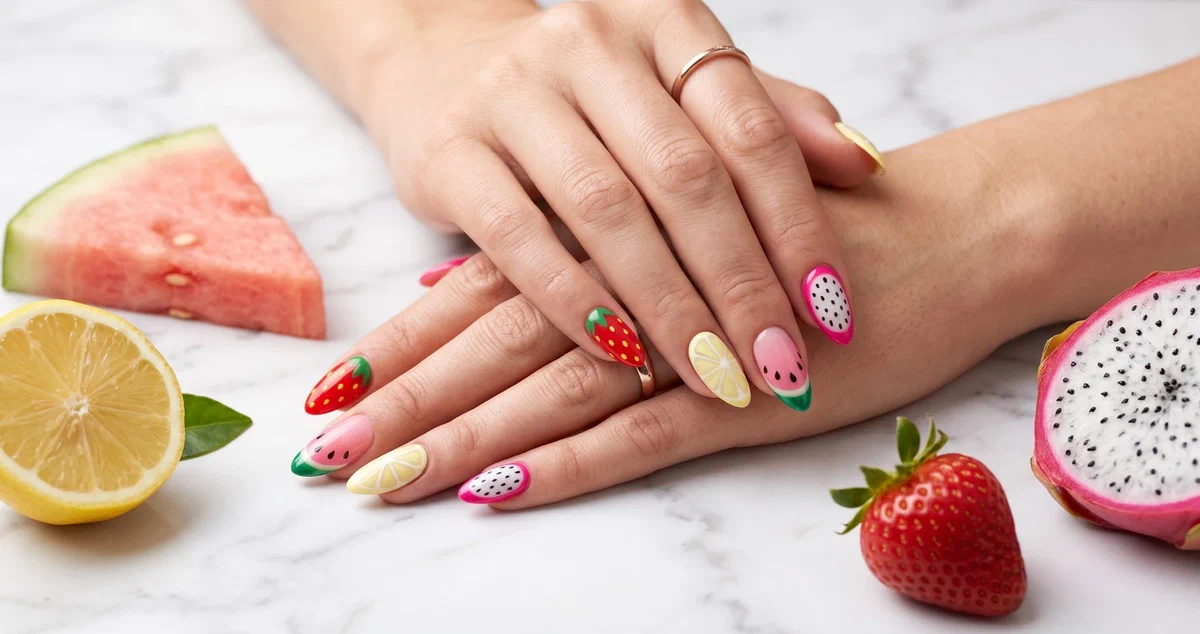
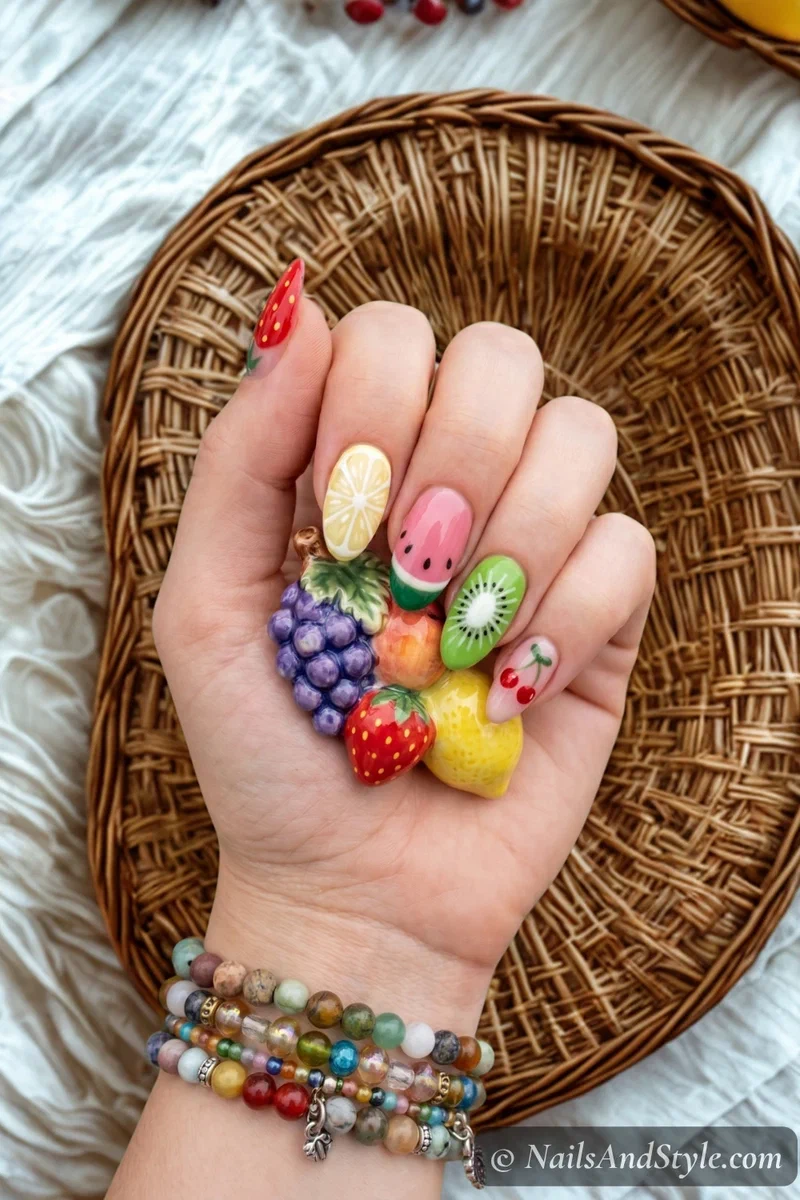
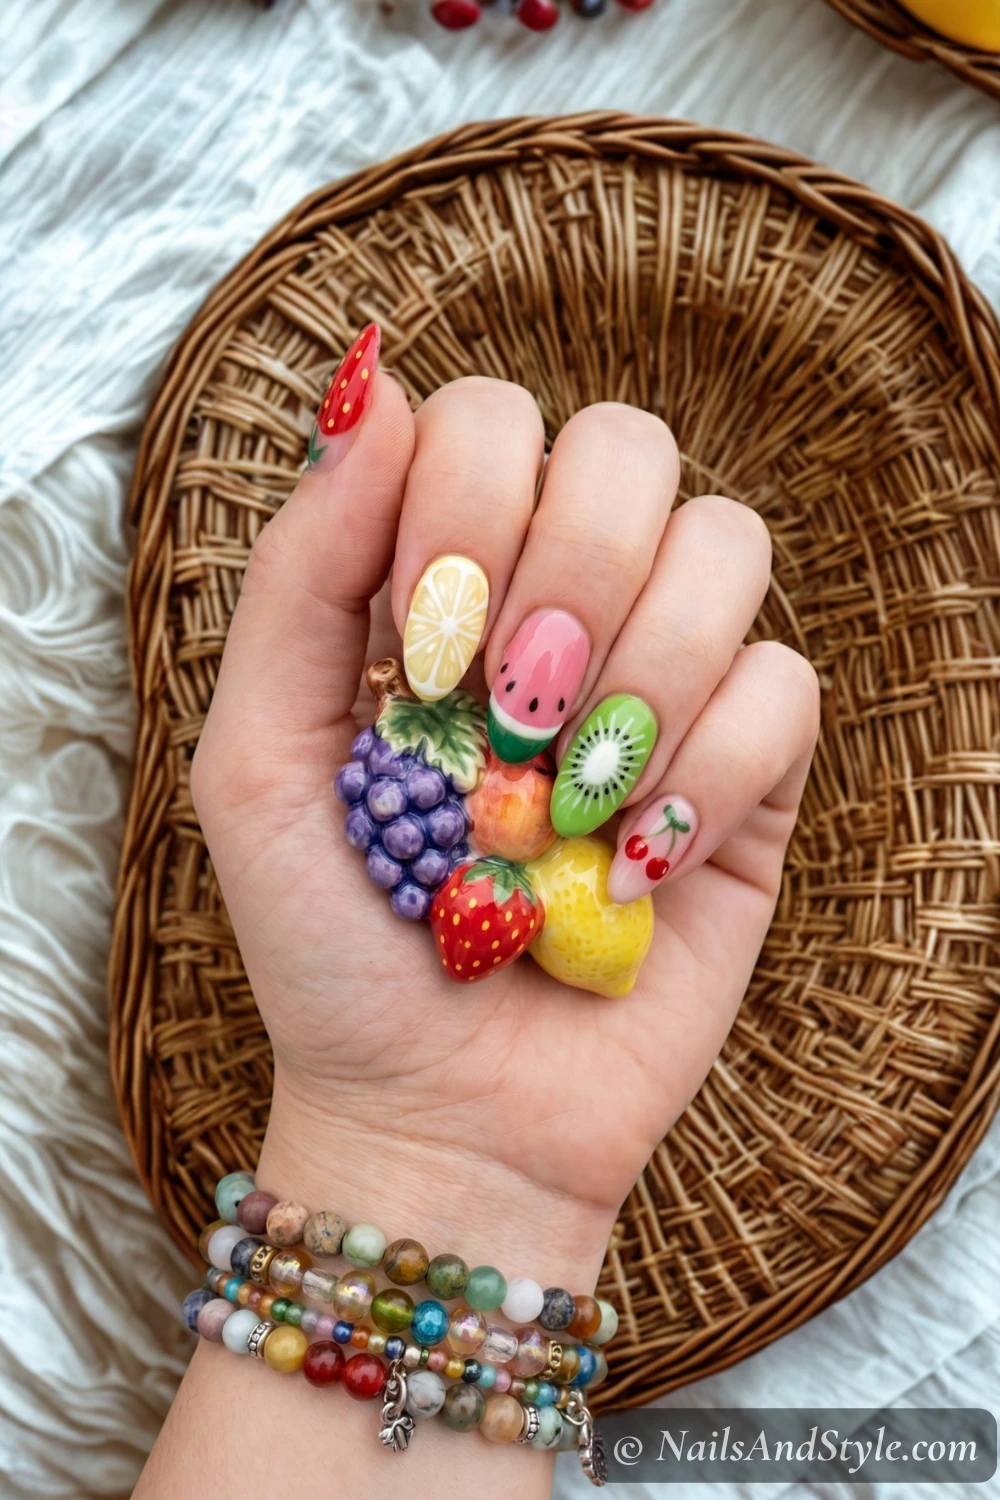
The maximalist option. Different fruit on each nail — strawberry thumb, lemon index, watermelon middle, kiwi ring, cherry pinky. Mix the techniques above and go wild. Chaotic, colorful, and the most fun you’ll have with a dotting tool all summer.
Fruit Nails on Short Nails#
Short nails and fruit art? Great combo. Smaller nail beds keep designs compact and intentional — nothing gets stretched out or crowded.
A Few More Short Nail-Specific Ideas#
- Strawberry accent — one nail, one berry, done.
- Watermelon tips — the French shape only needs a sliver of pink.
- Blueberry dots — small clusters stay proportional.
- Peach ombré — sponged gradient, no art needed.
- Dragon fruit speckles — scattered dots work at any length.
How to Do Fruit Nails at Home#
- Remove old polish, trim, file into almond or round.
- Push cuticles back gently.
- Buff lightly to smooth ridges.
- Base coat — let it dry fully to prevent staining.
- Two thin coats of base color, drying between each.
- Add fruit details with dotting tool, striping brush, or toothpick.
- Clean edges with a small brush dipped in remover.
- Seal with glossy top coat — cap the free edge.
How to Ask Your Nail Artist for Fruit Nails#
Fruit designs are super specific, so the salon needs to know exactly what you’re going for — “fruit nails” can mean anything from one tiny strawberry to a full mixed-fruit set across every nail.
- Bring 2-3 reference photos showing the exact fruit, color brightness, and how detailed you want each piece
- Specify whether you want one fruit or mixed fruit across all five nails — these are very different time and skill commitments
- Almond or short squoval shape keeps fruit art proportional; coffin and stiletto stretch the design
- Most fruit details are hand-painted — ask about stamping for citrus segments or stickers for berries if you want to keep the cost down
- Gel polish is worth it for the details — fine-line fruit art chips faster on regular polish, especially around the cuticle line
Tips to Make Your Fruit Nails Last#
- Thin layers always — thick coats peel faster.
- Seal the free edge with color and top coat.
- Avoid water for at least an hour after painting.
- Gloves for dishes. Every time.
- Reapply top coat every two to three days.
- Cuticle oil daily — hydrated nails chip less.
Quick FAQ#
Are fruit nail designs hard for beginners?#
Most use dotting tools and basic shapes — circles, lines, dots. Watermelon tips and blueberry clusters are the easiest starting points and still look adorable even slightly imperfect.
What colors work best?#
Bright red, hot pink, sunny yellow, orange, lime green, and deep purple cover pretty much every fruit. Pair with nude or white base and you’re set.
Can I do these on natural nails?#
Every design here works with regular polish on natural nails. Gel works too for longer wear — just cure each layer before adding details.
Shop the Look#
Everything you need to paint these fruit looks at home:
 BaseBase + Strengthener CoatBright fruit pigments stain — a base coat keeps nails clean
 ShineGlossy Top CoatMakes fruit colors look wet and juicy
 Berry & redEssie Fruit ShadesReally Red, Peach Side Babe, Watermelon, Bordeaux
 Citrus & brightOPI Fruit ShadesNever a Dulles Moment, Toucan Do It, Big Apple Red, Hotter than You Pink
 Seeds & dotsDotting Tool SetFor seeds, berries and slice details
 Fine detailThin Nail Art BrushFor stems, segment lines and fine fruit art
 Crisp tipsNail Guide StickersFor clean watermelon and citrus French tips
Final Thoughts#
Fruit nail designs are that sweet spot where cute meets creative — you’re painting tiny strawberries and kiwi slices on your nails and that’s honestly kind of delightful. Save the looks that caught your eye, grab a dotting tool, and give one a try this weekend. Your summer manicure is about to get a whole lot more fun.