October has a way of sneaking up on you. One minute you’re still in summer brights, and the next your whole feed is cobwebs and candy corn — and suddenly your nails feel a little too plain for the season. That’s exactly why I pulled together these Halloween nails 2026 ideas: 35 of them, from sweet to genuinely spooky.
Every single one is something you can actually recreate at home. No salon booking, no fancy kit — just polish, a couple of cheap tools, and a spooky playlist. And yes, they all work on short and medium nails, which is where most of us live.
Some are five-minute jobs. Some need a steadier hand and a glass of wine. Let’s get into it.

Why Everyone’s Obsessed With Halloween Nails This Year#
Halloween nails used to mean orange and black, full stop. Not anymore. The whole vibe got more playful — think little kawaii pumpkins, glazed ghosts, chrome so shiny it looks wet, and glow-in-the-dark polish that turns into a party trick after dark.
And there’s a look for every mood. Going to a costume party? Go full gore with blood drips. Working a normal office Thursday? A single tiny bat on a nude nail says “I get it” without shouting. These carry you from pumpkin patches to parties to trick-or-treat duty without a single reapplication.
A Few Things to Keep in Mind Before You Start#
- Build your palette first. Orange, black, and white are your base. Purple and lime read witchy; blood red reads vampire. Pick two or three, not all of them.
- Match the mood to your skin. Warm skin loves orange, rust, and gold. Cooler skin pops against black, purple, and icy white. Green suits almost everyone (annoyingly).
- Short and almond-ish holds art best. A clean short shape gives tiny designs somewhere to sit without smudging. You don’t need long claws for this.
- Never skip base and top coat. Dark shades stain natural nails fast, and a glossy (or matte) top coat is what makes the whole thing look finished instead of homemade.
Quick Pick: Which Design Should You Try?#
| If you’re looking for… | Try these designs |
|---|---|
| Beginner-friendly | Classic Ghost Nails, Matte Black Halloween Nails |
| Short nails | Minimal Halloween Accent, Candy Corn Nails |
| Full-on spooky | Blood Drip Nails, Skeleton Nails |
| Witchy and mysterious | Witch Hat Nails, Black Flame Candle Nails |
| Party showstopper | Glow-in-the-Dark Nails, Orange Chrome Nails |
35 Halloween Nail Designs to Copy in 2026#
Here’s the full lineup. I’ve loosely grouped them from cute to creepy to witchy to bold, so you can jump to whatever matches your mood this year.
1. Classic Ghost Nails#
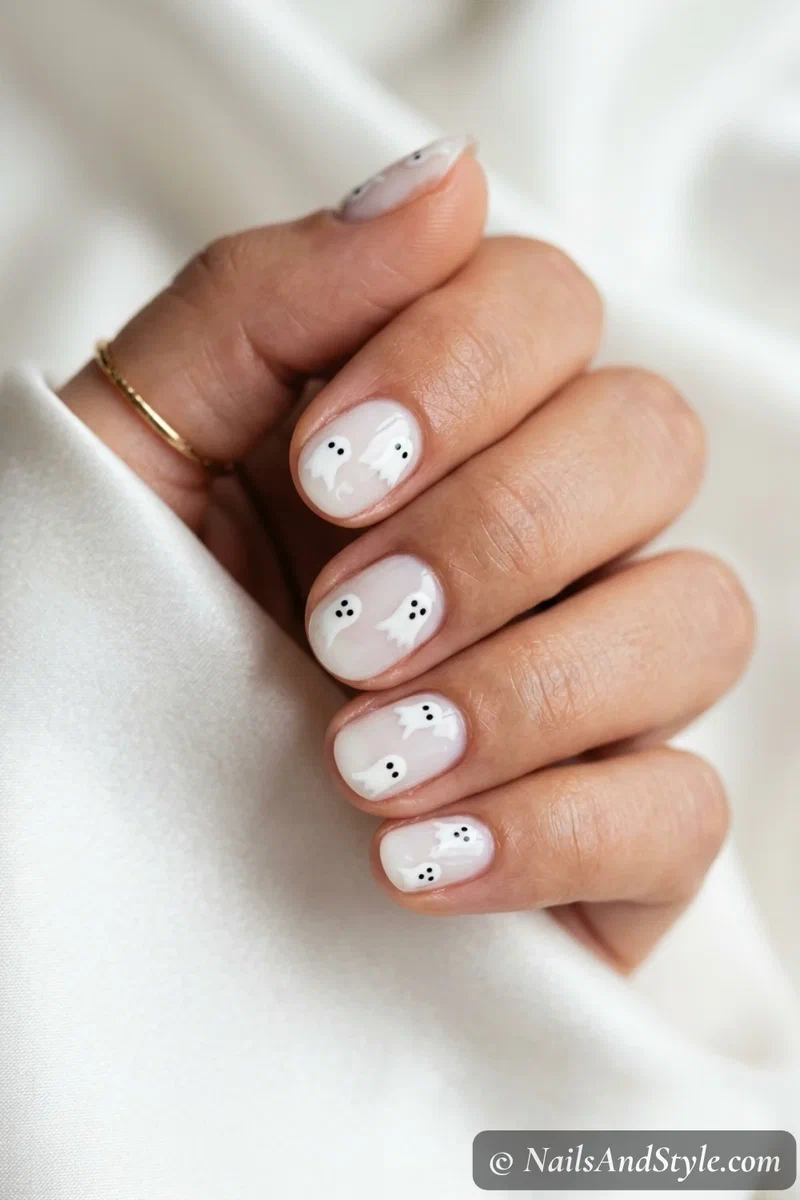
The one everyone saves first. A milky white base with a couple of little floating ghosts — sweet, not scary, and honestly foolproof. Paint two sheer white coats, then use a small dotting tool or a thin brush to add wavy ghost shapes on one or two nails, with tiny black dots for eyes. Finish glossy so the ghosts look like they’re glowing.
2. Pastel Ghost Trio Nails#
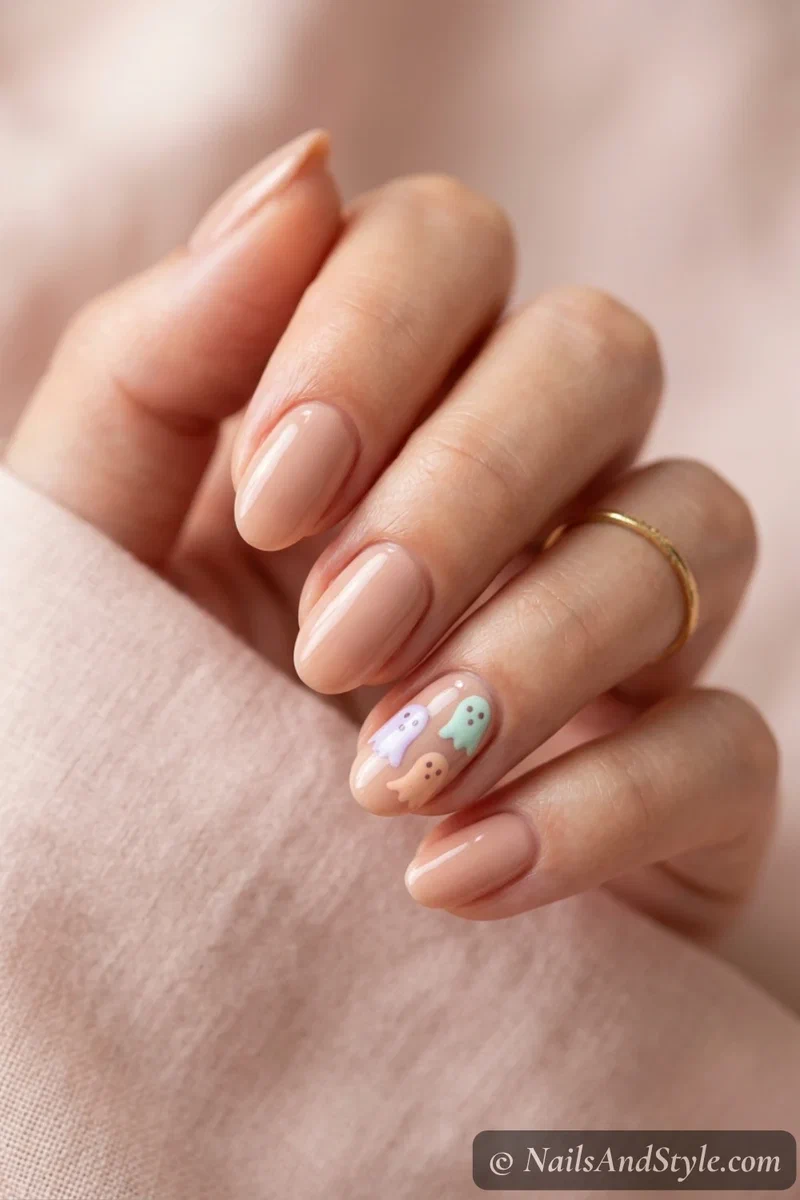
Same ghost energy, softer palette. Instead of white-on-white, these little ghosts come in pastel lilac, mint, and peach for a cuter, less spooky spin. Base your nails in a warm nude, then dab three tiny pastel ghosts across an accent nail with a dotting tool. It’s a great one if orange-and-black feels too heavy for you.
3. Jack-o’-Lantern Nails#
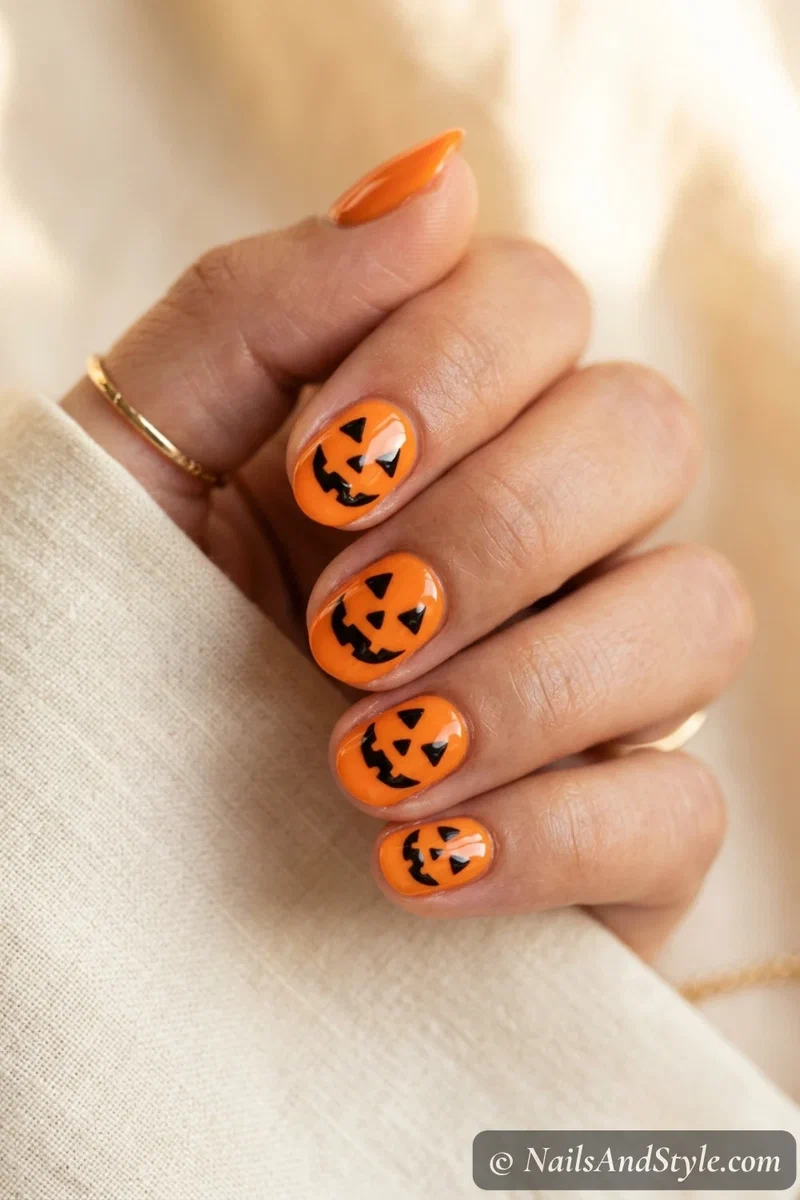
You can’t do Halloween nails without at least one pumpkin. A glossy orange base with a cheeky carved face — triangle eyes, a snaggle-tooth grin — instantly reads October. Paint the nails orange, let them dry, then use a thin black liner brush for the face. Keep the grin a little wonky. That’s the charm.
4. Kawaii Pumpkin Nails#
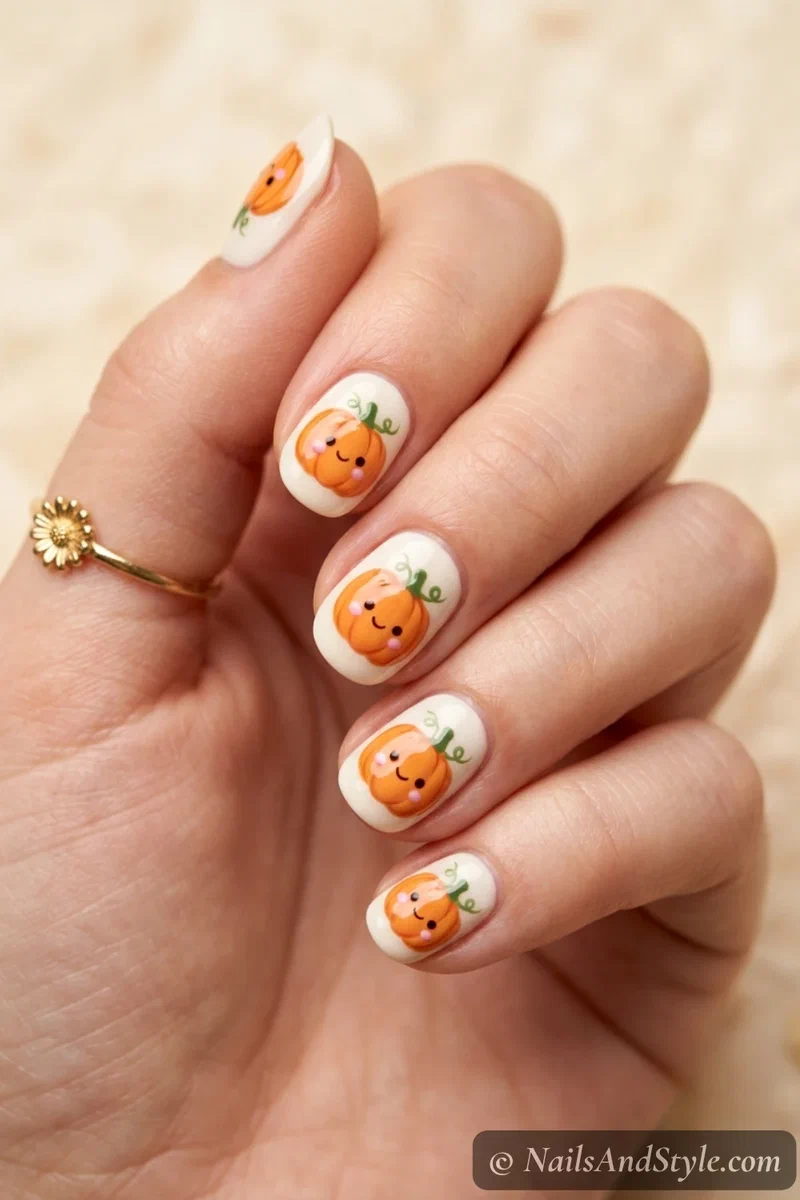
For when you want cute over creepy. These are tiny, rounded, smiling pumpkins with rosy cheeks — more Studio Ghibli than horror movie. Dot a small orange pumpkin onto a cream base, add a green stem, then two little pink blush dots. Love this one on short nails, where the pumpkins look extra chubby. Pair it with more pumpkin patch nail ideas if you want a full harvest set.
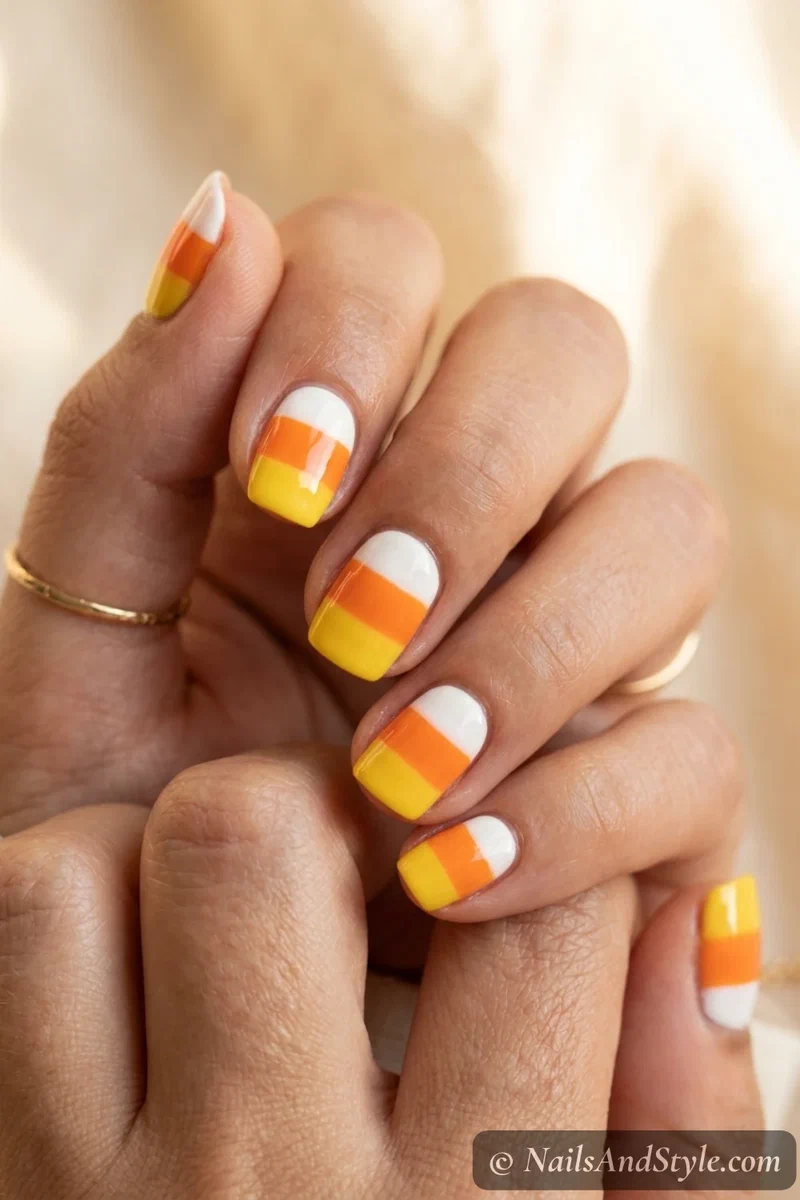
5. Candy Corn Nails#
Retro, sugary, and weirdly satisfying to paint. Candy corn’s three stripes — white tip, orange middle, yellow base — make a cute vertical or French-tip design. Use striping tape to keep the color blocks crisp, peel it while the polish is wet, and seal glossy. Tastes like nostalgia. Looks like candy.
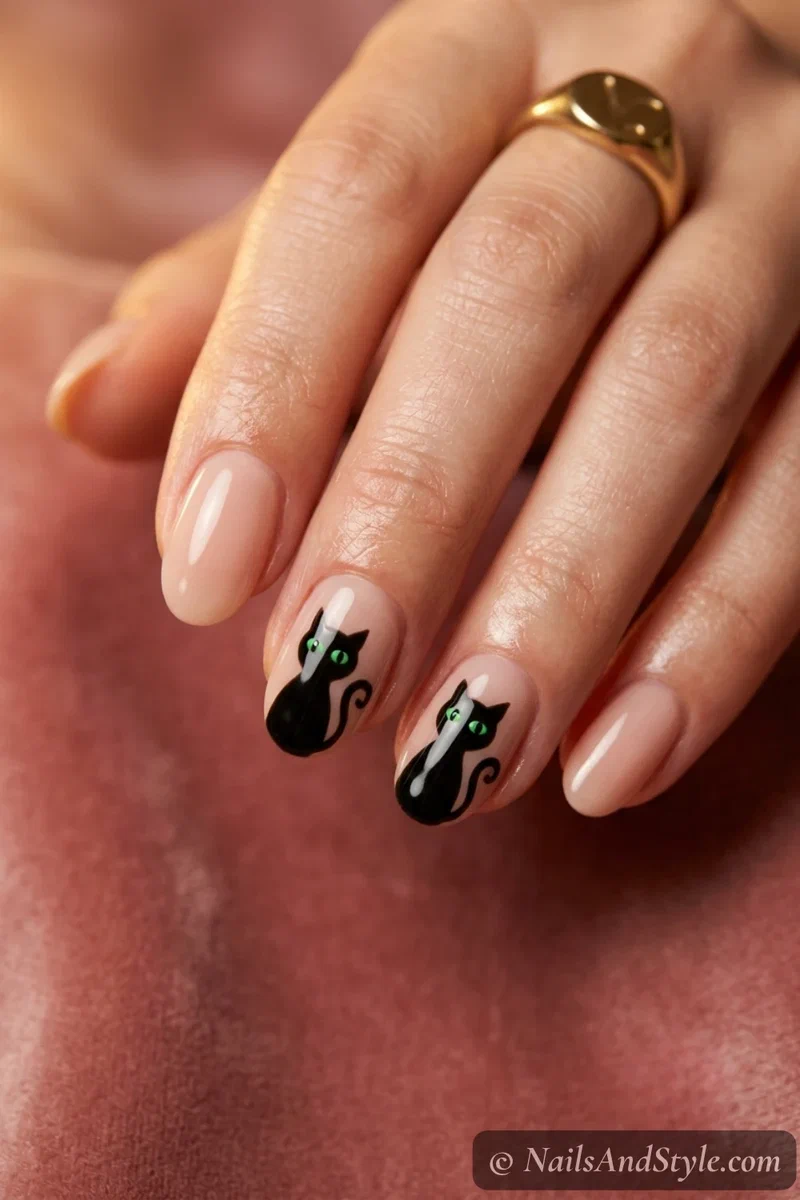
6. Black Cat Nails#
A little superstition never hurt anyone. Black cats — just a silhouette, a curled tail, two green eyes — look chic on a nude or orange base. Paint a small black cat shape with a thin brush, then add two tiny green dots for eyes. Simple, graphic, and it photographs really well.
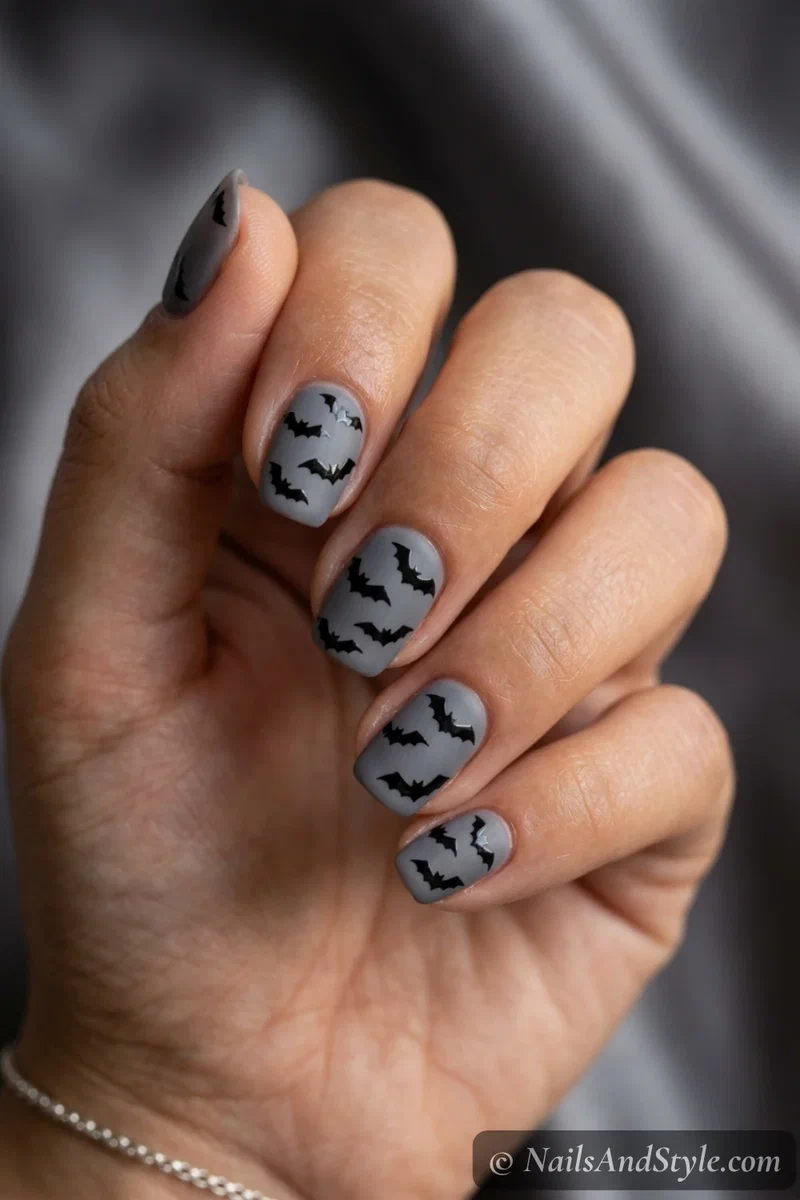
7. Bat Silhouette Nails#
Minimal but so effective. Little black bats scattered over a smoky grey or full-moon-yellow base feel spooky without any gore. Use a bat-shaped stamping plate if freehand stresses you out, or just paint a rounded “M” shape and round the wings. A matte top coat makes them look like they’re mid-flight at dusk.
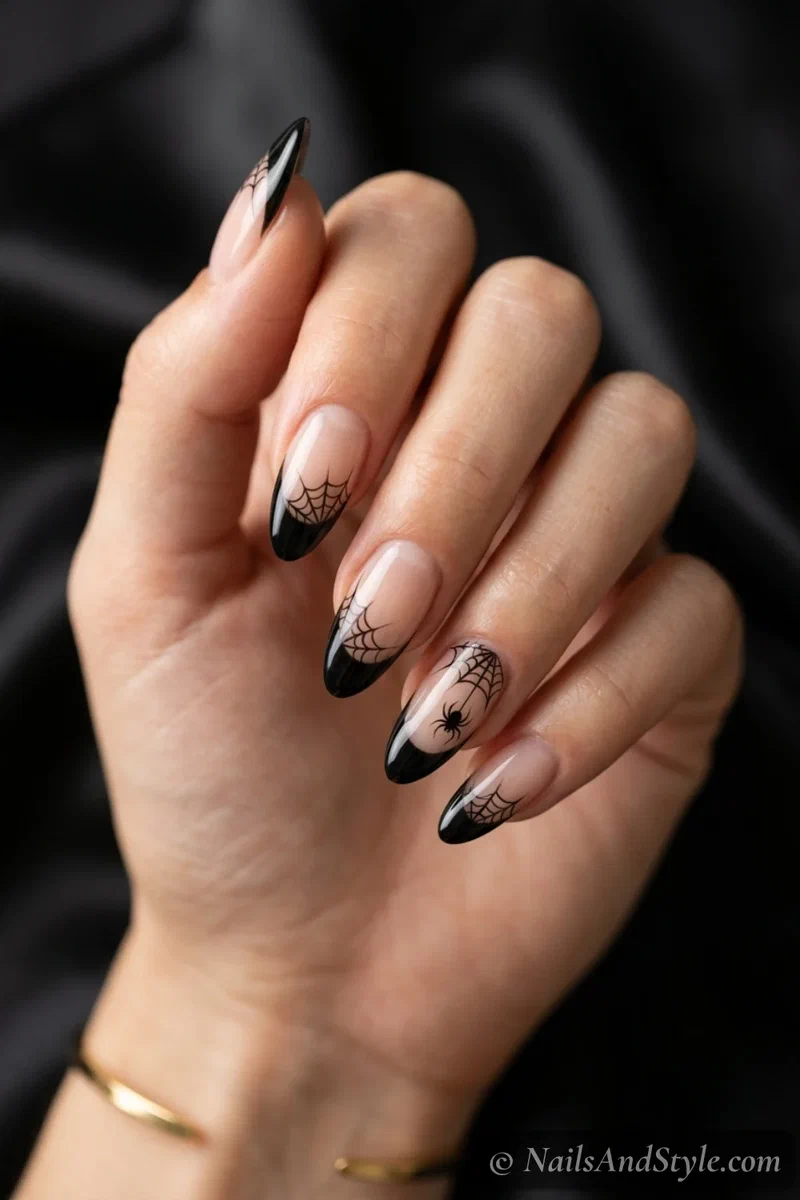
8. Spider Web French Tips#
Take a normal French tip and give it a haunted upgrade. A thin black web crawling from the corner of each nail is delicate, not gross — my personal favorite way to do “spooky but still classy.” Paint your tips (or leave the nail sheer), then use the thinnest brush you own to draw web lines from one corner. Add one tiny spider if you’re feeling brave.
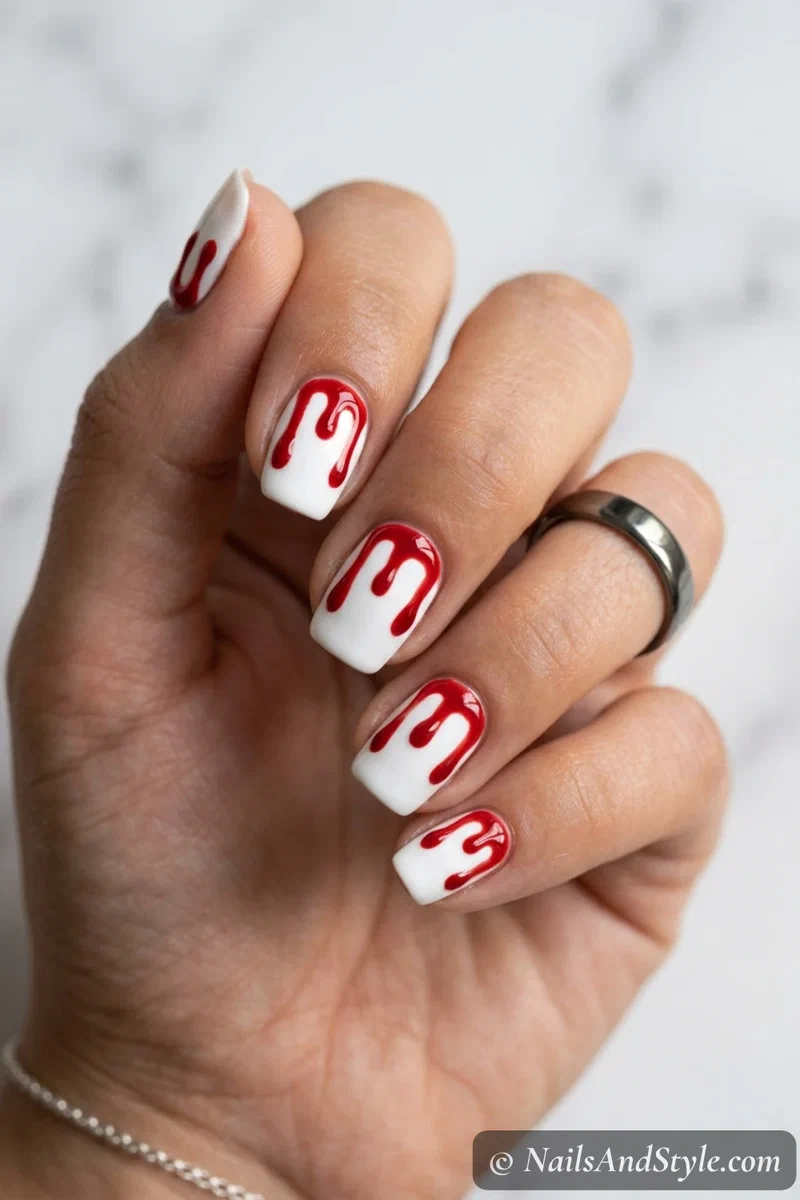
9. Blood Drip Nails#
Okay, now we’re getting spooky. Glossy red drips running down from the cuticle look like something out of a slasher film — in the best way. Over a white or nude base, load a small brush with bright red and drag uneven drip shapes down each nail. Uneven is the goal here; real drips aren’t neat. High-shine top coat makes it look wet.
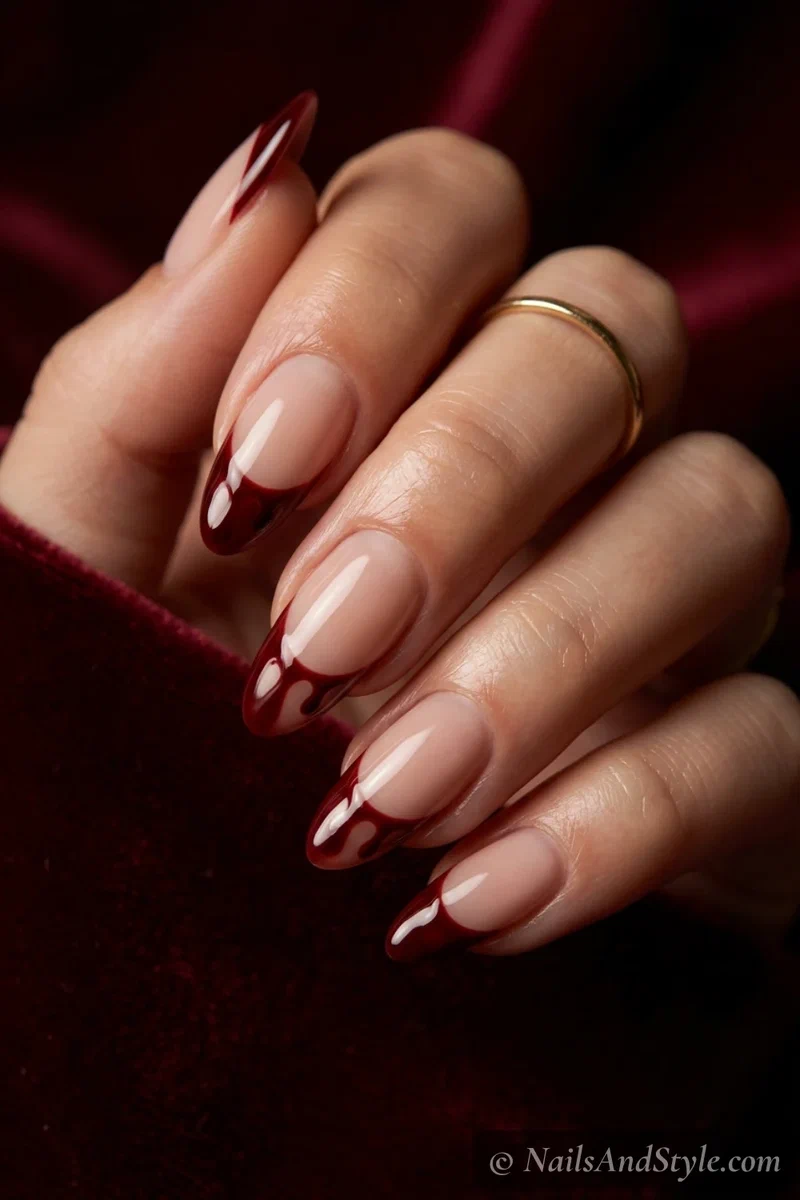
10. Bloody French Tips#
The subtle cousin of the full blood look. Instead of a clean white smile line, the tip drips down into the nail like it’s bleeding. Do a normal red or dark-red French tip, then pull a few thin drips downward with a liner brush before it dries. Reads elegant from a distance, then you notice — oh. Oh no.
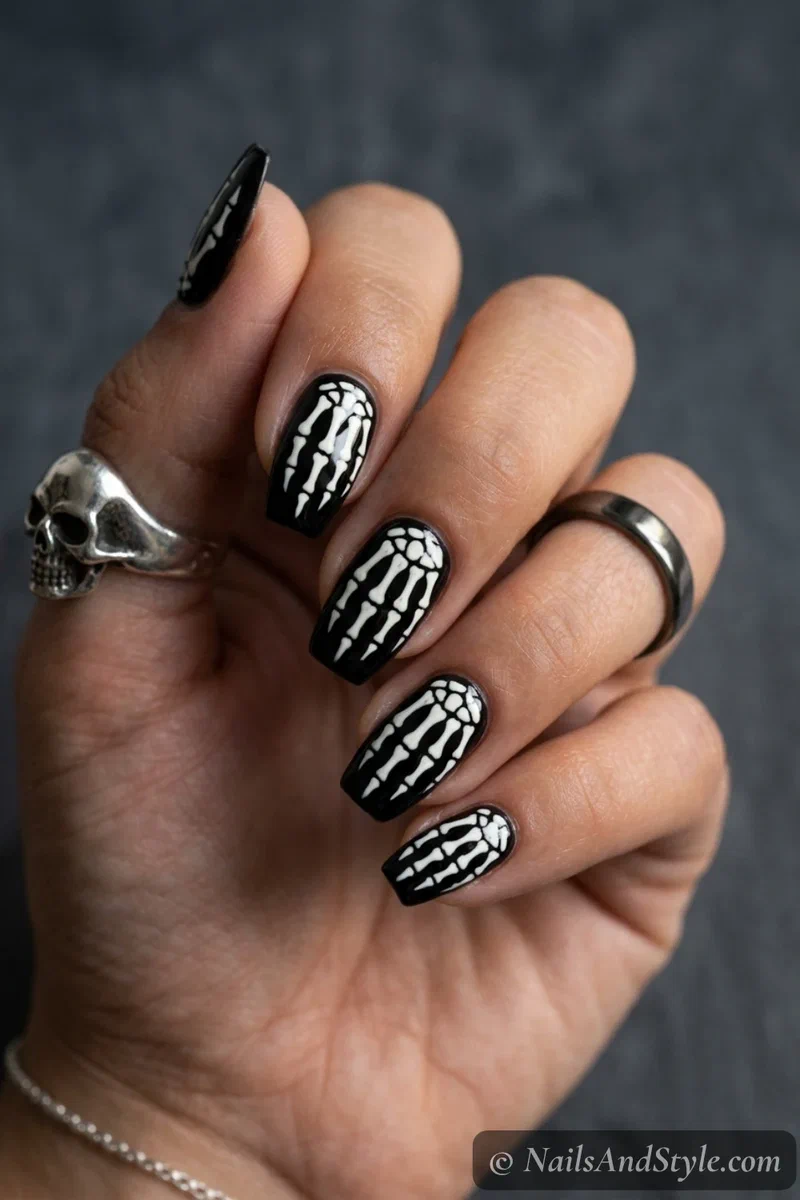
11. Skeleton Nails#
A whole skeleton hand across your five nails is a commitment — and a total showstopper. Each nail gets a section of bone: finger bones on the fingers, a little rib detail if you’re going all out. White or bone-cream lines over a black base, drawn with a thin brush. Take your time. This is a sit-down-with-a-podcast design.
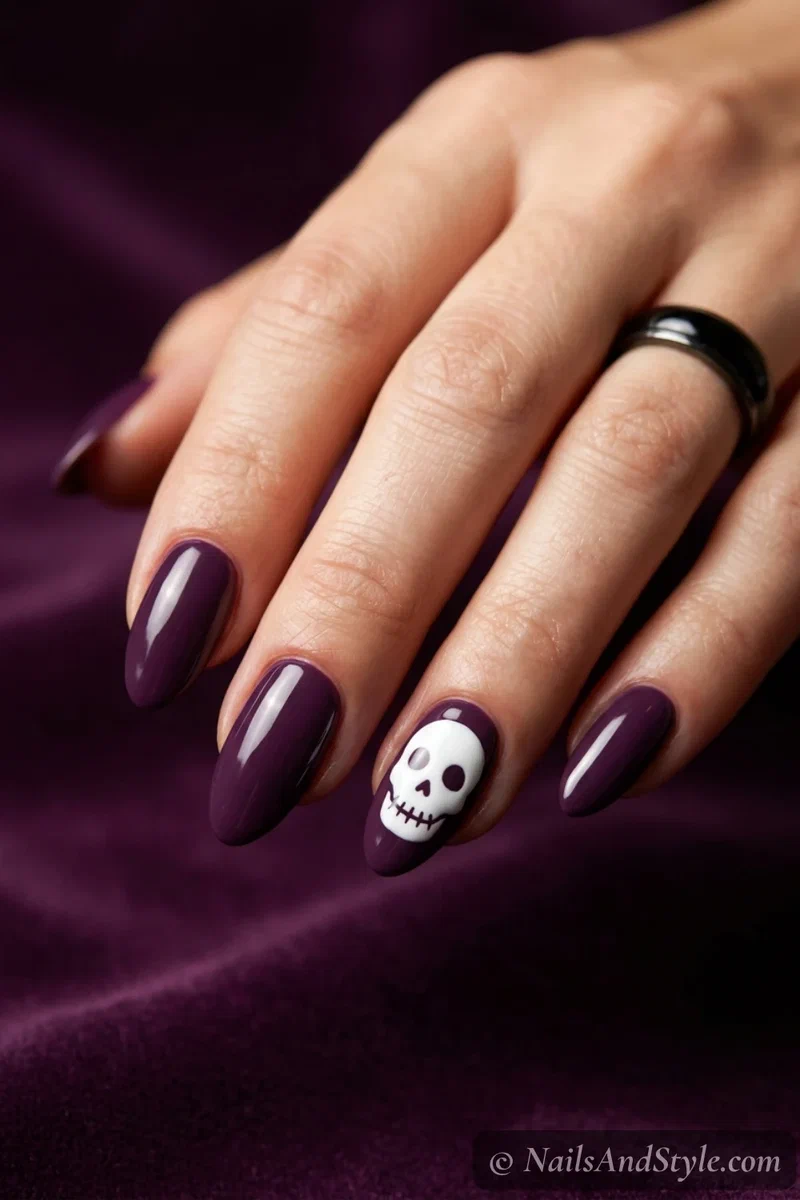
12. Skull Accent Nails#
Want the skeleton vibe without the full project? One little sugar-skull or plain white skull on an accent nail does the job. Paint a small skull shape in white on a black or deep-purple nail, then add tiny dots for eyes and stitches. Keep the other four nails solid so the skull stands out.
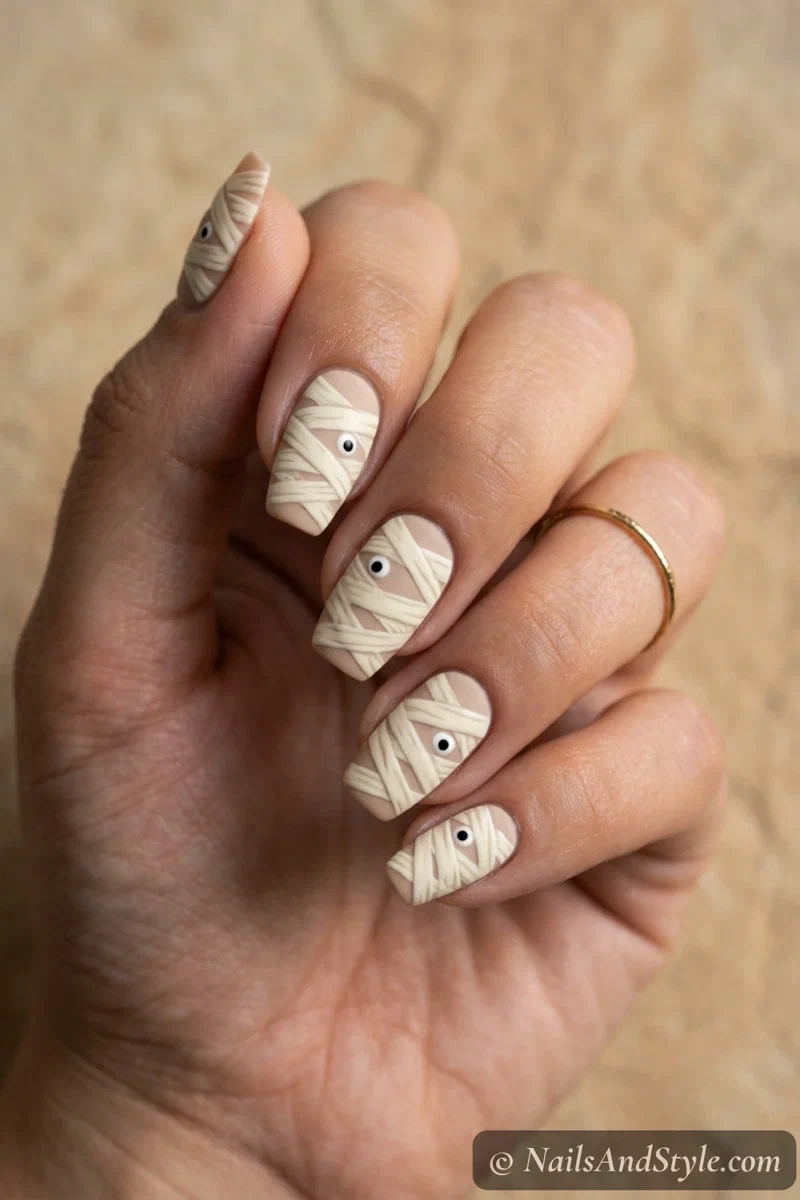
13. Mummy Wrap Nails#
Underrated and honestly kind of adorable. Criss-crossed cream “bandage” strips over a beige base, with two little eyes peeking through, and you’ve got a mummy. Use a striping brush for the wrap lines, layering them unevenly, then dot two eyes near the tip. Matte top coat sells the linen-bandage look.
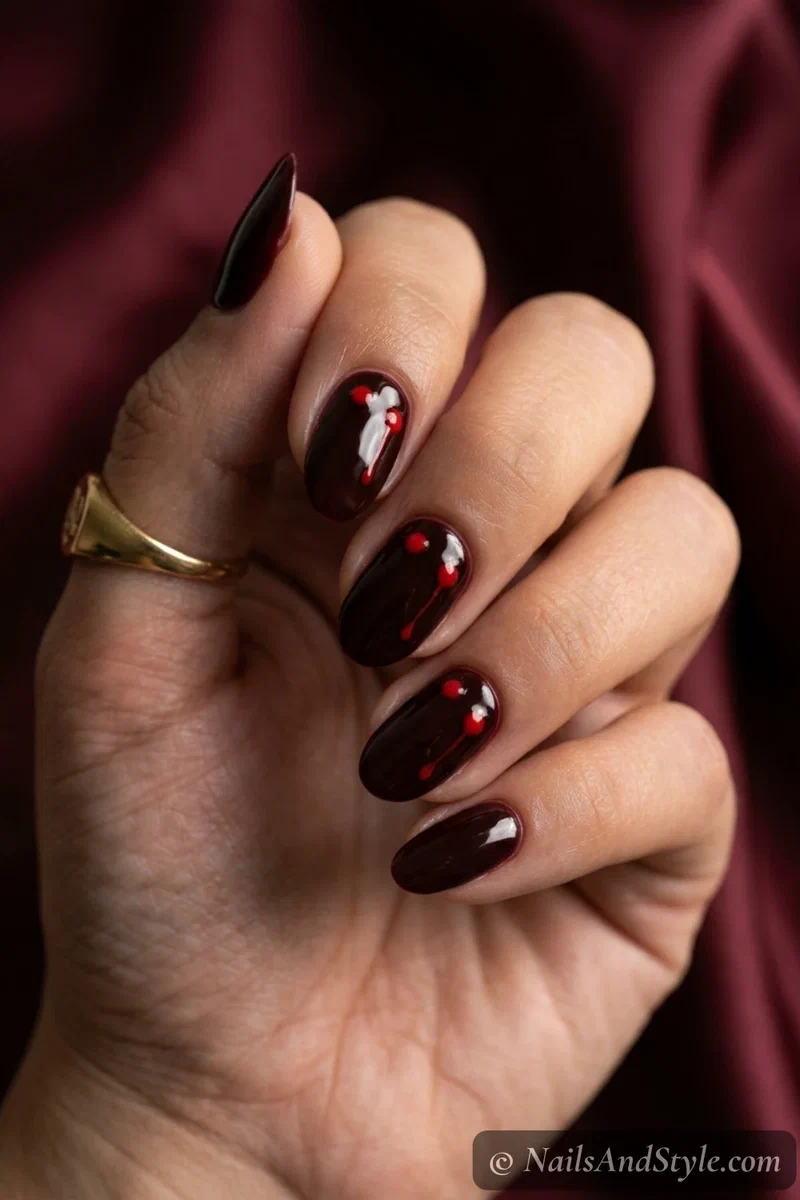
14. Vampire Bite Nails#
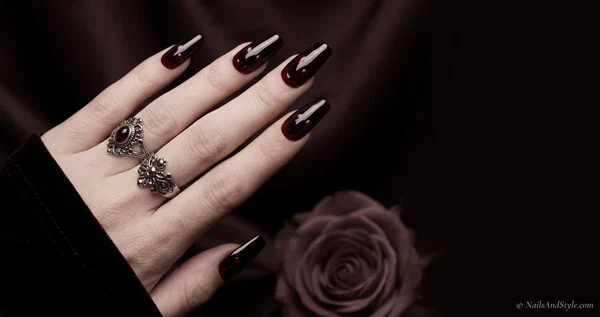
So simple, so effective. A deep oxblood nail with two tiny red bite marks and a thin blood trickle — that’s the whole design, and it’s genuinely creepy. Paint a dark wine base, then add two small dots and a short drip with a liner. Best on short nails where it looks sharp and intentional.
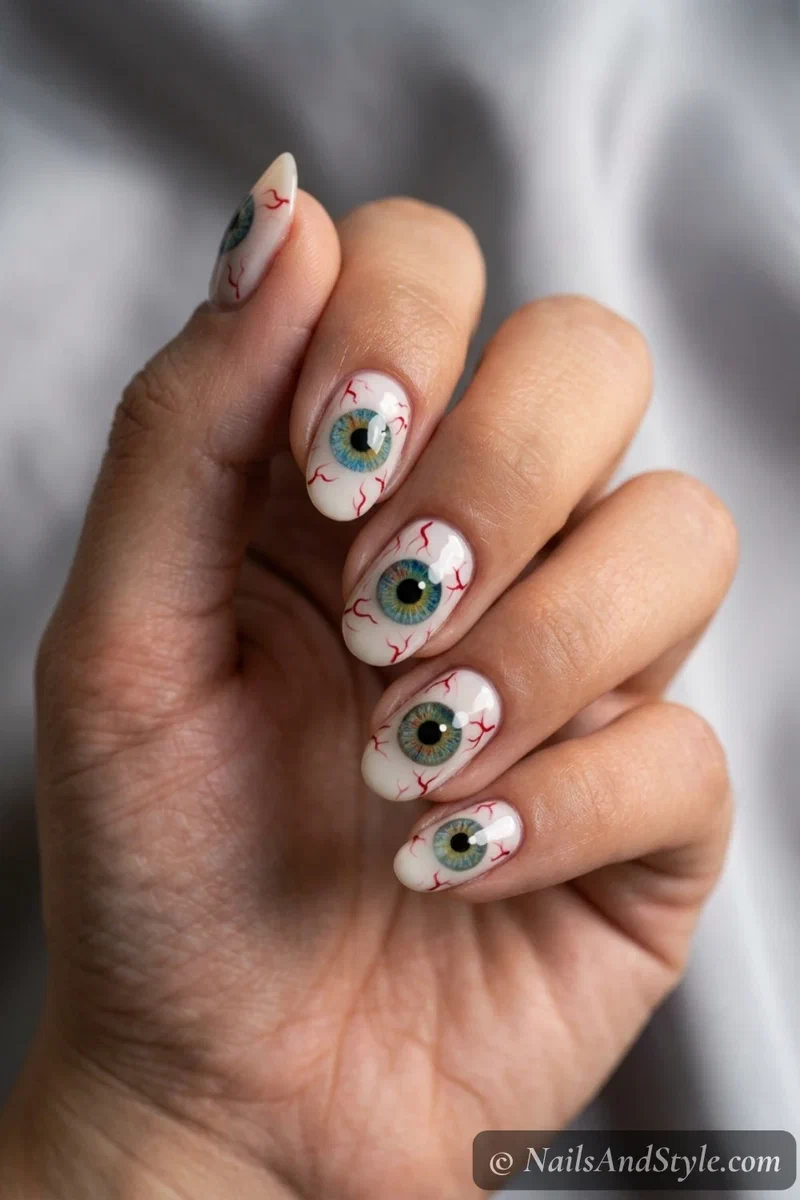
15. Eyeball Nails#
Creepy-cute and a little bit gross — which is the point. A single wide eyeball on an accent nail, veins and all, staring right back at you. Paint a white circle, a colored iris, a black pupil, then add fine red veins with a thin brush. One eye per hand is plenty. Any more and it gets intense.
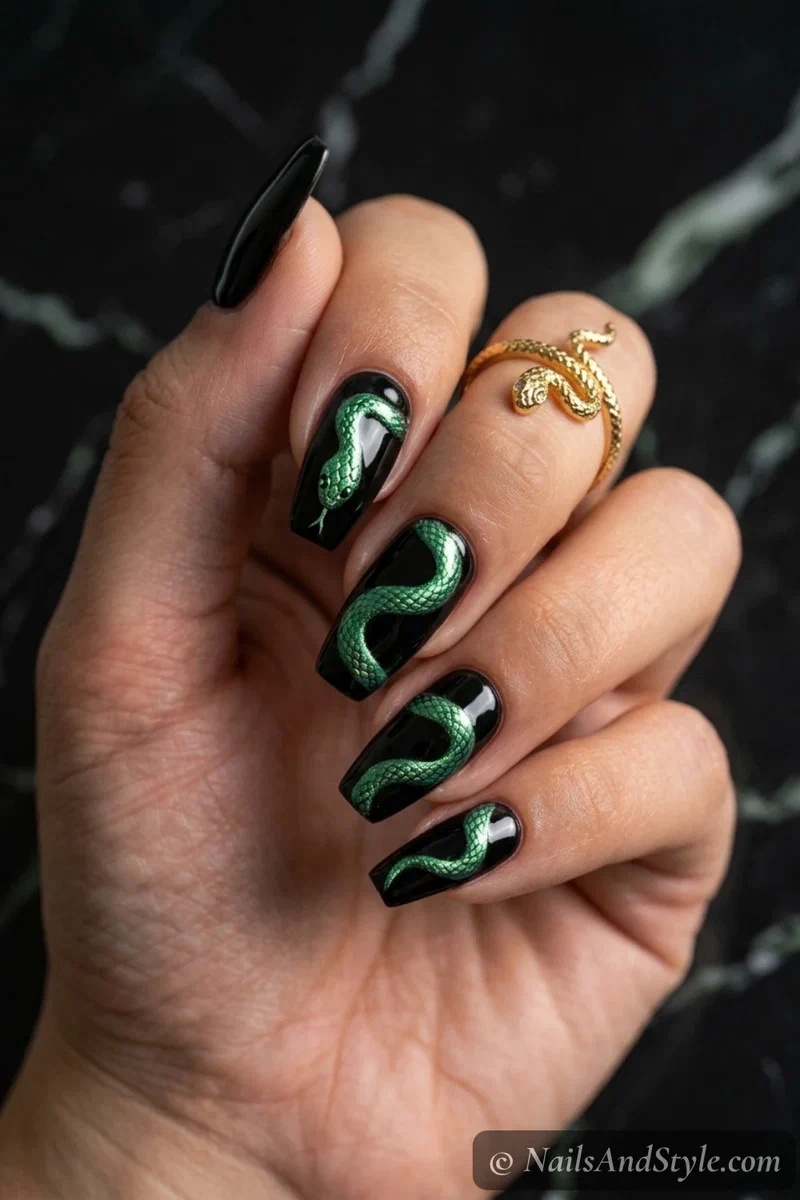
16. Snake Nails#
Slithery and a bit witchy. A green or black snake winding across a couple of nails gives that dark, mystical feel without any blood. Draw a curving snake body with a thin brush, add a diamond-scale pattern and a tiny forked tongue. Metallic green over black looks especially venomous.
17. Witch Hat Nails#
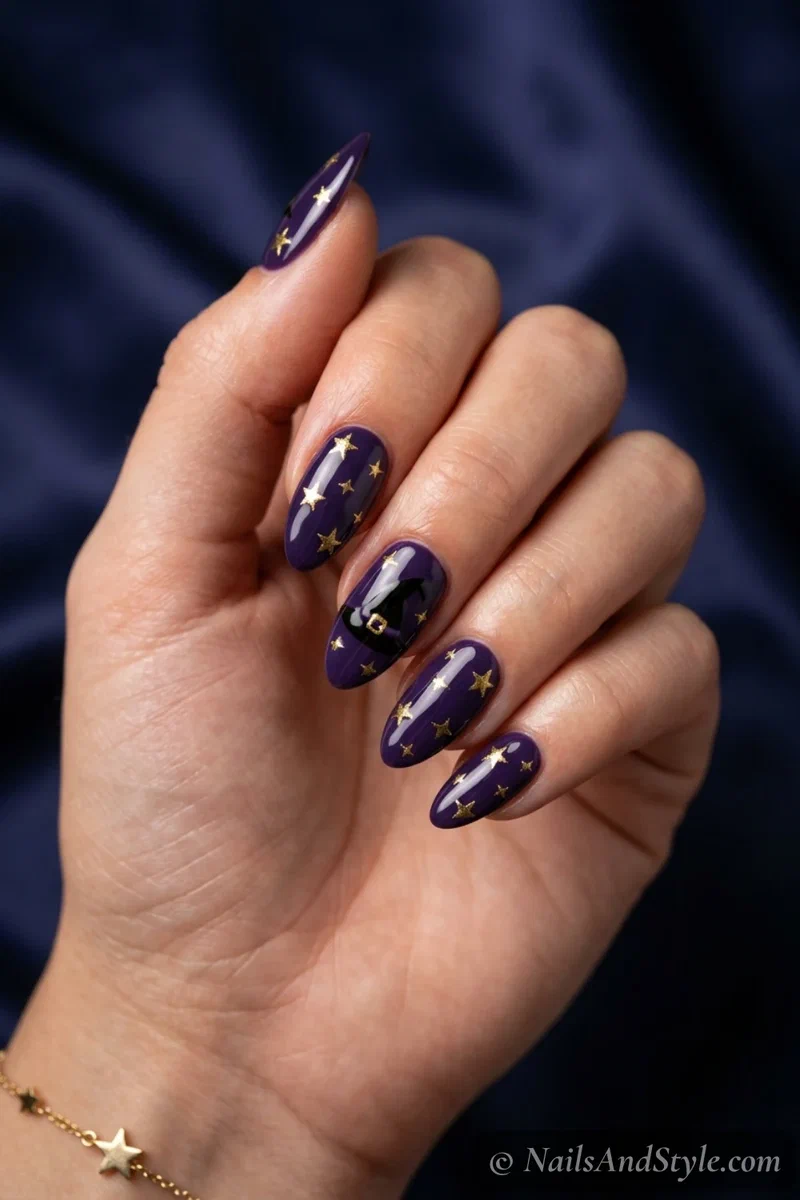
Peak witchy season. A pointed black hat, maybe a little buckle or a crescent moon on the band, over a purple or midnight base. Paint a black triangle with a curved brim on an accent nail, then add a gold buckle dot. Sprinkle a few stars around it if you want that “cackling under a full moon” energy.
18. Potion Bottle Nails#
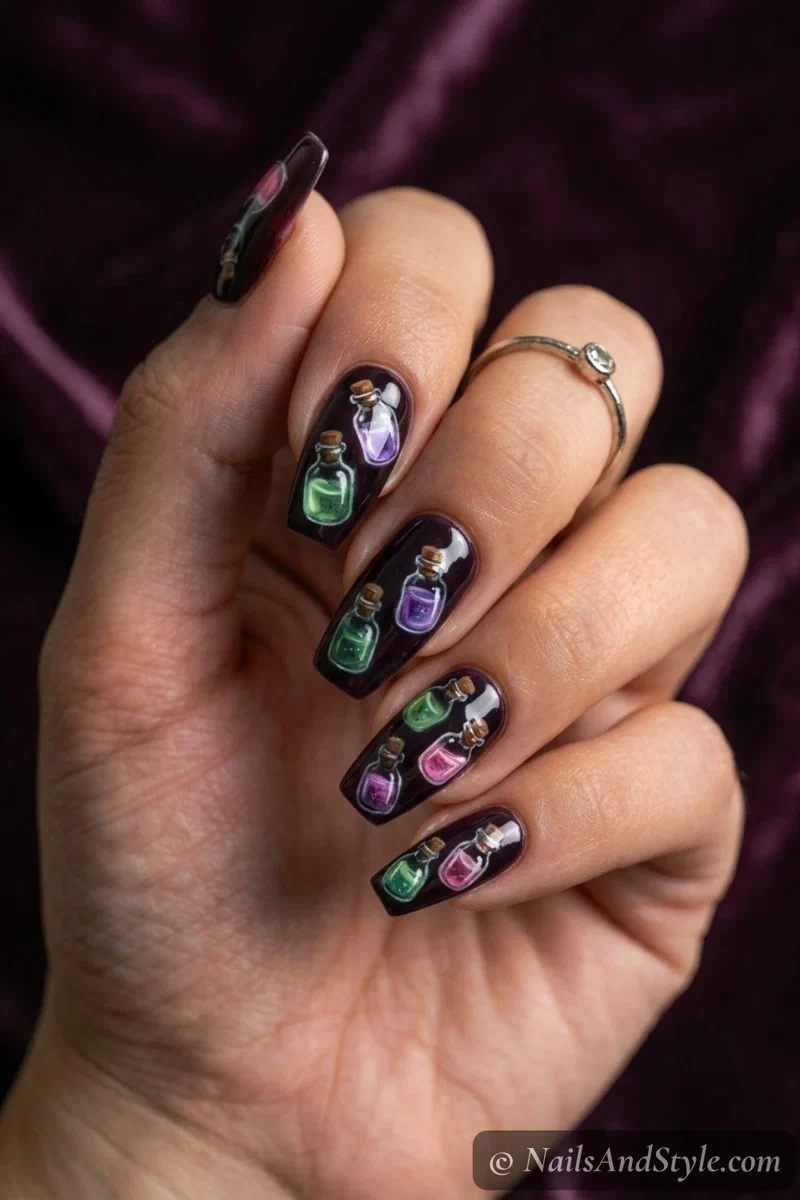
Like a tiny apothecary shelf on your hands. Little glass bottles filled with colored “potion” — green, purple, pink — each with a cork and a wispy label. Paint small bottle outlines, fill with translucent color, then a brown cork dot on top. Different potion on each nail keeps it interesting. So fun to stare at.
19. Spell Book Nails#
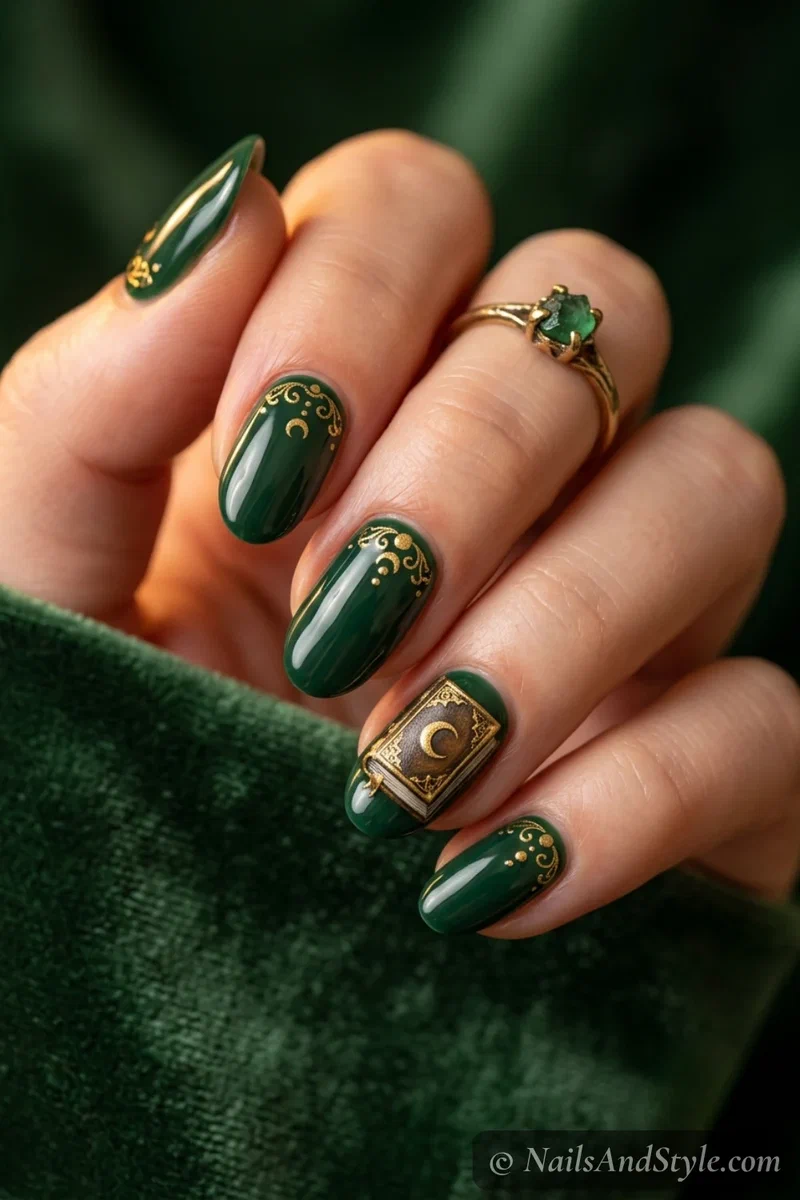
For the cottage-witch crowd. A closed spellbook with an ornate cover — a crescent moon, an eye emblem, gold corners — painted on one accent nail over a mossy green or deep-brown base. Use a fine brush for the gold detailing. Keep the rest of the nails a solid earthy shade so the book feels like the treasure.
20. Black Flame Candle Nails#
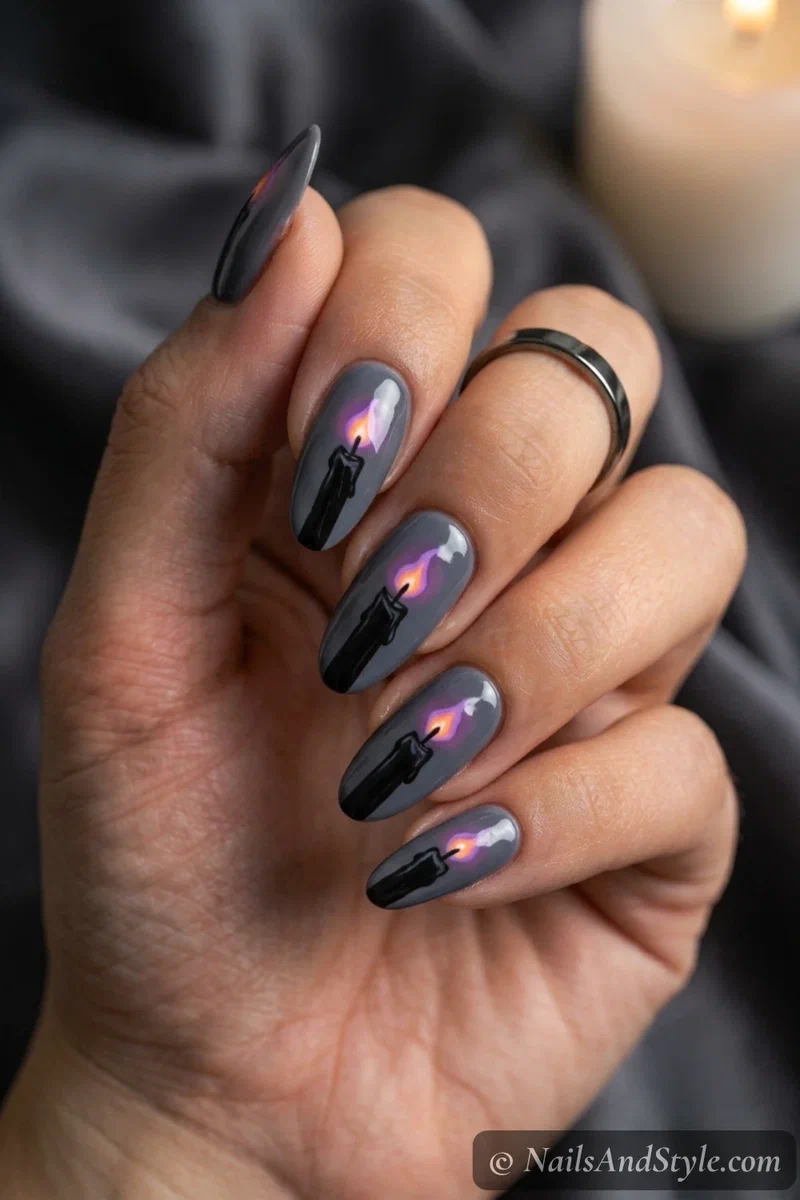
If you know, you know. That black candle with the eerie purple-and-orange flame is pure Halloween-movie magic. Paint a tall black candle on a dusk-grey nail, then blend a flame in orange and purple at the top with a tiny brush. A soft glow around the flame makes it look genuinely lit.
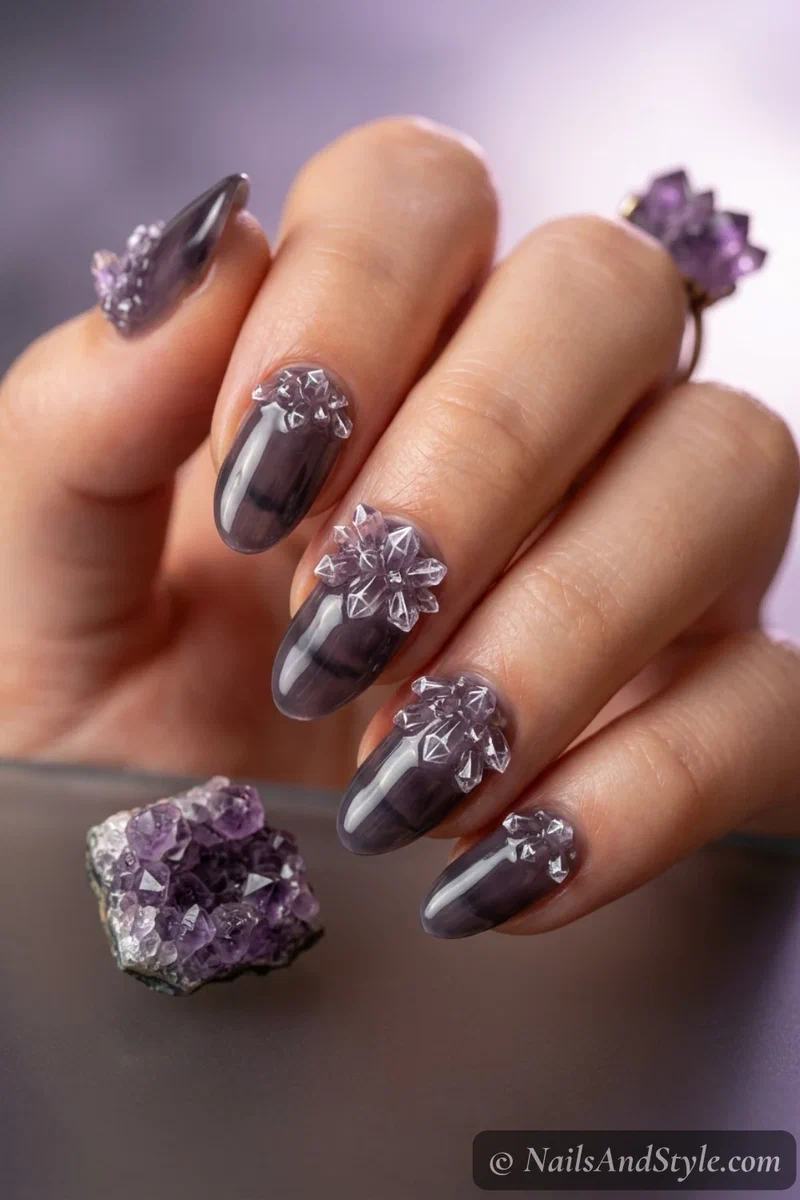
21. Magic Crystal Nails#
Mystical and a little dreamy. Jewel-toned crystal clusters — amethyst purple, smoky quartz — jutting up from the cuticle like you dug them out of a cave. Paint angular crystal facets in translucent purples and greys, then add thin white highlight lines so they catch the light. A glossy top coat is what makes them sparkle.
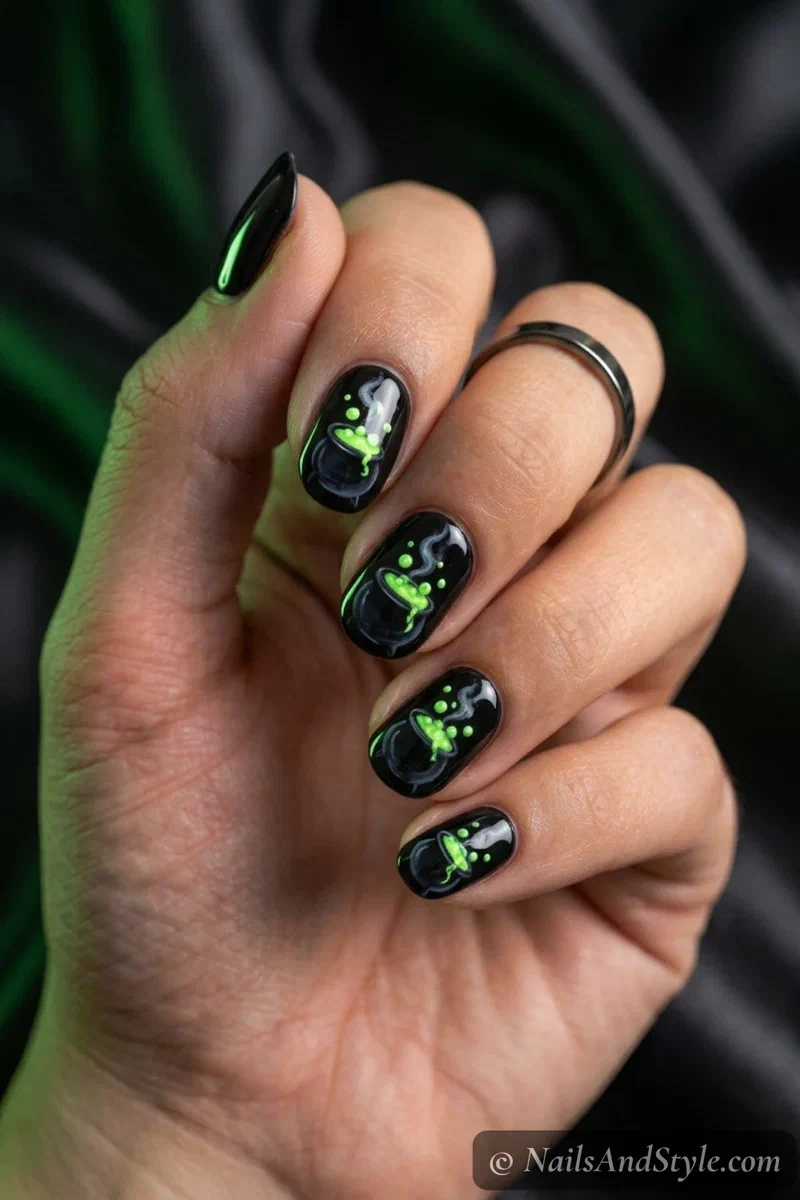
22. Cauldron Nails#
Bubble, bubble. A little black cauldron with lime-green potion bubbling over the rim (and maybe a wisp of smoke) is such a fun accent. Paint a rounded black pot near the tip, then dab glowing green bubbles spilling out with a dotting tool. Green over black always reads “something wicked this way comes.”
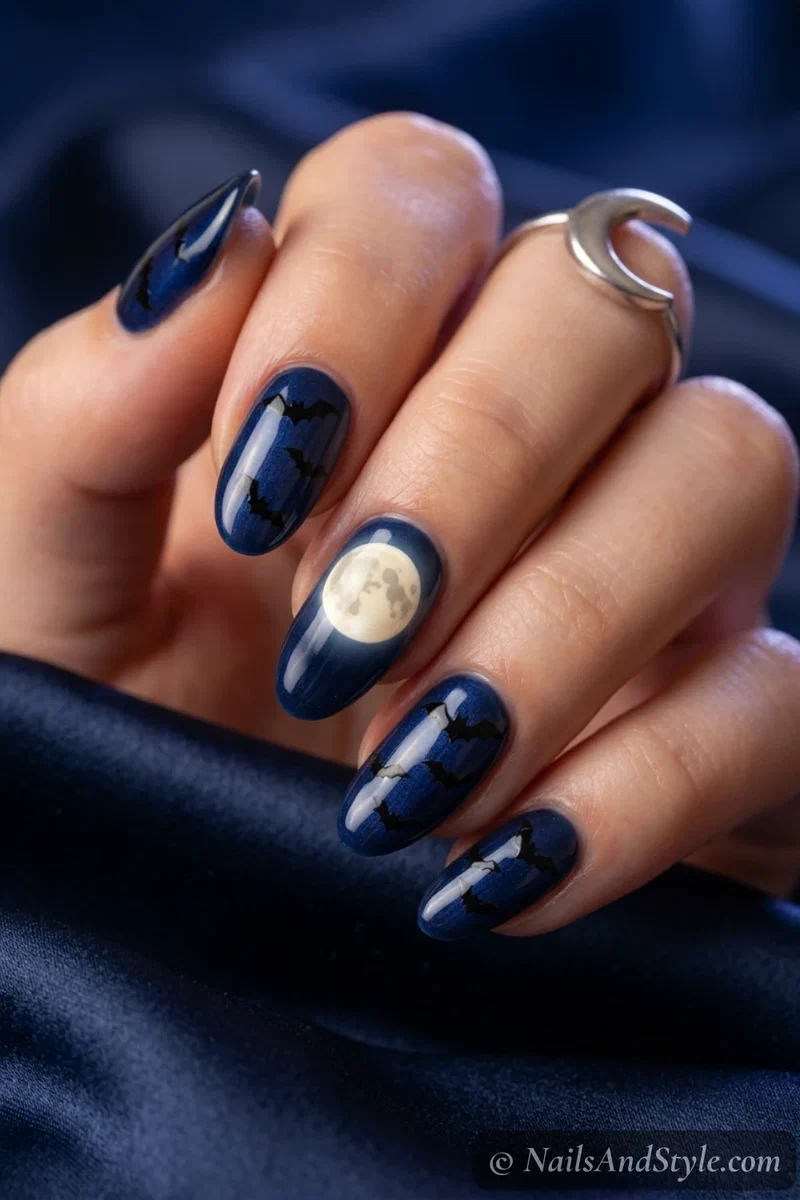
23. Moon & Bats Nails#
Simple, moody, gorgeous. A big cream full moon on one nail, a scatter of black bats flying across the others, all on a night-sky navy or black base. Sponge a soft moon glow, then dot little bats around it. This is the “spooky but I still want it to look pretty” pick, and it delivers.
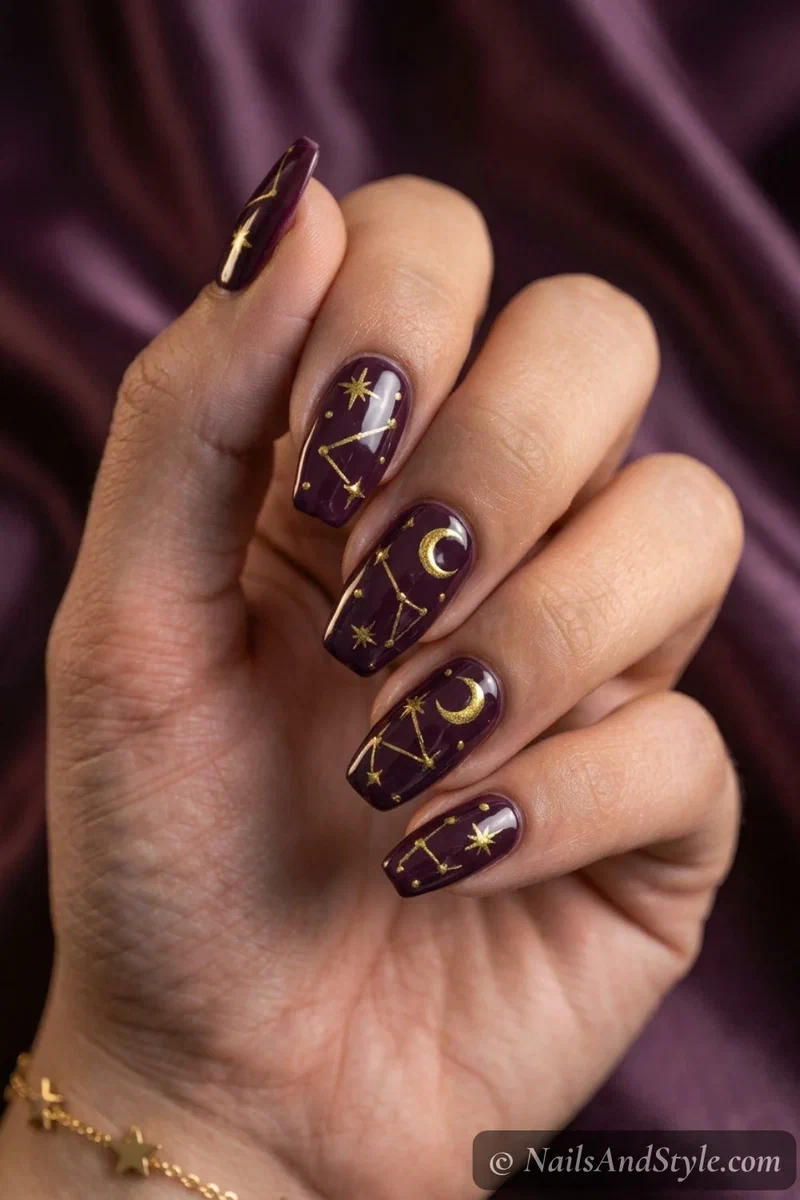
24. Celestial Halloween Nails#
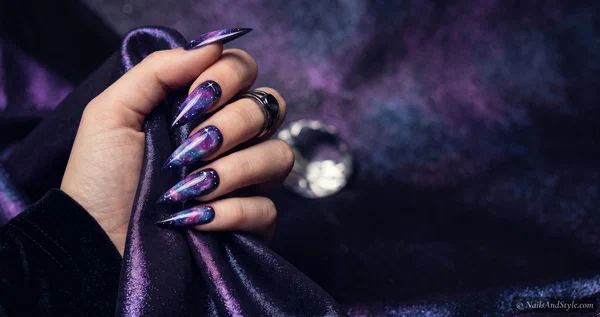
A darker, witchier take on the celestial trend everyone already loves. Deep plum or black nails with gold stars, tiny constellations, and a crescent moon. Use a fine gold liner or a nail-art pen to dot the stars and connect a few constellation lines. Barely any effort, looks like the night sky. Want the softer version? My dark plum nail ideas lean into the same moody palette.
25. Haunted House Nails#
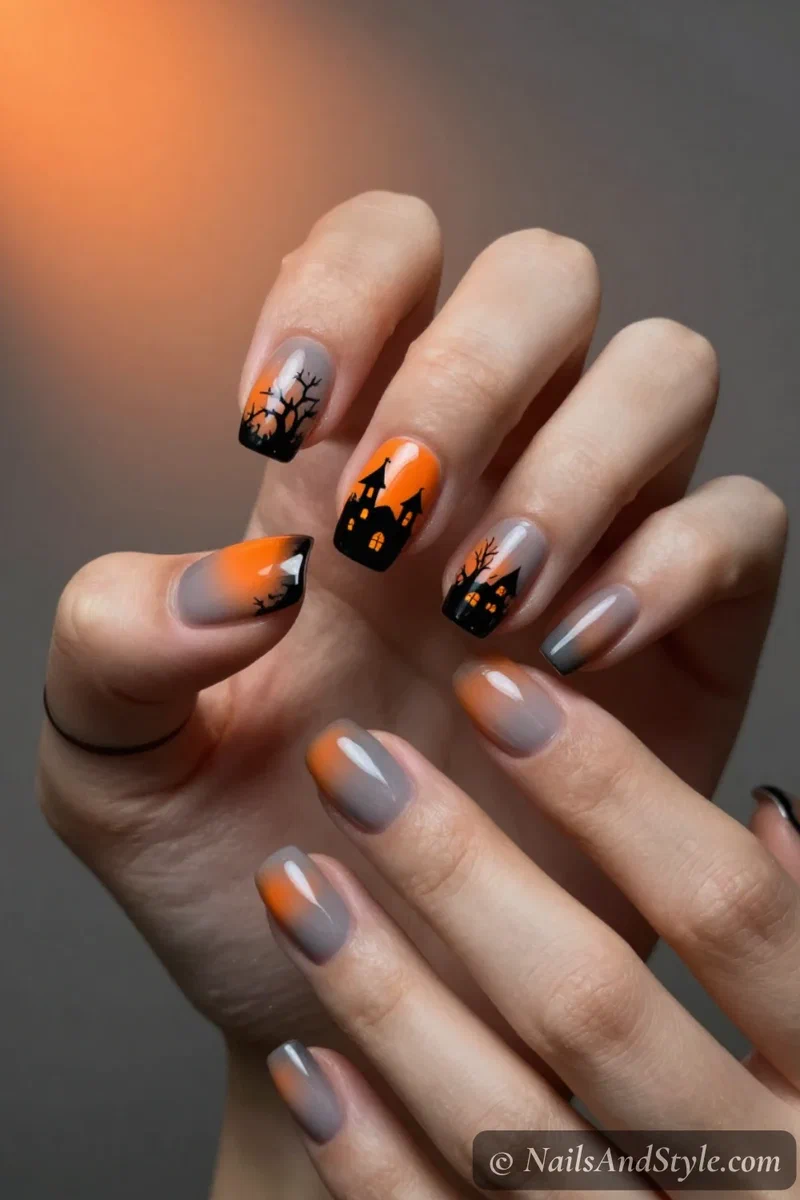
The ambitious one. A spooky silhouette house — crooked roof, glowing windows, a dead tree — against an orange or grey moonlit sky. This takes patience and your thinnest brush, so save it for one accent nail rather than all ten. Sponge a gradient sky first, then paint the black silhouette on top. Worth every minute.
26. Graveyard Nails#
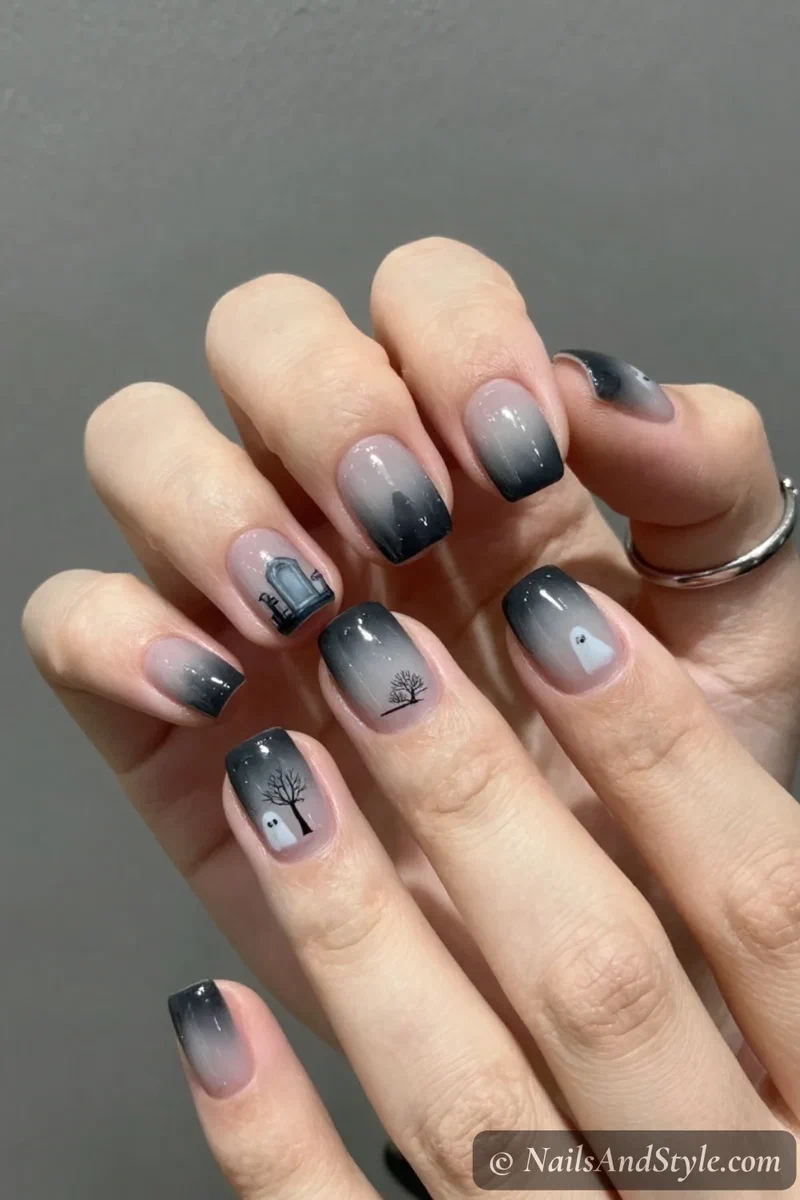
Creepy little scene, big payoff. Grey tombstones, a bare tree, a rising ghost or two along the bottom of the nail like a foggy cemetery. Paint a misty grey-to-black gradient, then add tombstone shapes and thin cross details. A couple of dots of glow polish for “spirits” is a nice touch after dark.
27. Poison Apple Nails#
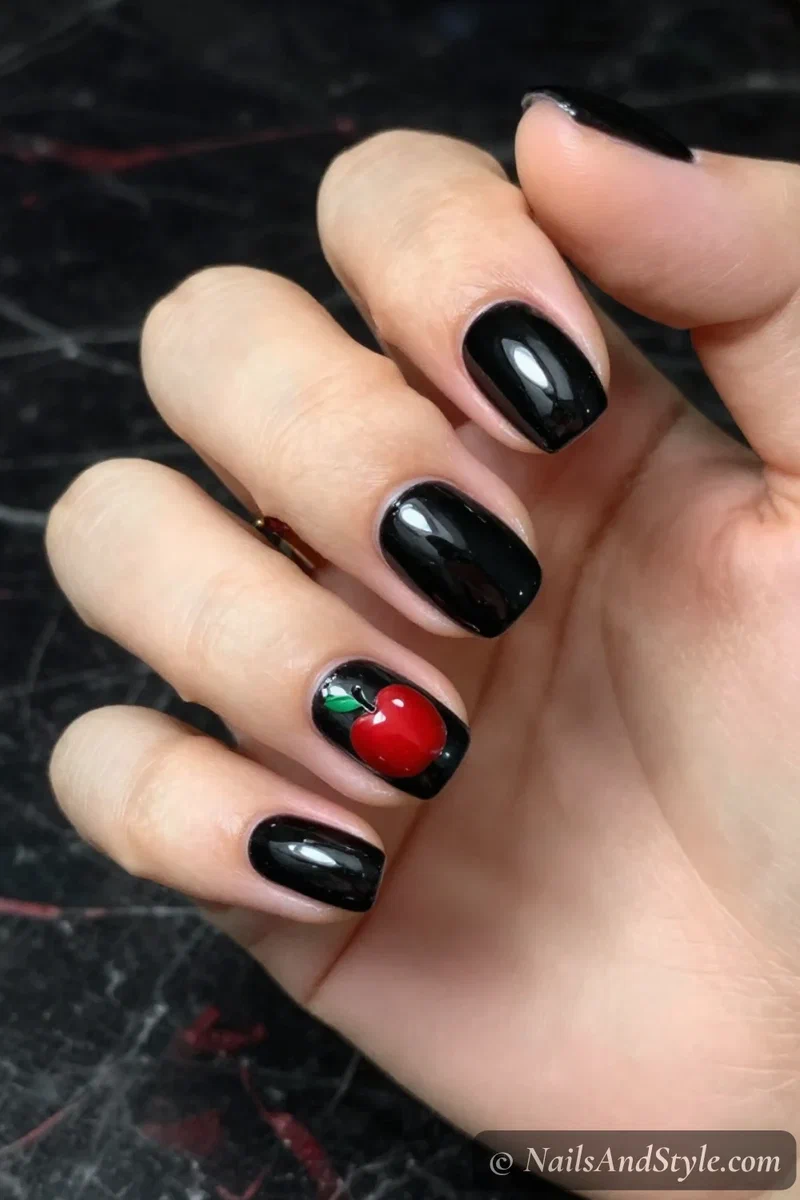
Fairytale-villain vibes. One glossy red apple — the kind the evil queen would hand you — with a green leaf and maybe a single drip of “poison.” Paint a rounded red apple on an accent nail over a dark base, add a highlight for shine and a tiny leaf. Deliciously sinister. Do not eat.
28. Matte Black Halloween Nails#
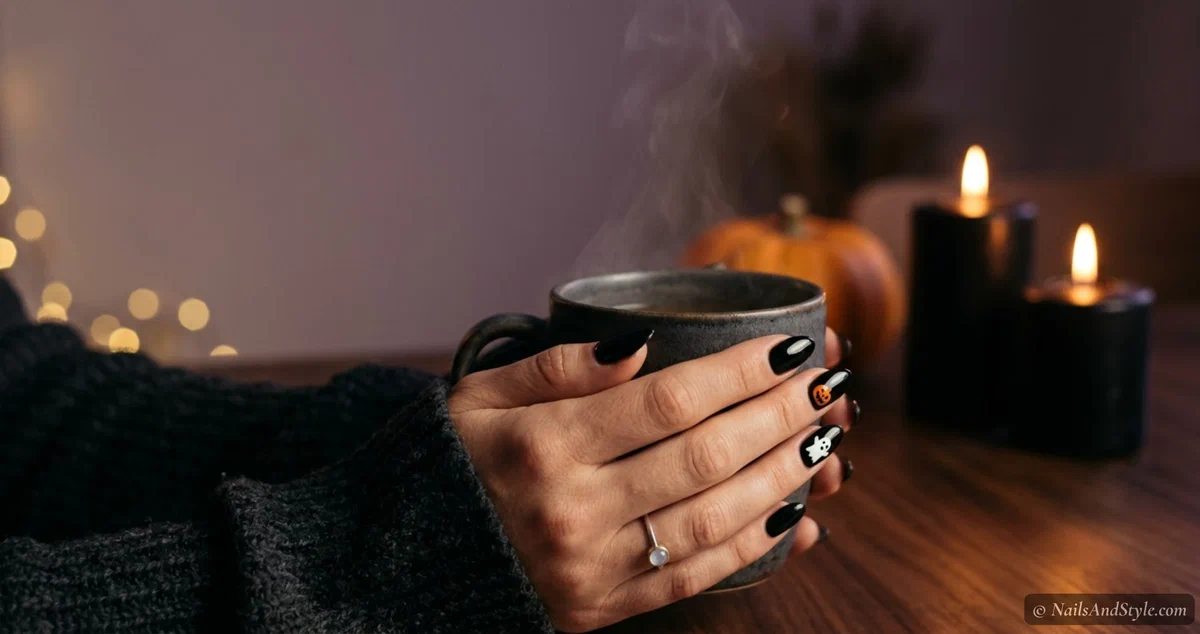
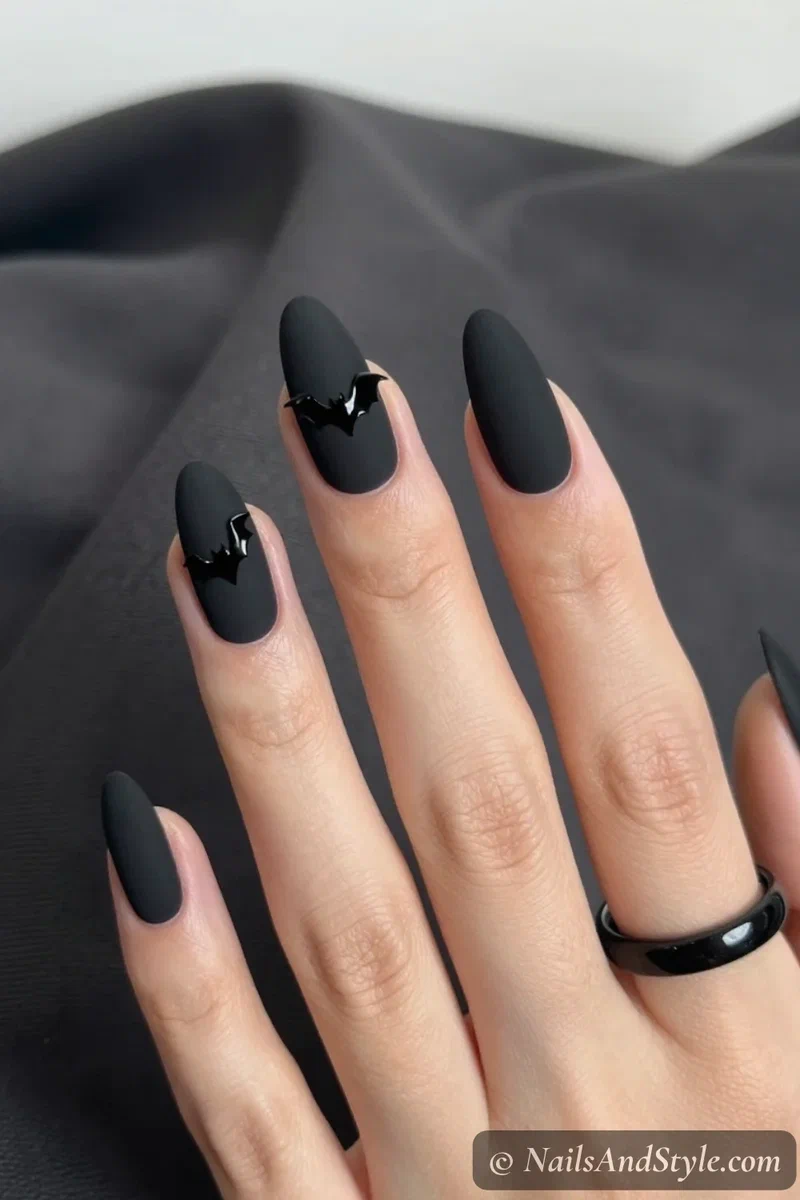
Sometimes the spookiest thing is the simplest. Full matte black nails are moody, chic, and take about ninety seconds. Two coats of black, one matte top coat, done. Add a single glossy black bat or spider on one nail (glossy-on-matte is a chef’s kiss detail) if you want a little something. Beginner-proof and always cool.
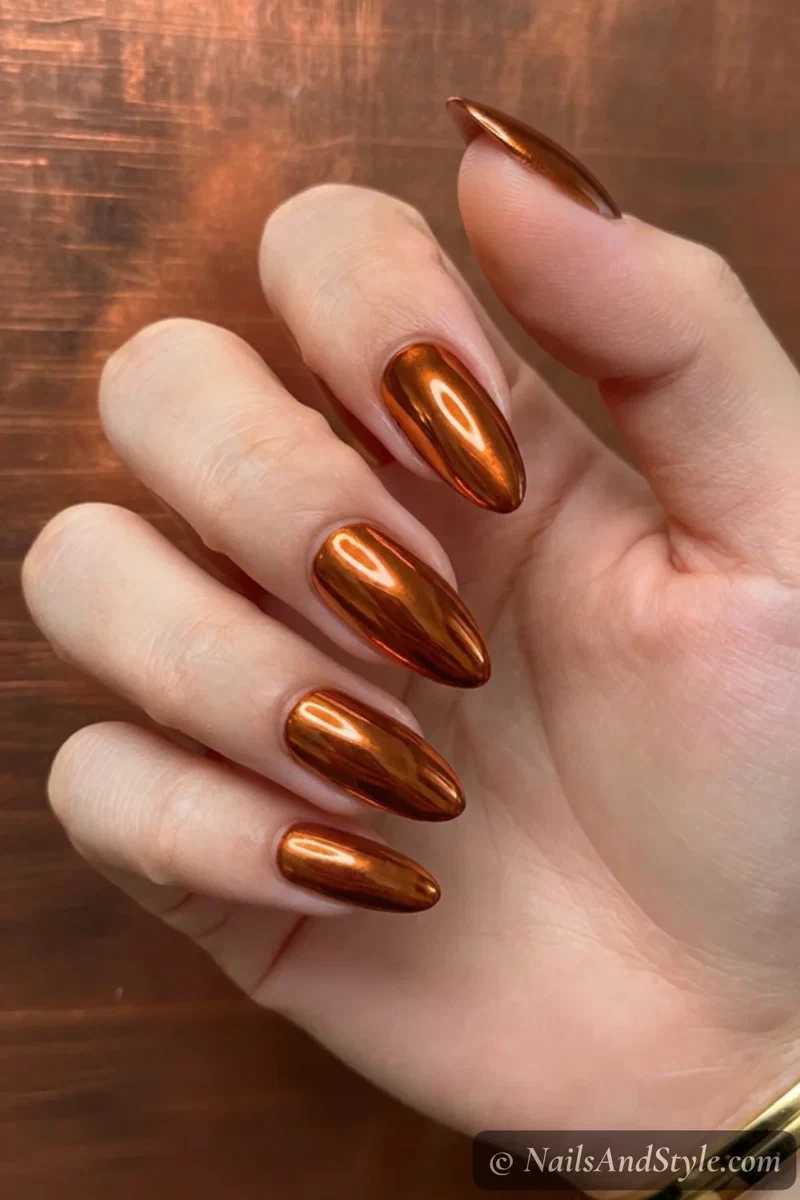
29. Orange Chrome Halloween Nails#
Halloween, but make it luxe. Burnt-orange chrome catches the light like liquid metal and feels way more grown-up than a flat orange. Paint a dark orange base, let it fully dry, then buff chrome powder over the top with a soft applicator and seal fast. If chrome’s new to you, here’s how to apply chrome powder on nails step by step. Mirror-shiny and so good.
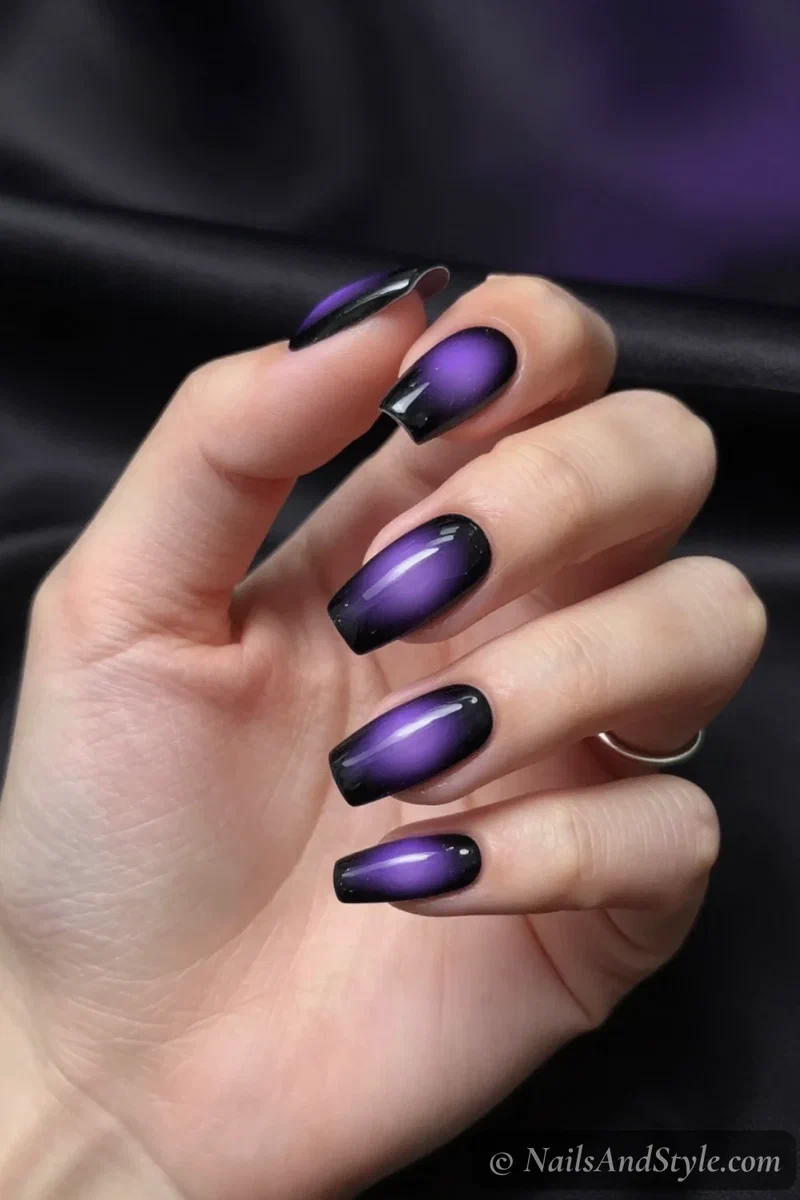
30. Purple Aura Halloween Nails#
That soft, blurry glow in the middle of the nail — but in a spooky purple over black. Moody, hazy, and honestly kind of hypnotic. Sponge a bright violet into the center of each black nail and blend the edges out, then seal glossy for that backlit look. Feels like a haunted mood ring.
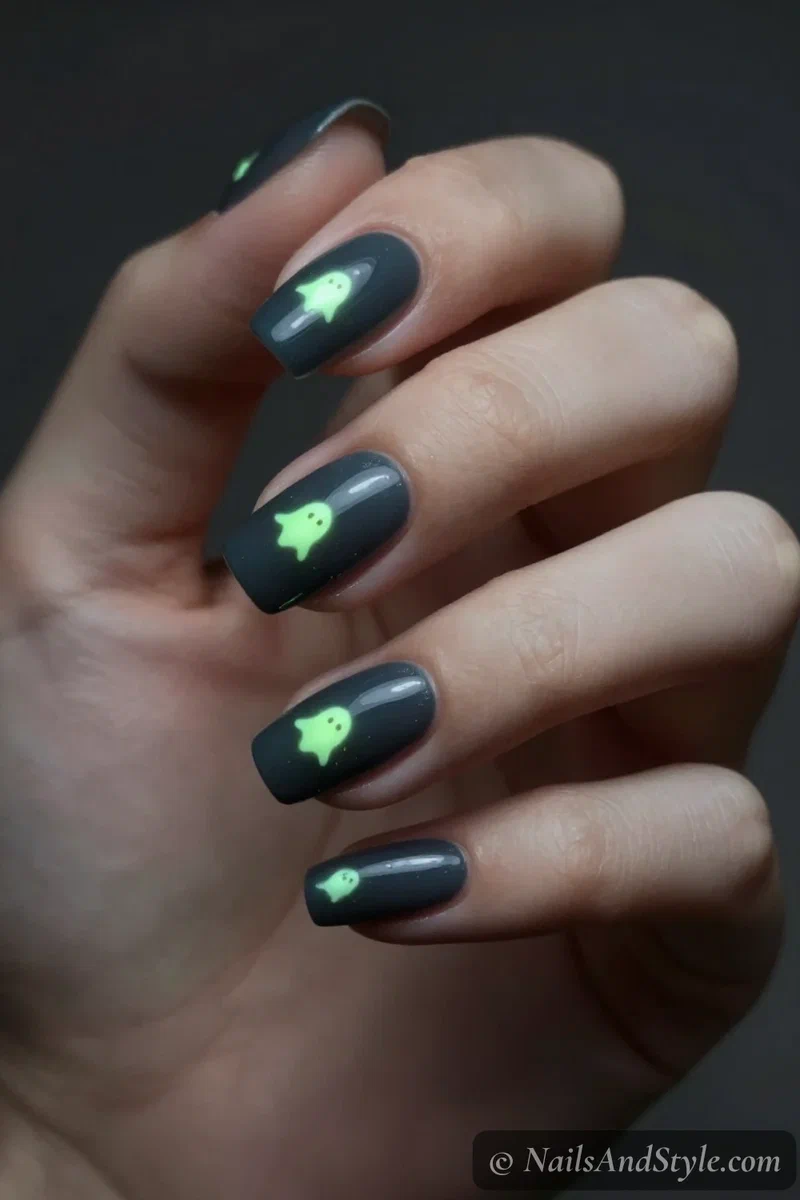
31. Glow-in-the-Dark Nails#
The party trick of the bunch. These look like a normal (or spooky) design in daylight, then glow green or blue the second the lights go down. Paint your design, then add a layer of glow-in-the-dark topcoat over the whole nail or just the accents. Charge them under a light for a minute first. Everyone at the party will lose it.
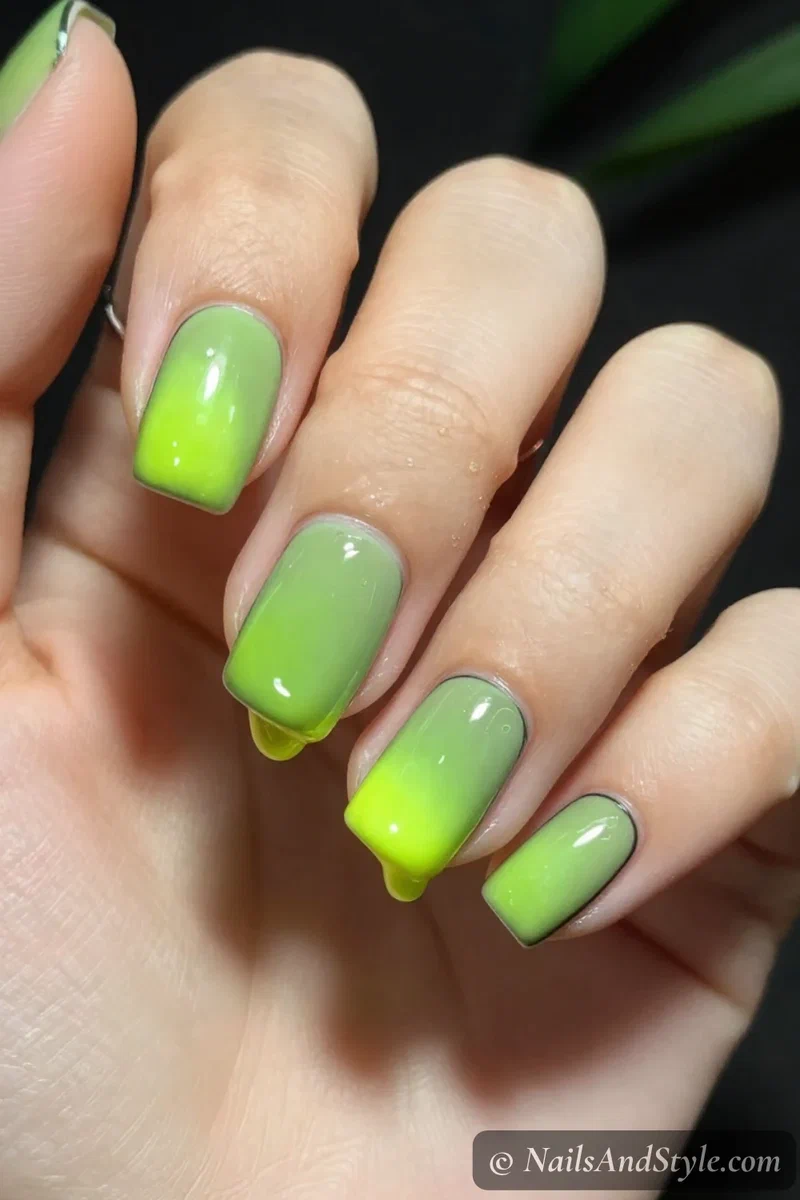
32. Green Slime Nails#
Drippy, gooey, cartoon-gross. Neon lime “slime” oozing down from the cuticle looks like something crawled out of a lab. Over a black or white base, drag thick uneven green drips downward, keeping the edges blobby. A super-glossy top coat makes it look wet and fresh. Not subtle. Not trying to be.
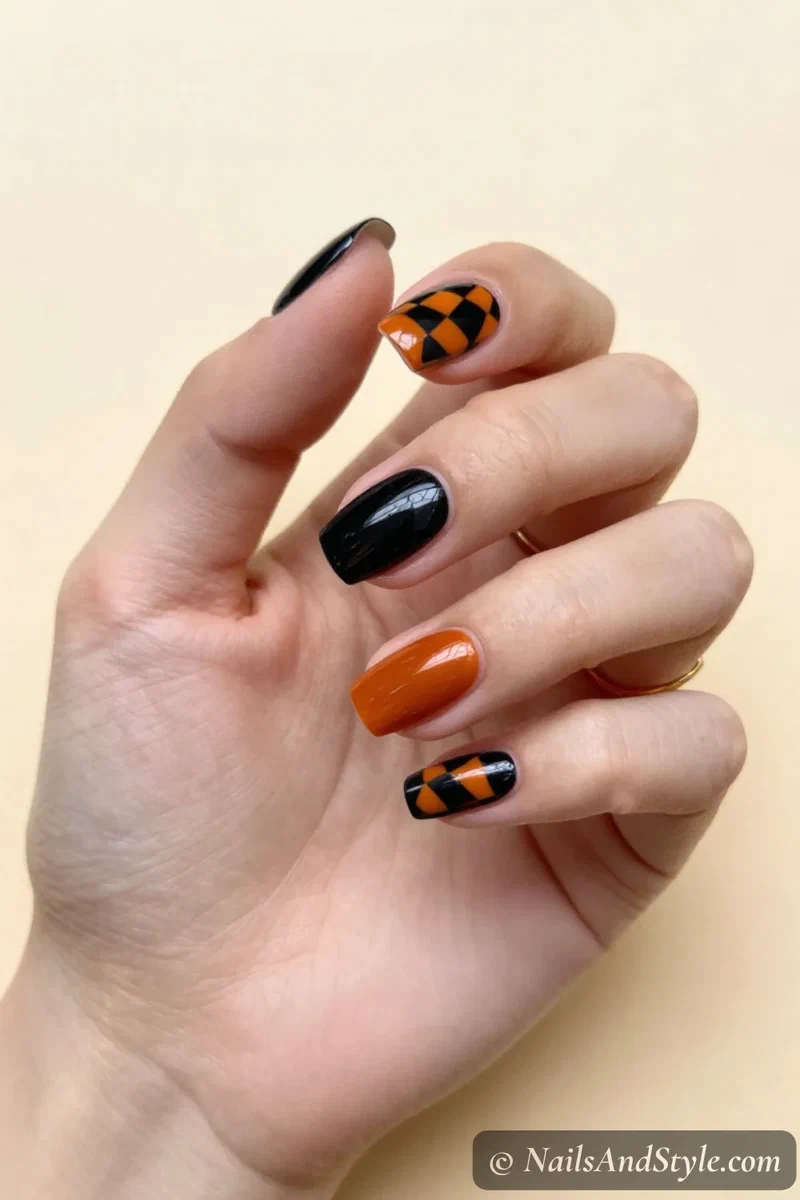
33. Black & Orange Checkerboard Nails#
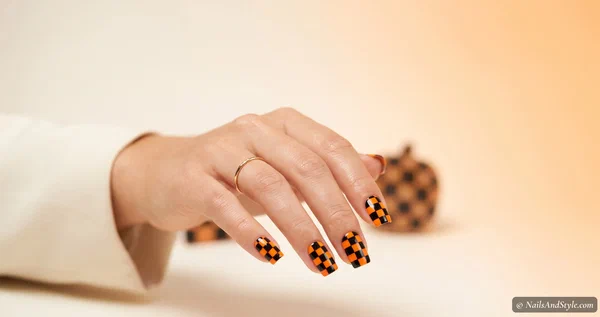
Retro, graphic, and easier than it looks. A black-and-orange checkerboard on one or two nails, solid shades on the rest, gives that cool skater-Halloween thing. Use striping tape to grid it out, or a small square brush and a steady hand. Keep the squares a little imperfect — it looks more hand-done and less stiff.
34. Gothic Lace Nails#
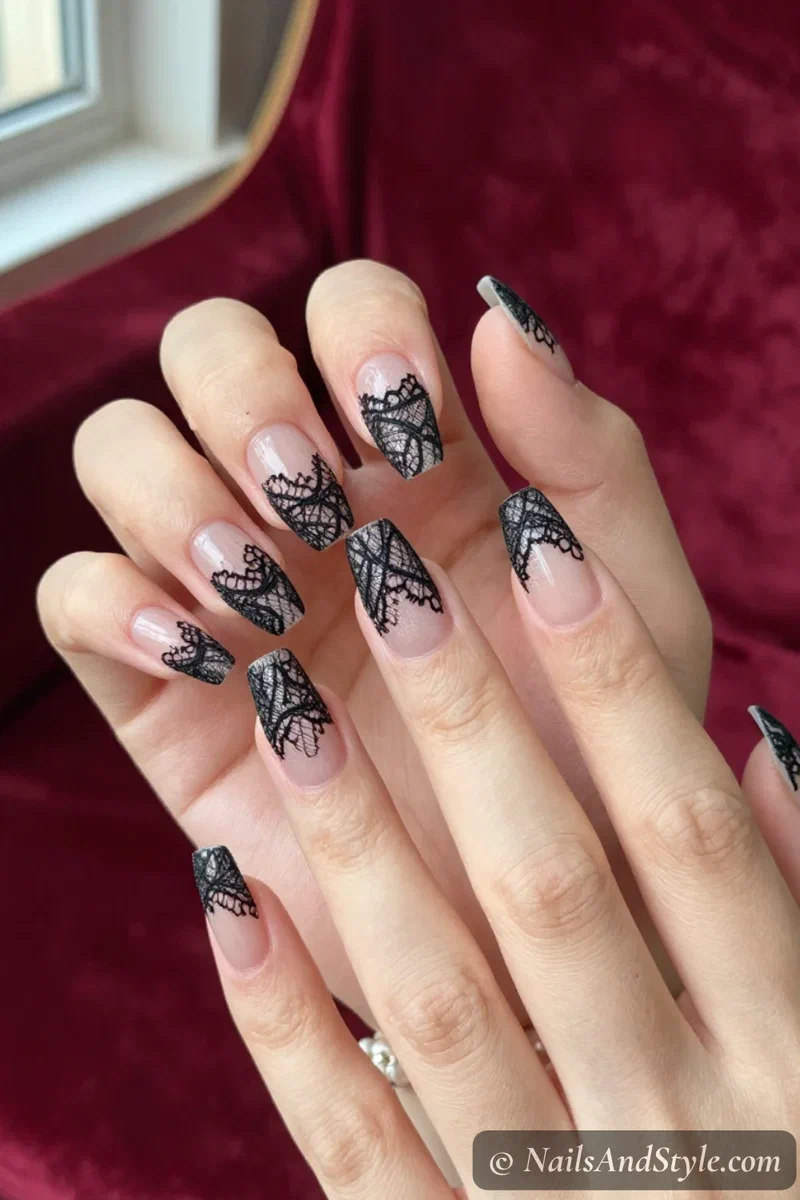
The most elegant look on this list. Delicate black lace over a sheer nude or deep-red base feels like a Victorian ghost bride — dramatic but refined. Use a lace stamping plate or a very fine brush to trace scalloped lace edges and tiny dots. A matte finish makes it look like real fabric. Into the moody-romantic thing? These play well with lace nail ideas year-round.
35. Minimal Halloween Accent Nails#
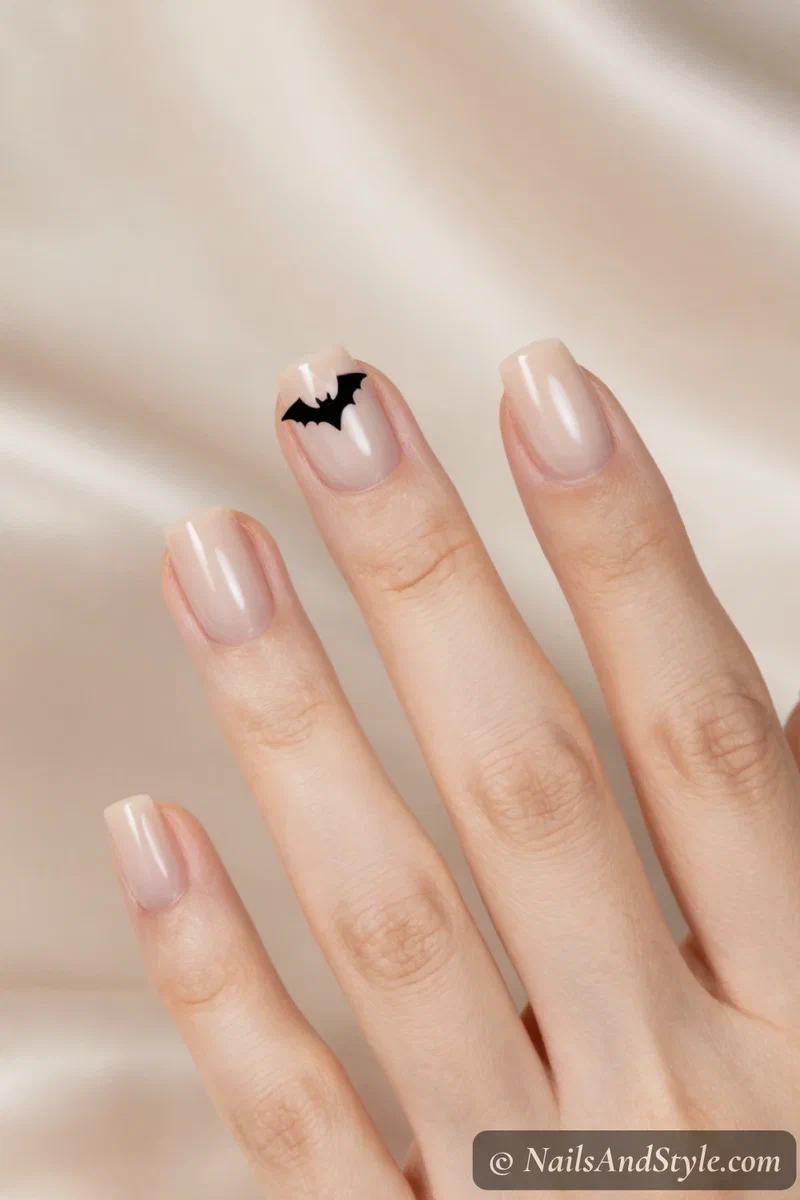
For the “I want in, but subtly” crowd. Four clean nude or milky nails and one tiny detail — a single ghost, one small bat, a lone spider. That’s it. Paint your neutral base, then add one minimalist black or white motif to a single nail with a dotting tool. Office-safe, quietly festive, and takes five minutes.
Halloween Nails on Short Nails#
Here’s something people forget: short nails were basically made for Halloween. Small designs — ghosts, bats, candy corn tips, a single spider — actually look better with less space to fill. No awkward gaps, no smudging, no fighting with a long canvas.
And if you want the illusion of length, keep the art vertical and the base dark. A black or deep-purple nail reads long and sleek, and a tiny accent motif keeps it fun without crowding. Short nails also just survive the season better — carving pumpkins and digging through candy bowls is rough on long tips.
A Few More Short Nail-Specific Ideas#
- Single ghost on a nude base — barely-there but instantly festive, and it never looks cluttered.
- Matte black with one glossy spider — one color, huge mood, zero fiddly art.
- Candy corn French tips — the stripes sit neatly on a short tip without needing length.
- Tiny bat scatter — small enough that three dots read as bats mid-flight.
- Orange chrome, no art at all — short chrome nails look expensive and take two minutes.
Simple Step-by-Step: How to Do This at Home#
- Prep your nails. Wipe them clean, trim and file to your shape, and gently push back your cuticles.
- Buff lightly. A quick soft buff helps polish grip — don’t go overboard or you’ll weaken the nail.
- Apply a base coat. Non-negotiable with dark Halloween shades — it stops black and red from staining.
- Lay down your base color. Two thin coats of your main shade (black, orange, nude, whatever the look needs) beat one thick gloopy one.
- Paint the main design. Freehand with a thin liner brush, use striping tape for clean lines, or reach for stamping plates for lace and webs.
- Add the details. Eyes, drips, stars, glitter, chrome powder, glow topcoat — whatever your design calls for goes on now.
- Clean up the edges. Dip a small brush in remover and tidy any color off your skin for that salon-neat line.
- Seal and dry. Finish with a glossy or matte top coat and let everything dry fully — longer than you think, especially over thick art.
How to Ask Your Nail Artist for Halloween Nails#
Not doing these at home? Totally fair — some of them are a project. A little prep makes the salon trip go so much smoother, because “Halloween nails” can mean a hundred different things.
- Bring 2-3 reference photos. “Spooky” ranges from a cute ghost to a full gore blood drip — pictures settle exactly which direction you mean.
- Name the finish. Matte, glossy, chrome, or glow-in-the-dark completely changes the same design, so say it upfront.
- Suggest a shape. Short almond or coffin holds detailed art best; mention it so you don’t end up with something too long to live in.
- Say if it’s hand-painted. Skeletons, haunted houses, and lace need freehand or stamping time — flag it so they book enough of it.
- Ask for gel on the detailed looks. Gel locks in intricate art and deep colors without chipping or staining, which matters a lot with black and red.
Tips to Make Your Nails Last Longer#
- Keep every layer thin — thick coats stay soft and dent for hours.
- Seal the free edge by swiping polish along the very tip of each nail.
- Skip long hot baths right after painting; water wrecks a fresh mani fast.
- Wear gloves for dishes and cleaning — chores chip nails faster than anything else.
- Swipe a fresh top coat on every two or three days to keep the shine and stop chips.
- Use cuticle oil daily so your nails bend instead of snapping.
- And please don’t use your nails to pry open the candy bag. We all do it. It always ends in a chip.
Quick FAQ#
Are Halloween nails hard to do for beginners?#
A lot of them really aren’t. Solid matte black, a single ghost, or a few spider dots need almost no skill and still look great. Save the skeleton hands and haunted houses for once you’re comfortable with a thin brush — those are the fiddly ones.
What colors are best for Halloween nails?#
The classics never miss: orange, black, and white. Add purple and lime green for a witchy, potion-y feel, or deep blood red for anything vampire. Matte and chrome finishes make every one of them look more expensive than they actually are.
Can I do these on natural or short nails?#
Yes, and honestly short nails often look better. Small motifs like ghosts, bats, and candy corn tips don’t need length — one or two accent nails is plenty. Just use a base coat under the dark shades so your natural nails don’t stain.
Final Thoughts#
The best part of these Halloween nails 2026 ideas is how much range there is — you can go full haunted-house gore or keep it to one tiny bat and still feel completely in the spirit. Nothing here needs a salon, and most of it survives a lazy October Sunday and a horror-movie marathon just fine.
Save the looks that made you stop scrolling, pin them somewhere you’ll actually find them again, and don’t be scared to remix — a matte black base with a glow-in-the-dark ghost, a chrome pumpkin, whatever feels like you this year. And if you finish your set before the last leaf drops, my fall nail trends 2026 roundup will carry your hands straight through to Thanksgiving.