I’ll be honest — the first time I tried water marble nails, it was a disaster. Polish floating everywhere, fingers covered in color, and the swirls looked more like a toddler’s finger painting than anything I’d seen on Pinterest. But once I figured out the actual technique? Total game changer.
How to do water marble nails at home is one of those things that looks wildly impressive but really just comes down to the right polish, room temperature water, and a little patience. This guide walks through everything step by step — what supplies you need, the technique itself, and some gorgeous variations to try once you’ve got the basics down.
And the best part — this works beautifully on short and medium nails. No extensions required. If you’re still building your at-home nail skills, my gel nails at home complete guide covers another great technique to have in your back pocket.
Why Water Marble Nails Hit Different in Summer#
There’s something about warm weather that makes me want wild, swirly nails. Water marble gives you that organic, one-of-a-kind pattern that you literally cannot replicate — every nail turns out slightly different, and honestly? That’s the whole charm.
Summer is the best time to go bold with this technique. The colors that work best are the ones already in season — coral and white, turquoise and gold, hot pink and orange. Even pastels marble beautifully when you want something softer. If you’re into that softer palette, my pastel summer nails post has a bunch of shades that translate perfectly into marble patterns.
Before we get into it:
- Room temperature water matters. Cold water makes polish sink. Warm water makes it dry too fast. Room temp is the sweet spot.
- Thin, creamy polish formulas spread best. Skip anything thick, glittery, or quick-dry.
- Tape or liquid latex around your nails saves cleanup time. Trust me on this one.
- Base coat first, always. Protects your natural nails from staining.
What You’ll Need#
Pretty simple setup, honestly:
- 2–3 creme nail polishes — thin creme formulas spread best — skip shimmers and jellies
- Base coat — so the marble grips and lasts
- Glossy top coat — seals the swirl and adds shine
- Liquid latex (or tape) — a peel-off skin barrier — this one gets messy
- Toothpick or orange stick — for dragging the swirl pattern
- Room-temp water + a disposable cup — filtered or bottled gives the cleanest film
- Cotton pads, remover + paper towels — cleanup is half the job, fair warning
How to Do Water Marble Nails at Home — Step by Step#
Prep your nails. File, shape, push back cuticles, and buff lightly. Clean nails with remover to get rid of any oils.
Apply base coat. Let it dry completely. This protects against staining — and with marble nails, there’s a lot of pigment touching your nail.
Paint a white or light base color. One thin coat is fine. This makes the marble pattern pop way more than doing it over bare nails. Let it dry.
Protect your skin. Wrap tape around your fingers or brush liquid latex around the nail. This is the part most people skip and then regret.
Drop polish into the water. Hold the brush close to the water surface and let a drop fall in. It should spread into a thin circle. Alternate colors — drop, spread, drop, spread — until you have 5-8 rings.
Swirl with a toothpick. Drag the toothpick gently through the polish to create your marble pattern. Don’t over-swirl — two or three drags is plenty. More than that and it turns muddy.
Dip your nail in. Place your finger nail-down into the pattern you like. While your finger is still in the water, use the toothpick to clear away the excess polish floating on the surface. Then pull your finger out slowly.
Clean up and seal. Peel off the tape or latex, clean any edges with a small brush dipped in remover, and apply a generous top coat once everything’s dry.
That’s genuinely it. The first nail takes the longest — by the third or fourth, you’ll be moving fast.
5 Water Marble Designs Worth Trying#
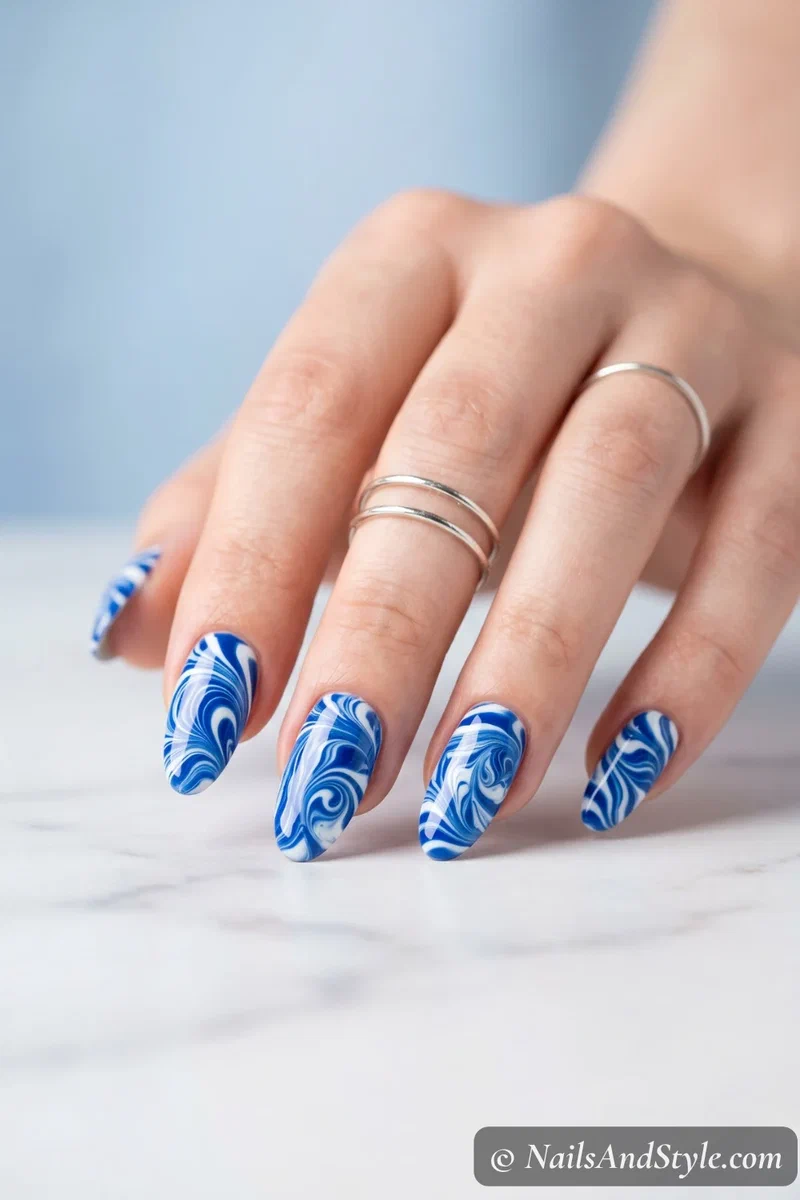
1. Classic Blue and White Swirl#
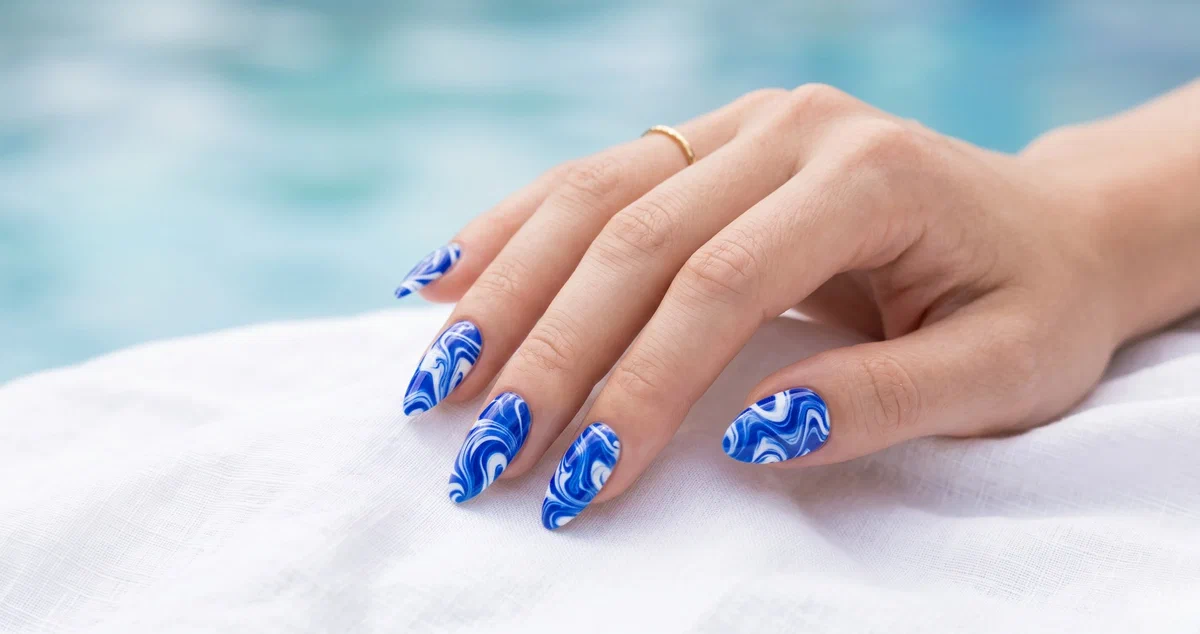
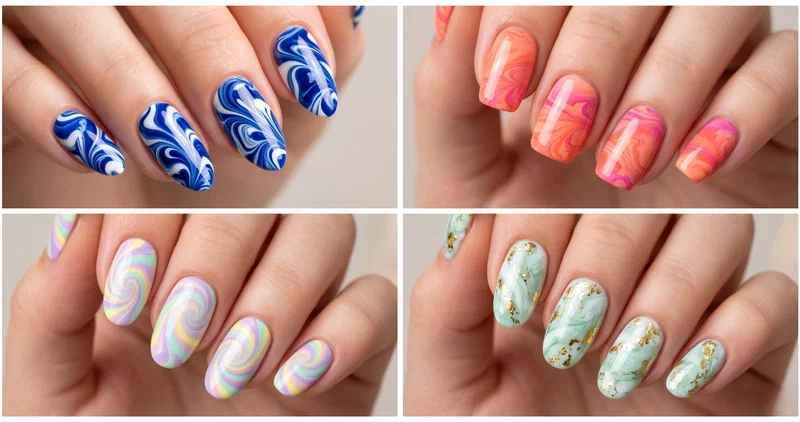
The one that started it all for me. Cobalt blue and crisp white create these ocean-wave patterns that look insane in person. Two drops of each, one gentle drag with the toothpick, and you get these fluid lines that look hand-painted. Glossy top coat makes it almost ceramic.
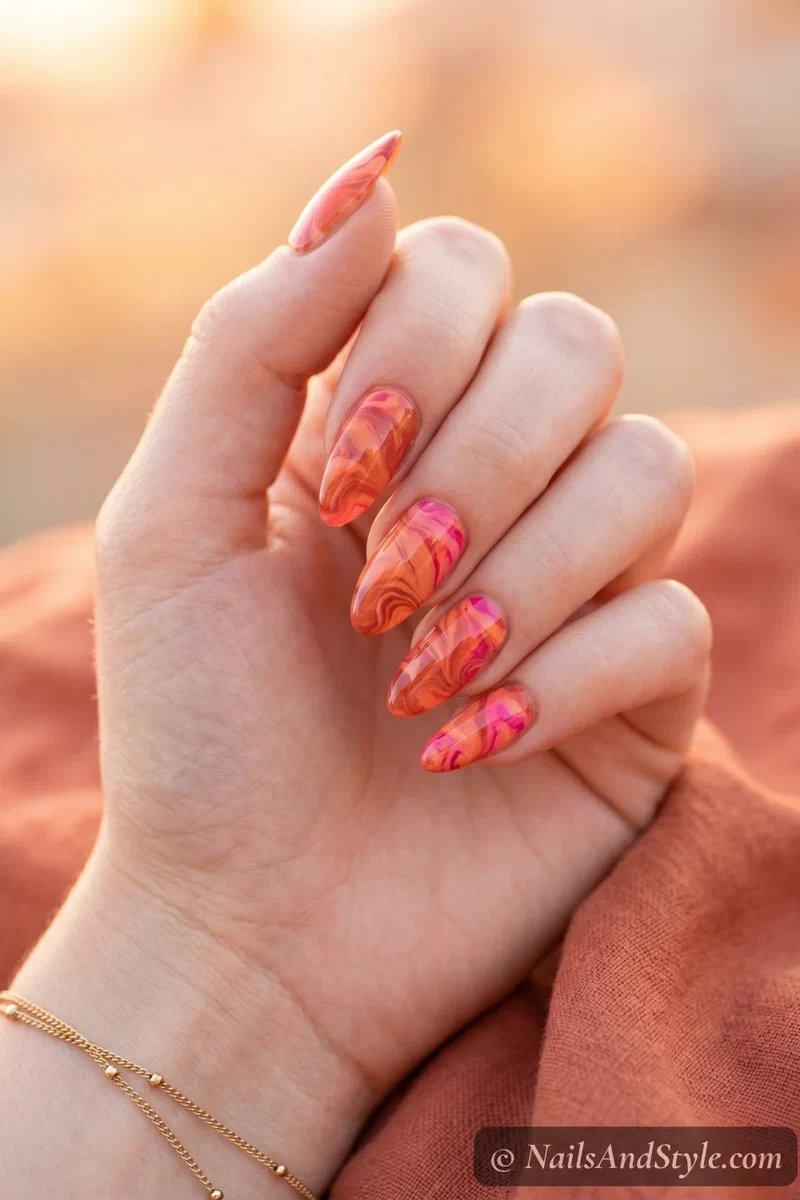
2. Sunset Gradient Marble#
Okay, this one’s a show-stopper. Layer coral, orange, and a touch of hot pink. The colors bleed into each other in the water and create this warm gradient that looks like a sunset melted onto your nails. It’s messier than a two-color marble, but so worth the extra cleanup. Goes with everything summery — bright fun summer nails territory for sure.
3. Pastel Rainbow Swirl#
Use three pastel shades — lilac, mint, and butter yellow work beautifully together. The swirls come out softer and more dreamy than bold colors. This is the one to try if you want marble nails that feel subtle instead of loud. Pretty underrated combo, honestly.

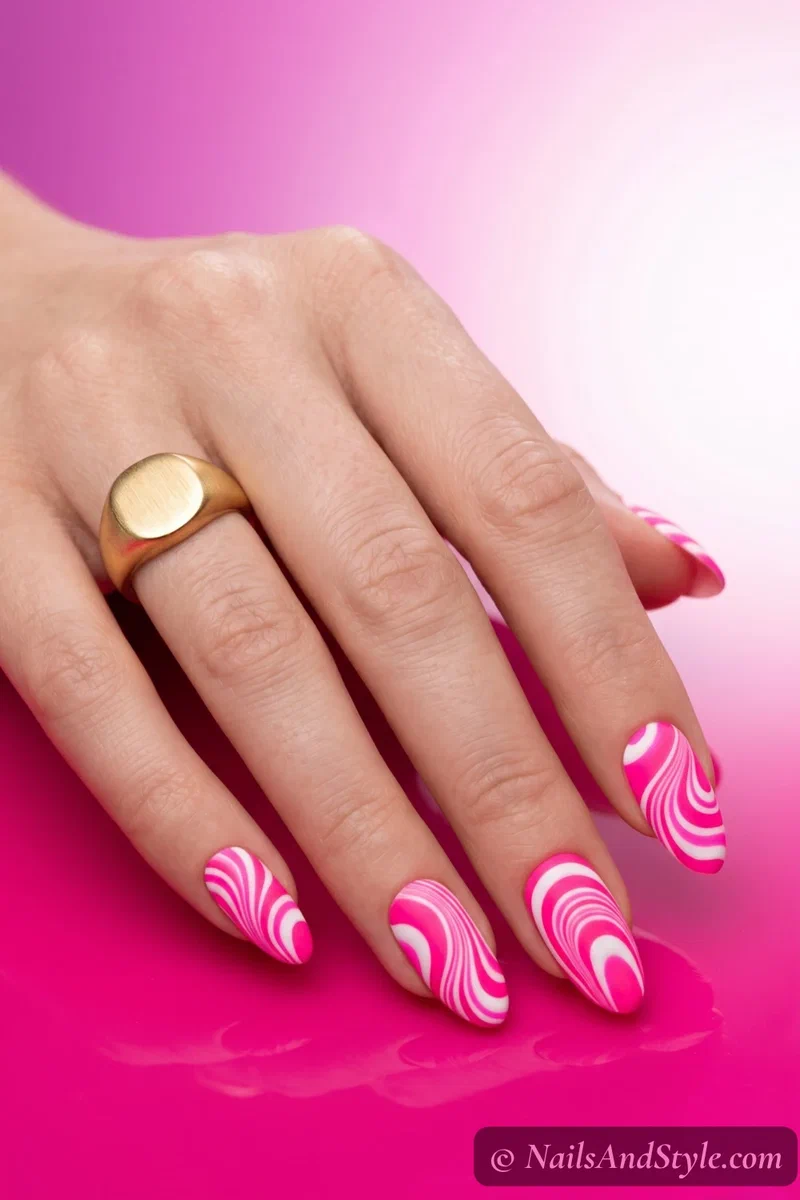
4. Neon Pink and White Pop#
Hot pink and white with really tight, deliberate swirls. The trick here is to swirl less — just one clean drag through the center. You get these bold graphic lines instead of busy patterns. Try a matte top coat on this one. It hits differently. Total vacation energy.
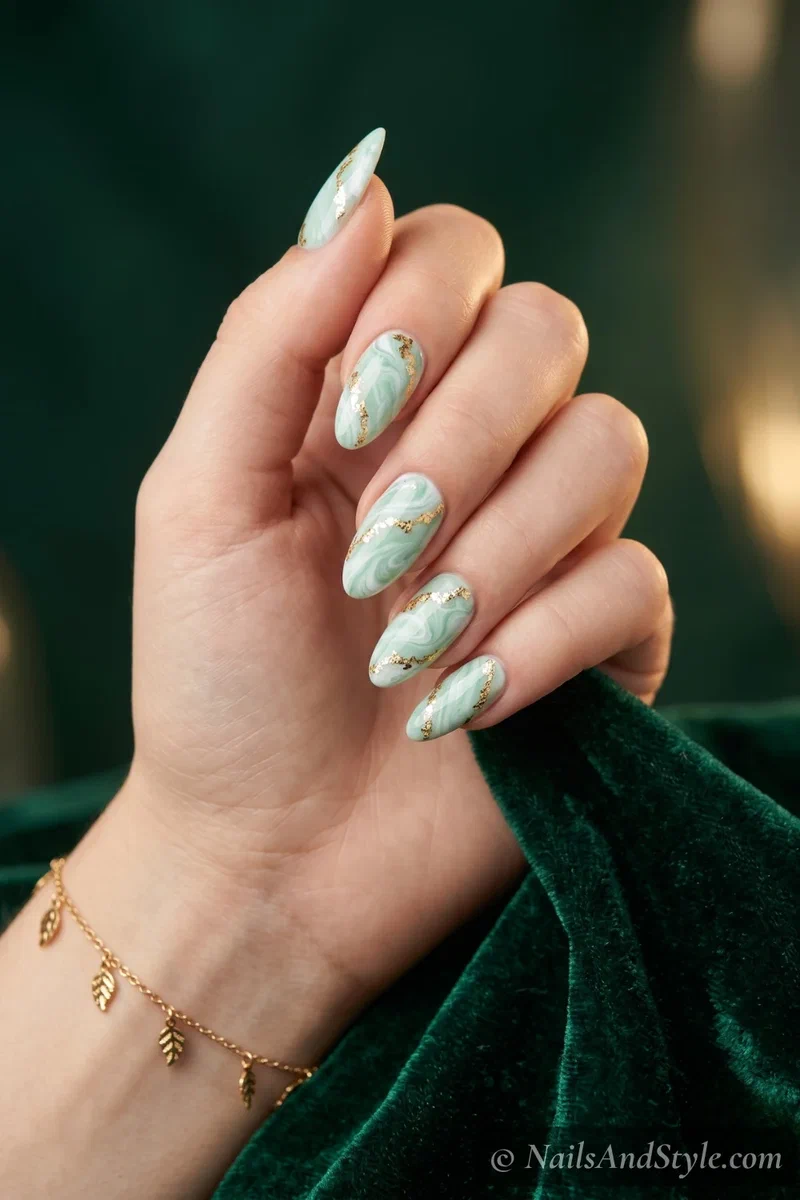
5. Mint and Gold Marble#
Drop mint green and white, marble as usual, then once it’s dry — add tiny gold foil flakes or a thin line of gold polish along the swirl lines. It gives the whole thing a luxury feel. Like those fancy marble countertops but on your nails. (Yes, I thought that too.) Glossy top coat is non-negotiable here.
Water Marble on Short Nails#
If you’ve been thinking this probably only looks good on long nails — nope. Water marble actually looks amazing on short nails because the pattern wraps around the smaller surface in a way that feels almost more intentional.
A few things that help:
- Stick to two colors max — keeps the pattern clean on a smaller canvas
- Bigger, bolder swirls work better than tiny ones on short lengths
- Round and squoval shapes show the pattern off best
- Light base colors make the marble pop more on shorter nails
- One or two accent nails mixed with solid colors is a great low-commitment option
Tips to Make Your Water Marble Nails Last#
- Apply thin layers of top coat — thick top coat over marble tends to smear
- Seal the free edge of each nail when applying top coat
- Stay away from water for at least an hour after finishing
- Wear gloves when washing dishes or cleaning (the pattern sits on top and chips faster than regular polish)
- Reapply top coat every two or three days
- Use cuticle oil daily — keeps everything looking fresh and hydrated
- If you want even more durability tips, my how to do ombre nails at home post has a longevity section that applies to basically any polish technique
Quick FAQ#
Is water marbling hard for beginners?#
It takes a couple of tries to get the hang of it, but it’s honestly not as tricky as it looks. The biggest learning curve is getting your polish-to-water ratio right. Once that clicks, the rest is pretty intuitive.
What kind of nail polish works best for water marbling?#
Regular cream polishes work best — the thinner the formula, the easier it spreads on the water surface. Thick, glittery, or quick-dry polishes don’t spread well and usually sink. Stick with basic creme finishes.
Can I do water marble nails on natural nails?#
Absolutely. No extensions or gel needed. Just your natural nails, some polish, and a cup of room temperature water. Works on any nail length or shape.
Final Thoughts#
Learning how to do water marble nails at home is one of those nail art skills that feels really satisfying once it clicks. The first attempt might be chaotic — that’s normal. By the second or third try, you’ll be creating swirls that look like they came from a salon.
Save the designs you love, try different color combos, and don’t stress about making every nail identical. The beauty of marble is that it’s supposed to be a little unpredictable. Grab a cup of water, pick two colors that make you happy, and see what happens.