So here’s the thing. You don’t need a fancy dotting tool set or a drawer full of thin brushes to do cute nail art at home. A toothpick — yeah, the kind sitting in your kitchen right now — is honestly one of the best starter tools out there. Learning how to do nail art with a toothpick for beginners is probably the lowest-barrier entry into nail art that exists.
And these designs? They actually look good. We’re talking dots, flowers, marble swirls, little leopard spots — all with something you grabbed from next to the stove. This post breaks down 15 easy designs you can try at home on short and medium nails, no art degree required.
Why Toothpick Nail Art Is a Summer Must-Try#
There’s something about summer that makes you want to experiment. Bright colors, fun patterns, all the nail inspo flooding your feed at 2am. The beauty of toothpick nail art is that you can try a new look every week without spending a dime on tools you’ll use once and forget about.
Plus, a toothpick pairs perfectly with other beginner-friendly techniques. If you’re into the swirled effect, my guide on how to do water marble nails at home uses the same kind of everyday tools.
A few quick tips before you grab that toothpick:
- Pick high-contrast colors. White dots on a dark base or bright shades on nude — the design pops more when there’s contrast
- Keep your nails short to medium. Toothpick designs are small and detailed, so they look best when they’re not competing with super long tips
- Let your base dry completely. If it’s even a little tacky, your toothpick will drag through the polish instead of sitting on top
- Base coat and top coat are non-negotiable. They protect the design and make everything last way longer
15 Easy Toothpick Nail Art Designs for Beginners#
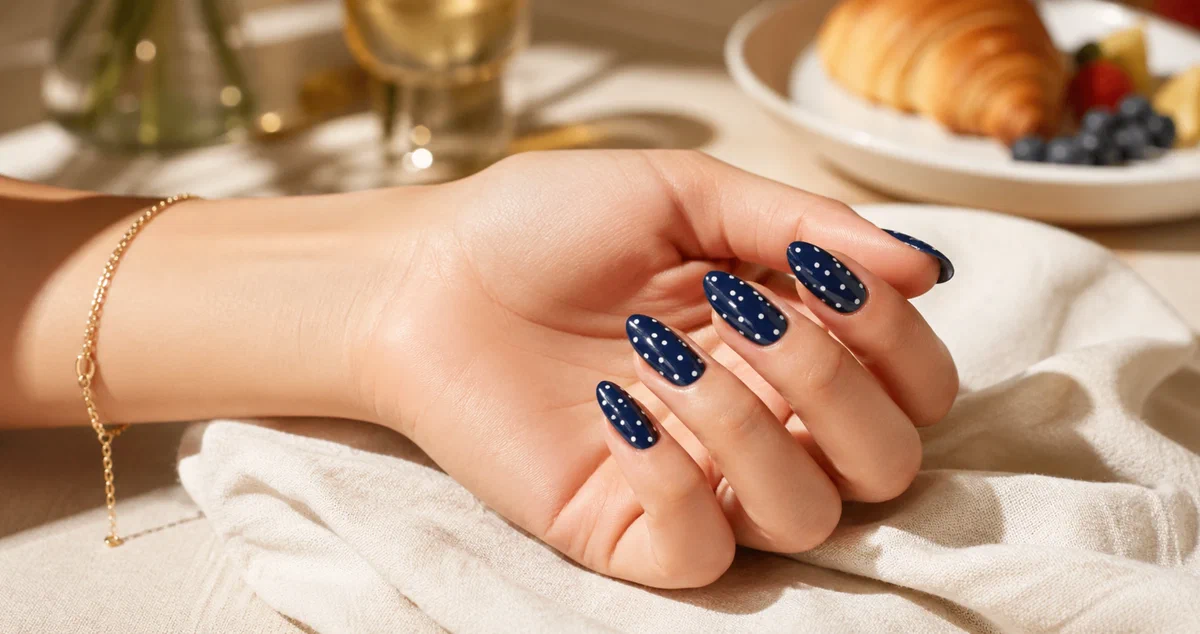
1. Classic Polka Dots#
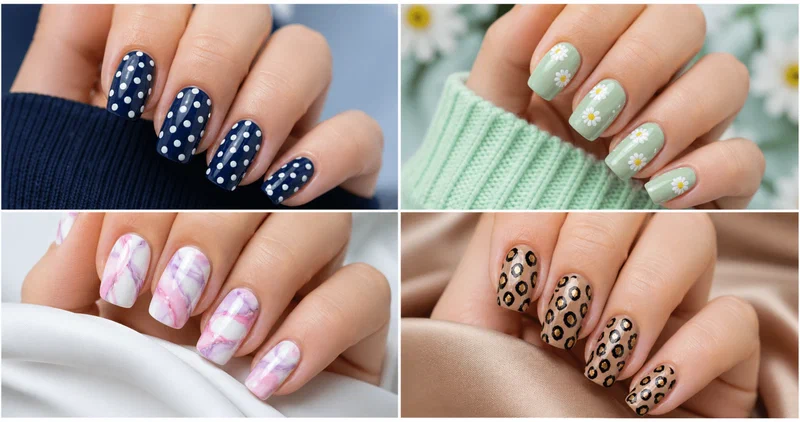
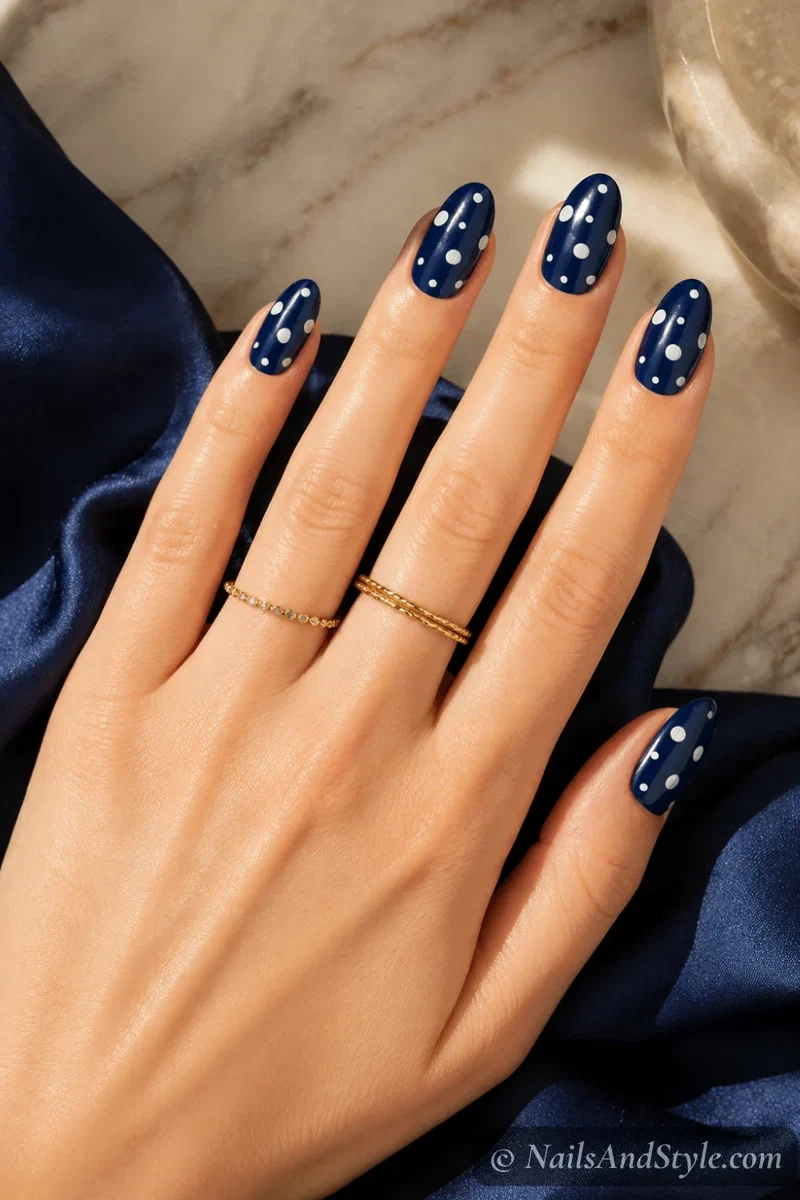
The simplest one on this list and probably the most satisfying. Dip the blunt end of your toothpick into polish and press it gently onto your nail. That’s it. You get perfectly round little dots every time. Go with white dots on a navy base for something timeless, or do multicolor dots on nude for a playful summer vibe. Glossy top coat makes these look super polished (pun intended).
2. Tiny Daisies#
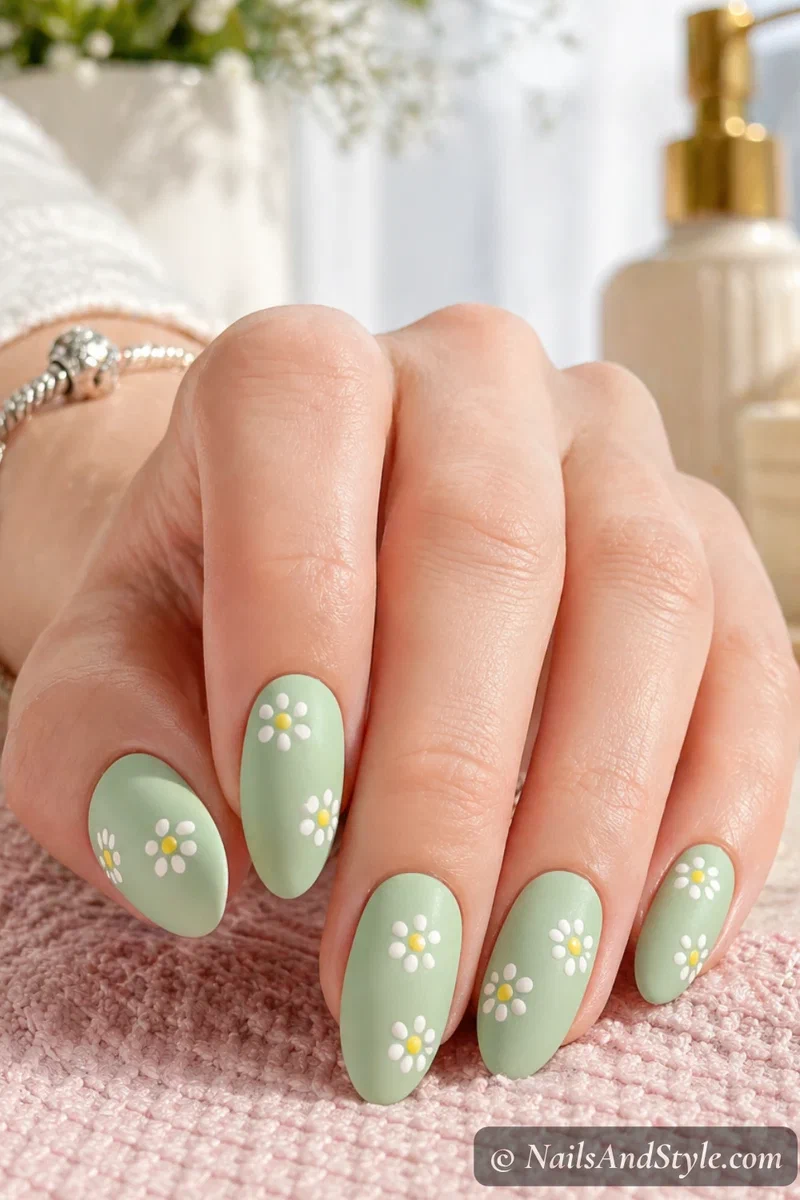
OK hear me out — these look way harder than they are. Start with five dots in a circle using the blunt end of your toothpick (white or yellow, your call). Then add a contrasting dot in the center. That’s the whole flower. Place two or three on an accent nail, or scatter them across every finger for a full garden vibe. Matte top coat gives these a really soft, dreamy finish.
3. Marble Swirl#
This one’s messy in the best way. Apply two or three drops of different polish colors onto your nail while the base is still wet, then drag the pointed end of your toothpick through them in swirling motions. You’ll get this gorgeous marbled effect that looks completely different every time. No two nails will match and that’s kind of the whole point.
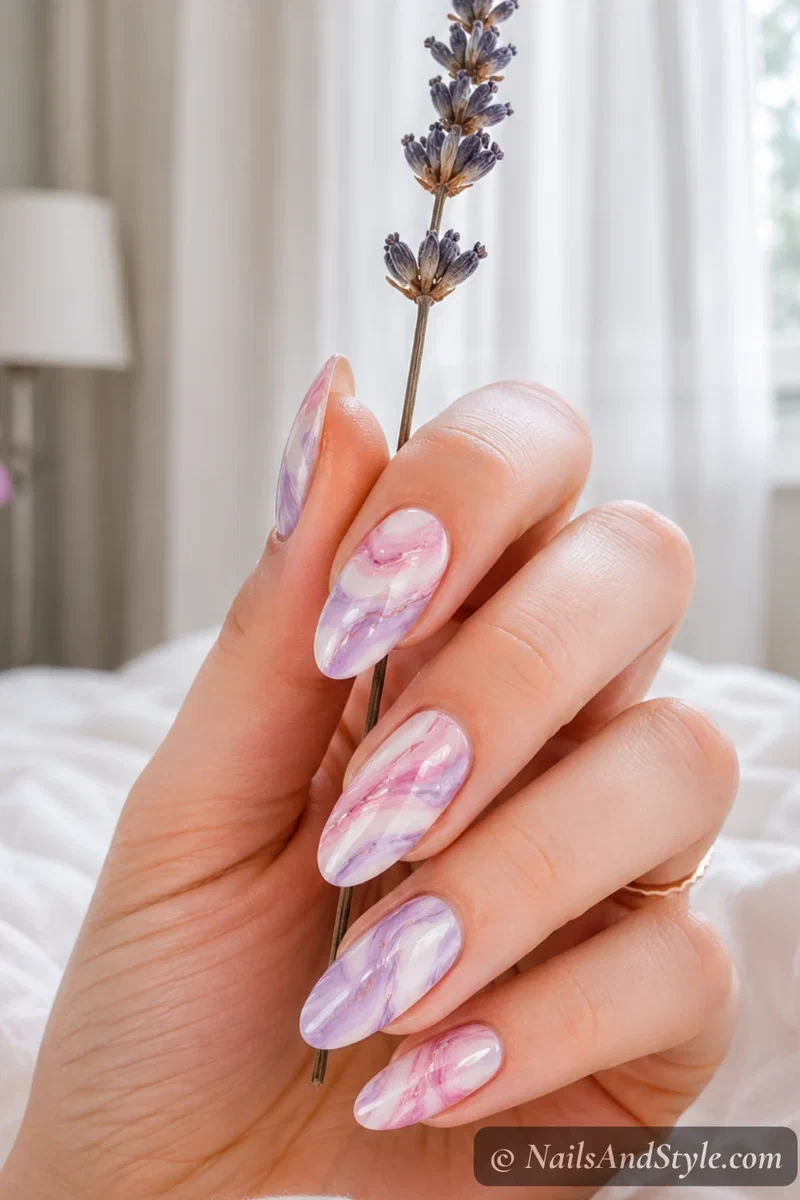
Love the marbled look? My full water marble nails tutorial takes this swirl technique even further with a water-dipping method.
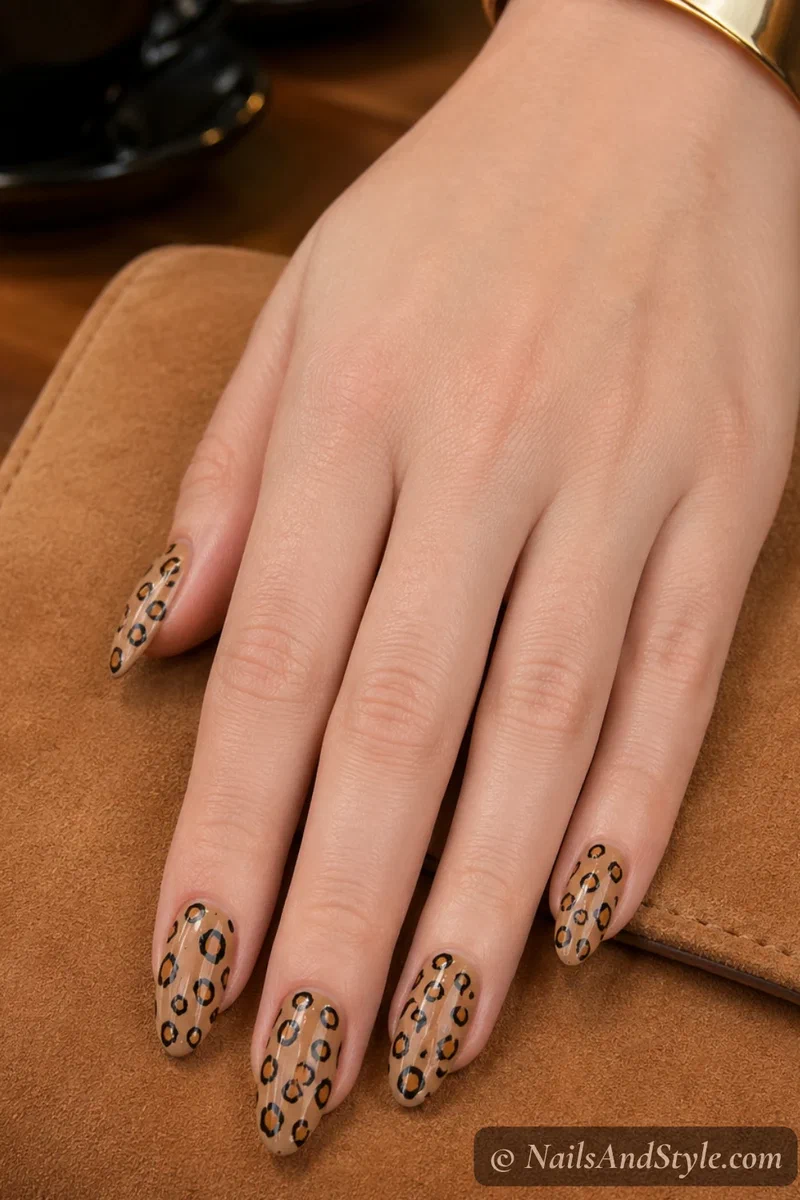
4. Leopard Print#
For a design that looks like it took an hour but really took five minutes — leopard print. Paint random dots in a tan or gold shade using the blunt end. Let those dry for a minute. Then use the pointed end dipped in black to draw little broken C-shapes around each dot. Imperfection is literally the goal here. A glossy finish makes the whole thing look expensive.
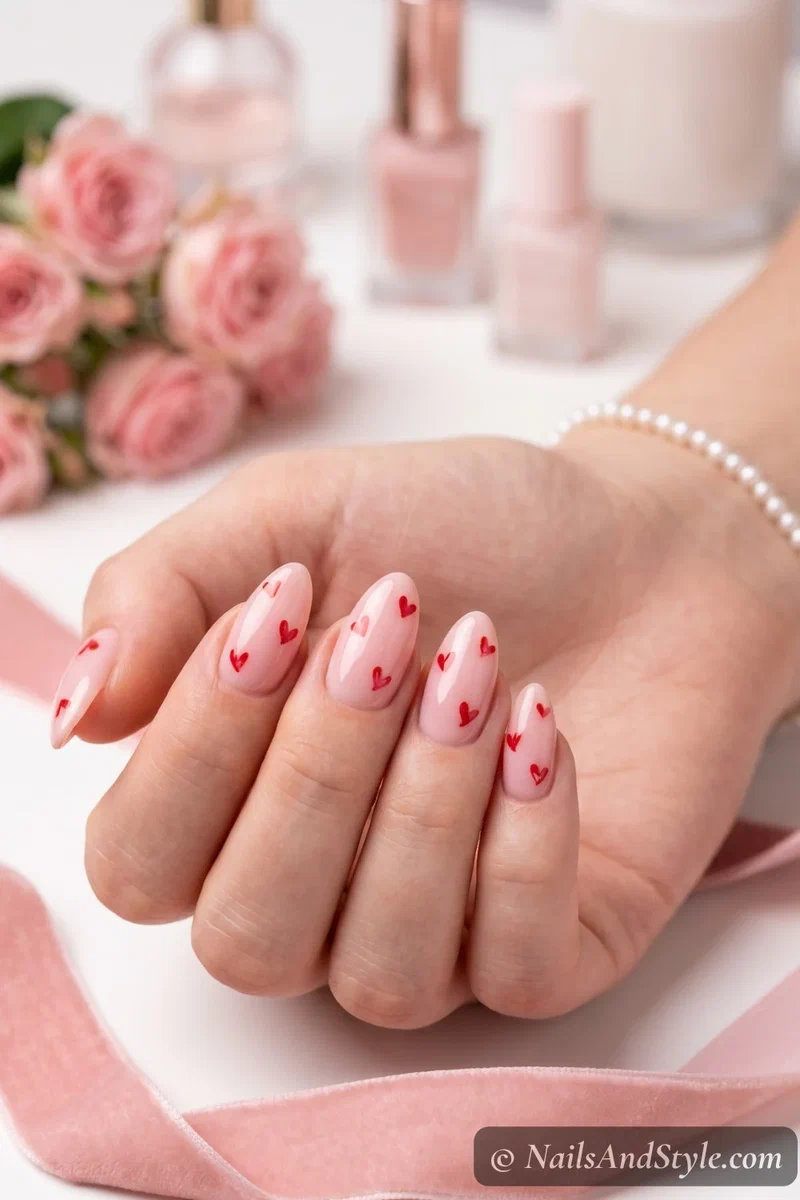
5. Heart Accents#
Use the pointed end to draw two tiny dots side by side, then drag each one downward toward the same point to form a heart shape. They come out small and a little uneven, which honestly makes them cuter. Red on nude is the obvious choice, but pink on white or lavender on lilac hits different. Pretty enough for a date night and casual enough for everyday.
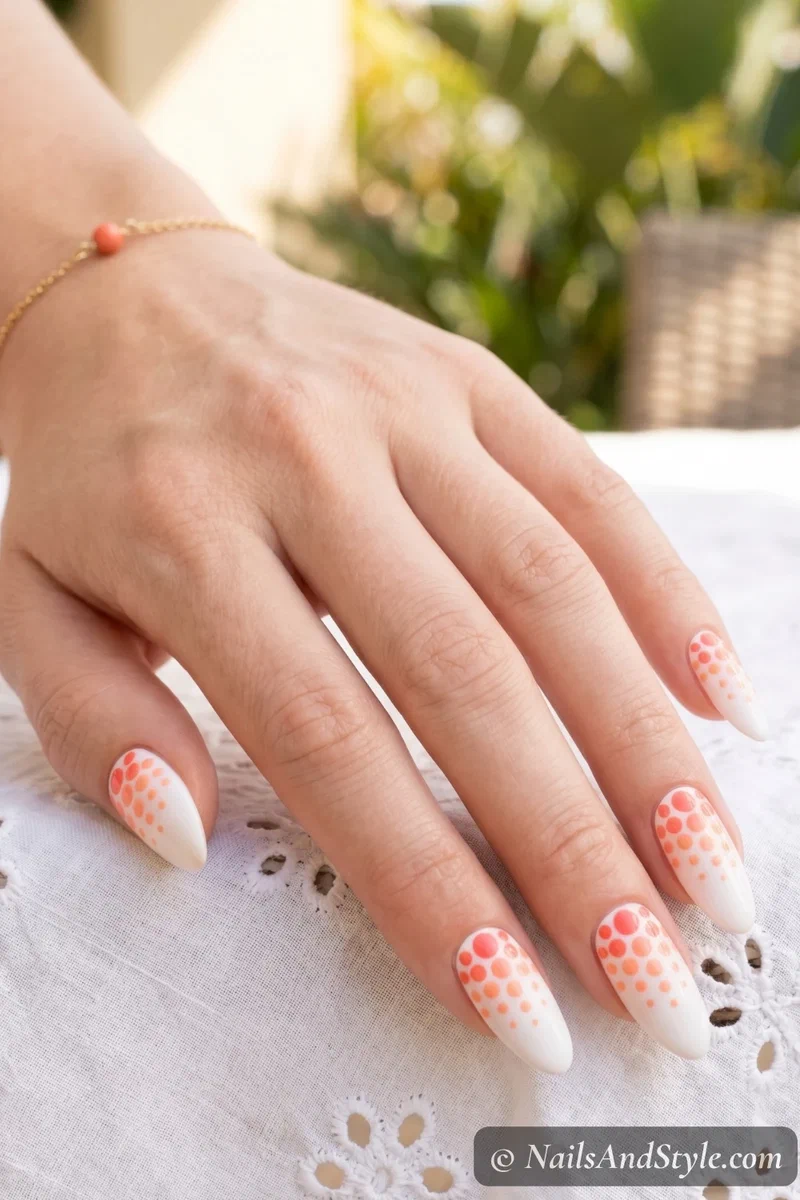
6. Ombre Dot Gradient#
Start with larger dots at the base of your nail and gradually make them smaller toward the tip — or flip it, your call. Use the blunt end for big dots and switch to the pointed end as they shrink. One color on a contrasting base works great, or try a gradient from dark to light using three shades from the same color family. Glossy top coat ties it all together.
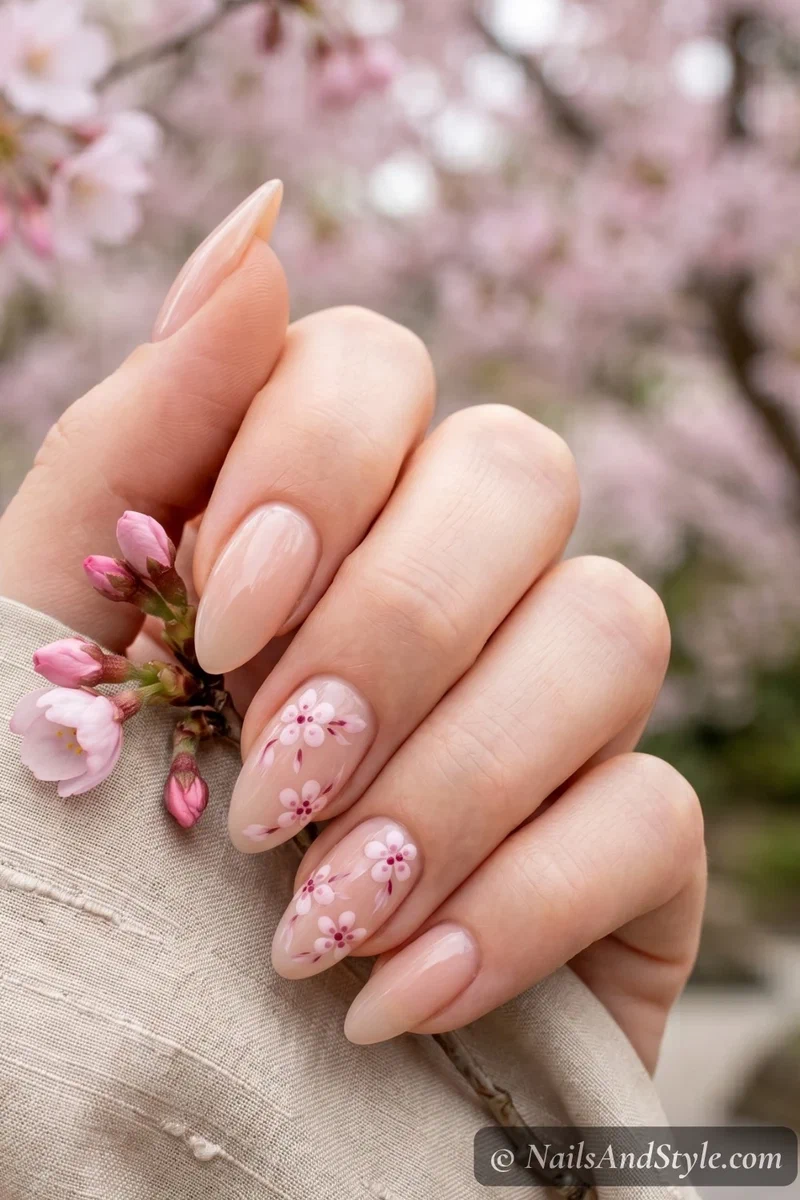
7. Cherry Blossoms#
These are giving soft girl spring-into-summer vibes and I’m here for it. Dot five pale pink petals in a loose cluster, then add a tiny brown or dark pink center dot. Use the pointed end to gently drag each petal outward just slightly for that wispy, natural look. Place a few clusters on one or two accent nails and leave the rest in a soft nude. Glossy finish makes the petals look almost watercolor-like.
8. Confetti Color Dots#
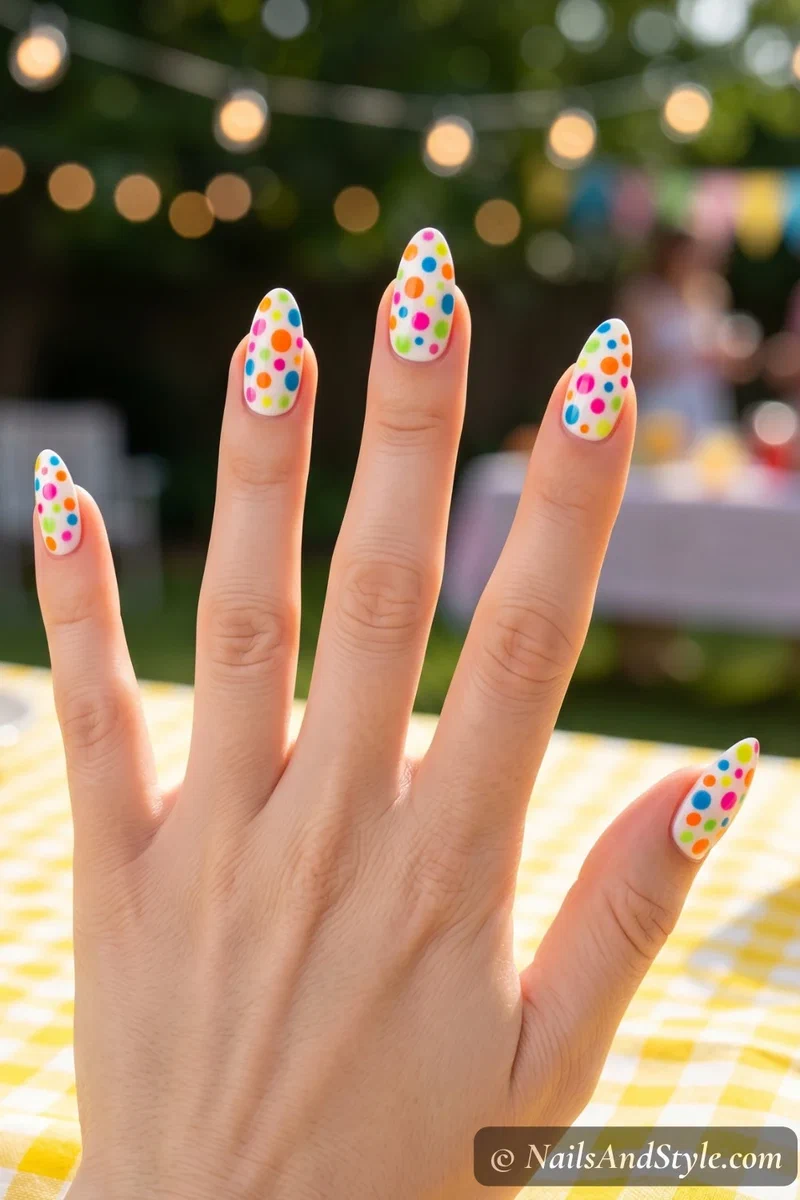
Think of this as polka dots’ cooler older sister. Instead of one color, use four or five bright shades and place random dots all over a white or nude base. The trick is spacing them unevenly — too uniform and it looks stiff. Let some dots overlap slightly. This is the kind of design that gets compliments from strangers. Jelly top coat adds a fun candy-like finish.
9. Butterfly Wings#
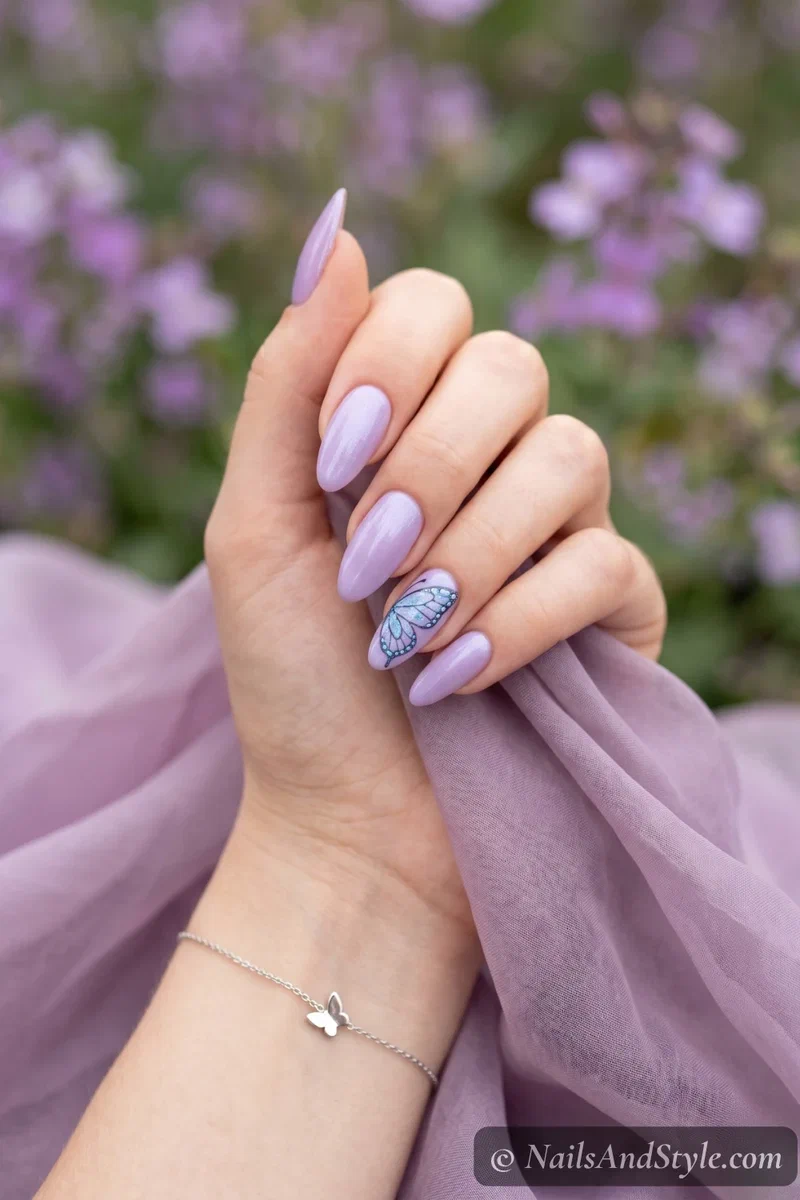
A little more involved but still totally doable. On an accent nail, use the pointed end to draw the outline of one butterfly wing from the cuticle area outward. Fill it in with dots in a contrasting color, then add a few tiny dots along the edge for detail. You only need to do one wing per nail — it looks more artistic that way. Shimmer polish for the wing color takes this one up a notch.
If you’re into the floral vibe, my spring flower nail ideas post has a ton more bloom-inspired designs to try.
10. Sunflower Nails#
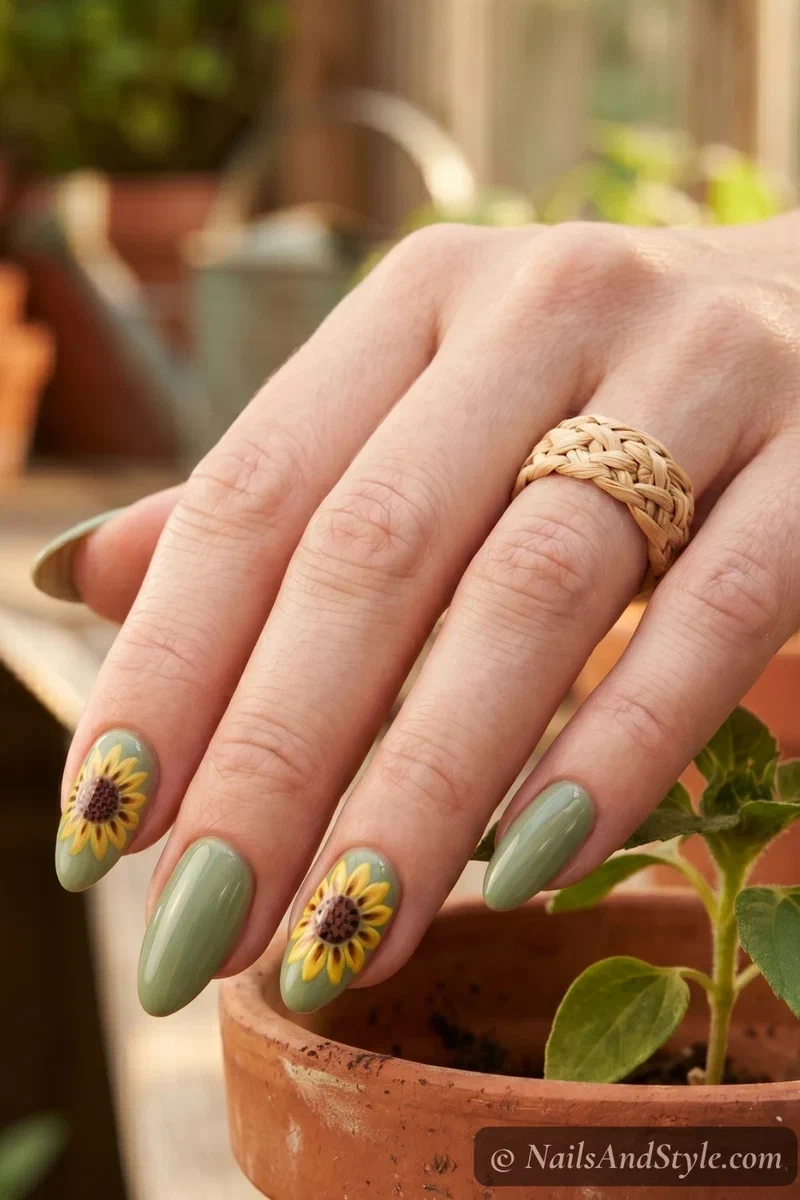
Yellow petals radiating from a brown center dot. Draw the center first using the blunt end, then use the pointed end to pull out petal shapes from the edges. It’s basically the daisy technique but bigger and bolder. Two sunflowers on ring finger nails with a warm sage green base on the others? Chef’s kiss for late summer.
11. Abstract Lines#
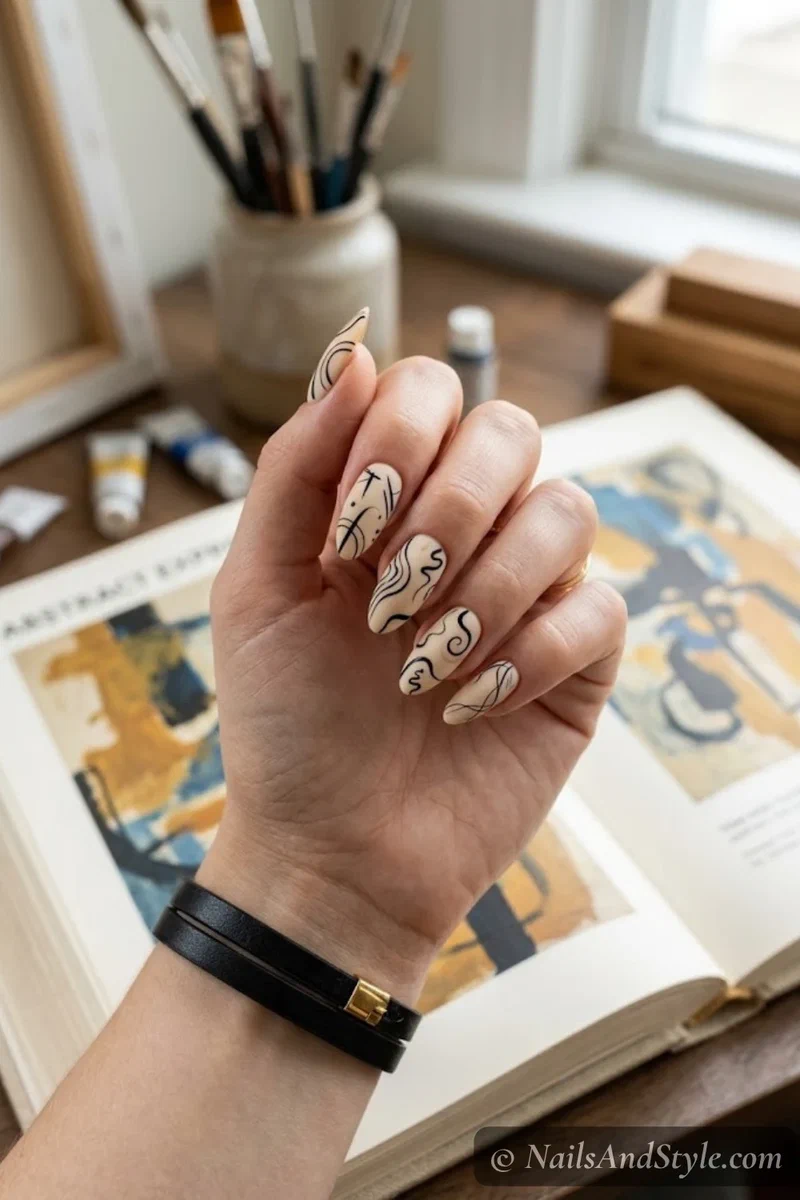
For when you want something artsy but can’t be bothered to plan it out. Dip the pointed end of your toothpick in black (or any dark shade) and just… draw. Thin lines, curves, squiggles, whatever feels right. There are no rules with abstract nail art and that’s why it’s so beginner-friendly. Matte top coat makes this look gallery-worthy.
12. Galaxy Dots#
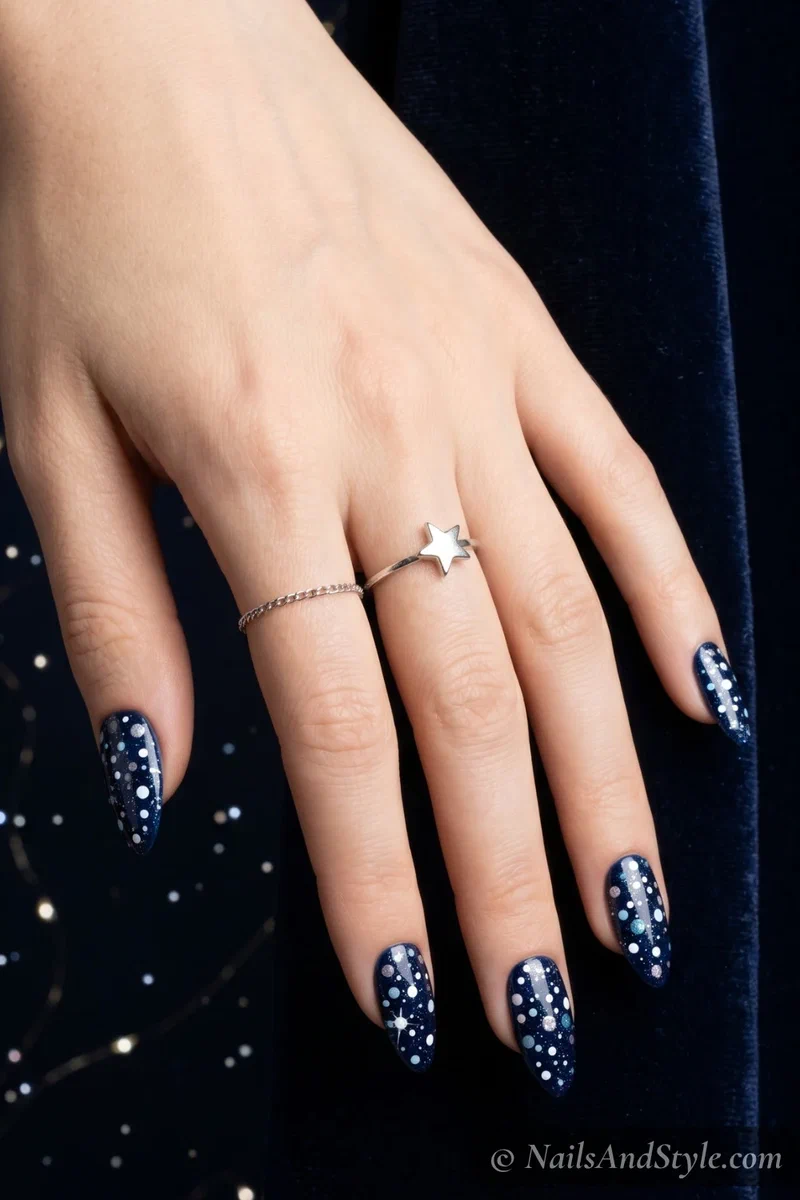
Dark base (black, deep navy, or dark purple), then layer on dots in different sizes using silver, white, light blue, and a tiny bit of pink. Build it up gradually — bigger dots first, then scatter tiny ones with the pointed end. It ends up looking like a little constellation on each nail. Glitter top coat instead of regular clear makes the whole thing sparkle.
13. Rose Swirls#
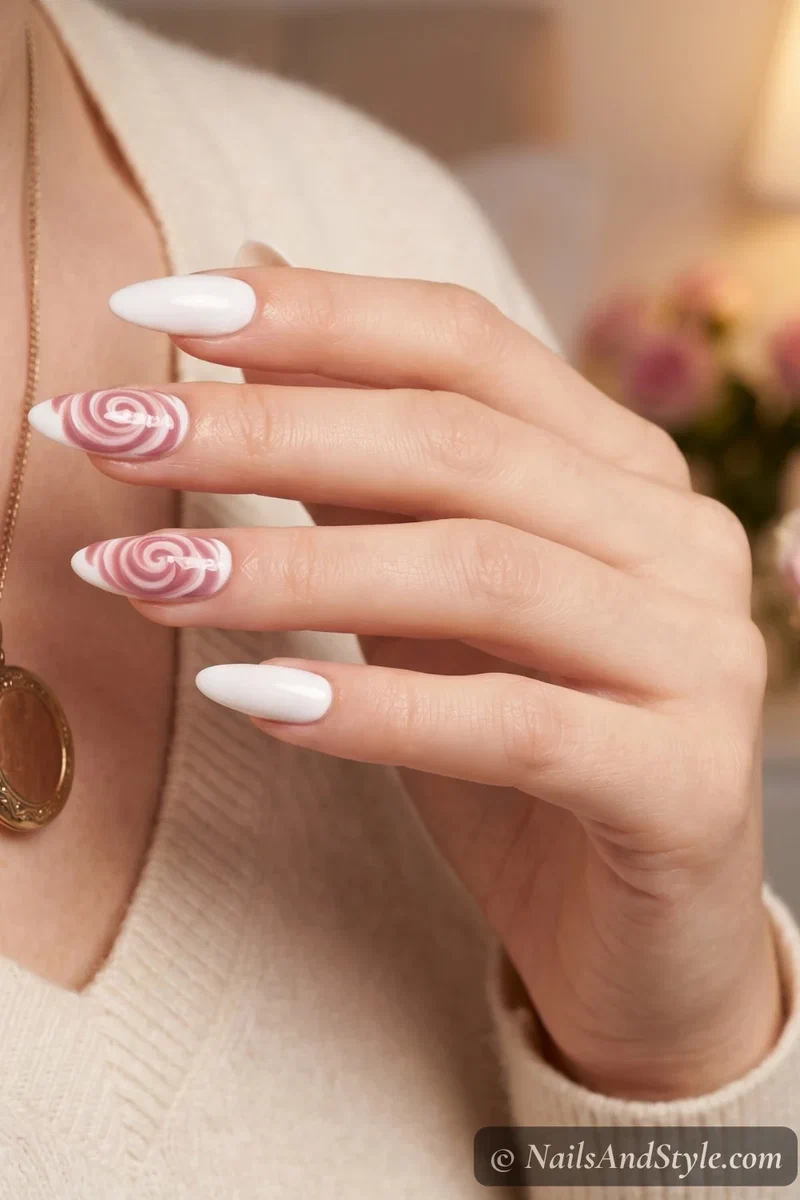
Start with a dot of red or pink in the center of your nail. While it’s still wet, use the pointed end to spiral outward from the center in a tight swirl. It creates this rose-like shape that’s honestly gorgeous. The key is working fast before the polish dries. One rose per accent nail over a nude or white base keeps it graceful without going overboard.
14. Geometric Dot Grid#
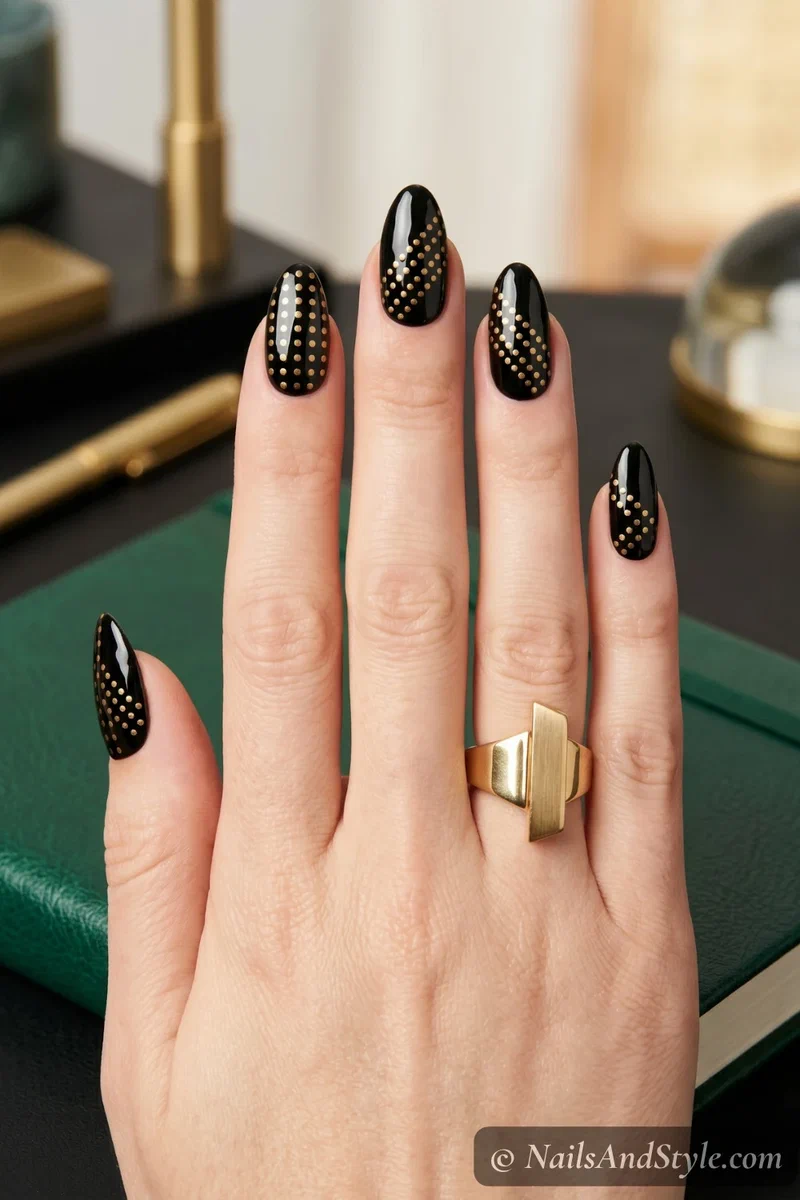
This is for the type-A people who like their nail art organized. Place dots in a straight line or grid pattern using the blunt end. You can go diagonal, horizontal, or create a triangle shape building from one dot to a row of five. Gold dots on a black base look incredible. So do white dots on forest green. Clean and satisfying.
15. French Tip Dots#
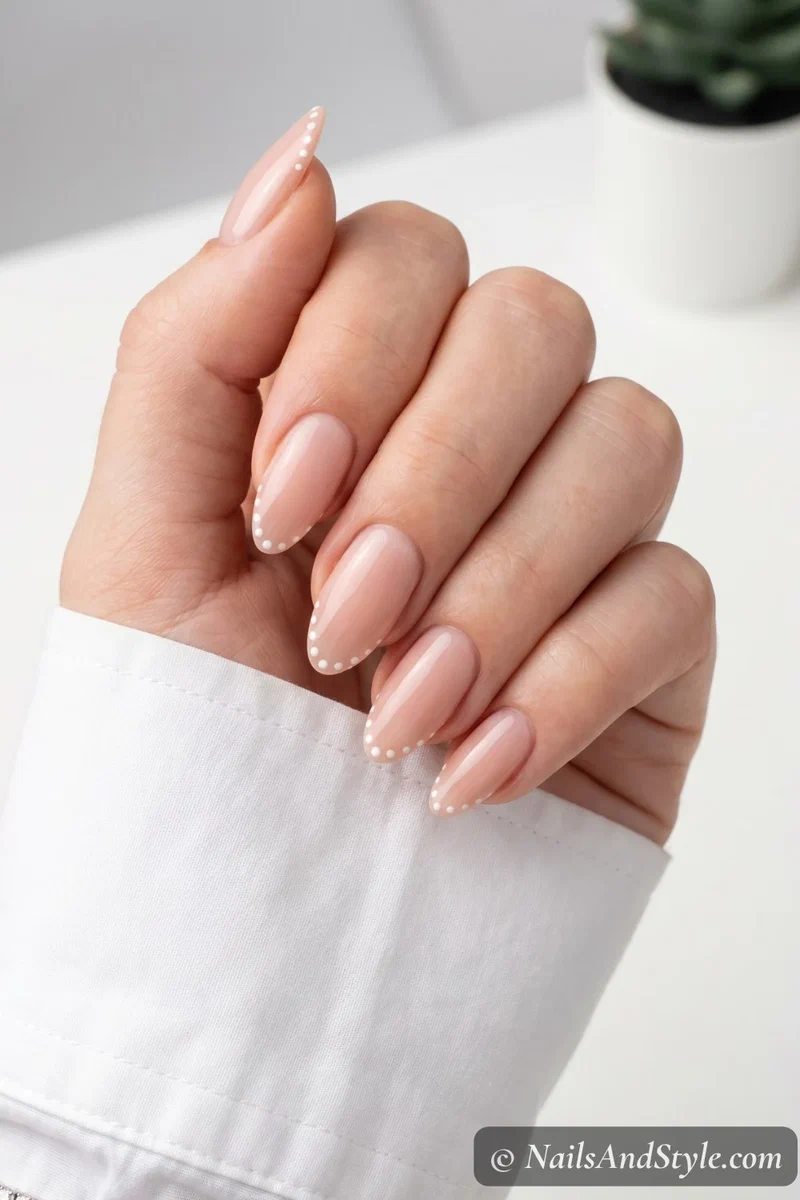
A modern spin on the classic French tip. Line the edge of your nail with tiny dots instead of painting a solid stripe. Use the pointed end for small, evenly-spaced dots along the tip. White on nude is forever, but try pastel shades or metallics for a summer twist. Subtle, clean, and honestly one of the prettiest beginner designs on this list.
Toothpick Nail Art on Short Nails#
Can we talk about how good these designs look on short nails? Honestly, some of them look even better short. Small details like polka dots, tiny daisies, and French tip dots don’t get lost on a shorter nail — they fill the space just right.
Short nails are also way easier to work with when you’re using a toothpick. Less surface area to cover, fewer chances to smudge. Win-win.
A few ideas that really shine on short nails:
- Single accent dot clusters — three or four dots on one nail looks intentional and minimal
- French tip dots — the dotted tip actually makes short nails look a tiny bit longer
- Mini daisies — one small flower per nail is all you need
- Leopard print on one or two nails — keeps it from looking too busy on shorter lengths
- Abstract single lines — one swooping line across a short nail is clean and artistic
For even more short-nail inspiration, my cute short summer nails round-up is packed with ideas that don’t need any length at all.
What You’ll Need#
- A toothpick (or orange stick) — your one and only art tool here
- Base coat — a smooth base for clean designs
- Glossy top coat — seals everything in
- 2–3 nail polishes — creamy formulas drag best
Simple Step-by-Step: How to Do Toothpick Nail Art at Home#
- Clean and prep your nails. Remove old polish, trim, and file into your preferred shape. Push back cuticles gently with an orange stick.
- Buff the surface lightly. Just enough to smooth out ridges — don’t overdo it.
- Apply a base coat. Let it dry completely. This protects your nails and helps the polish stick.
- Paint your base color. Two thin coats of whatever shade you’re using as background. Let each coat dry fully before moving on.
- Grab your toothpick and dip. Use the blunt end for dots, the pointed end for lines and fine details. Dip lightly — too much polish means blobby dots.
- Create your design. Work one nail at a time so you’re not rushing before polish dries.
- Clean up the edges. Dip a small brush in nail polish remover and tidy up around the cuticles and sidewalls.
- Seal with top coat. One generous layer over everything. Let it dry for at least five minutes before touching anything.
Tips to Make Your Toothpick Nail Art Last Longer#
- Apply polish in thin layers — thick coats peel faster
- Seal the free edge of your nail with both base coat and top coat
- Avoid hot water for at least an hour after painting
- Wear gloves when cleaning or doing dishes
- Reapply a thin layer of top coat every two to three days
- Use cuticle oil daily to keep everything hydrated
- Stop using your nails to open cans and peel stickers (you know who you are)
Quick FAQ#
Is toothpick nail art hard for beginners?#
Not at all. It’s actually one of the easiest ways to get into nail art because you already have the tool at home. The pointed tip gives you a surprising amount of control for dots and thin lines, and there’s pretty much zero learning curve for basic dot designs.
What colors work best for toothpick nail designs?#
High-contrast combos show up the best. Think white on dark shades, bright colors on nude, or metallics on black. Since toothpick designs tend to be small and detailed, you want that contrast so the art actually stands out instead of blending into the base.
Can I do toothpick nail art on natural nails?#
Absolutely. It works on natural nails, gel, acrylics, and press-ons. The only thing that matters is making sure your base layer is completely dry before you start adding designs on top. Wet base plus toothpick equals a smeared mess — learned that one the hard way.
Final Thoughts#
Figuring out how to do nail art with a toothpick for beginners honestly opens up more possibilities than you’d expect from such a simple tool. Dots turn into flowers, swirls turn into marble, and random lines turn into something that looks genuinely artistic.
Save the ones that caught your eye and try them this weekend. Start with dots if you’re nervous, work up to swirls when you’re feeling brave, and don’t stress about making every nail identical. The slightly imperfect ones always end up being my favorites anyway.