Here’s a little secret the internet already cracked: the manicures that look the most expensive are usually the easiest ones in the room. That salon set you screenshot for later? Half the time it’s one polish and clean edges. No art degree required.
So this post pulls together 10 nail designs that look expensive but are secretly simple — the kind that make people assume you’ve got a standing appointment somewhere fancy. Every one works on short and medium nails, and most use stuff you probably already own.
Think quiet-luxury energy for summer weddings, brunches, and that one nice dinner on vacation. Let’s get into it.
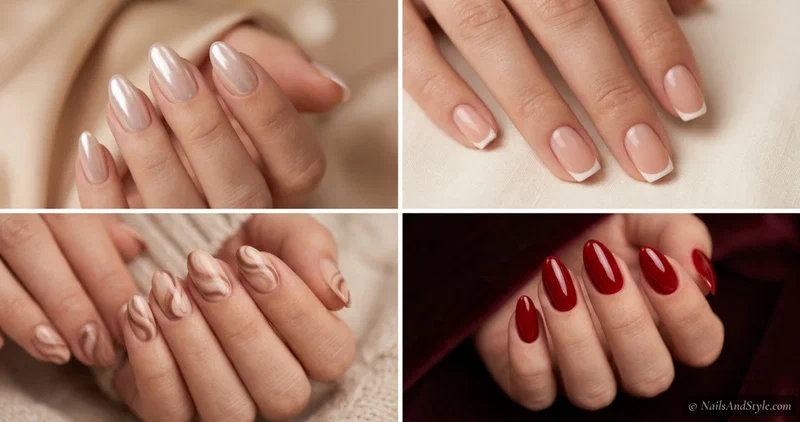
Why These Looks Punch Above Their Price#
Expensive-looking nails almost always come down to three things: clean cuticles, a really glossy finish, and colors that don’t try too hard. That’s basically it. The art, when there is any, is minimal.
And that’s good news for the rest of us. Because a neat, glassy nude reads pricier than a busy design that’s slightly messy — every single time. These looks lean into that.
A Few Things to Keep in Mind Before You Start#
- Color: soft neutrals, milky whites, and deep jewel tones almost always look more expensive than bright, loud shades.
- Skin tone: warm undertones glow with caramel, gold, and true red; cool undertones love pearl, mauve, and berry.
- Shape and length: keep all ten nails the same length and shape — consistency is the biggest “expensive” giveaway there is.
- Base and top coat, always. A glossy top coat is what turns a flat color into something that looks like glass. Never skip it.
Quick Pick: Which Look Should You Try?#
| If you’re looking for… | Try these designs |
|---|---|
| Total beginner (no art) | Milky White, Glossy Classic Red |
| Short nails | Micro French Tips, Nude with Gold Foil |
| Maximum wow-factor | Glazed Chrome, Cat-Eye Magnetic |
| Understated everyday chic | Latte Swirls, Minimalist Line Art |
10 Nail Designs That Look Expensive But Are Easy#
I’ve mixed up the finishes so there’s something here whether you want glossy, pearly, matte, or jewel-toned. Pick your mood.
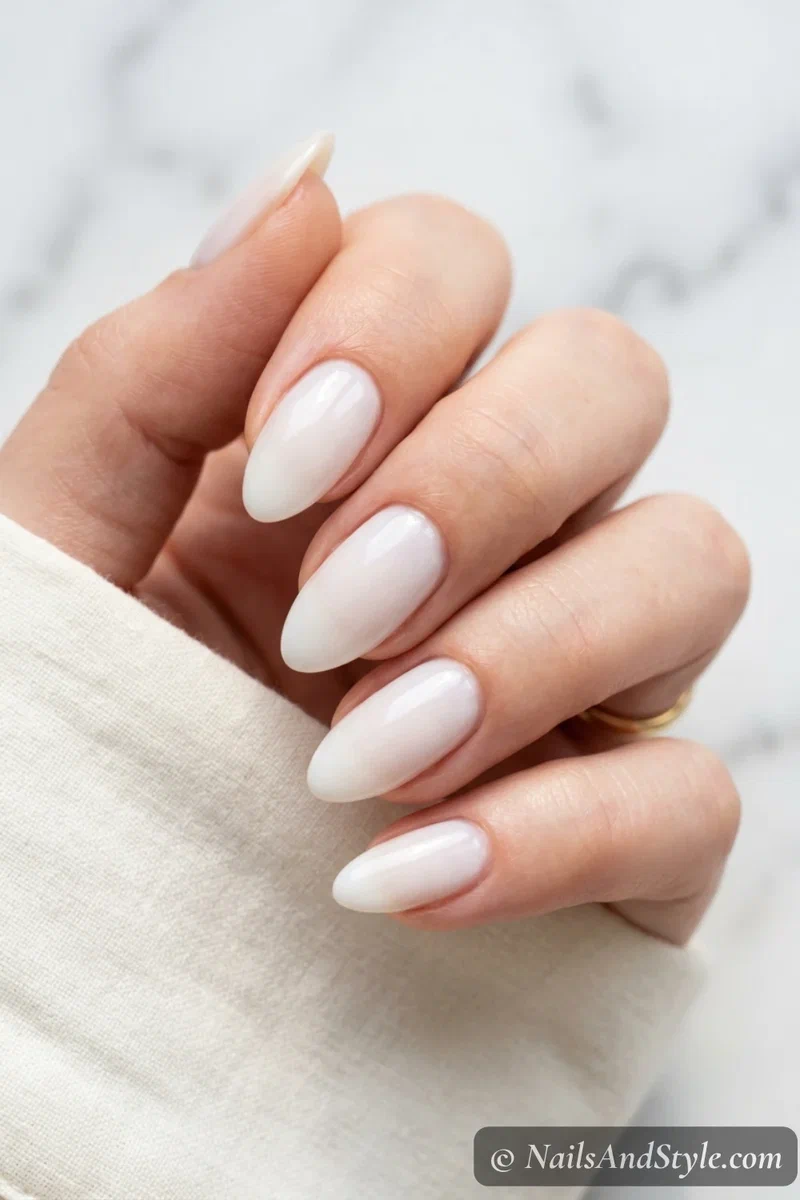
1. Milky White Nails#
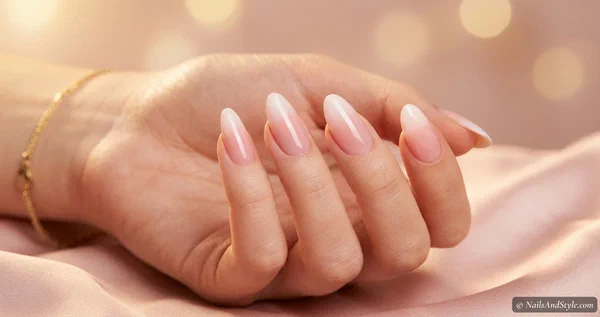
Quiet luxury in a bottle. This soft, cloudy white is the manicure version of a crisp linen shirt — plain on paper, expensive in person.
Build it with two or three thin coats of a sheer milky white, letting each layer stay a little translucent instead of going full chalky. Glossy top coat, done. It looks best on oval or almond shapes where that soft wash really shows.
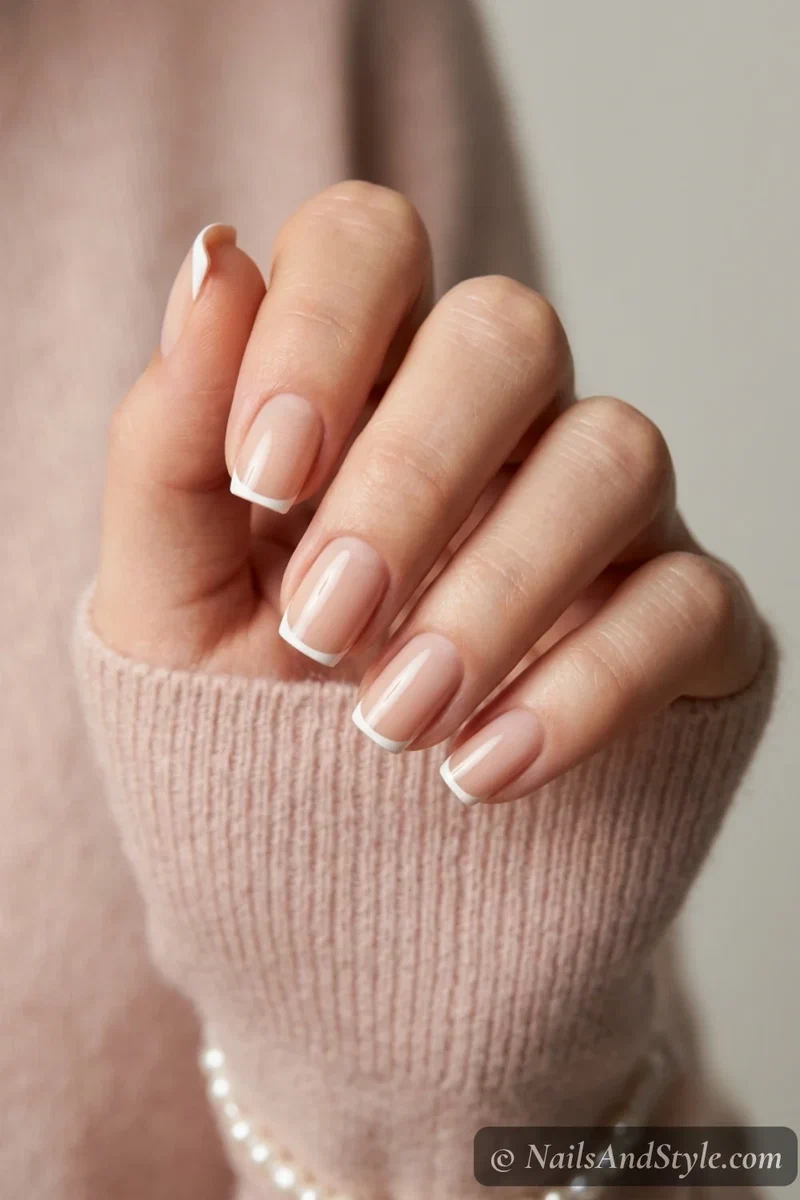
2. Micro French Tips#
The trick to a French that looks designer? Make the line ridiculously thin. A skinny, barely-there tip reads so much more expensive than a thick white smile.
Start with a nude or milky base, then paint the thinnest line you can manage across each tip — a striping brush or French guides will save your sanity here. Keep it under a couple of millimeters. If your hands shake (mine do), guides really are worth it. My French tip tutorial walks through the line technique.
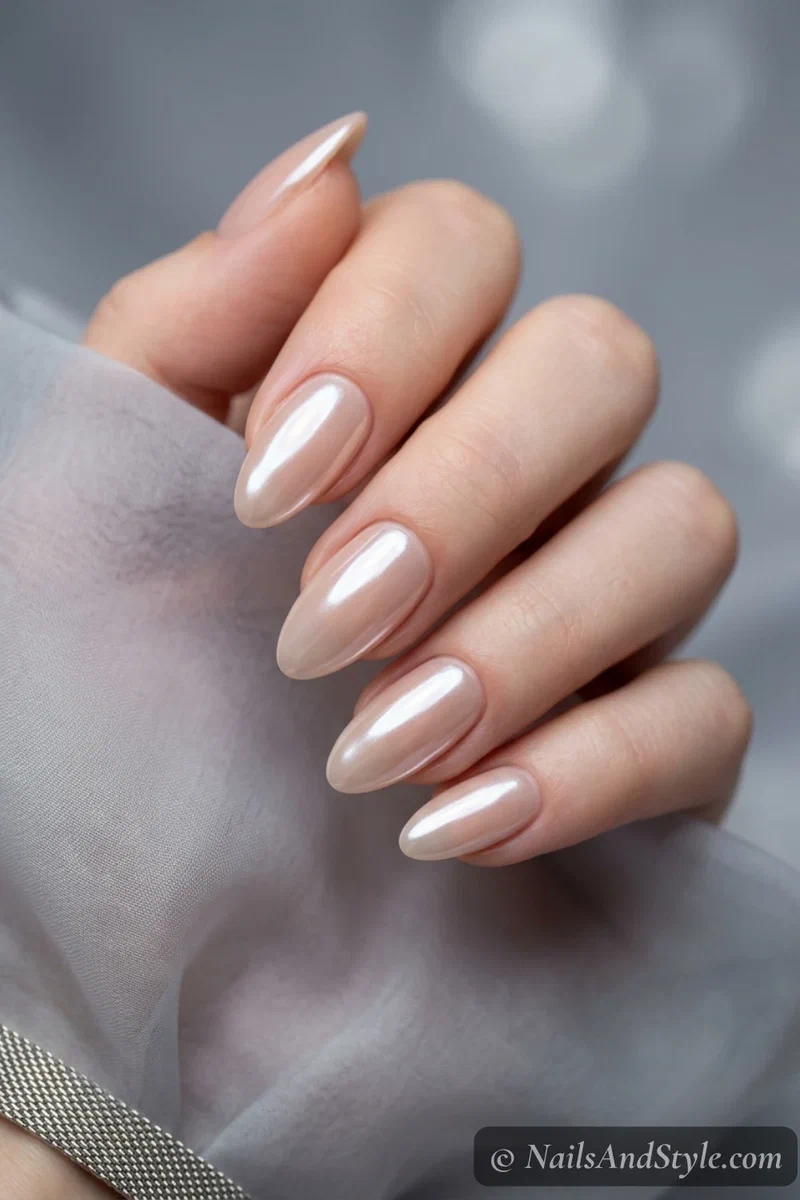
3. Glazed Chrome Nails#
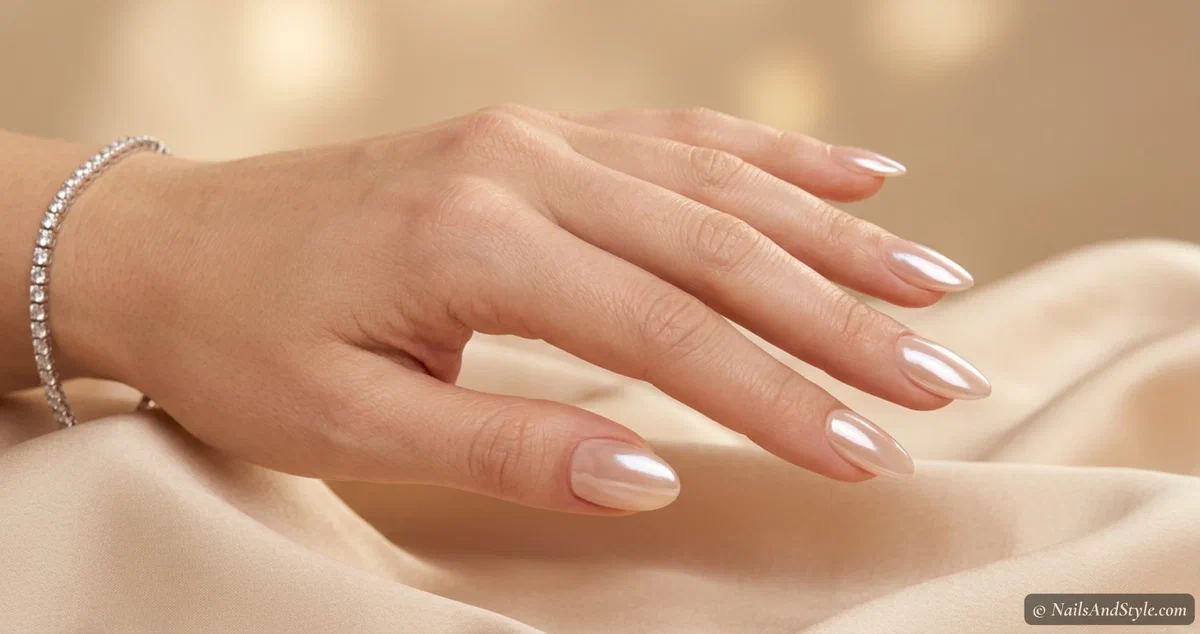
You’ve seen these everywhere — that pearly, wet, glazed-donut shine. It looks like liquid mother-of-pearl and costs about two dollars in chrome powder.
Paint a sheer pink or nude base, then buff a pearl chrome powder over the top with a soft applicator and seal it in. No lamp at home? A pearl or “aurora” top coat gets you surprisingly close. The full method lives in my chrome powder guide.
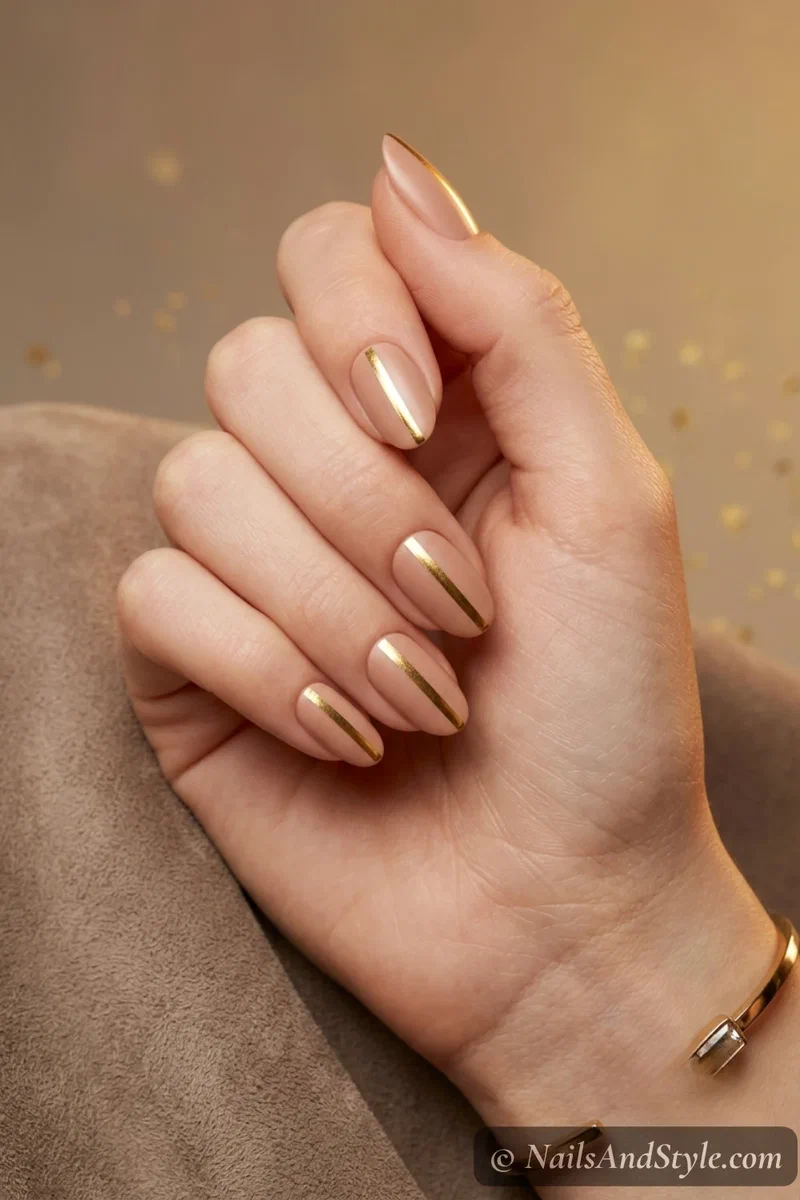
4. Nude with a Gold Foil Stripe#
One thin line of gold. That’s the whole design. And somehow it looks like tiny jewelry for your fingertips.
Lay down a warm nude base, then run a single strip of gold foil (or draw a line with a gold striping polish) down the center or along one edge of each nail. Seal it really well so the foil doesn’t lift. Keep everything else bare and clean — the restraint is the point.
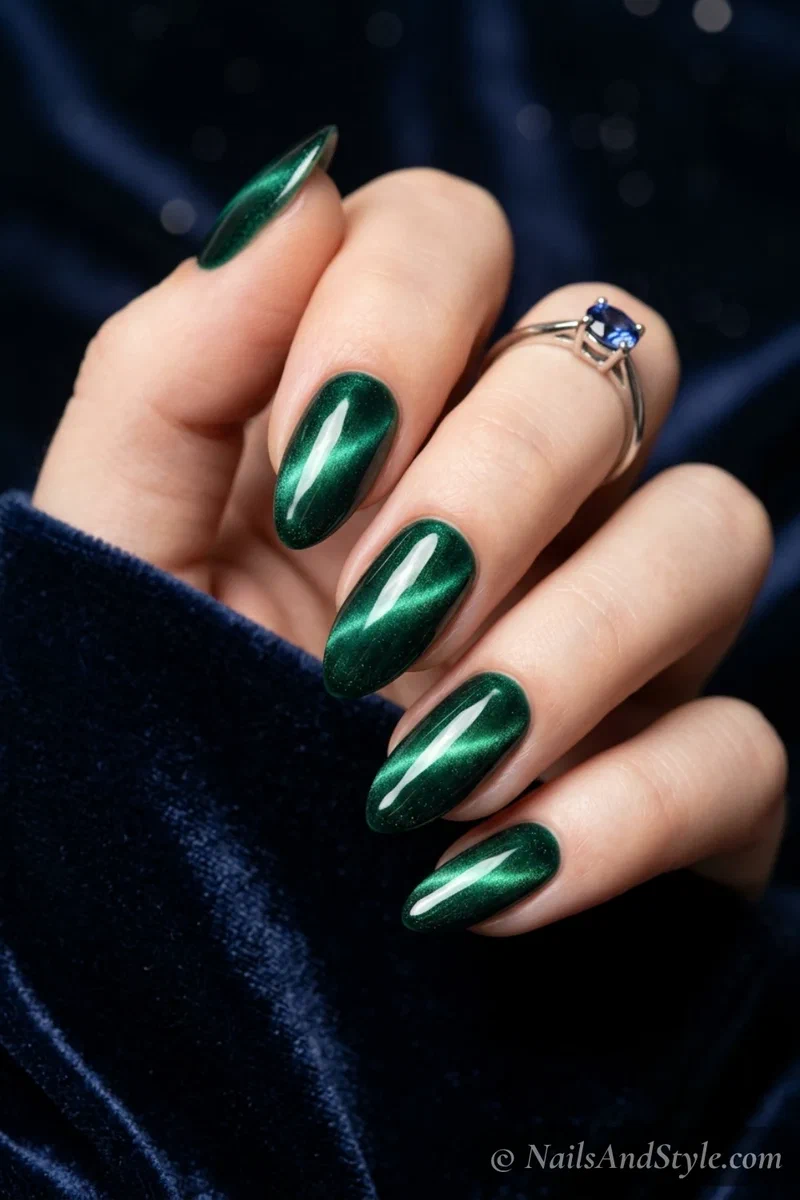
5. Cat-Eye Magnetic Nails#
These look like polished gemstones — that shifting band of light down the middle is pure velvet-jewelry-box energy.
Use a magnetic gel or polish in a deep jewel tone (emerald, sapphire, plum are gorgeous), then hover a magnet over each wet nail for a few seconds to pull the shimmer into a bright stripe. Cure or dry, top coat, done. Sounds high-tech; takes about ten seconds a nail. Here’s my full cat-eye nails how-to.
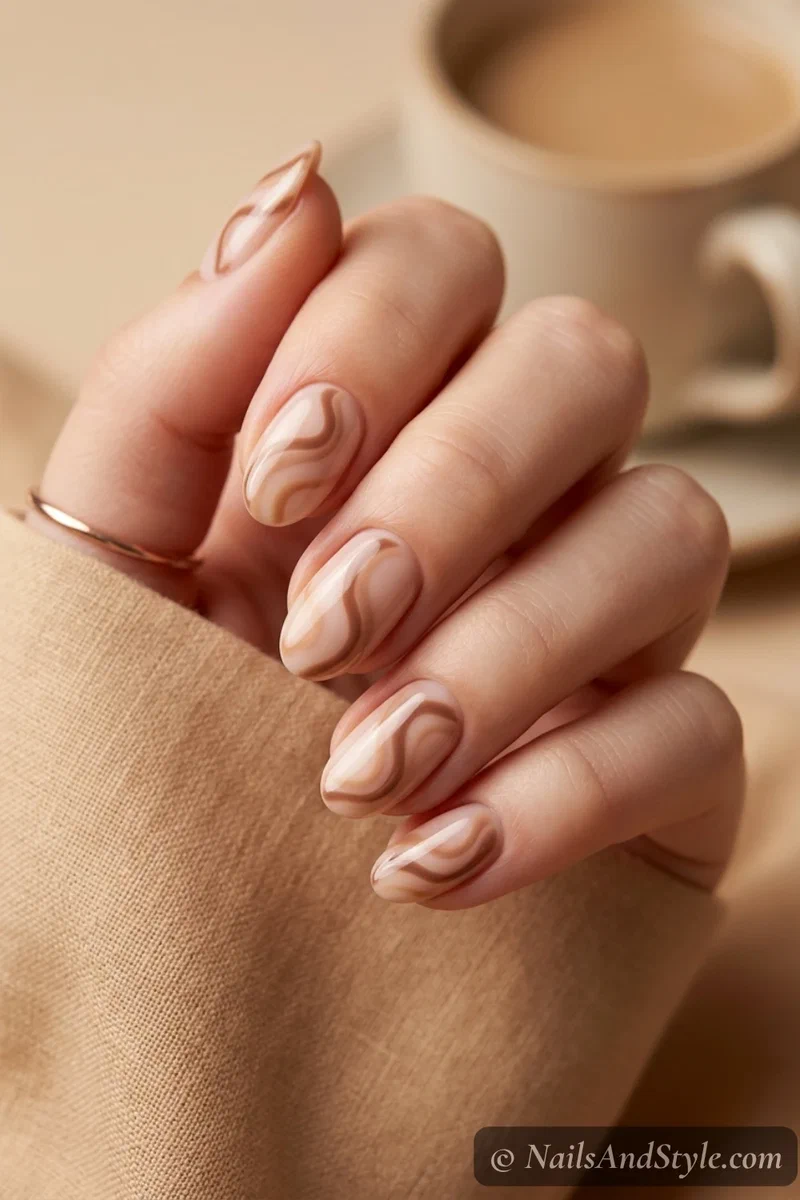
6. Latte Swirl Nails#
Cozy, but make it expensive. Soft mocha and cream swirls that look like a barista free-poured them onto your nails.
Over a milky nude base, use a thin brush to swirl caramel or mocha brown in loose S-shapes across a few fingers. Here’s the thing — don’t aim for symmetry. The slightly imperfect swirl is exactly what makes it read hand-done and pricey. Blend the edges gently while the polish is still wet.
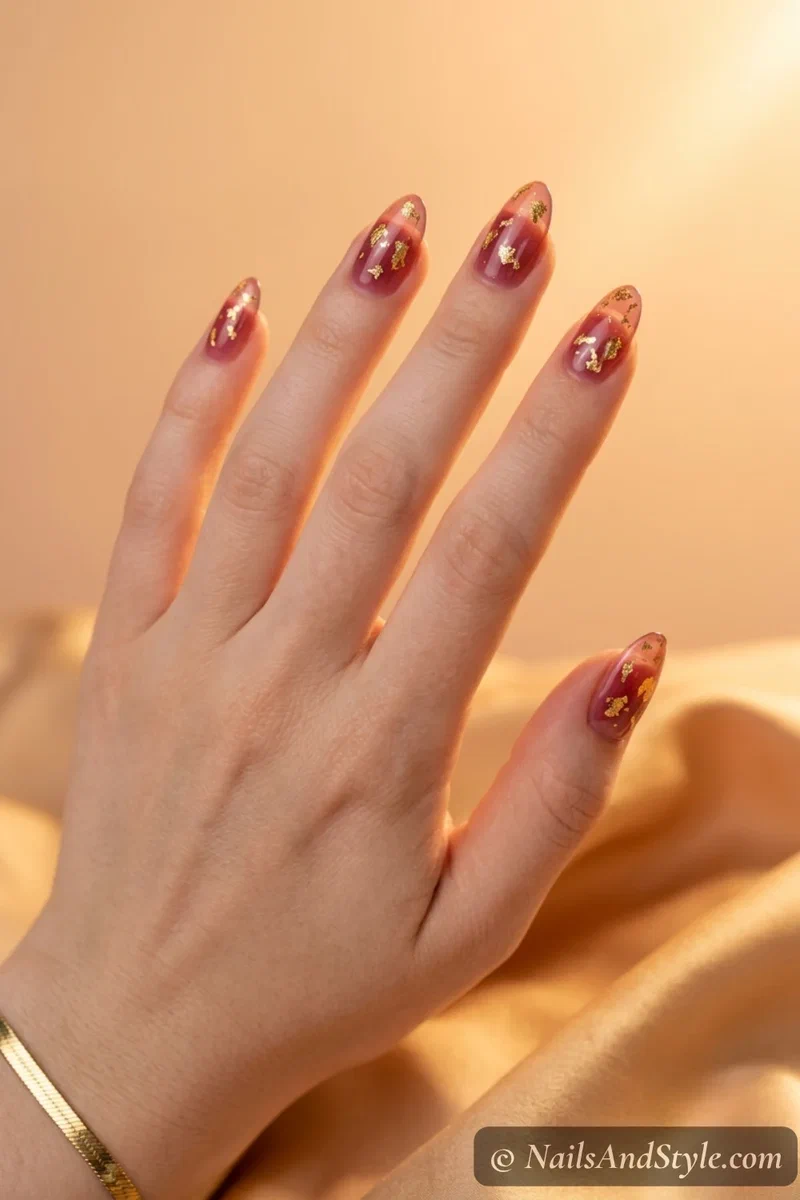
7. Jelly Nails with Gold Flakes#
Sheer jelly polish plus a few flecks of gold leaf equals the whole “I definitely didn’t do these myself” look. (You did.)
Two thin coats of a tinted jelly polish — soft pink, amber, or berry all work — then press a few pieces of gold leaf onto random nails with a slightly damp tool. Cap it with a glossy top coat so the flakes sit flush and smooth. Translucent, glassy, and quietly glinting in the light.
8. Minimalist Line Art#
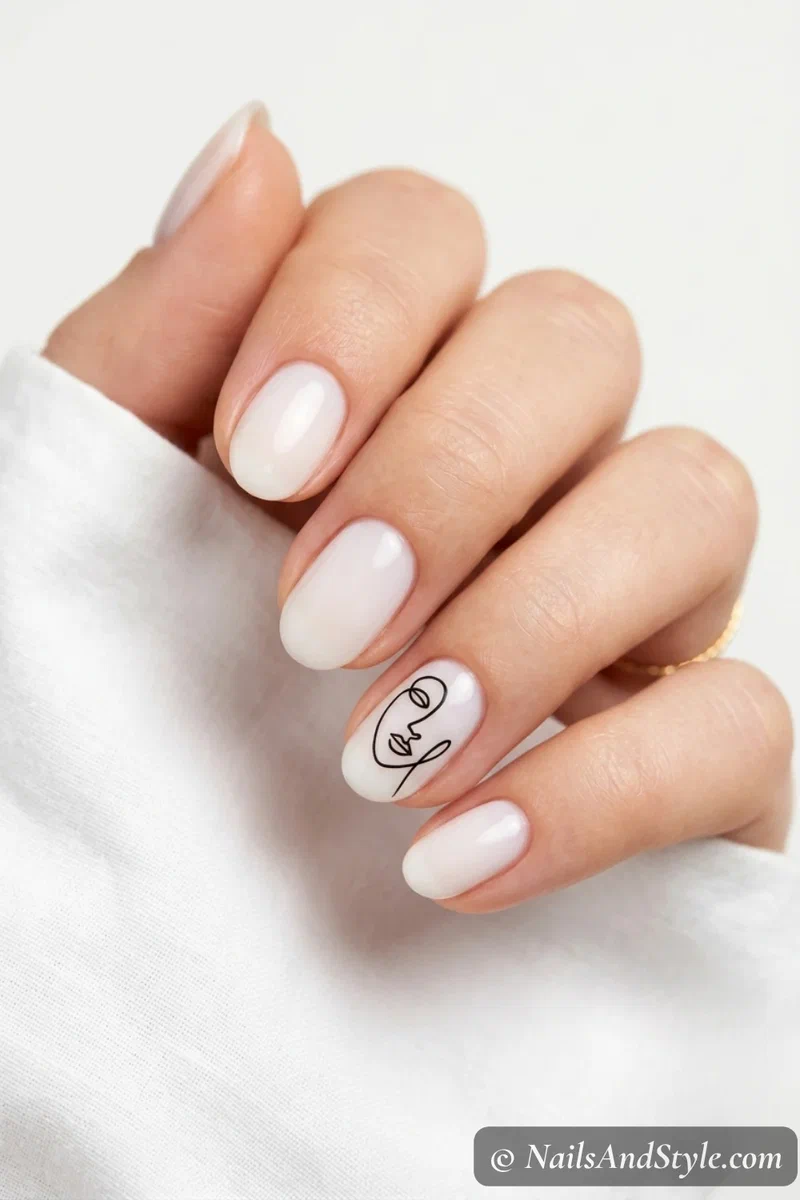
The kind of thing you’d spot in a gallery gift shop. One fine abstract line on a bare or milky nail, and suddenly it’s art.
Over a sheer base, use a fine brush to draw a single continuous squiggle or a simple abstract shape on one or two accent nails. Black reads graphic and modern; gold reads soft and delicate. Genuinely, less is more here — resist the urge to keep adding lines once you start.
9. Tortoiseshell Nails#
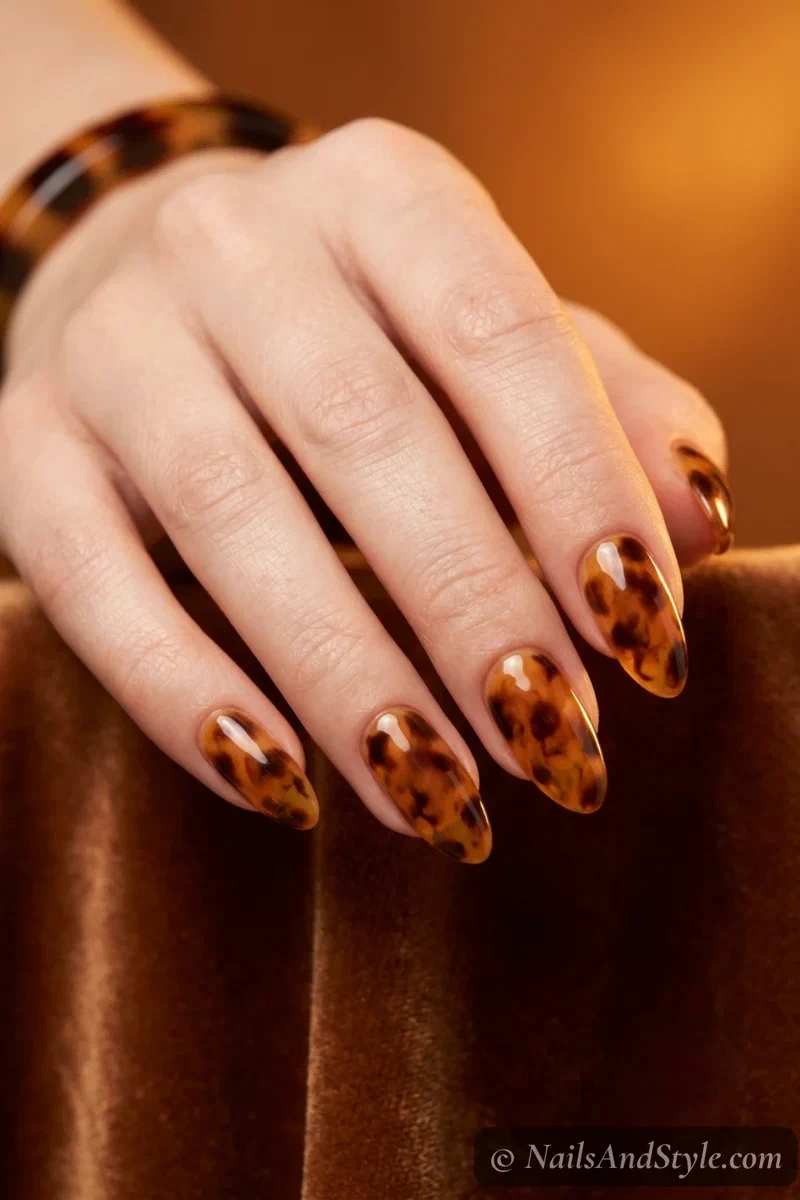
Like your favorite sunglasses, but on your nails. Amber, honey, and dark brown melting into each other — very old-money, very forgiving to paint.
Brush on a translucent amber or caramel base, then dab irregular blobs of dark brown (and a touch of black) with a small brush while it’s still wet, letting them bleed into a mottled pattern. Soften the edges with a clean brush, then a glossy top coat melts it all together. Imperfect is the goal.
10. Glossy Classic Red#
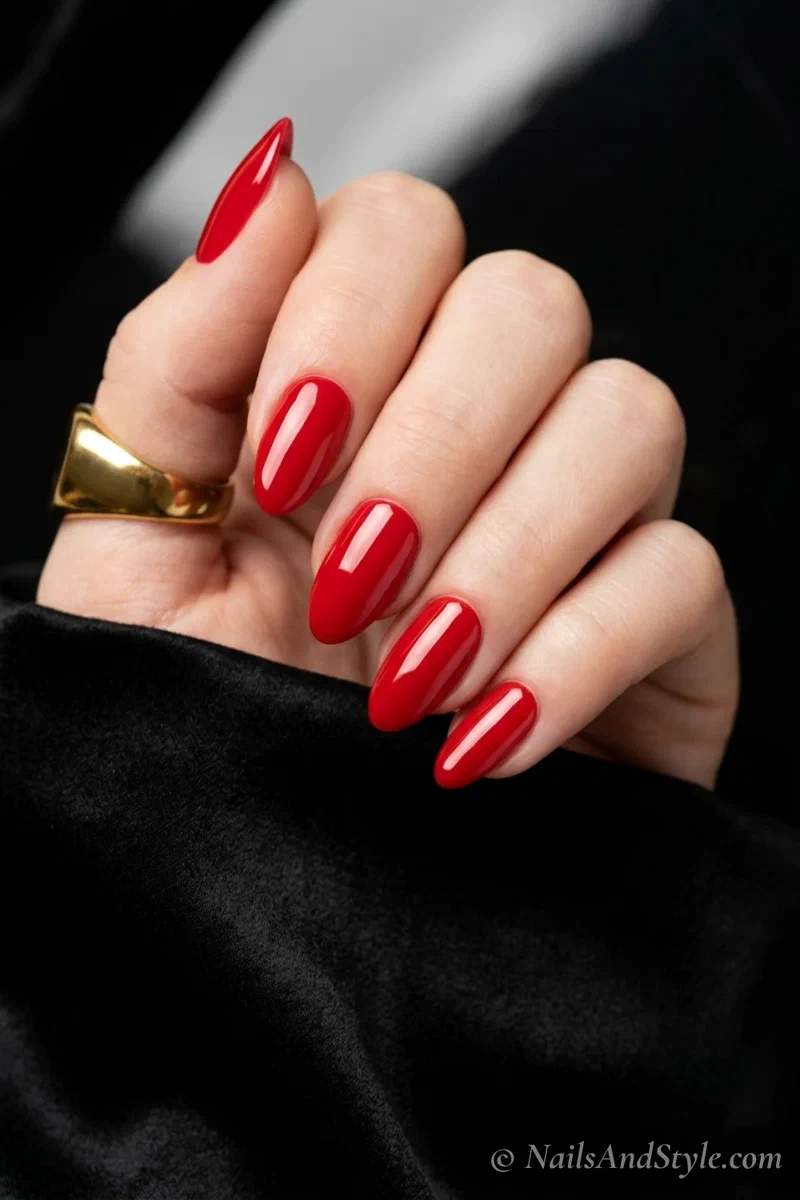
Sometimes the most expensive-looking nail is just a flawless red. No art, no glitter — a rich, mirror-glossy coat, done cleanly.
Two thin, even coats of a true red or deep berry, then clean around the cuticles with a small brush dipped in remover so every edge is razor-sharp. That crisp edge? It’s the entire difference between “eh” and “money.” Finish with a wet-look glossy top coat.
These Looks on Short Nails#
Good news if you keep things short: most expensive-looking designs actually prefer a short nail. There’s less surface to keep flawless, and minimal looks read even chicer on a tidy, compact shape.
The move is to keep it simple and keep it neat. A clean short nail in one gorgeous color beats a long nail with a rushed design, always.
A Few More Short-Nail Ideas#
- Milky white on short nails looks instantly clean and manicured, like you just left a salon.
- Micro French visually stretches a short nail because the eye follows that thin tip line.
- A single vertical gold stripe lengthens the nail and adds a hit of luxe.
- Glazed chrome makes even the shortest nails look glassy and professionally done.
- Classic red on a short squoval is the most timeless, expensive combo there is.
Simple Step-by-Step: How to Get That Expensive Finish at Home#
The “expensive” part is 80% prep and cleanup. Here’s the order I follow:
- Shape evenly. File all ten nails to the same length and shape — mismatched nails instantly cheapen a set.
- Tidy the cuticles. Push them back and clean up the edges. Neat cuticles are the number-one expensive signal.
- Buff and wipe. A light buff plus a swipe of remover gives you a clean, grippy surface.
- Base coat. One thin layer to protect and smooth.
- Color in thin coats. Two thin coats beat one thick one, every time — thin dries smoother and chips less.
- Add your accent. Foil stripe, chrome, swirl, cat-eye — whatever your chosen look needs. New to detail work? My beginner nail art guide helps.
- Clean the edges. A small brush dipped in remover, run around each nail, is the single most pro-looking move you can make.
- Glossy top coat. Seal the free edge and go for maximum shine.
- Cuticle oil. Once dry, a drop of oil per nail adds that finished, expensive glow.
How to Ask Your Nail Artist for an Expensive-Looking Set#
If you’d rather sit back and let a pro handle it, a little vocabulary goes a long way. The clearer you are about “clean and minimal,” the closer you’ll land.
- Bring 2-3 reference photos and actually say the words “clean cuticles” and “thin lines” — it tells them exactly the finish you’re after.
- Name the finish you want: glossy glaze, pearl chrome, or a velvety cat-eye all look totally different in person.
- Ask for a shape that flatters your hands — almond and squoval tend to read the most elegant.
- Say whether you want hand-painted detail (swirls, line art) or powder and foil work, since they’re priced and timed differently.
- Go gel for the glass-like gloss — it holds that expensive, high-shine finish and photographs beautifully for longer.
Tips to Make Your Nails Last Longer#
- Keep every layer thin — thick polish chips and peels faster.
- Seal the free edge with base, color, and top coat.
- Skip hot water for at least an hour after painting.
- Wear gloves for dishes and cleaning (yes, even the quick jobs).
- Refresh a thin top coat every 2-3 days to keep that glassy shine.
- Cuticle oil daily — it’s the tiny habit that quietly makes everything last.
- Don’t use your nails as tools. Ever. Grab a key, not your thumbnail.
Quick FAQ#
Which expensive-looking design is easiest for beginners?#
Milky white or a clean glossy red. There’s no art to mess up — the whole look comes from thin coats, neat edges, and a glossy top coat. Start there and build confidence before trying chrome or swirls.
What colors actually look the most expensive?#
Soft neutrals, milky white, warm nudes, deep jewel tones, and a true red almost always read as pricey. As a rule, clean and simple beats loud and busy when you want that costly feel.
Can I do these on natural nails?#
Absolutely. Every look here works on bare natural nails. A glossy top coat and clean cuticle edges do most of the expensive-looking work — gel just helps it last a bit longer.
Final Thoughts#
The best part about nail designs that look expensive is that the “expensive” bit is mostly an illusion — clean edges, a glassy top coat, and a color that knows when to stop. Master those three, and almost any look on this list is yours in twenty minutes.
Save the ones that caught your eye, then start with whichever matches your mood — barely-there milky, jewel-toned cat-eye, or that unbeatable glossy red. Fair warning: once people start asking where you got your nails done, you might not want to admit it was your kitchen table.