You know that quietly smug feeling when someone asks who did your nails — and the answer is you? That’s the whole goal here. I pulled together 25 nail designs that look salon-made and can honestly be recreated at your own kitchen table, no appointment required.
For the longest time, salon-quality results felt like something you had to pay for. But most of it really comes down to three unglamorous things: clean edges, thin coats, and a top coat that shines like glass. Master those and the looks do the rest.
Every design here works on short and medium nails — no length needed. Some take five minutes, some closer to twenty, and not one of them needs a professional lamp or years of practice. Grab your polishes. Let’s get into it.
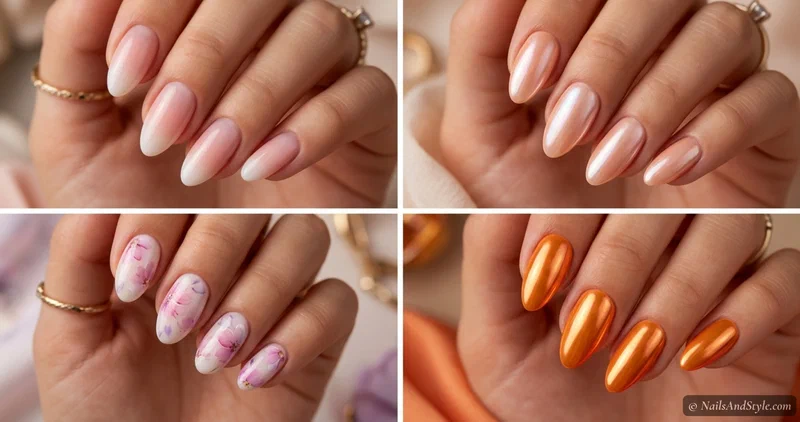
Why Salon-Made Nails Are Everywhere This Summer#
Salon-made results used to feel gatekept behind an appointment and a tip jar. Not anymore. The looks trending this summer — glazed chromes, soft ombres, milky washes, tiny gold details — are exactly the ones that translate well to a couch manicure.
And they fit whatever summer throws at you. Pool days, rooftop dinners, weddings, festivals, or just a Tuesday when you want your hands to look pulled-together. Bright shades, pastels, chrome, and little floral touches all photograph like salon work when the finish is clean.
A Few Things to Keep in Mind Before You Start#
- Color: pick shades that flatter your undertone — but honestly, if a color makes you happy, that’s reason enough to wear it.
- Skin tone: cool undertones love pinks, blues, and lilac; warm undertones glow in coral, peach, gold, and butter yellow.
- Shape and length: file all ten nails to the same shape and length — mismatched nails are the fastest way to look un-salon.
- Base and top coat, every time. Base stops staining; a glossy top coat brings the glass-like shine that makes the whole thing read professional. Never skip it.
Quick Pick: Which Design Should You Try?#
| If you’re looking for… | Try these designs |
|---|---|
| Total beginner (no art) | Milky Pink Gloss, Butter Yellow |
| Short nails | Micro Glitter Fade, Negative Space Half-Moon |
| A statement set | Tangerine Chrome, Glazed Peach Chrome |
| Weddings & events | Baby Boomer Ombre, Pearl Drop Accents |
| Everyday work-friendly | Milky Pink Gloss, Aura Blush |
25 Nail Designs That Look Salon-Made to Try This Summer#
I’ve mixed up the finishes and colors so there’s something here for every mood — glossy, glazed, pearly, jewel-toned, floral. Pick your favorite and go.
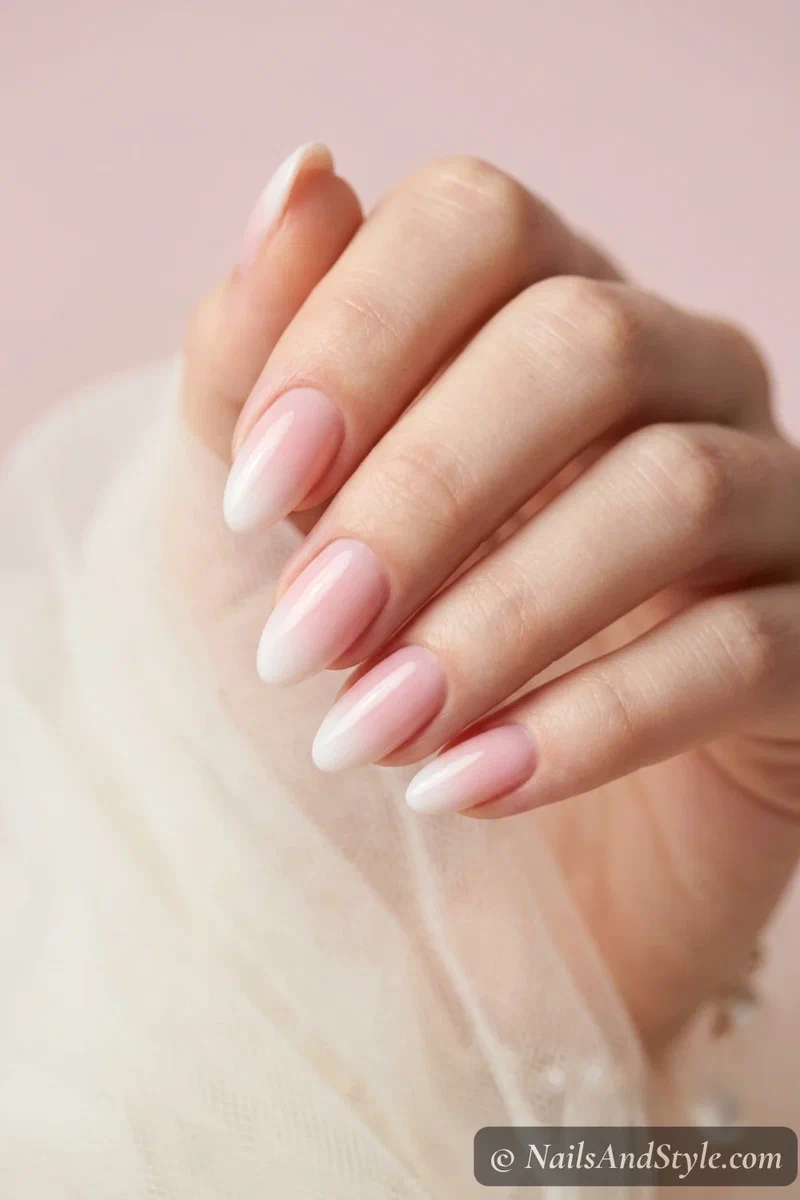
1. Baby Boomer Ombre#
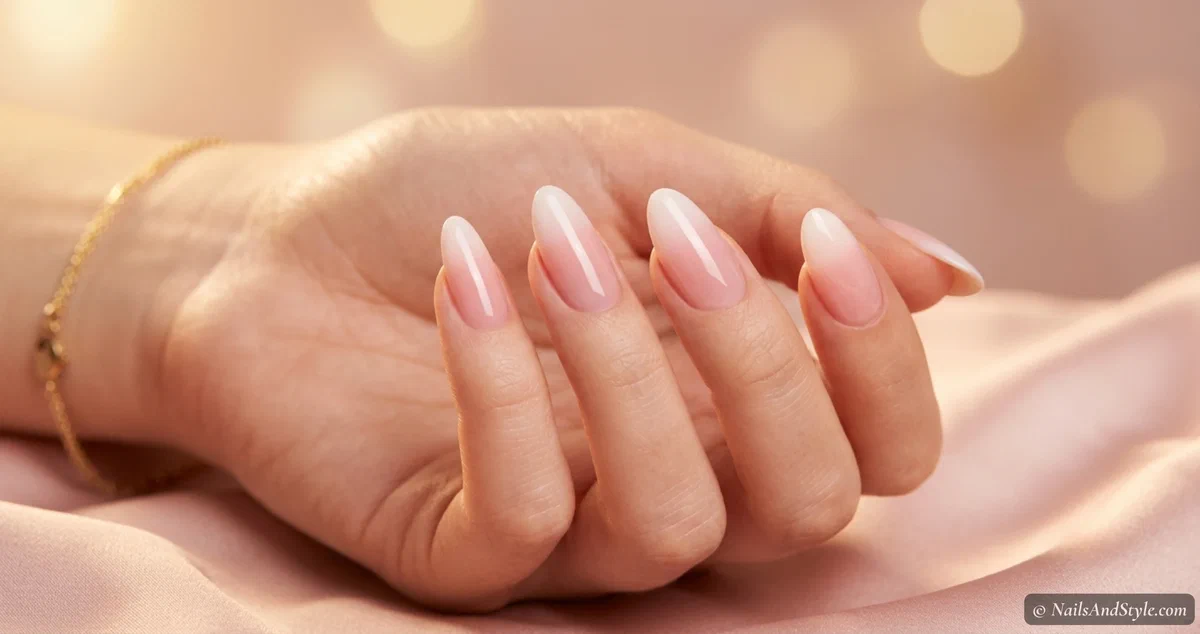
The pink-and-white gradient every salon keeps on its menu — soft, a little bridal, and impossible to get sick of. Sponge milky white onto the tips over a sheer pink base, then bounce the sponge up and down to blur the two shades into one seamless fade. My ombre nails tutorial breaks the sponge trick down if you’re new to it. Glossy top coat, and the blend goes even softer.
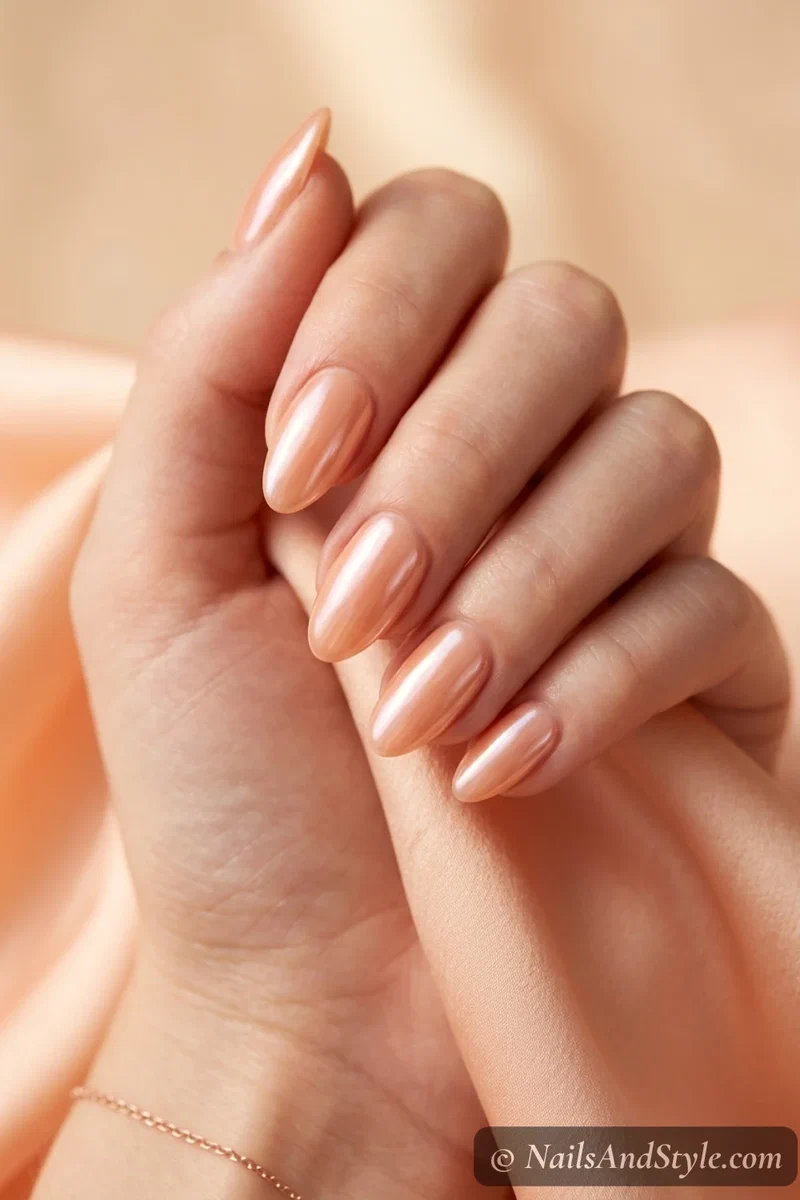
2. Glazed Peach Chrome#
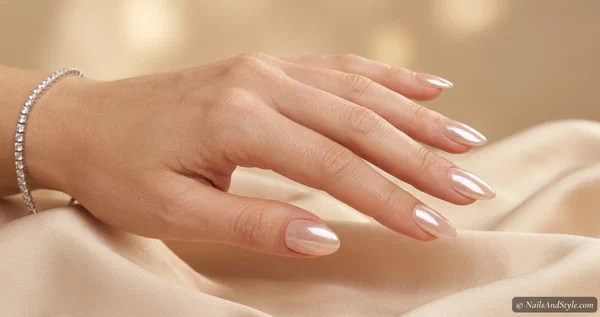
Glazed donut nails, but warmed up for summer. That wet, pearly peach sheen catches the light like nothing else and reads expensive instantly. Buff a pearl chrome powder over a sheer peach base with a soft applicator, then lock it under a top coat. The finish is liquid — like mother-of-pearl dipped in honey.
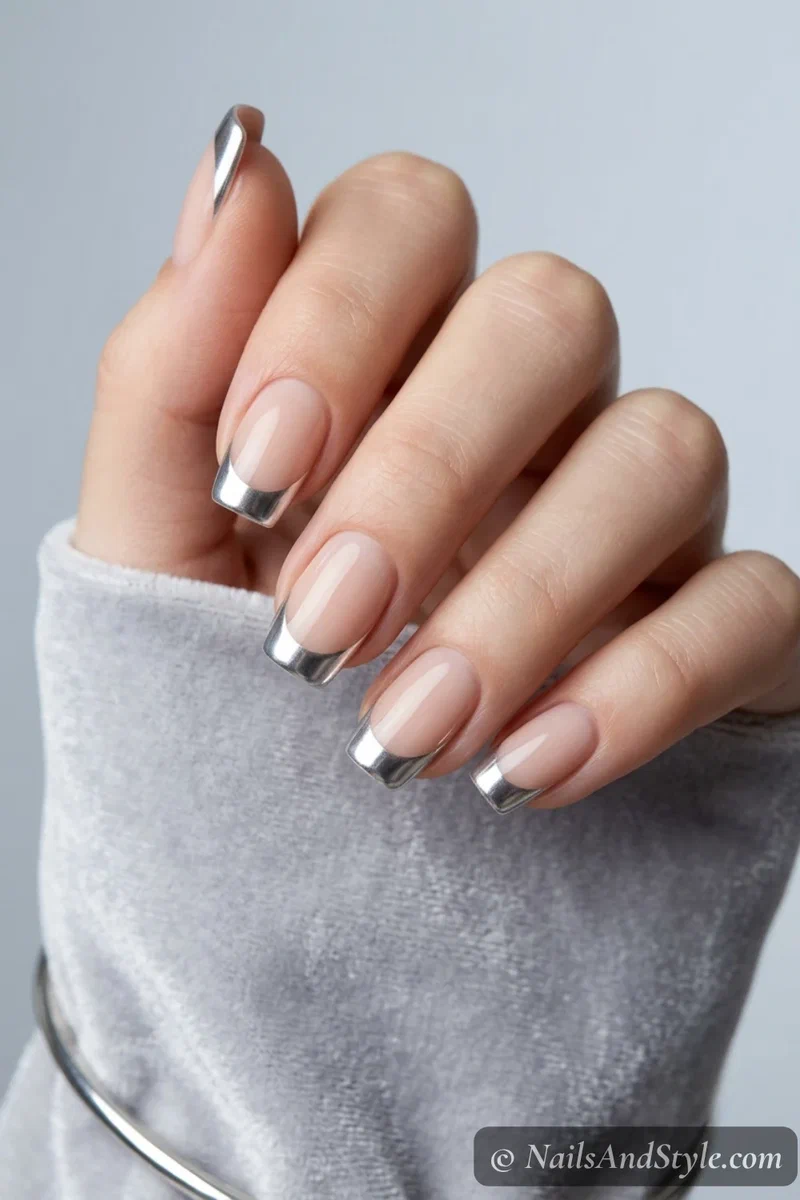
3. Chrome French Tips#
A classic French, except the smile line is mirror-chrome instead of white. Paint a nude base, then press silver chrome powder along just the tips — French guides keep that line crisp if freehand makes you nervous. Metallic, glassy, and very editorial. This is the set people assume cost a fortune.
4. Butter Yellow Gloss#
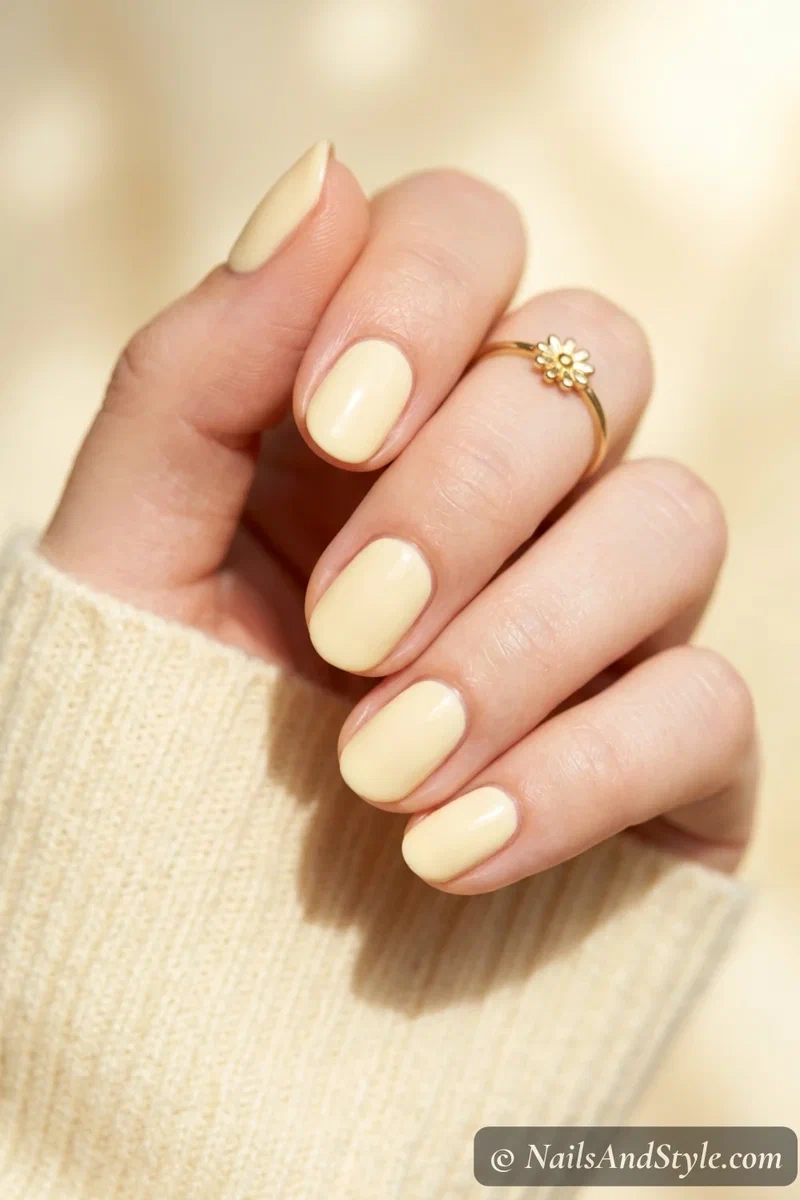
Soft, creamy, barely-there yellow — the shade everyone’s wearing right now. It looks pricey exactly because it’s so quiet. Two thin coats of a milky butter-yellow and nothing else, then a glossy top coat for that smooth, lit-from-within glow. That’s genuinely the whole thing. It’s having such a moment we gave it its own butter yellow nails guide.
5. Aura Blush Nails#
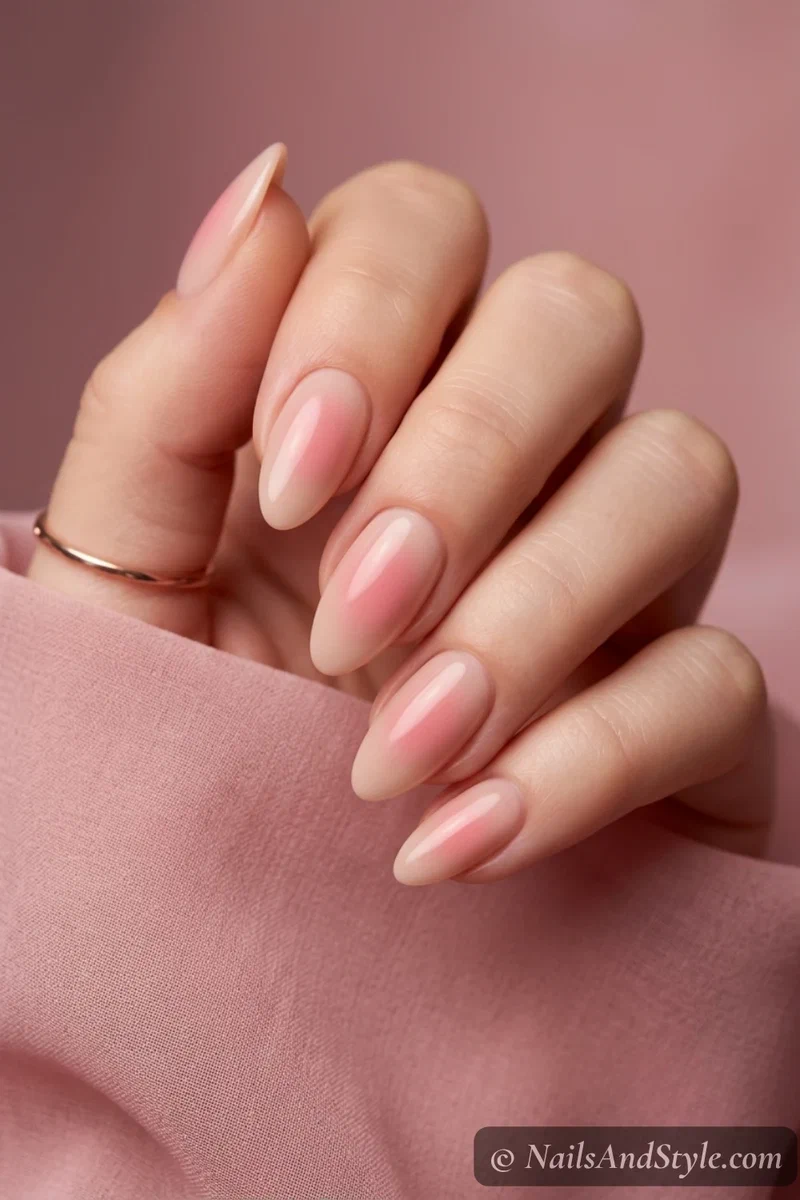
See that soft halo of color glowing from the middle of each nail? Looks like airbrushing. It’s a sponge. Dab a blush-pink in a small circle over a nude base, then blur the edges outward until it fades into nothing. Matte or glossy both look good here, though I lean glossy for the dreamier finish.
6. White Marble Swirl#
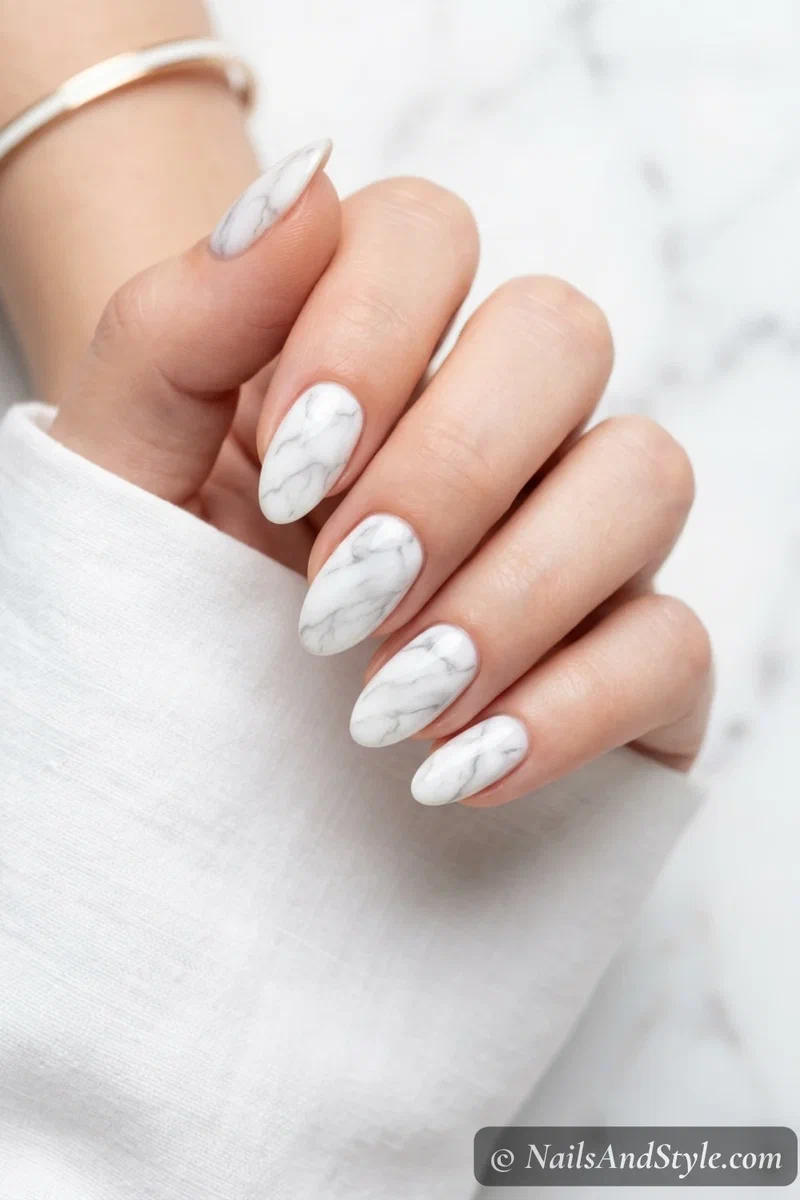
Cool, gallery-ish, and a total flex for something so forgiving. Over a white or milky base, drag a thin brush loaded with pale grey polish in loose, wandering veins — no two nails need to match. A little water-marble know-how helps; my water marble tutorial covers the swirl technique. Seal it glossy so the veins look set in stone.
7. Sunset Gradient#
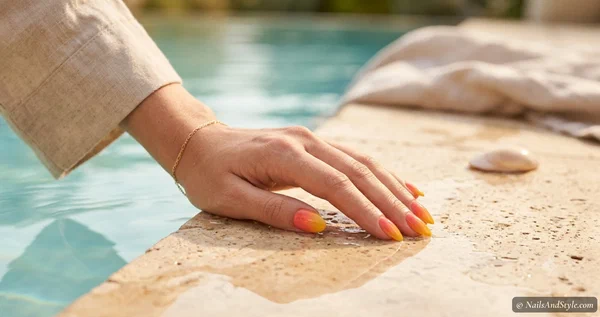
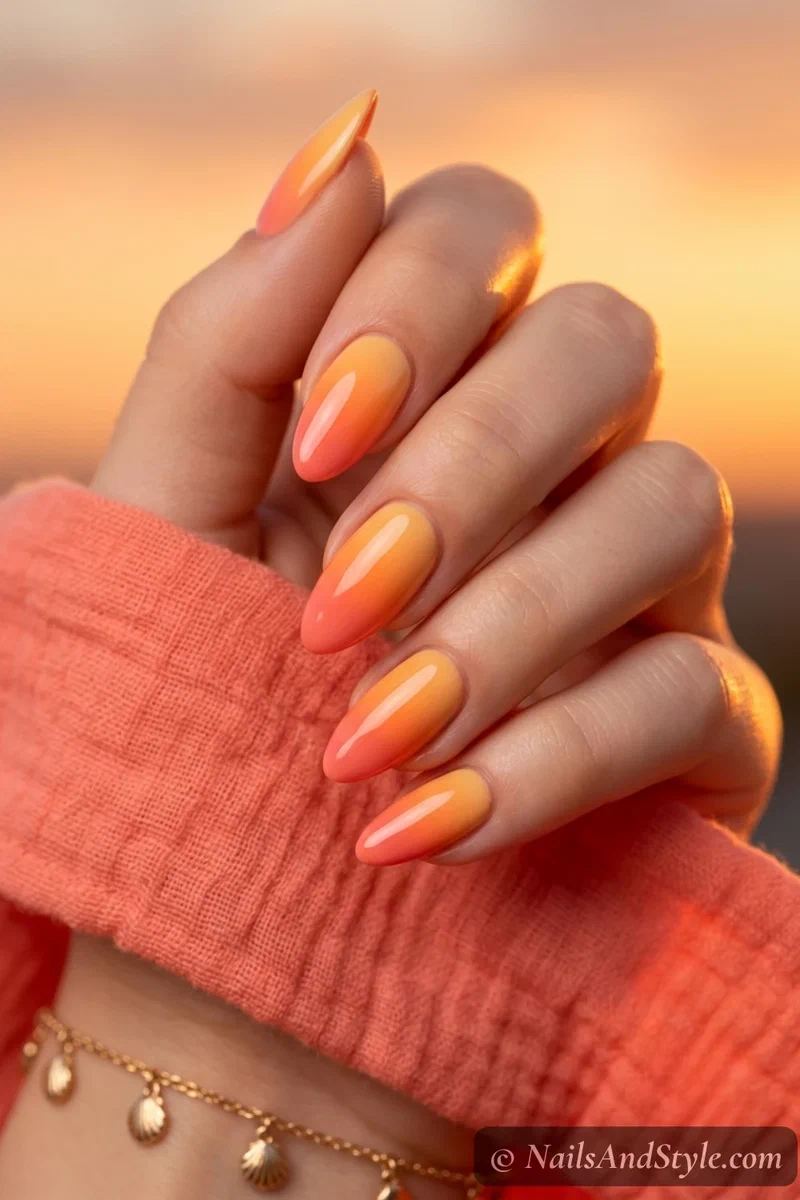
This one’s a whole vacation on your fingertips — coral melting into tangerine melting into soft yellow. Paint stripes of each shade side by side on a makeup sponge, press onto the nail, and dab to blend the seams. Reapply for a brighter fade. Glossy top coat pulls it all together.
8. Delicate Lace Tips#
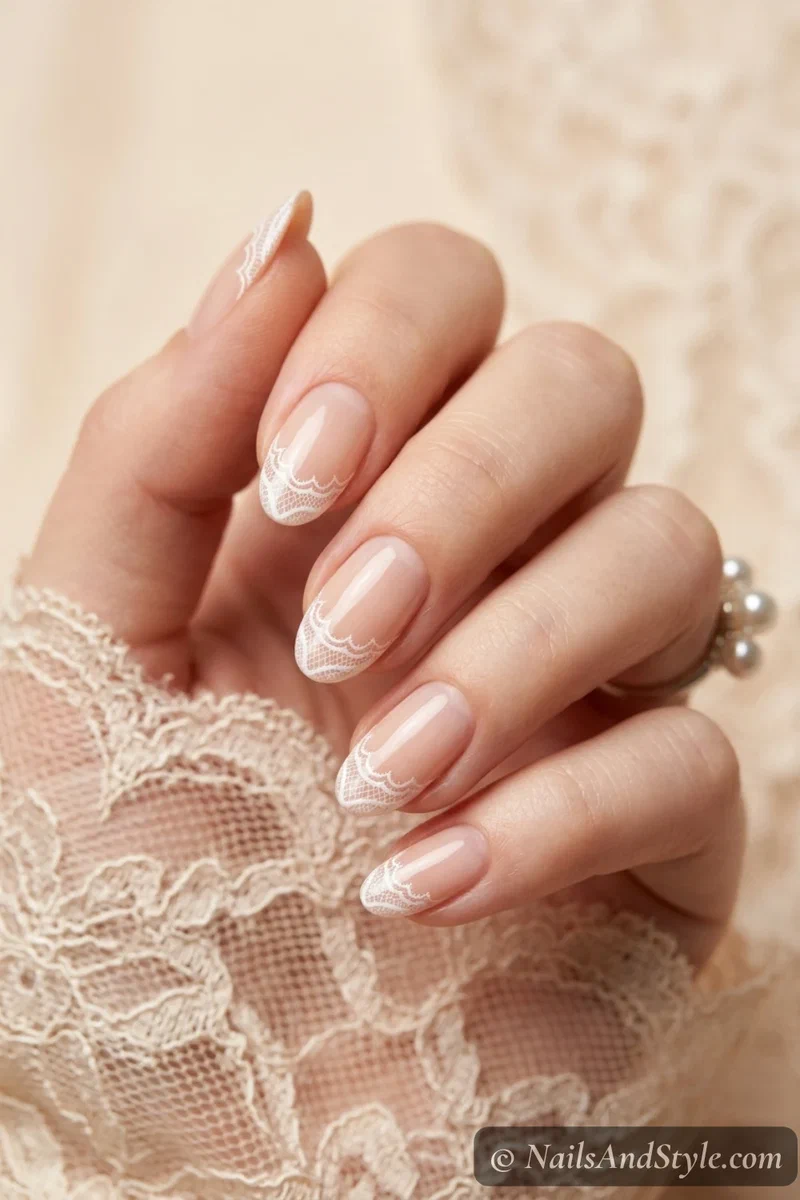
Bridal-shower energy, but you’d never guess it took ten minutes. Start with a sheer nude base, then use a fine detail brush (or a lace stamping plate) to trace a scalloped white pattern along each tip. Keep the linework thin — that’s what sells the whole handmade-lace look. Finish glossy.
9. Coral Jelly#
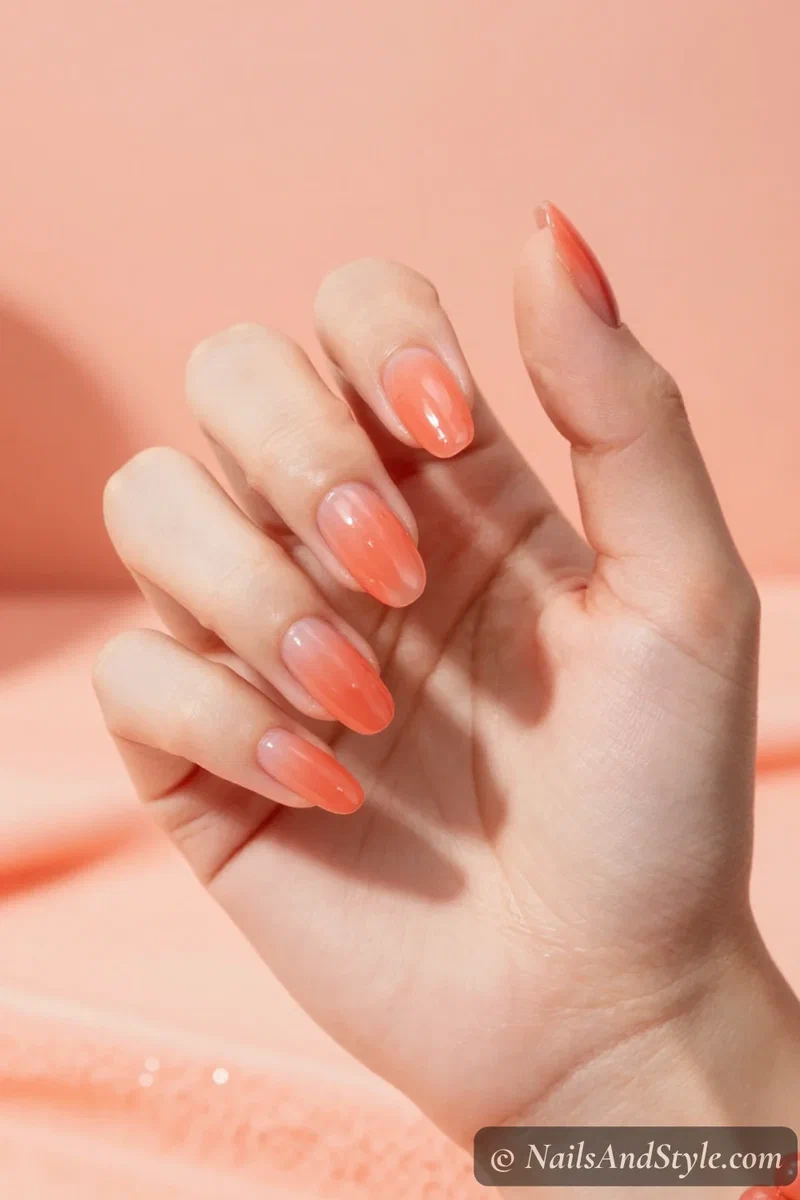
Sheer, squishy-looking, and so summery it almost hurts. Two thin coats of a translucent coral jelly polish let your natural nail glow through for that juicy, see-through finish. Want it deeper? Add a third coat. It’s the kind of glossy that looks wet even when it’s bone dry.
10. Pearl Drop Accents#
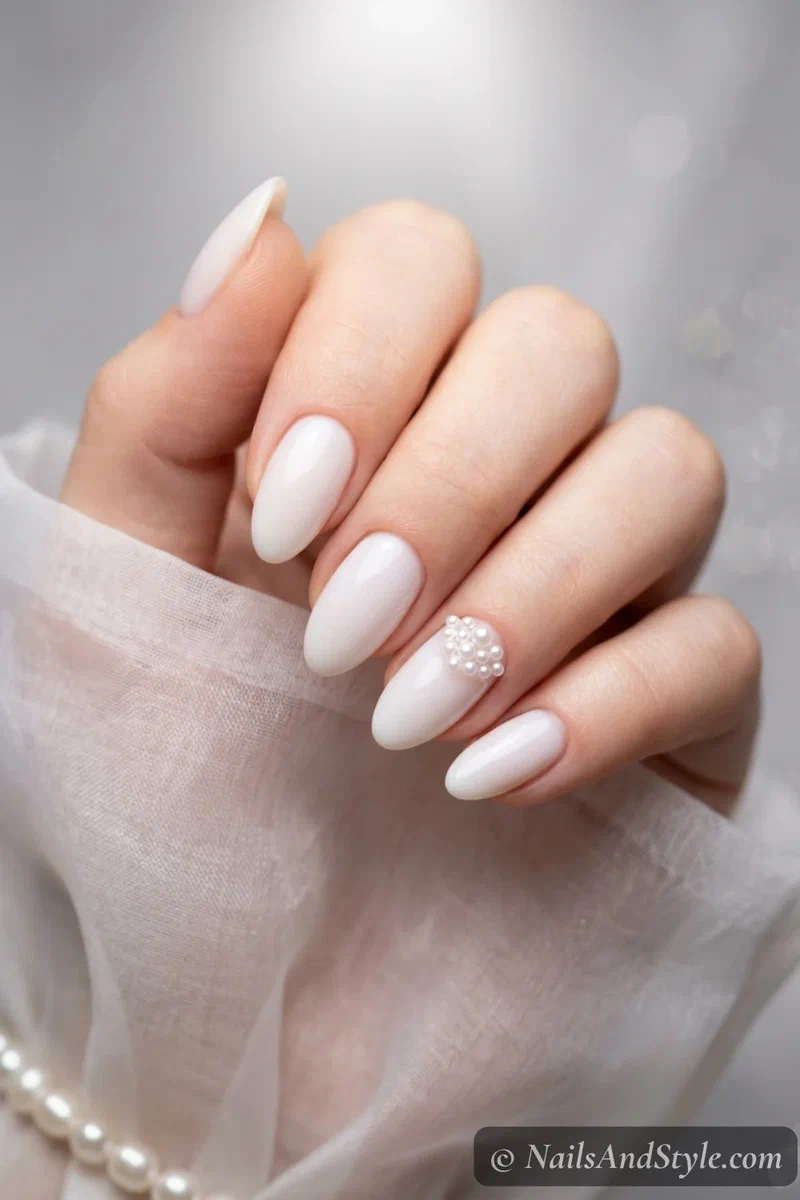
A couple of tiny pearls turn a plain milky manicure into something you’d spot in a bridal magazine. Paint a milky base on all nails, then press a few flat-back pearls near the cuticle of one or two accent nails while the top coat’s still tacky. Press gently, let it set, and seal around them. Understated, but so pretty.
11. Rose Gold Chrome Ombre#
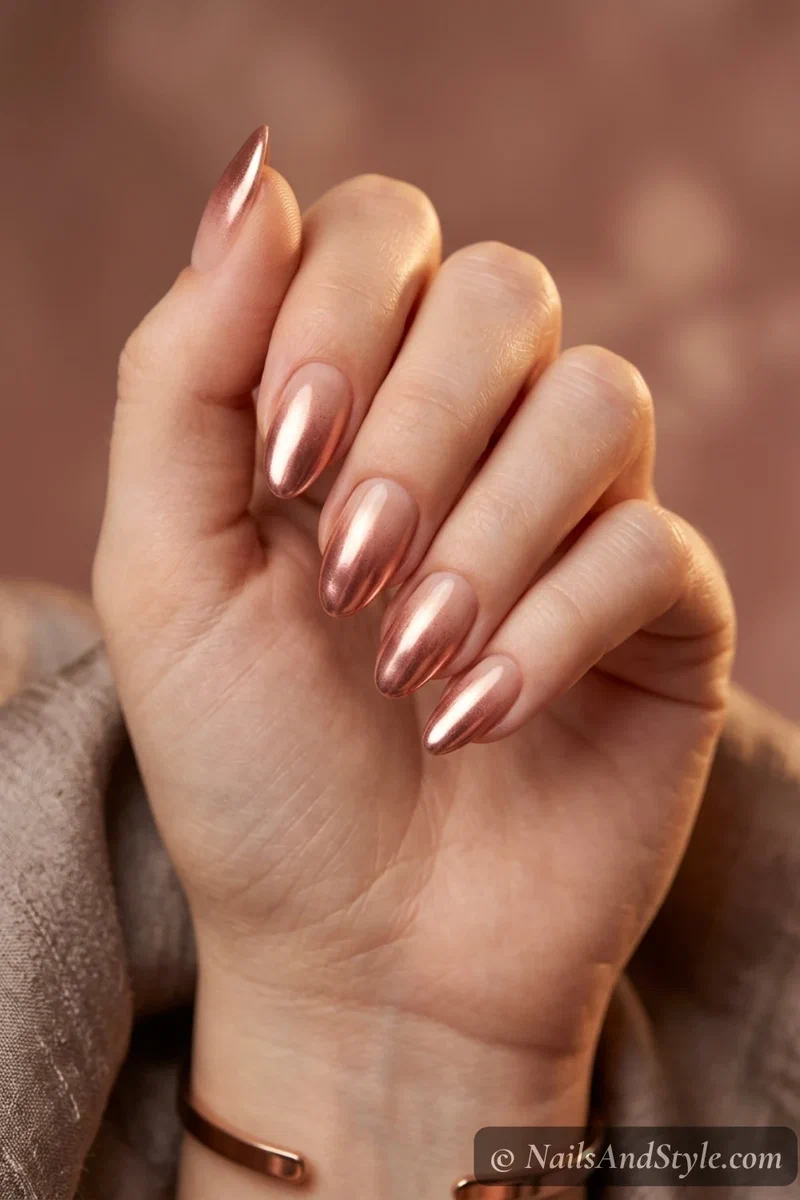
Metallic, but soft — rose gold that fades from a bright chrome tip down into a warm nude base. Buff rose-gold chrome powder heaviest at the tips and blend it toward the cuticle so it thins into the base color. Seal it well; chrome loves to escape. The gradient makes short nails look longer, too.
12. Watercolor Florals#
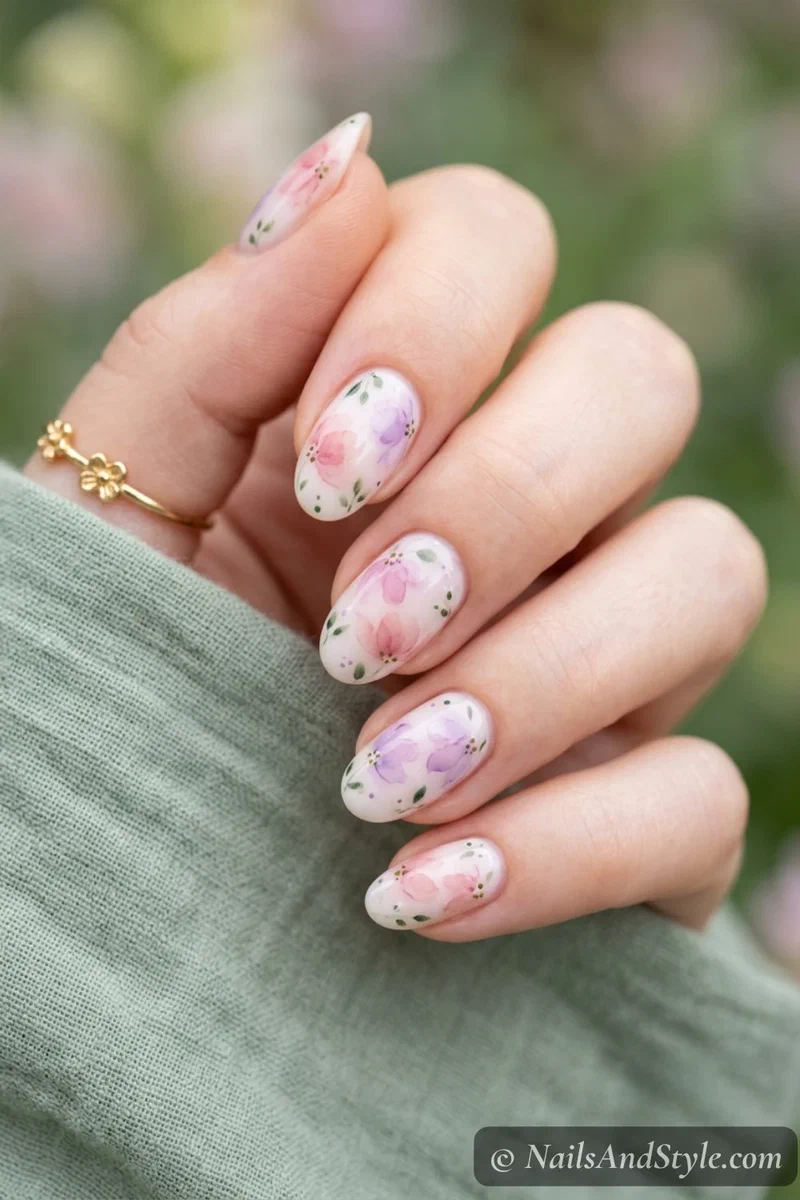
Soft painted blooms that look like they bled right into the nail — romantic without being fussy. Thin your polish with a drop of top coat, then dab loose petals in pink and lilac onto a milky base, letting the colors feather. Add a tiny green leaf and a dot center. It’s messy on purpose, which is why it works.
13. Powder Blue Glaze#
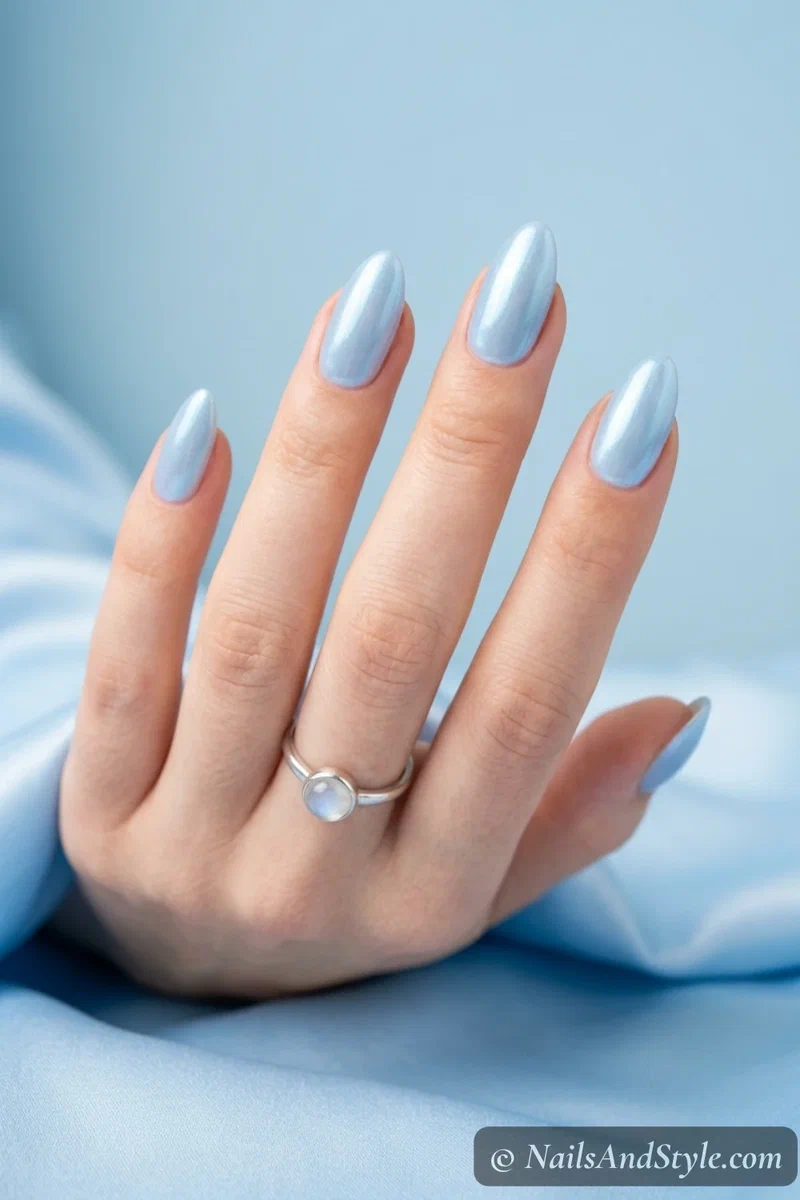
Sky-blue meets that glazed pearl finish, and the result is unreal — calm, cool, very summer-morning. Buff a pearl or blue-shifting chrome powder over a soft powder-blue base until it turns luminous. Top coat to lock the shimmer in. Reads like sea glass in sunlight.
14. Micro Glitter Fade#
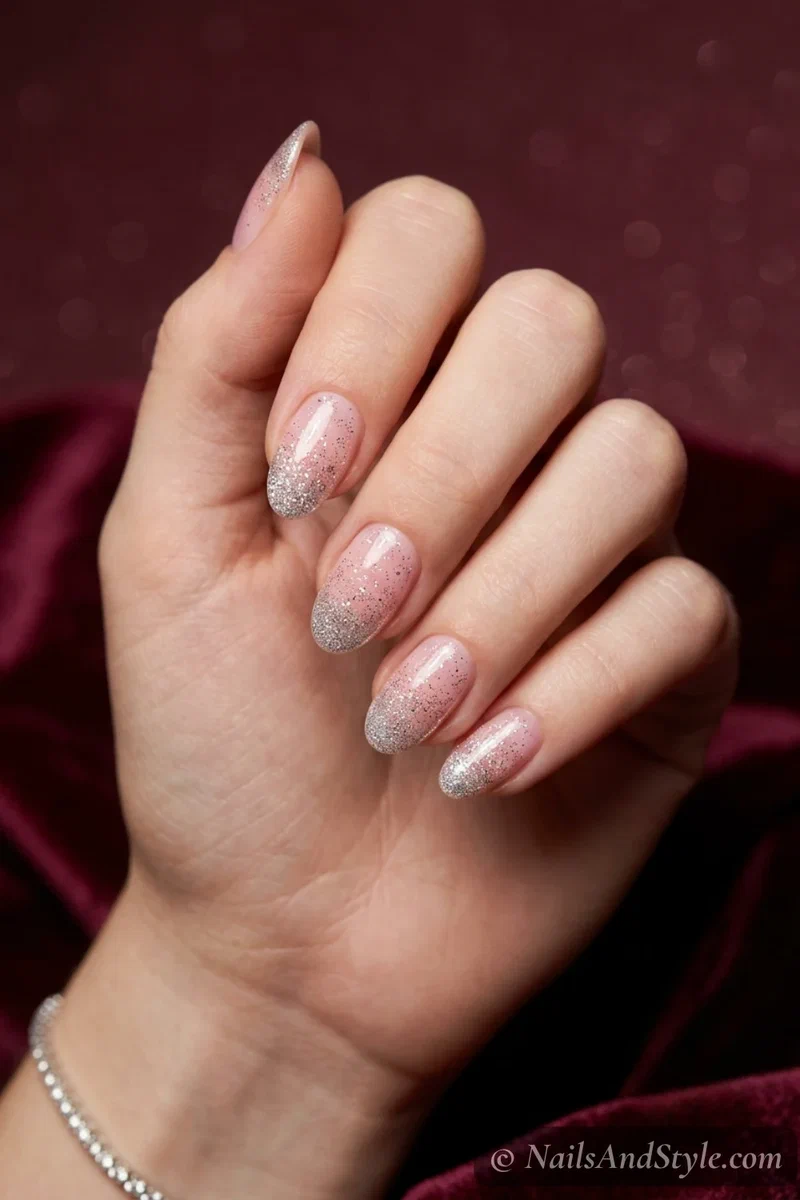
For when you want sparkle without the full disco. Dab a fine silver micro-glitter polish at the cuticle and fade it up the nail — densest at the base, scattering toward the tip. A sheer pink or nude underneath keeps it soft. Isn’t it funny how the tiniest glitter always looks the most expensive?
15. Negative Space Half-Moon#
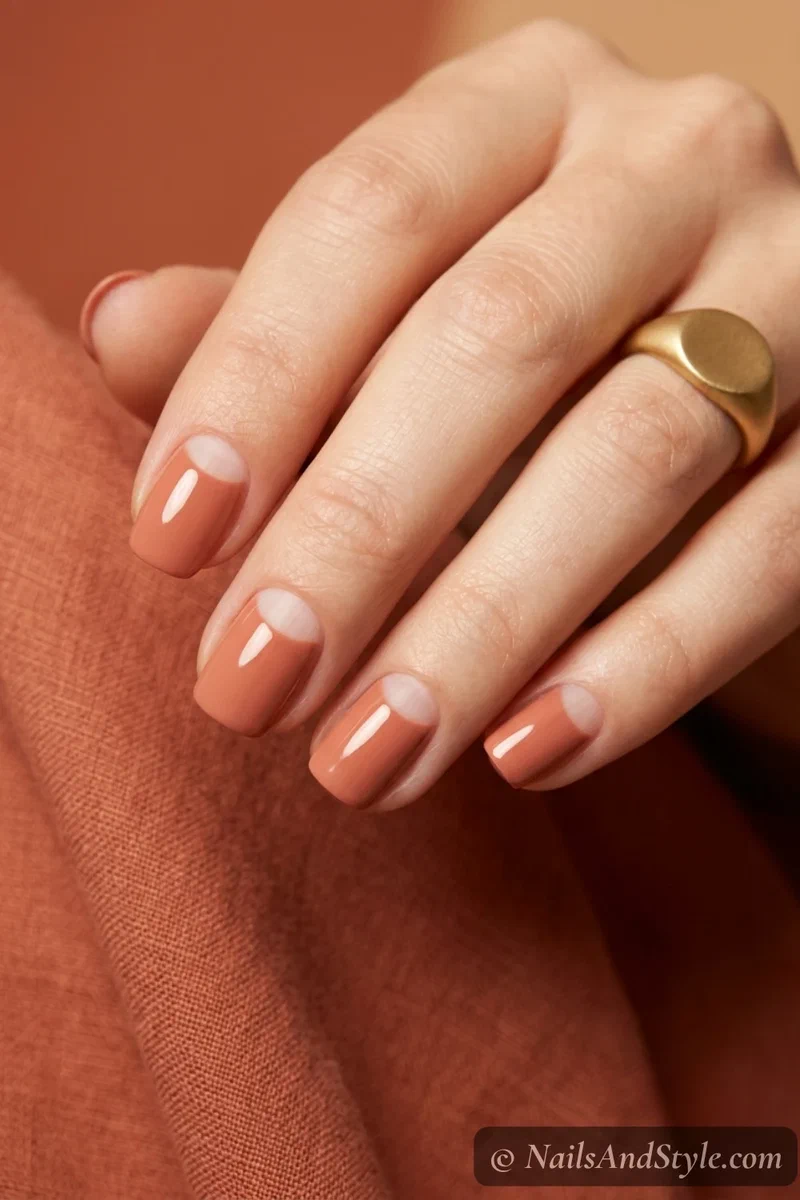
Modern, minimalist, and secretly one of the easiest looks here. Leave a little half-circle bare at the base of the nail and paint the rest in a clean color — a soft terracotta or crisp white both look great. Use a hole-reinforcement sticker as a guide for that neat curve. Bare nail plus one shade equals instant salon.
16. Lavender Chrome#
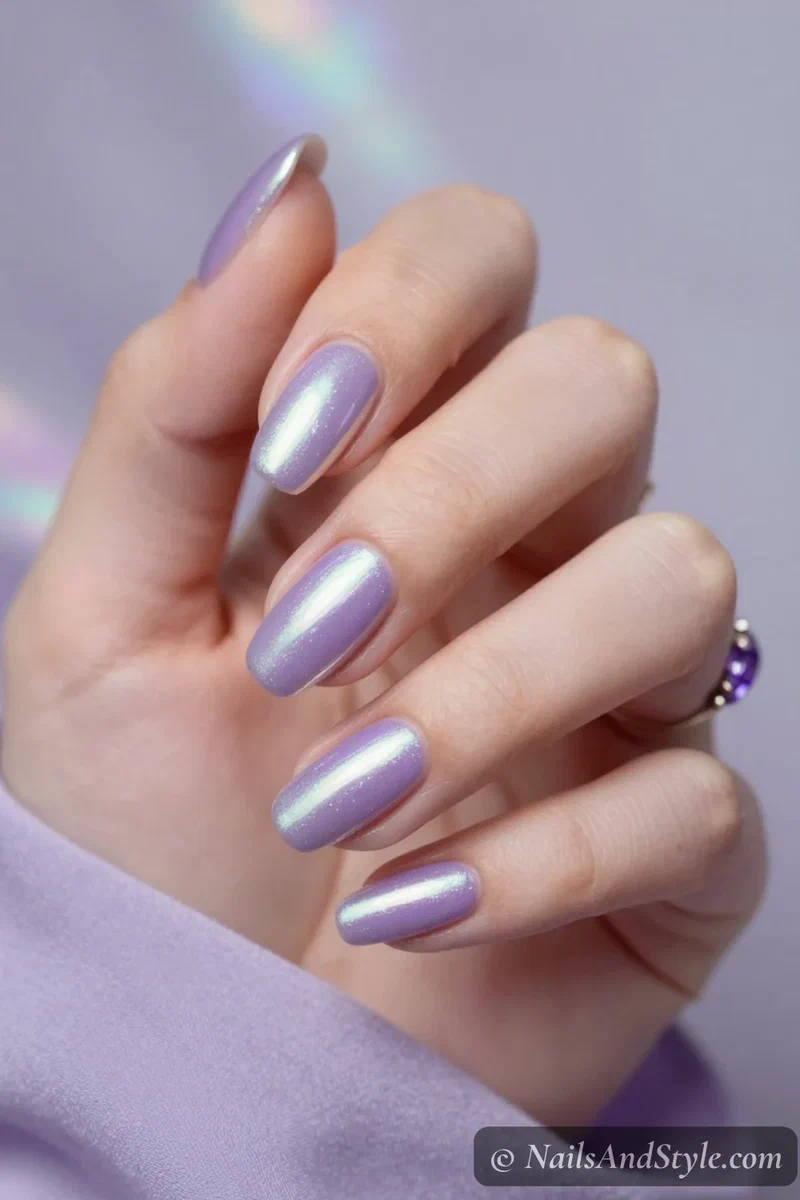
Soft lilac with a chrome twist — pastel, but make it luxe. Buff a silver-lilac chrome powder over a lavender base for that shifting, almost holographic glow, then seal with one coat of top coat. My chrome powder guide walks through the buffing if it’s new to you. Calm and eye-catching at once, which shouldn’t work but absolutely does.
17. Gold Leaf on Nude#
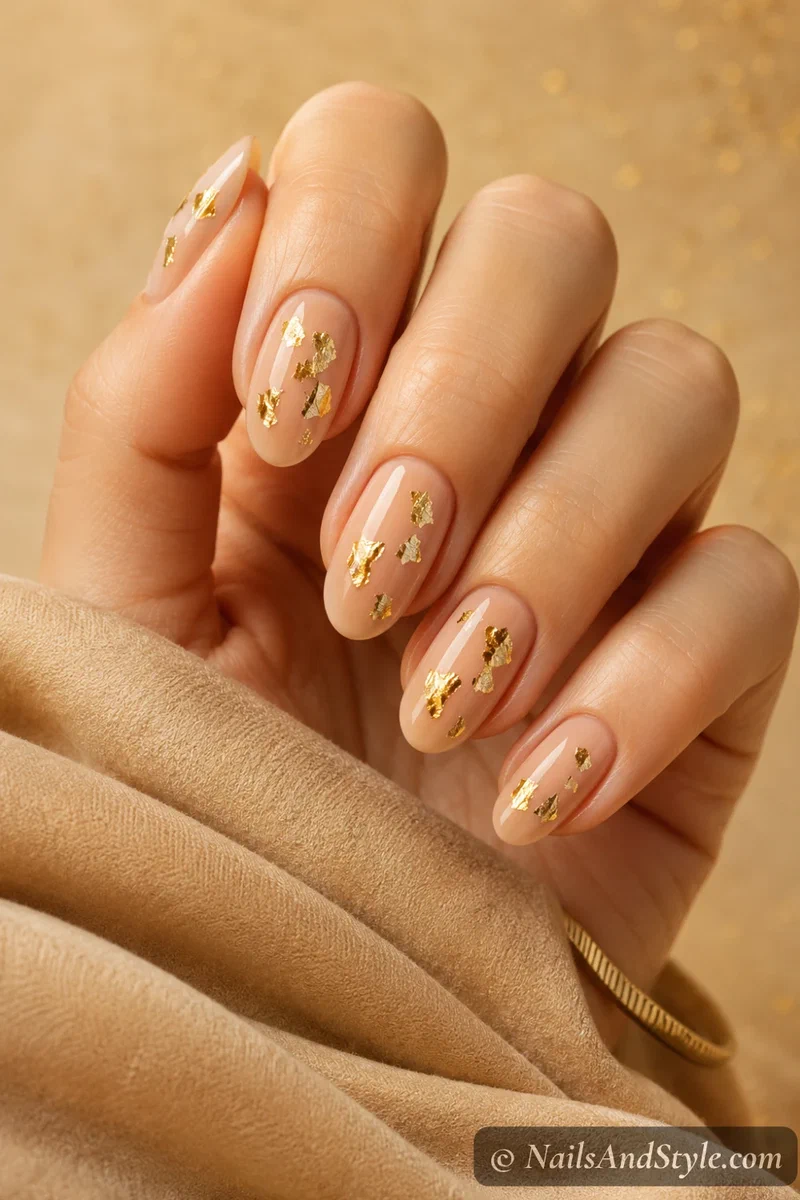
Proof that a few flecks of gold can carry an entire manicure. Over a warm nude base, press small torn pieces of gold leaf onto random spots with a damp tool, keeping it sparse. Cap it with a thick glossy top coat so the leaf sits flush and smooth. Quiet, glinty, expensive-looking.
18. Coral Ombre French#
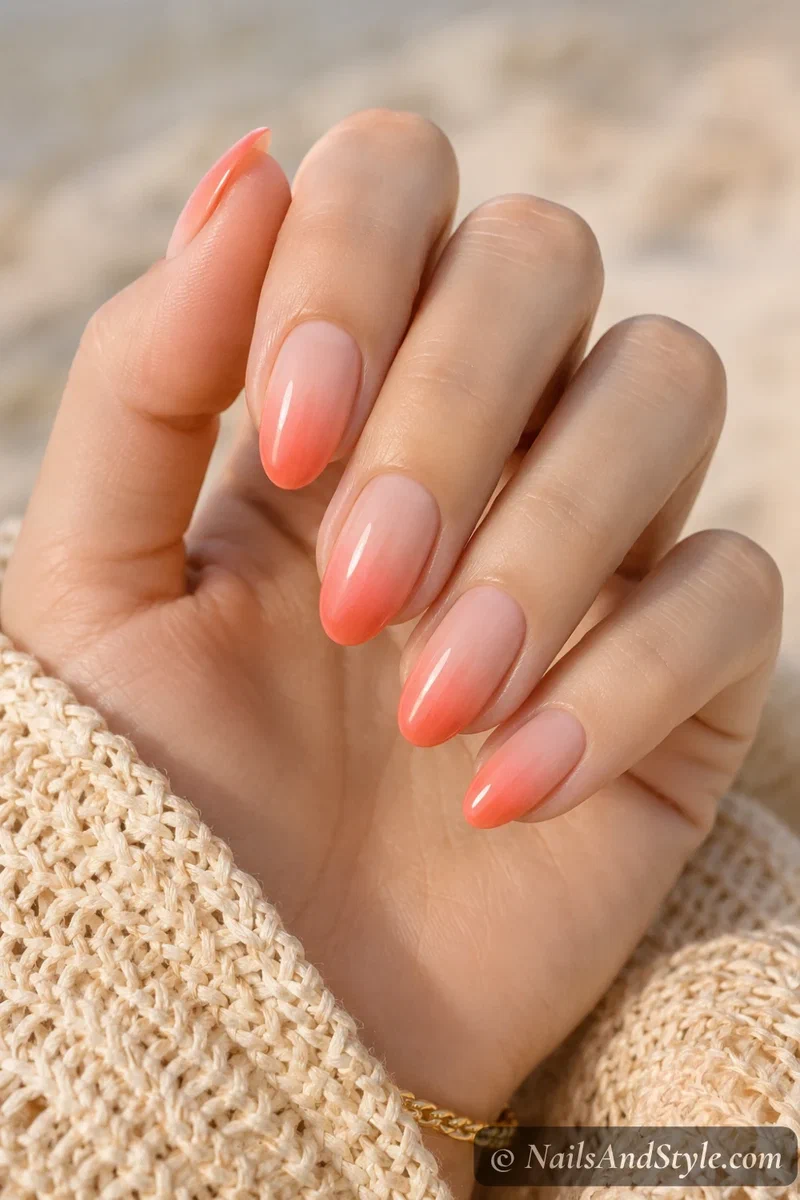
A French tip, but the smile fades from coral into the nude base instead of sitting as a hard line. Sponge a coral shade onto just the tips, then bounce it to soften where it meets the base. Playful and beachy without being loud. Glossy finish keeps it clean.
19. Milky Pink Gloss#
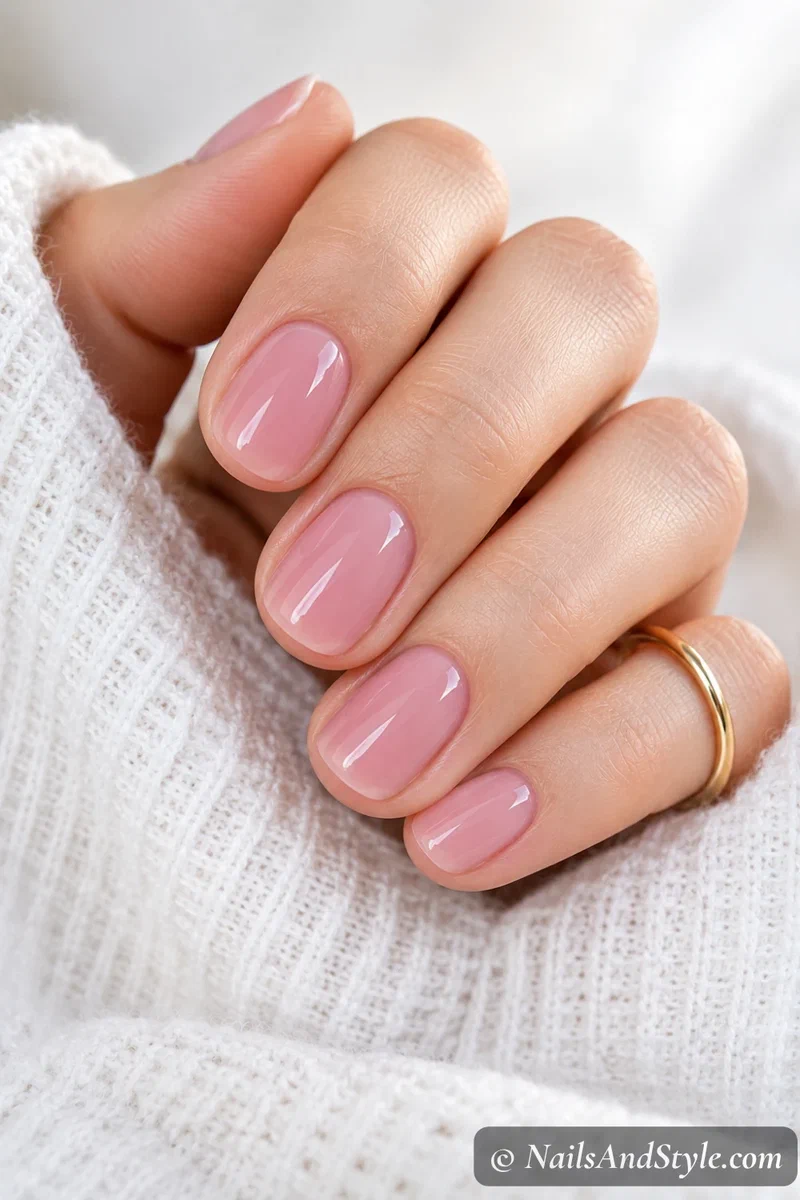
The your-nails-but-better shade — sheer, soft, and clean enough to wear absolutely anywhere. Two or three thin coats of a milky pink, kept a touch translucent so it glows instead of going flat. Glossy top coat. If I had to pick one look here as an everyday go-to, it’d probably be this.
20. Abstract Pastel Swirls#
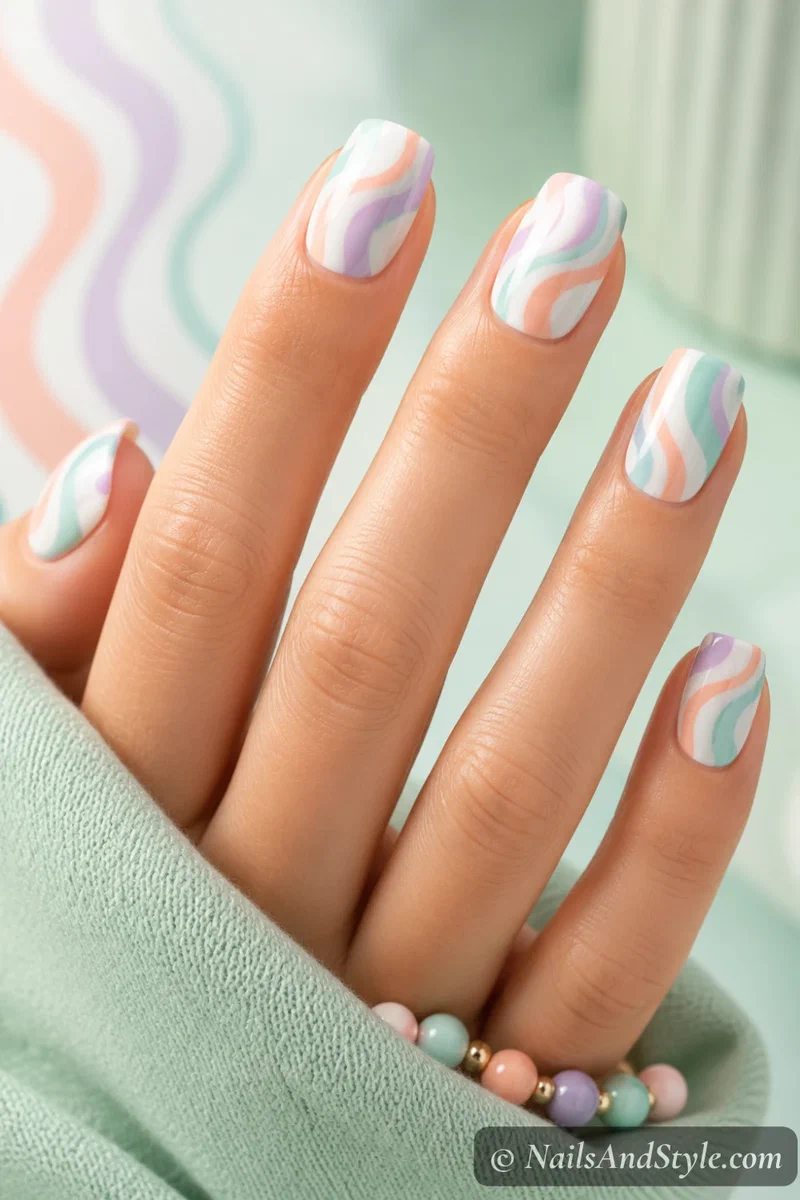
Retro, a little playful, and a great way to use up your pastel polishes. Over a white base, use a thin brush to swirl loose ribbons of mint, peach, and lilac across each nail (no symmetry needed, promise). Let the lines wander. Seal glossy and suddenly it all looks intentional.
21. Tangerine Chrome#
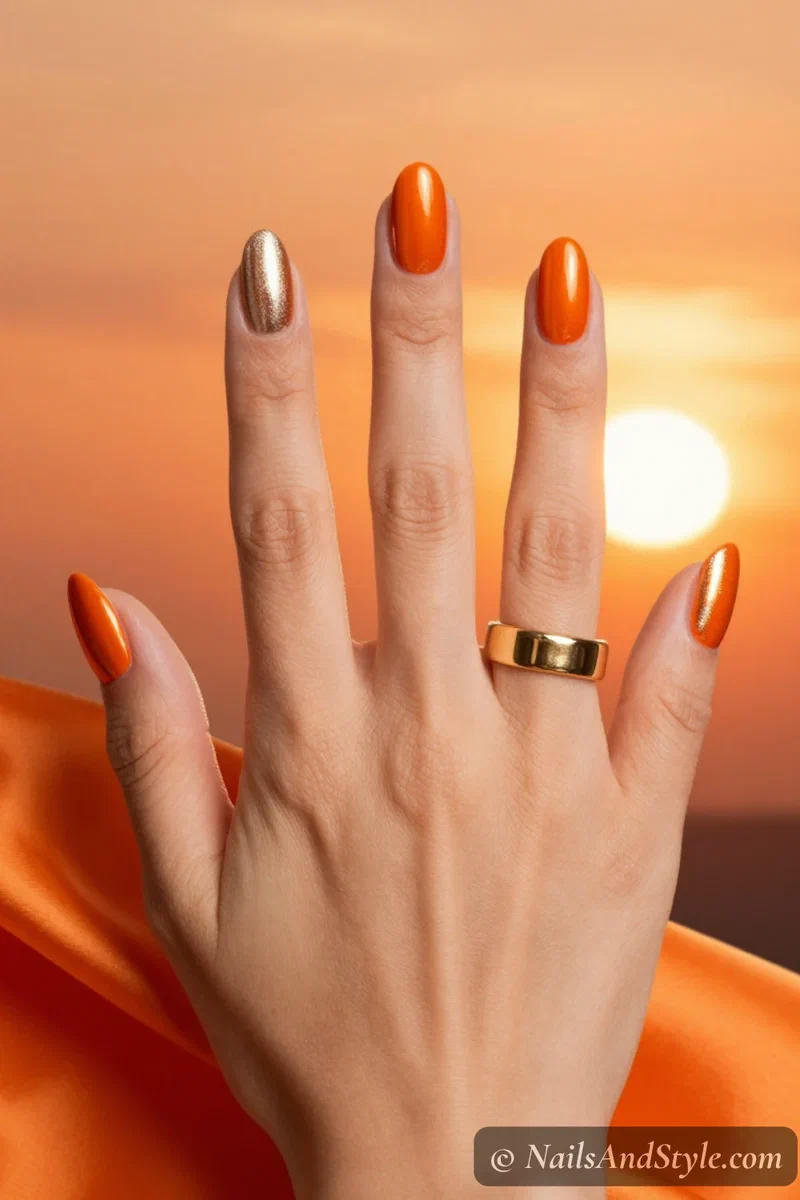
Want a statement? Here it is. A bright tangerine base under a mirror chrome finish is loud in the best, most sun-soaked way. Buff a silver or gold-toned chrome powder over saturated orange, then seal. This is the set that gets you compliments in the grocery line.
22. Micro Rhinestone Accent#
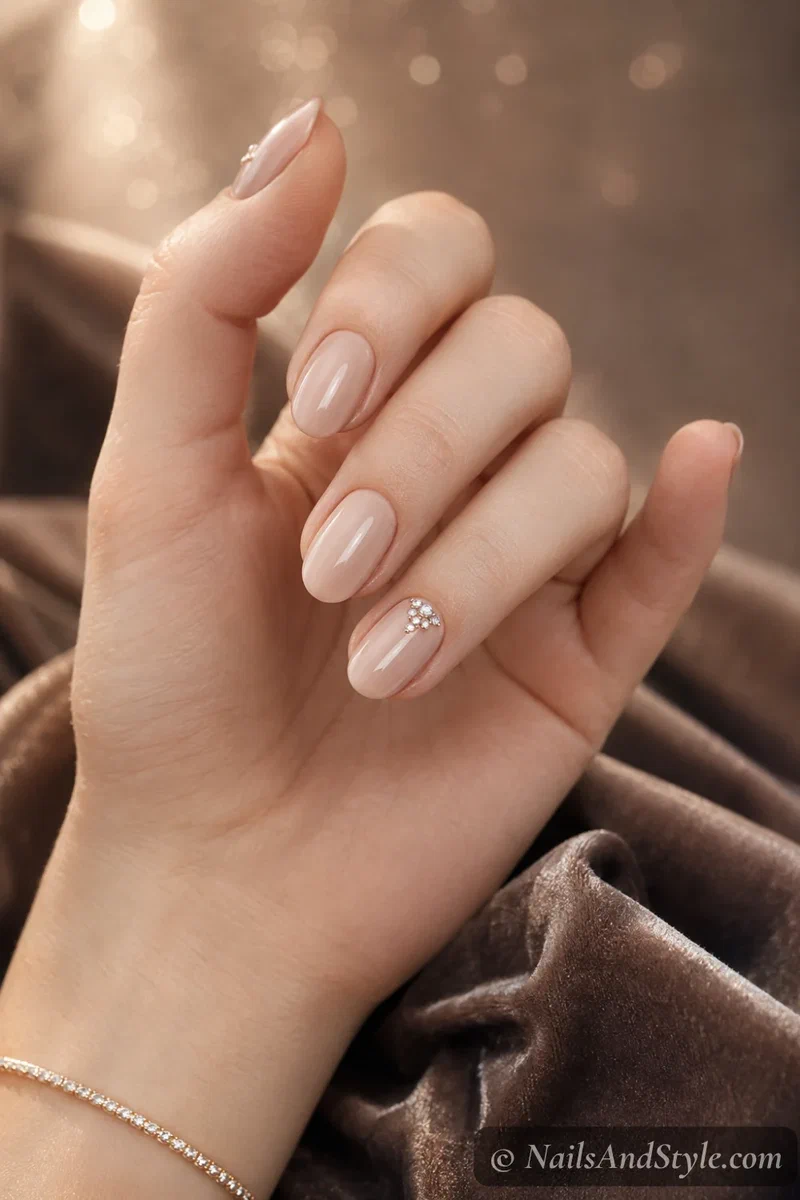
Just a whisper of sparkle — a tiny cluster of crystals, nothing more. Paint your nails a soft neutral, then use a wax pencil to place a few micro rhinestones in a small cluster or a thin line near the cuticle of one nail. Dot gel or a strong top coat holds them. Restraint is the whole trick.
23. Pressed Flower Milk Bath#
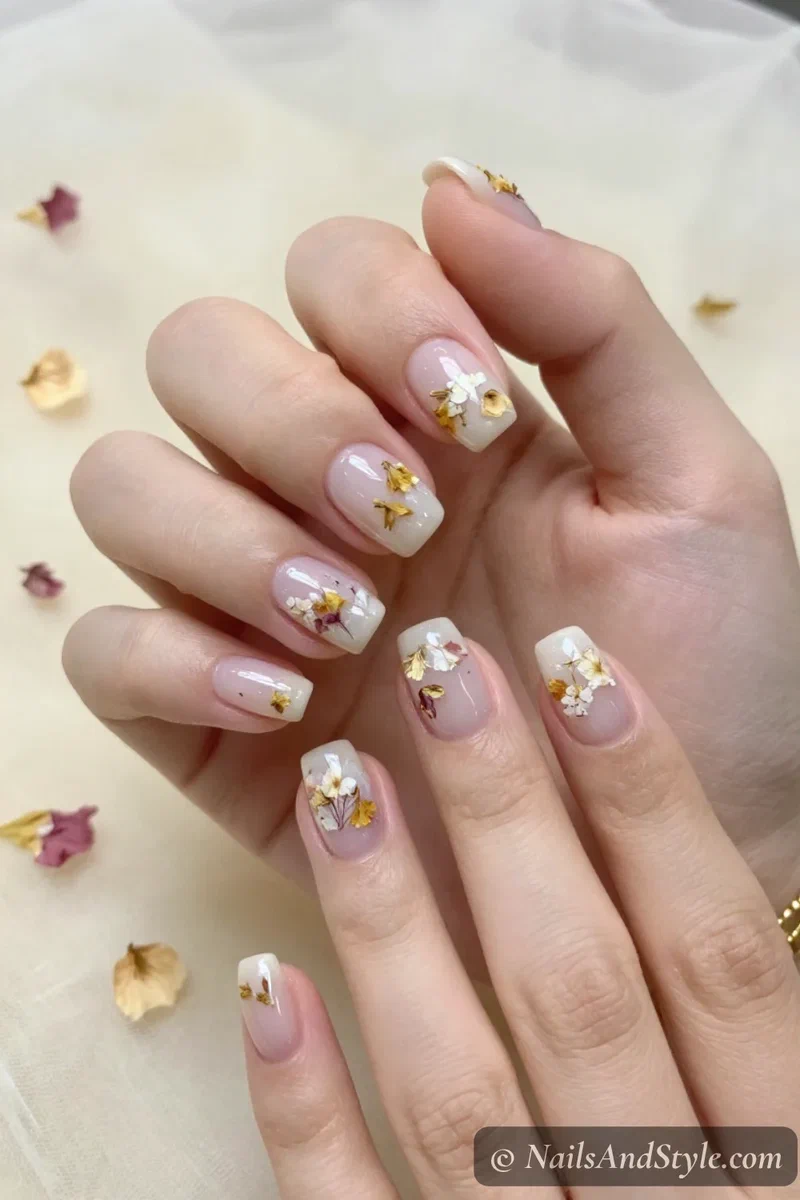
Those dreamy milk-bath nails with real-looking petals suspended inside? Way easier than they look. Paint a sheer milky white, press tiny dried flowers or floral decals onto the wet surface, then flood the whole thing with a thick glossy top coat so the blooms look sealed under glass. Soft, romantic, kind of magic.
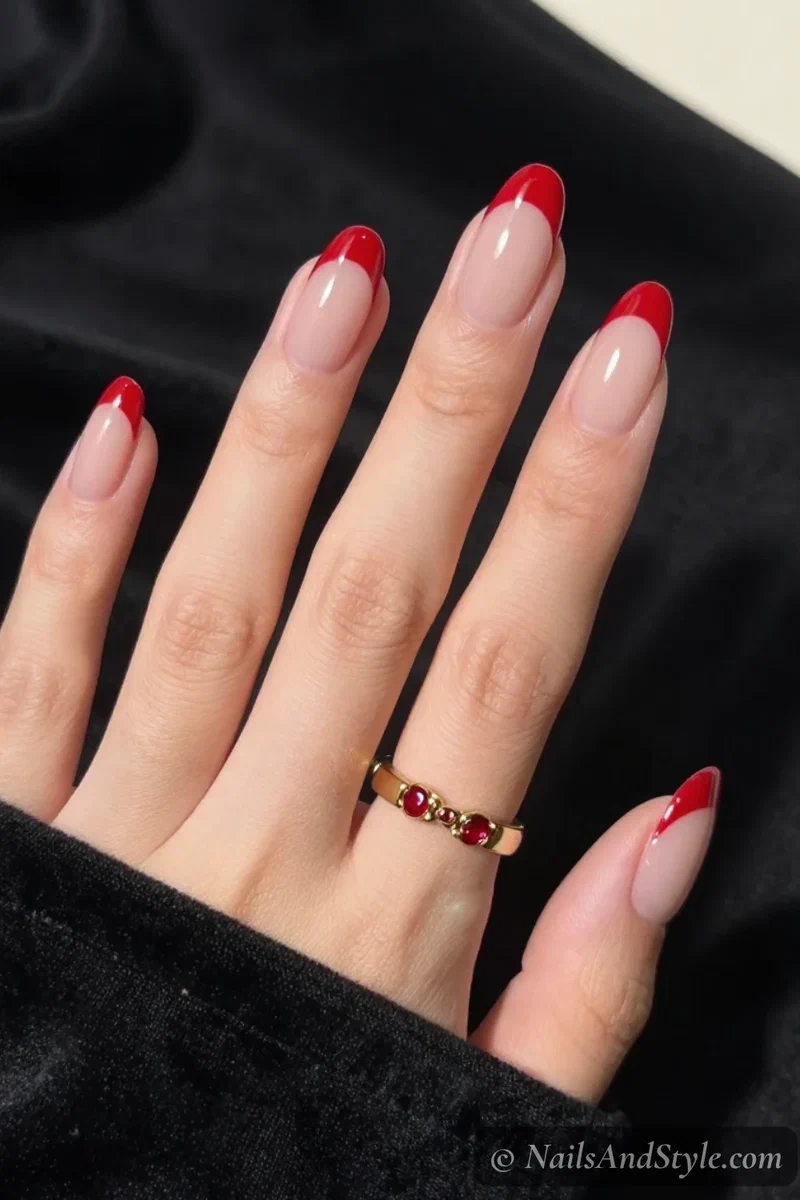
24. Classic Red French Tips#
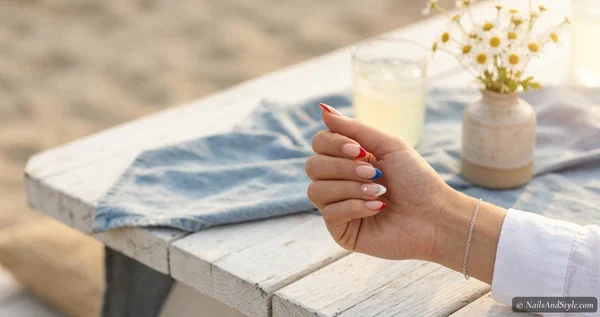
A French tip in true red instead of white — a little retro, a little bombshell, always chic. Over a sheer nude base, paint a clean red line across each tip; French guides or a steady striping brush keep it sharp. Keep the tips a consistent width across all ten, then finish with a mirror-glossy top coat.
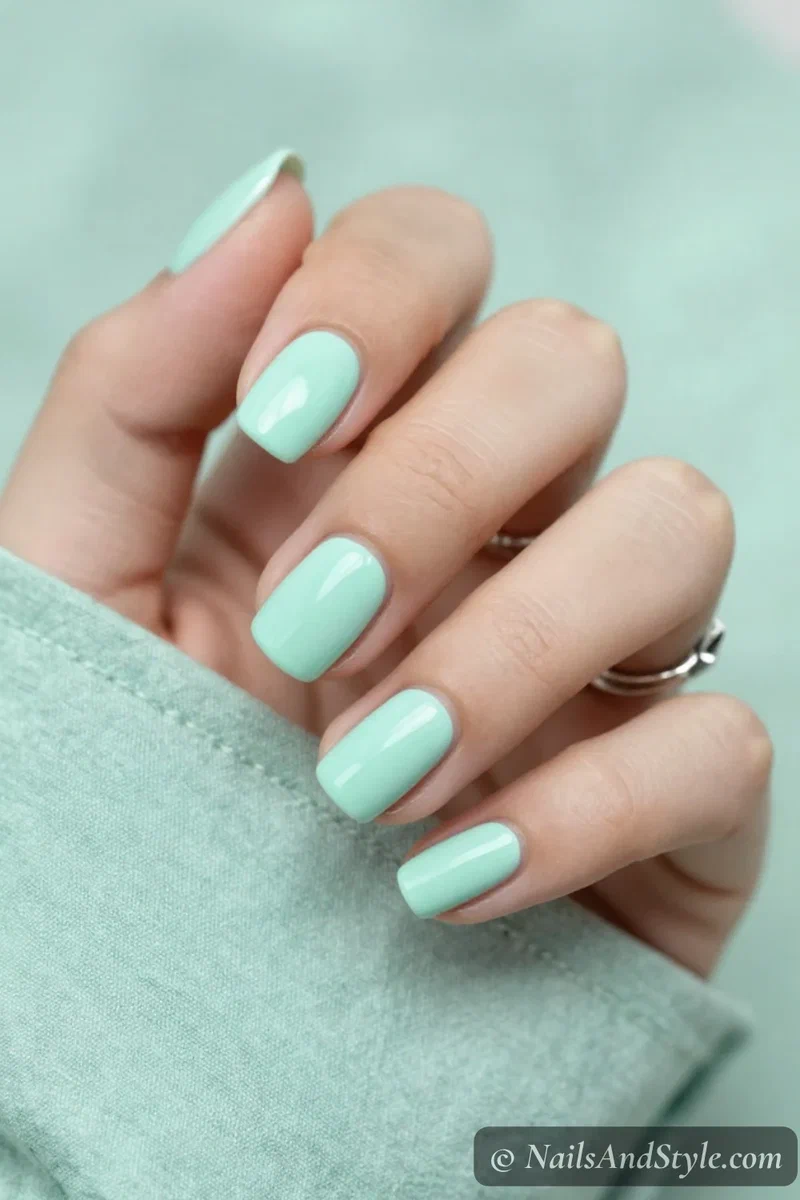
25. Mint Cream Gloss#
Ending on something soft and cooling — a creamy mint green that’s basically iced tea on a porch, in polish form. Two thin, even coats of an opaque mint cream, edges cleaned up sharp. Glossy top coat for that smooth, salon-fresh shine. Simple, but it just looks finished.
Salon-Made Nails on Short Nails#
Here’s the thing nobody tells you: a lot of these look better short. Short nails hold polish more evenly, chip less, and make clean, minimal looks read even crisper. You don’t need length to look salon-fresh — you need tidy edges and a good top coat.
And a few of these designs genuinely make short nails look longer. Anything with a vertical fade or a thin tip tricks the eye up the nail.
A Few More Short-Nail Ideas#
- Micro glitter fade — the vertical sparkle draws the eye upward and visually stretches the nail.
- Negative space half-moon — that little bare gap makes short nails look longer and more intentional.
- Milky pink gloss — clean, simple, and instantly manicured on any length.
- Chrome French tips — a thin metallic tip elongates without adding any bulk.
- Aura blush — the soft center glow flatters a short, rounded nail beautifully.
Simple Step-by-Step: How to Get That Salon Finish at Home#
The salon part is mostly prep and cleanup. Here’s the order I follow every time:
- Prep. Wipe off old polish, trim, file into one clean shape, and gently push back your cuticles. This does more for the salon look than any color you’ll pick.
- Buff lightly. A quick, gentle buff smooths ridges and helps polish grip — don’t overdo it, though.
- Base coat. One thin layer. It protects the nail and stops staining from brights and reds.
- Base color. Sheer nude, milky white, soft pink, or clear — whatever your chosen look starts from.
- Build the design. Sponge the ombre, buff the chrome, or paint your detail. New to art? My beginner nail art guide is a gentle place to start.
- Add the extras. Pearls, gold leaf, rhinestones, a floral petal — press them in while everything’s still tacky.
- Clean the edges. A small brush dipped in remover, run around each nail, erases every little wobble. This is the biggest pro move there is.
- Top coat and dry. Seal the free edge, go glossy, and let it all cure or air-dry fully before you touch a thing. Patience here saves the whole set.
How to Ask Your Nail Artist for Salon-Made Nails#
Sometimes you just want to sit back and let someone else do the work — zero shame in that. A little vocabulary gets you a lot closer to the picture in your head, though, so here’s how to explain what you want.
- Bring 2-3 reference photos and name the exact shade — “peachy glazed chrome,” “coral ombre tips,” “butter yellow” — since salon color names vary wildly.
- Say the finish out loud: glazed pearl, mirror chrome, sheer jelly, or classic glossy all look completely different in person.
- Ask for a shape that suits your hands — almond and squoval tend to read the most polished for these looks.
- Mention whether you want hand-painted detail (florals, swirls, lace) or powder-and-foil work, since they’re timed and priced differently.
- Go gel for the glazed and chrome finishes — they hold that wet, glassy shine far longer than regular polish, which can dull in a day or two.
Tips to Make Your Nails Last Longer#
- Keep every coat thin — thick polish bubbles, smudges, and peels way faster.
- Seal the free edge (the tip) with base, color, and top coat to lock everything in.
- Skip hot water and long showers for an hour after painting; heat softens fresh polish.
- Wear gloves for dishes and cleaning — water and soap are a manicure’s worst enemy.
- Swipe a fresh layer of glossy top coat every 2-3 days to fight chips and keep the shine.
- Massage in cuticle oil daily; healthy cuticles keep the whole look fresh longer.
- Stop using your nails as tools. Grab a coin for that package, not your thumbnail.
Quick FAQ#
Which salon-made look is easiest for a total beginner?#
Milky pink gloss or butter yellow, hands down. There’s no art to mess up — the salon effect comes entirely from thin coats, clean edges, and a glossy top coat. Start there, build confidence, then work up to chrome or florals.
What colors look the most salon-made?#
Soft neutrals, milky washes, glazed pastels, and anything with a clean chrome or pearl finish read the most professional. As a rule, it’s less about the color itself and more about how smooth and glossy you get the finish.
Can I do these on natural nails?#
Absolutely. Every look here works on bare natural nails with regular polish. Gel just helps the glazed and chrome finishes last longer — but a good glossy top coat and clean edges do most of the heavy lifting on their own.
Final Thoughts#
The best-kept secret about nail designs that look salon-made is that “salon-made” is mostly a finish, not a skill. Clean edges, thin coats, and a glassy top coat will carry almost any look on this list — the rest is just picking a color you love.
So save the ones that made you pause, and start with whatever suits your week — a soft milky pink, a glazed peach, or a full tangerine chrome moment. Which one are you trying first? Fair warning: once your hands start looking like this, you might quietly cancel your next appointment.