So here’s the thing about nautical nails — they’ve been around forever but they keep reinventing themselves every summer. What used to be just red, white, and blue stripes has turned into this whole world of anchor accents, rope textures, compass details, and chrome finishes. Way more interesting than it sounds.
This post has 15 nautical nail art designs you can actually pull off at home, even on short or medium nails. No salon trip required. Some need a steady hand, some just need tape. All of them scream summer.
Why Nautical Nails Are the Summer Mood#
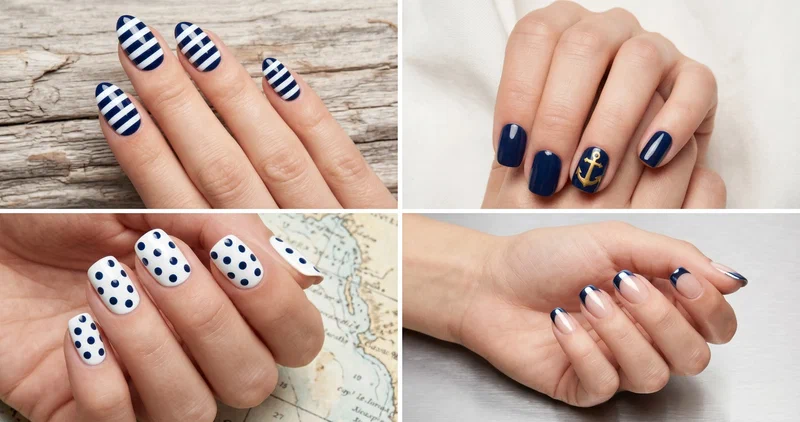
Nautical-themed nails have this effortless vacation energy. Whether you’re literally on a boat or just wishing you were, there’s something about navy and white on your fingertips that feels instantly polished. This summer the trend has expanded — think chrome anchors, pastel sailor stripes, glitter rope patterns, and gold compass accents layered over clean bases.
A Few Things to Keep in Mind Before You Start#
- Start with navy and white — they’re the backbone of every nautical look, then add red or gold if you want more punch
- Skin tone tip — deep navy reads beautifully on warm skin tones, while lighter sky blue or grey-navy flatters cooler undertones
- Go round or almond — both shapes suit the clean lines in nautical art
- Base coat always — dark blues especially will stain without one, so don’t skip this
Quick Pick: Which Nautical Design Should You Try?#
| If you’re looking for… | Try these designs |
|---|---|
| Beginner-friendly | Navy and Gold Foil, Anchor Stamp Nails |
| Short nails | Porthole Dot, Maritime Star |
| Statement piece | Compass Rose Accent, Chrome Nautical French |
| Patriotic and classic | Classic Sailor Stripes, Red White Blue French |
If you want to explore more in this direction, my blue summer nails post has plenty to dig into.
15 Nautical Nail Designs That Actually Look Amazing#
1. Classic Sailor Stripes#
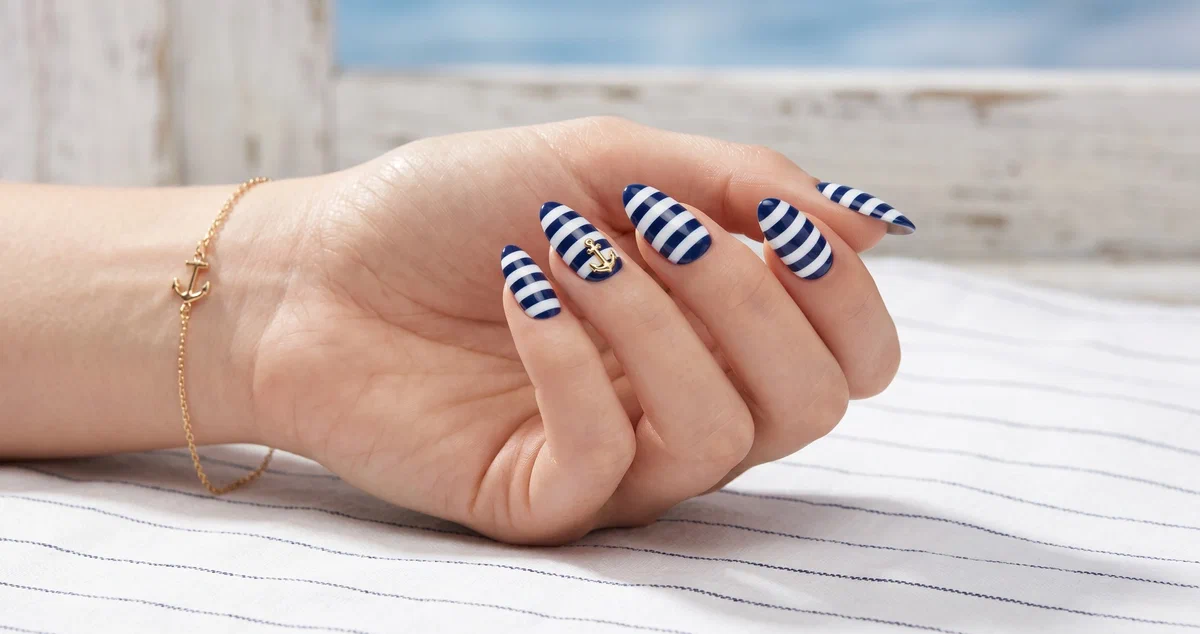
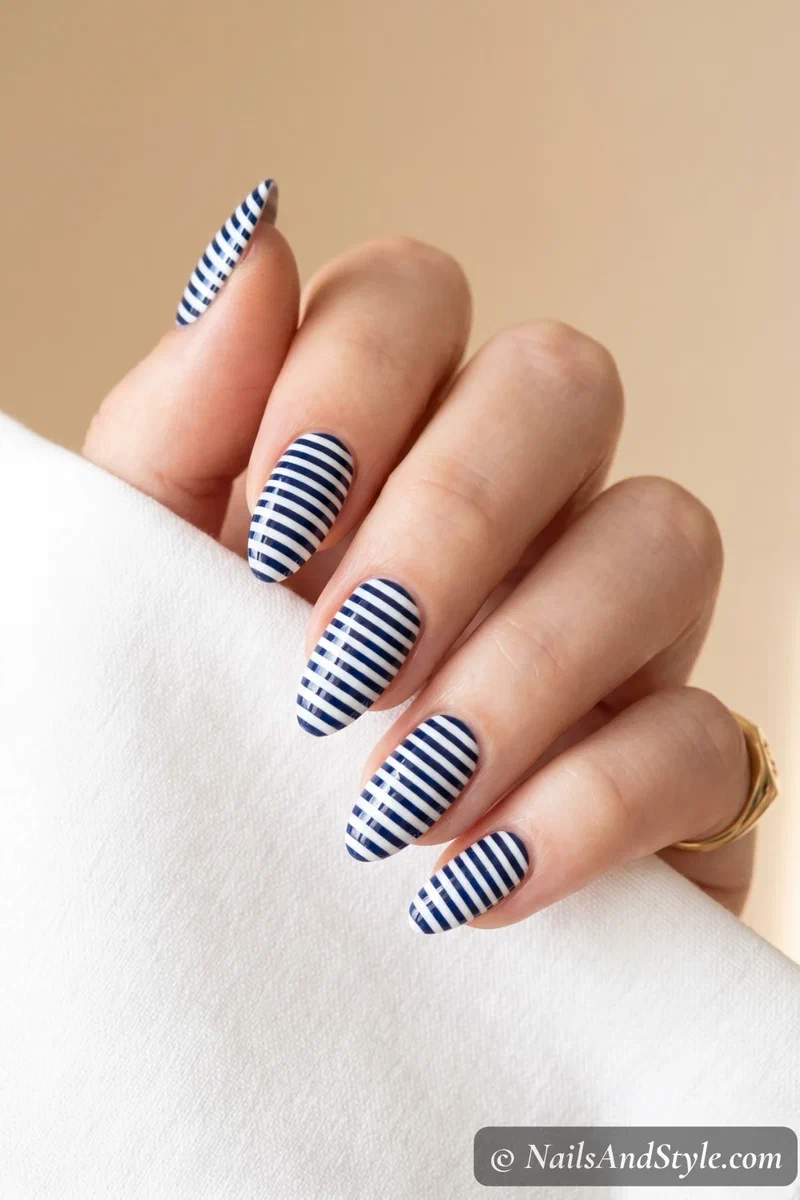
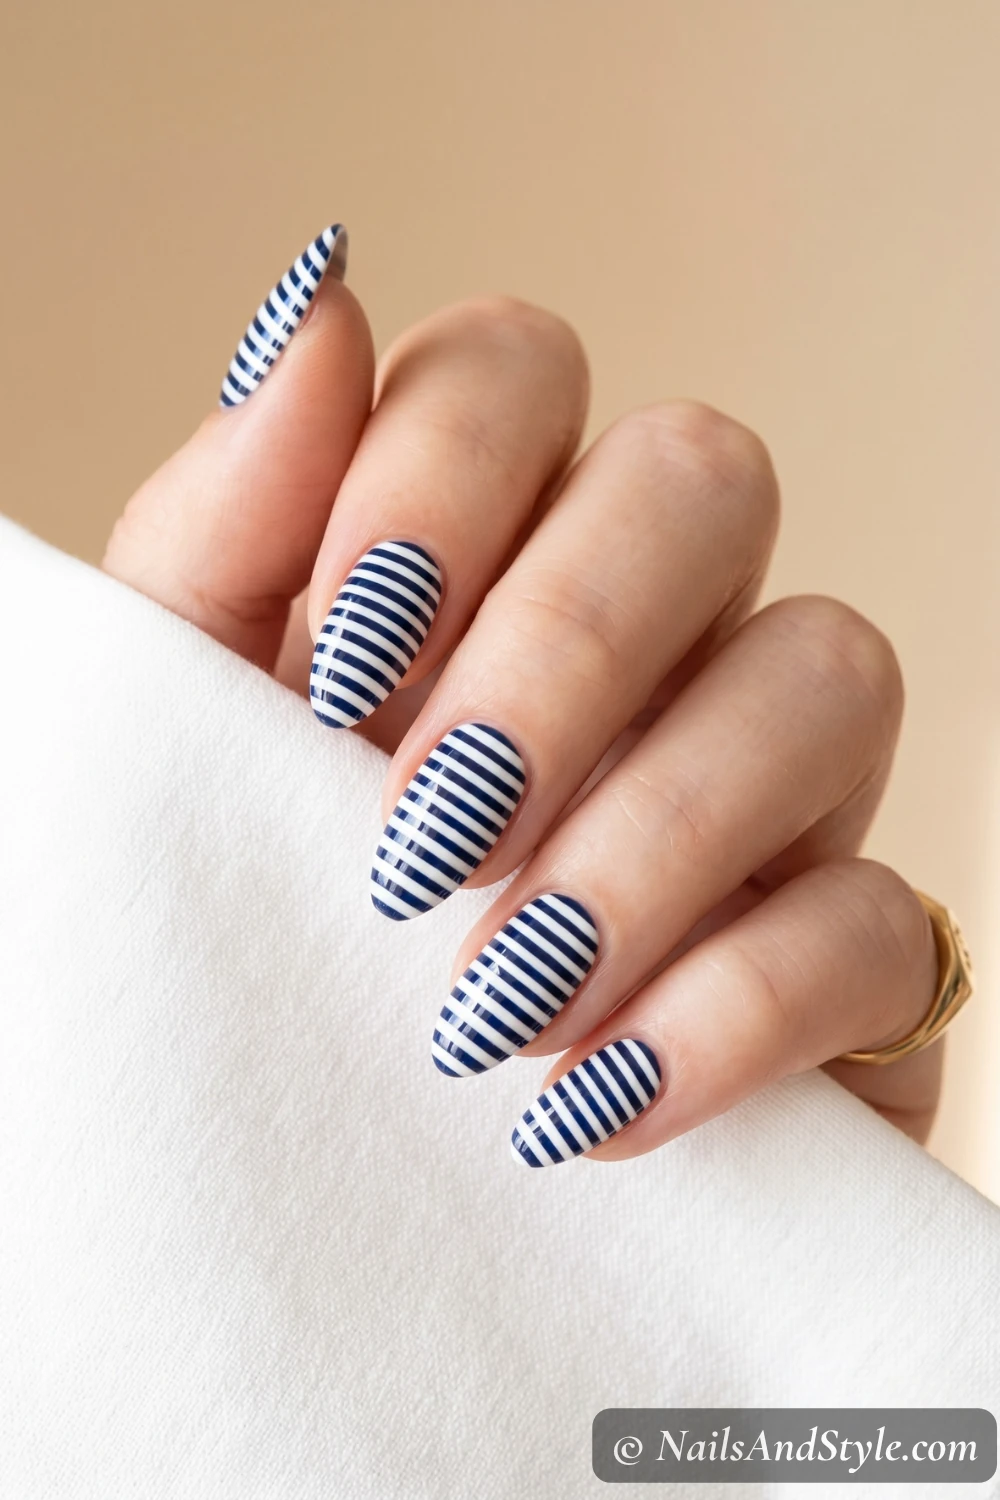
The one everyone thinks of first — and honestly, it holds up. Thin navy and white horizontal stripes across all ten nails. Use striping tape to keep lines crisp, or go freehand with a thin brush if you’re feeling confident. Glossy top coat makes the stripes pop like a fresh deck.
2. Gold Anchor Accent#
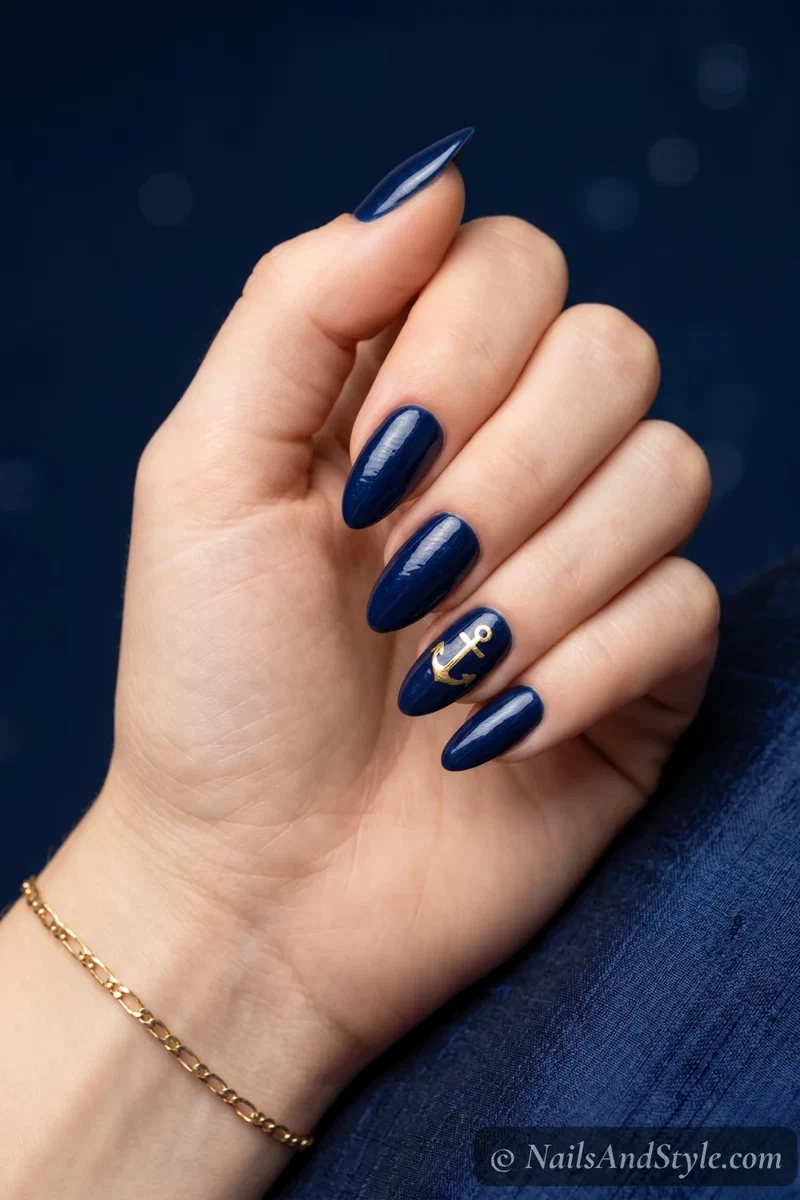
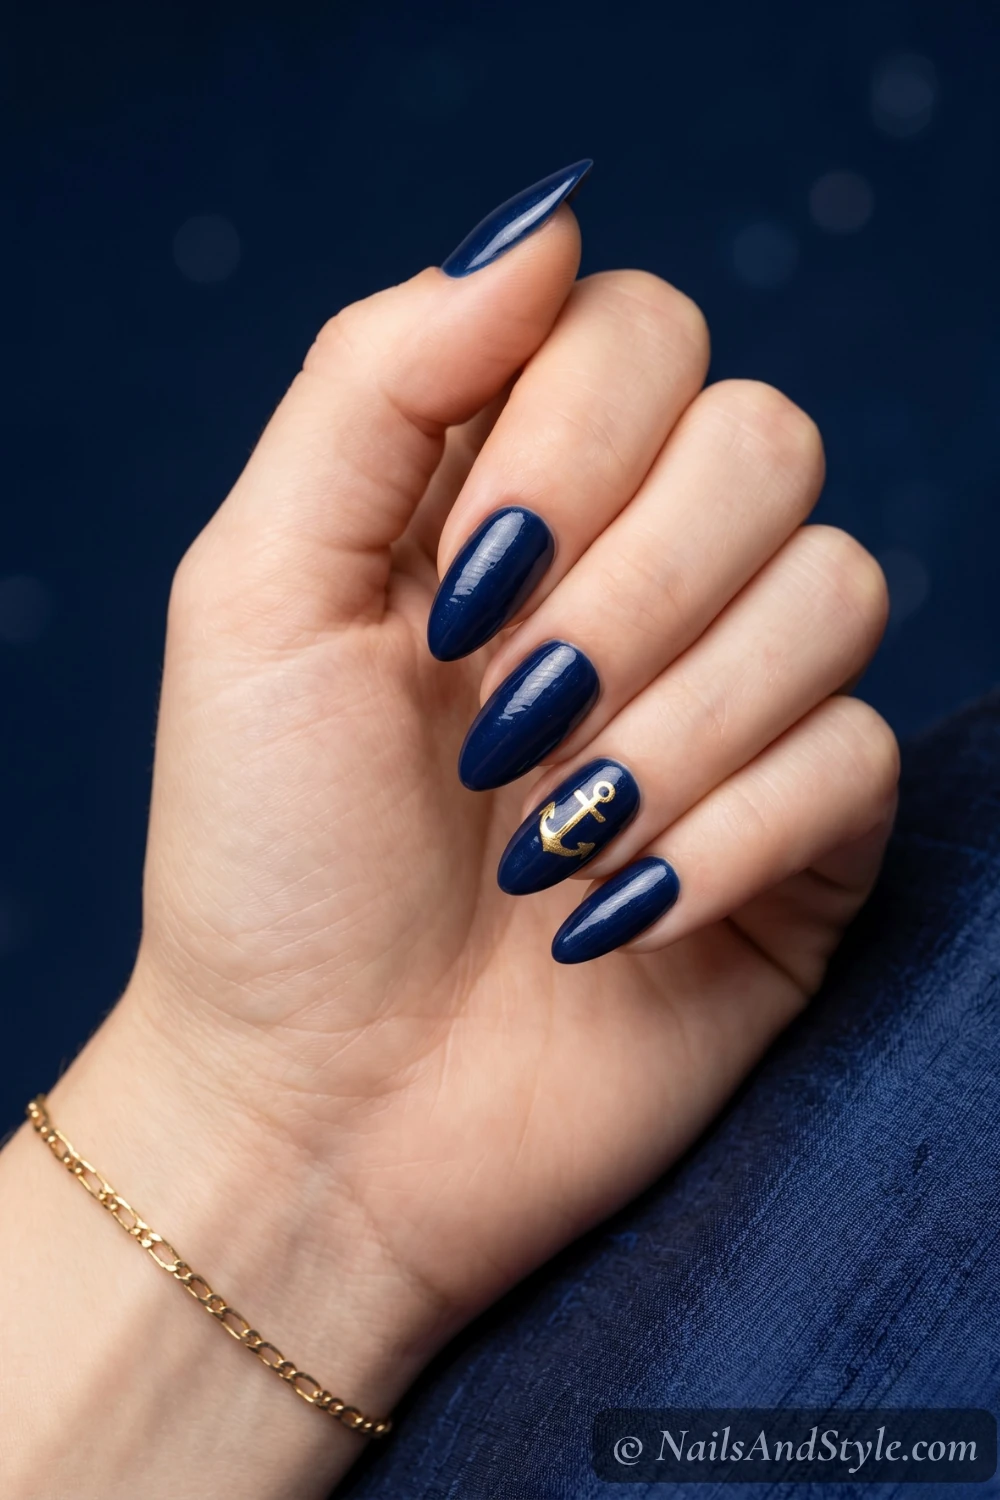
Paint all nails navy, then freehand a small gold anchor on one or two accent nails using a thin brush and gold polish. The anchor doesn’t need to be flawless — slightly imperfect ones actually look more charming. Glossy finish.
3. Red White and Blue French#
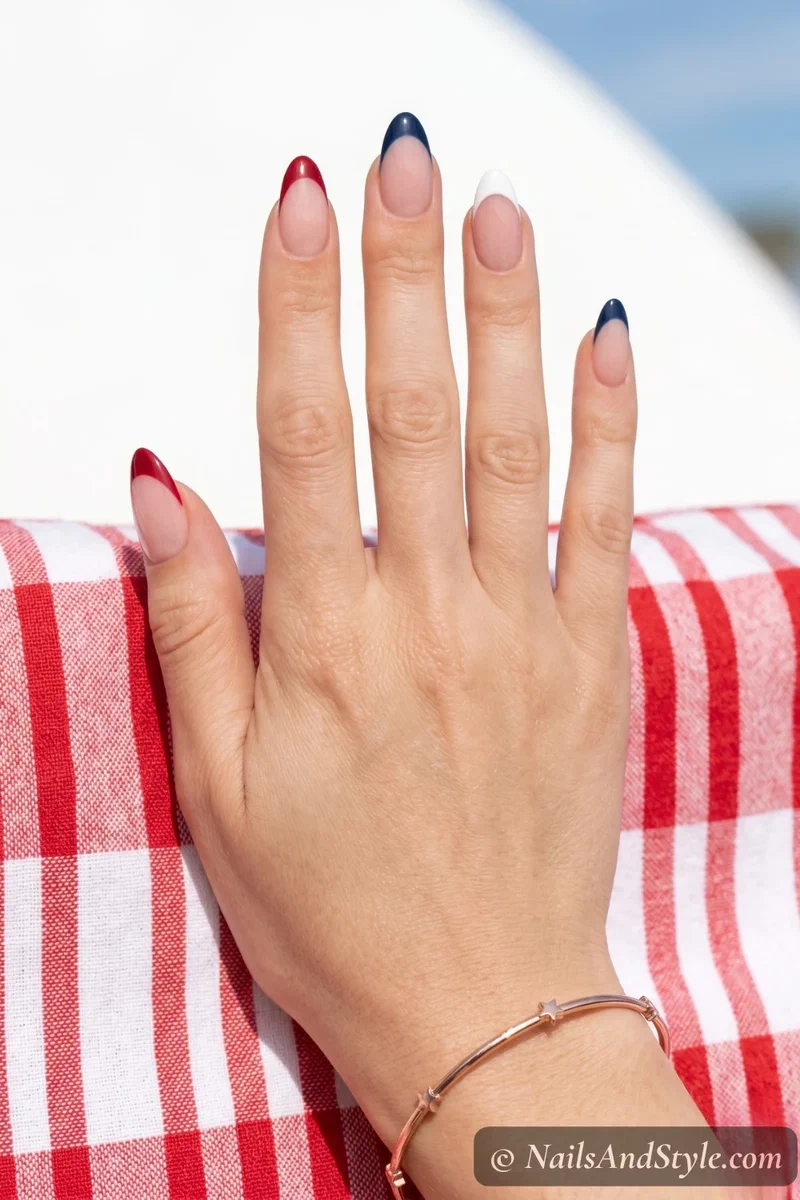
Here’s a twist on the French tip that feels very Fourth of July meets yacht club. Nude or sheer base, then alternate tips — red on one nail, navy on the next, white on the next. Use French guides or tape for clean curves. Glossy.
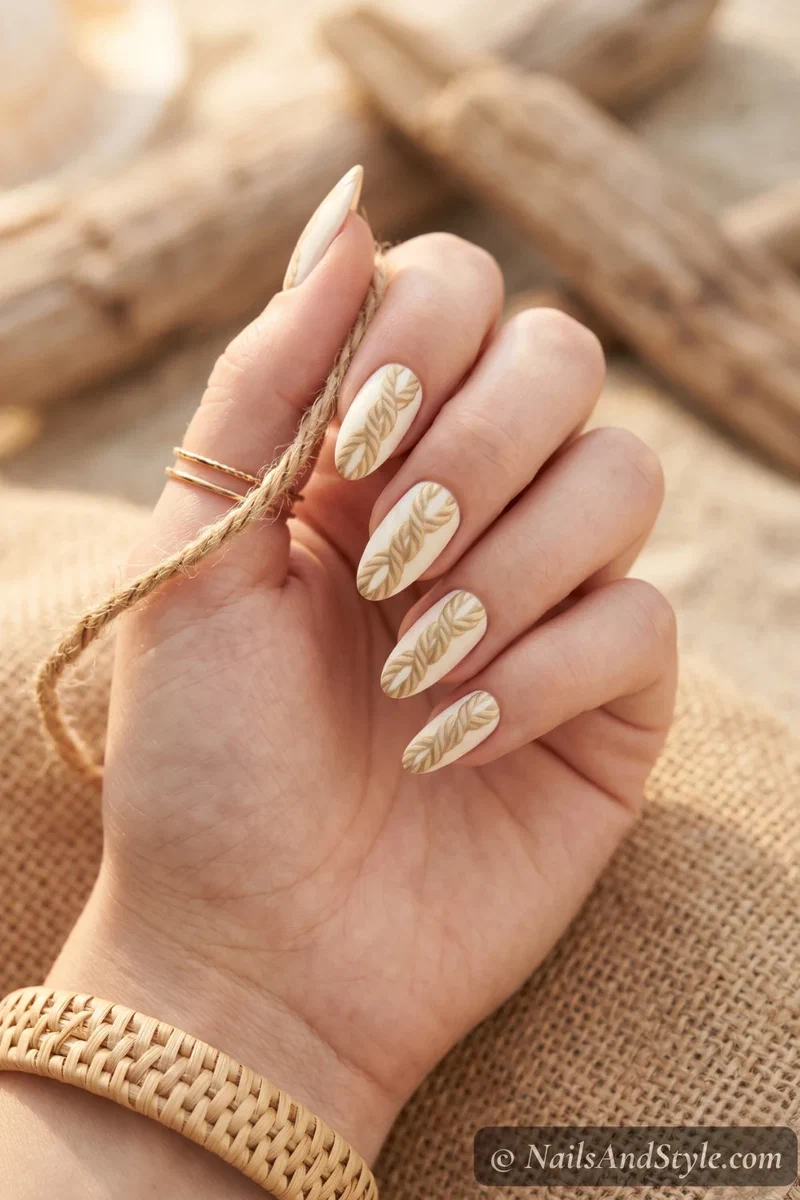
4. Rope Twist Nail Art#
This one’s cooler than you’d expect. On a white or cream base, use a thin striping brush to paint two intertwined gold or tan lines down each nail, mimicking a twisted rope. Takes some patience but the result is so unique. Matte top coat gives it a natural, textured feel.
My french tip nail art tutorial post is a great companion read if you’re loving this style.
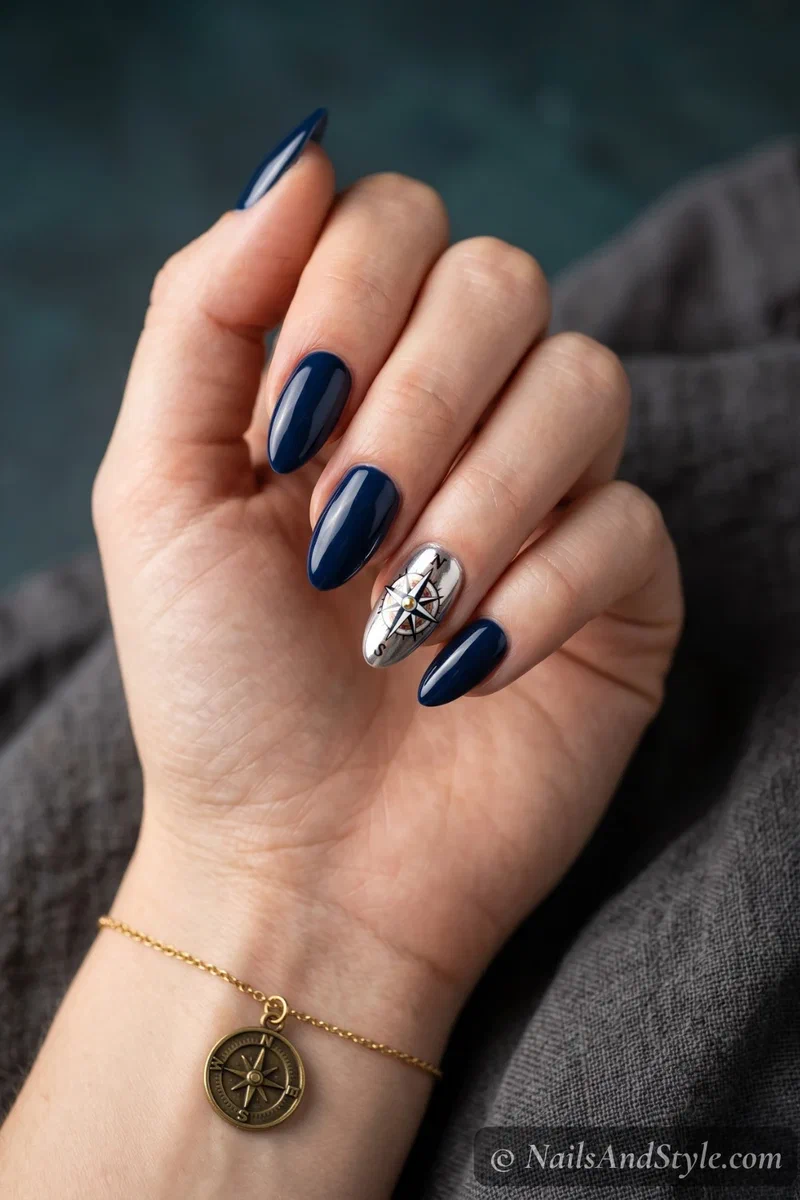
5. Compass Rose Accent#
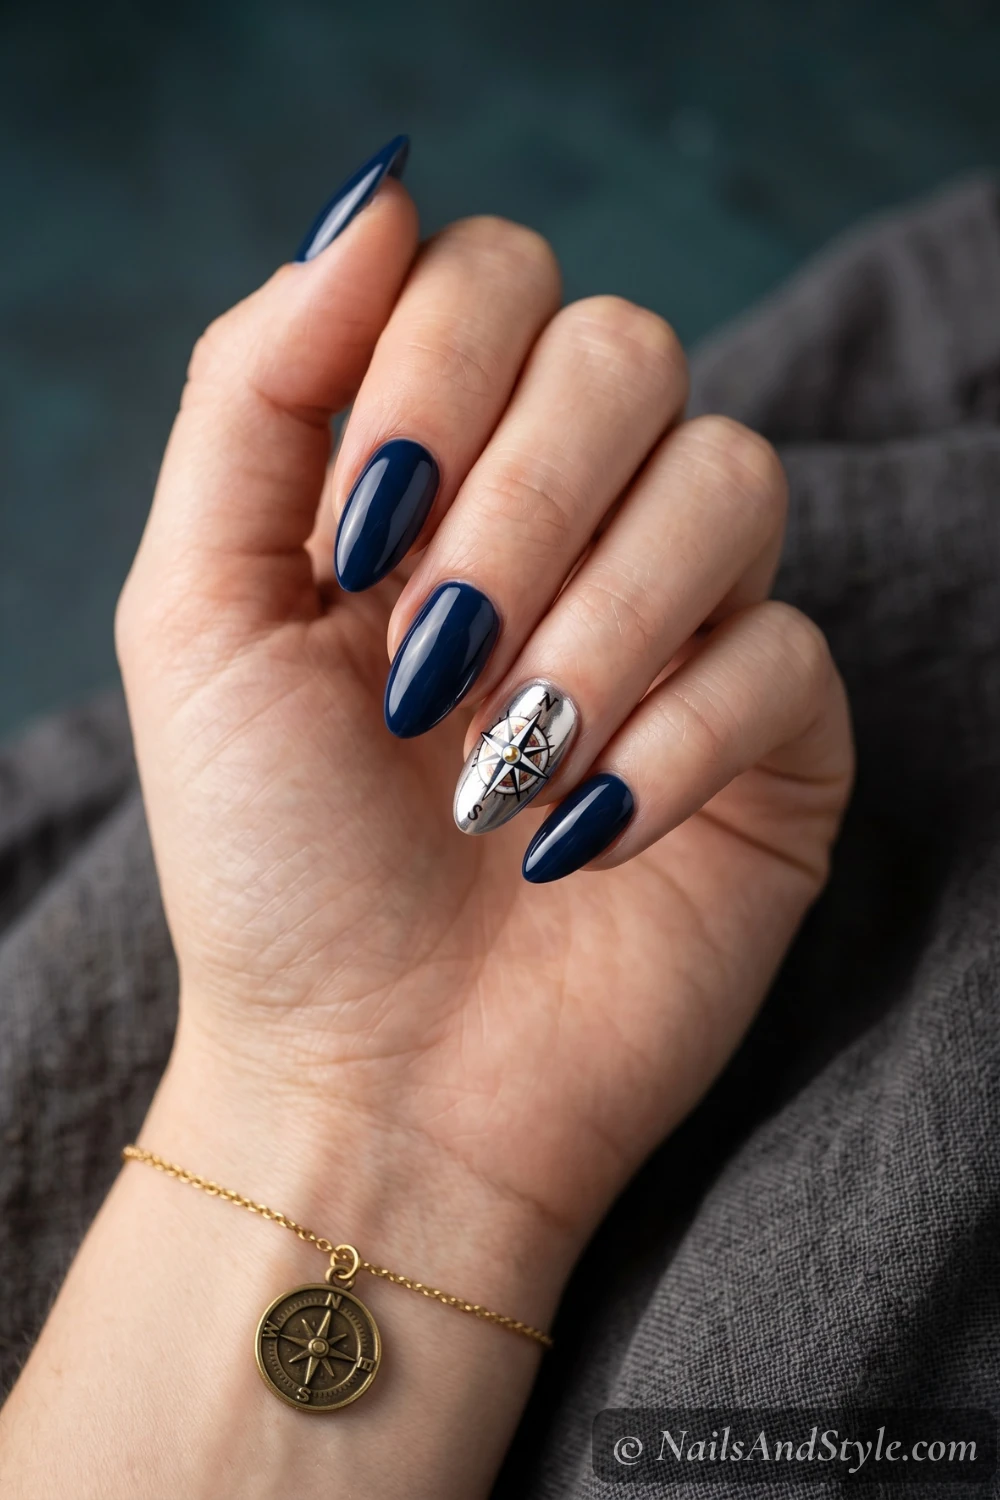
Navy base across all nails, with one accent nail featuring a tiny compass rose in white and gold. Use a dotting tool for the center point and a thin brush for the directional lines. It looks intricate but it’s basically just a star with a dot. Chrome top coat on the accent nail adds dimension.
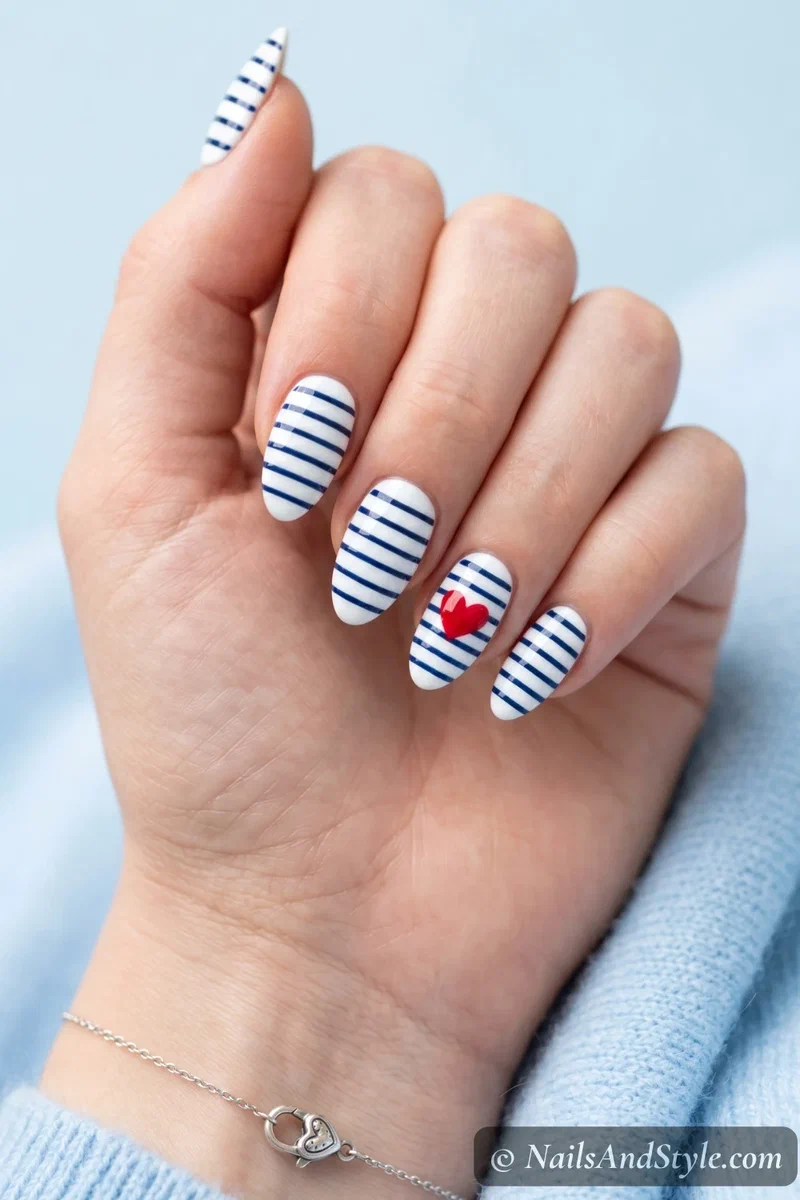
6. Striped Nautical Nails With Heart#
White base with thin navy stripes on most nails, and then a red heart painted over the stripes on one accent nail. The heart sitting over the stripes creates this adorable layered effect. Keep the heart small and centered. Glossy finish brings everything together.
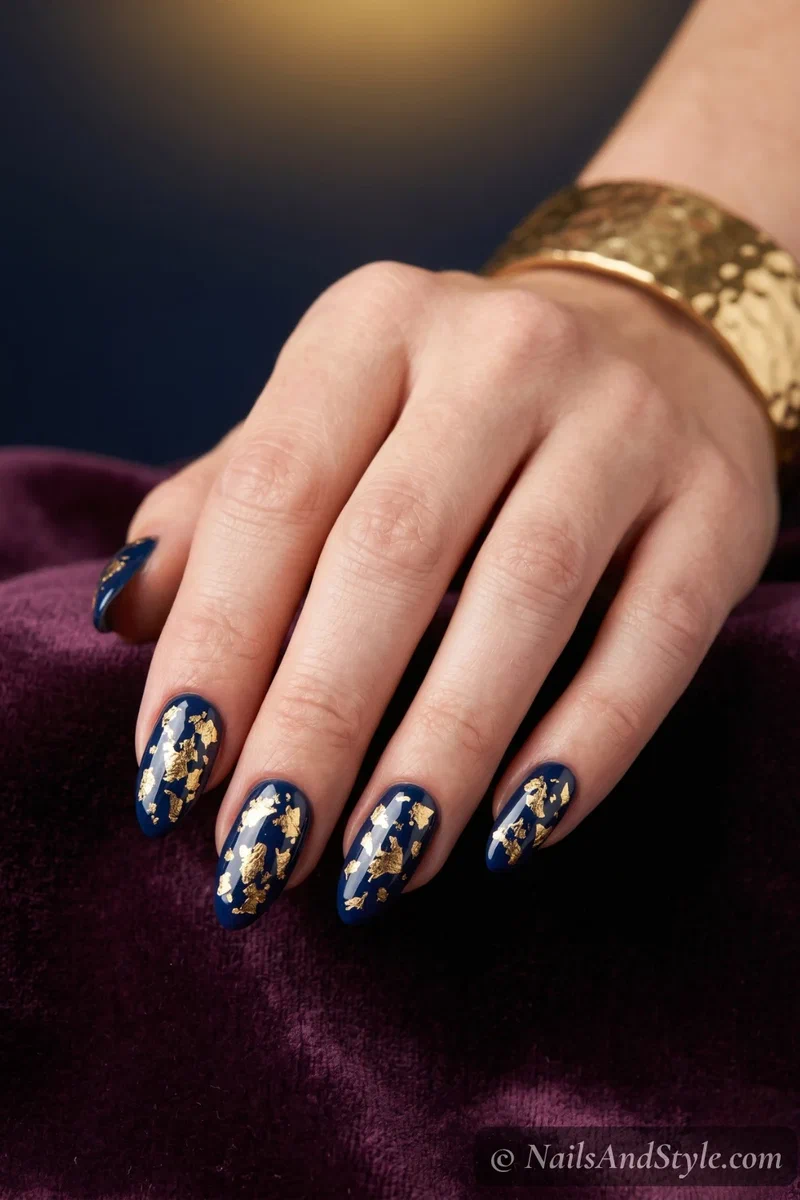
7. Navy and Gold Foil#
Apply a deep navy base, cure or dry completely, then press tiny pieces of gold foil randomly across the surface. The foil catches light like sun bouncing off water. No artistic skill needed — just press and seal with top coat. Honestly one of the easiest on this list.
8. Vertical Stripe Mix#
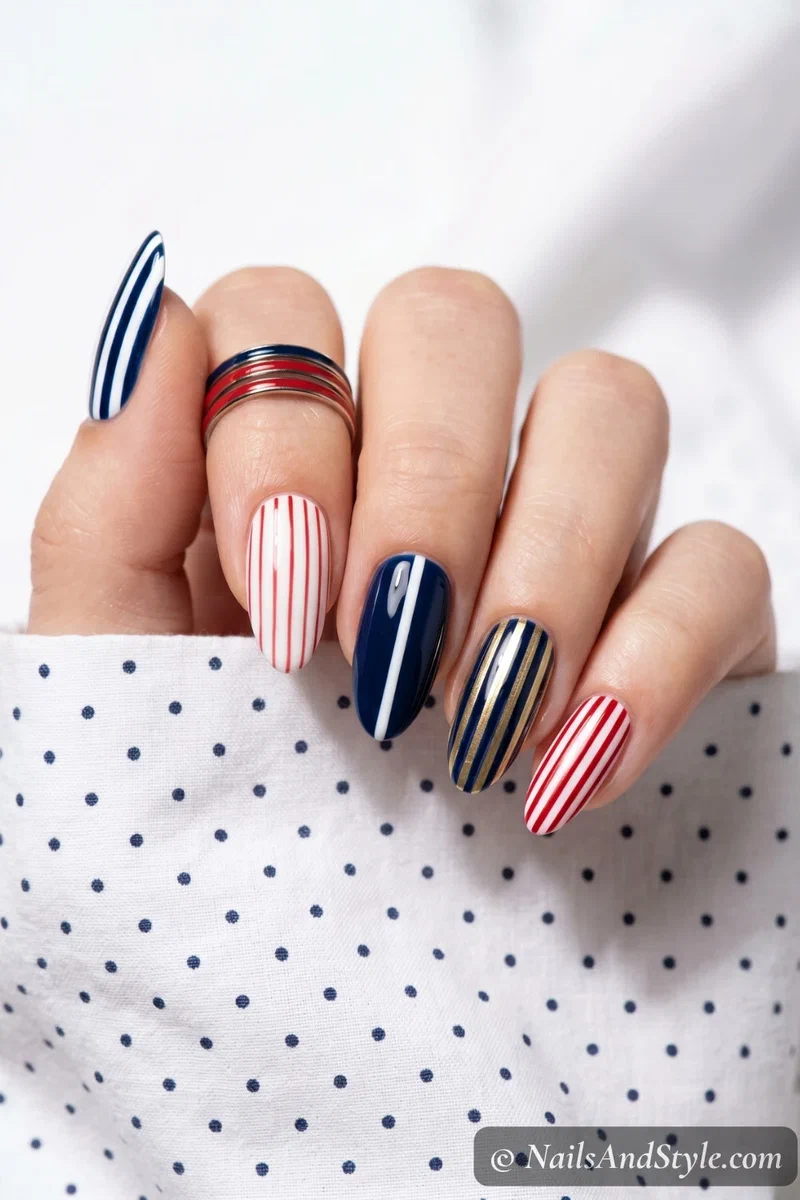
Instead of all the same stripes, mix it up — some nails get thick navy vertical stripes, some get thin red ones, one gets a single white center stripe on navy. Striping tape is your best friend here. The variety keeps it from looking uniform. Glossy.
9. Anchor Stamp Nails#
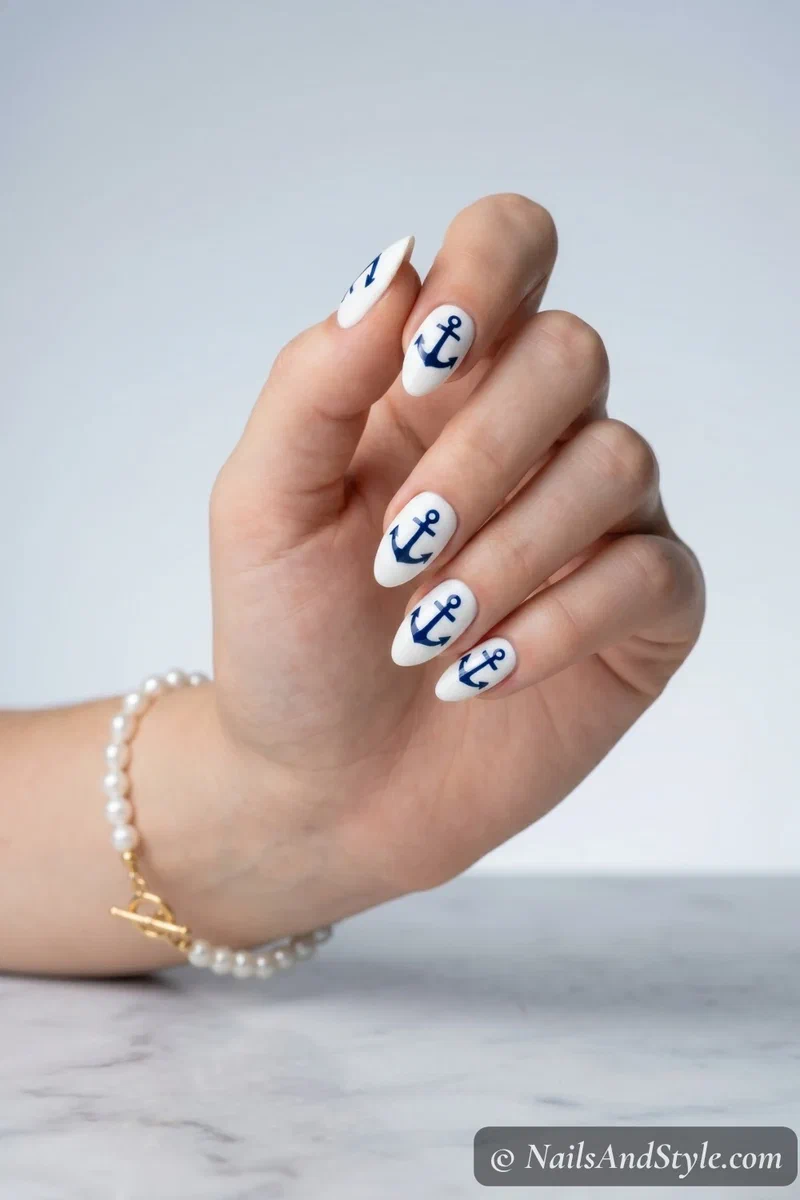
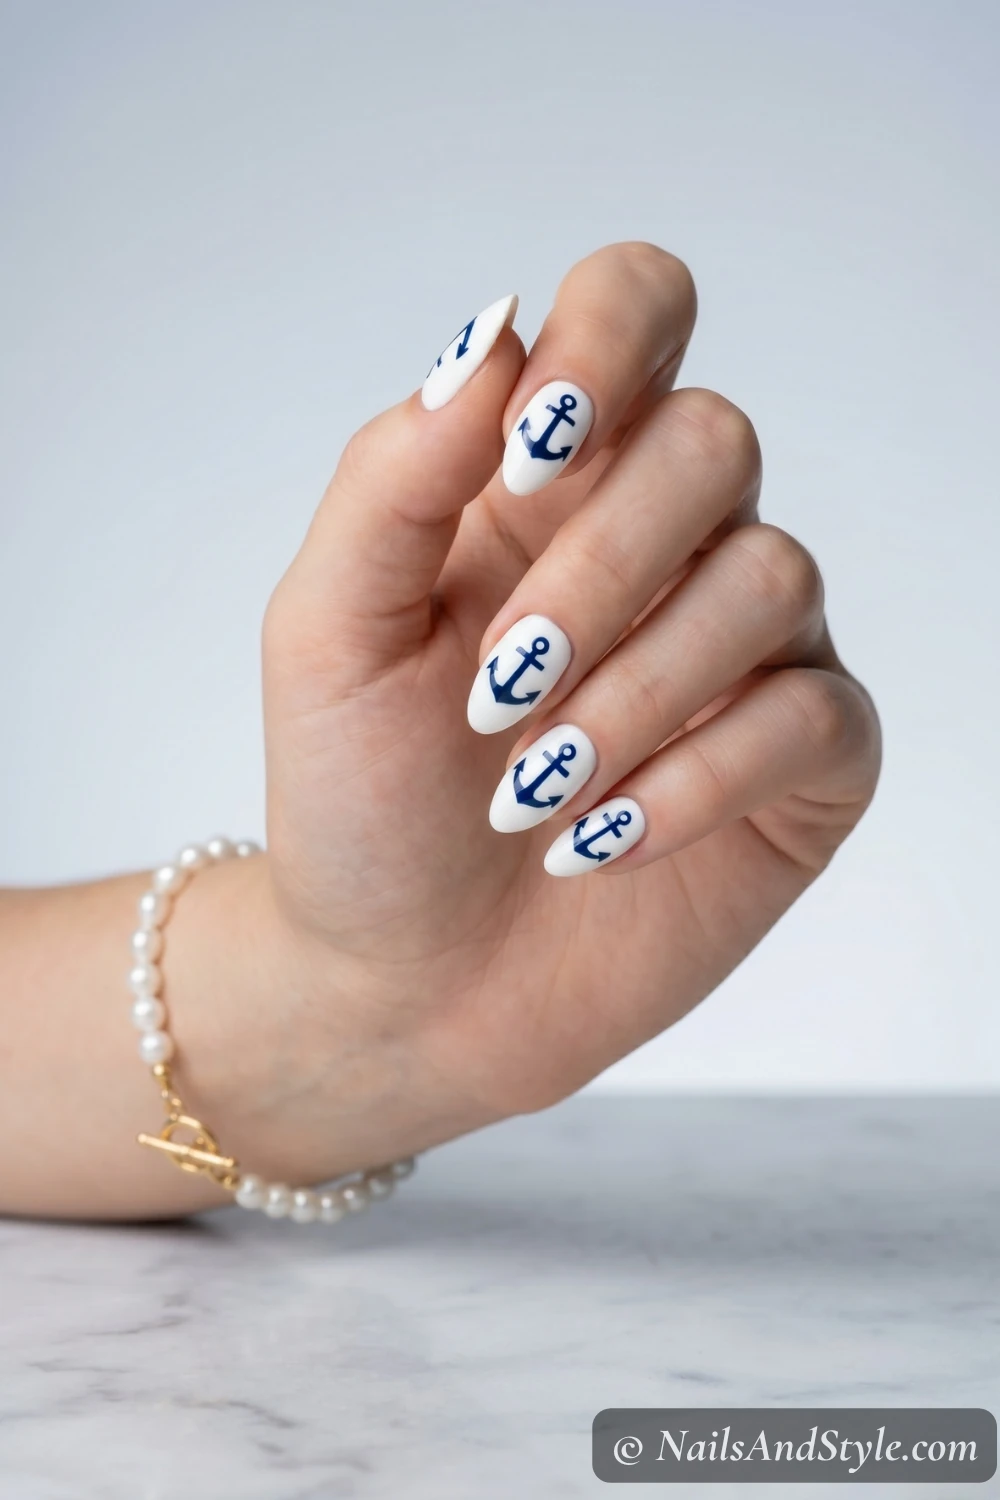
If freehand anchors stress you out, a nail stamping plate with nautical motifs is a game changer. Stamp navy anchors onto a white base — takes seconds and they come out perfectly crisp every time. Finish with glossy top coat.
For more ideas like this, check out my nail stamping tutorial for beginners post — worth a scroll.
10. Sailing Nails With Wave Tips#
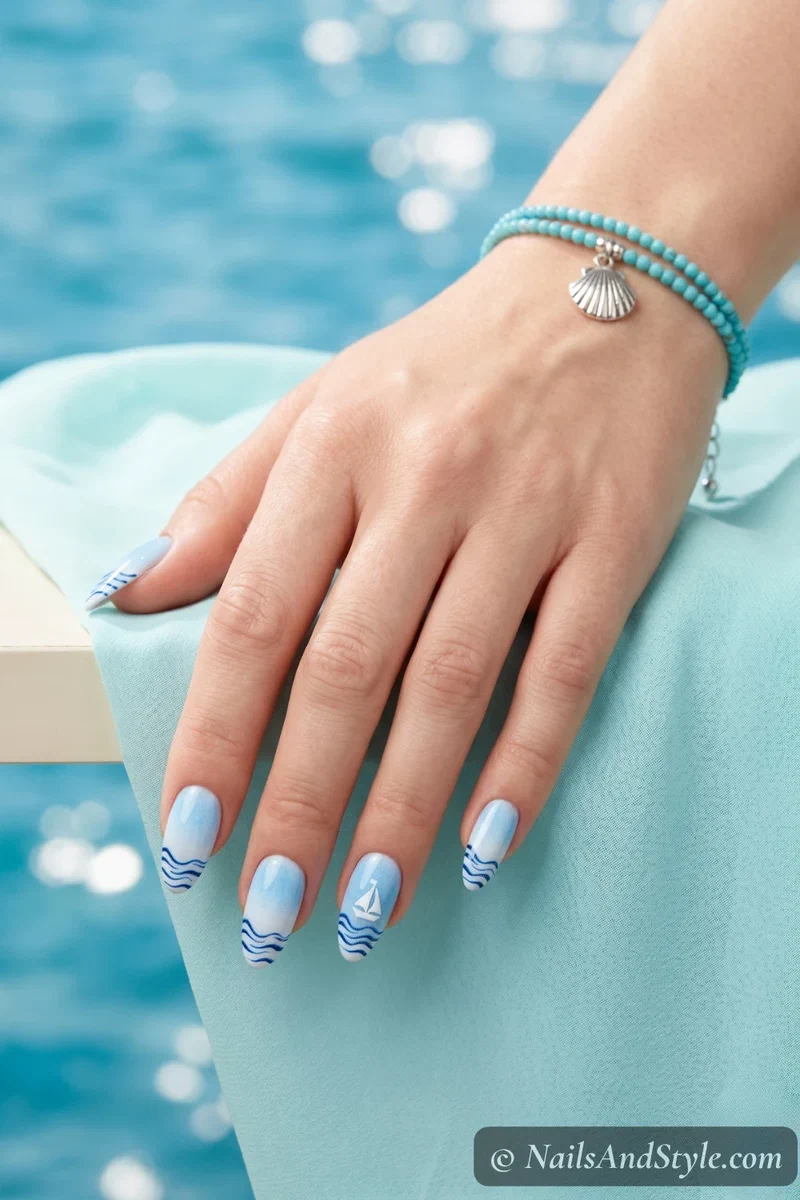
Soft sky blue base that fades to white at the cuticle area — sponge the gradient. Then paint wavy navy lines along the tips to mimic ocean waves. A tiny white sailboat silhouette on one nail pulls the whole story together. Glossy. Leaning into the coastal side of nautical? My seashell nail designs post pairs perfectly with these ocean looks.
11. Maritime Star Nails#
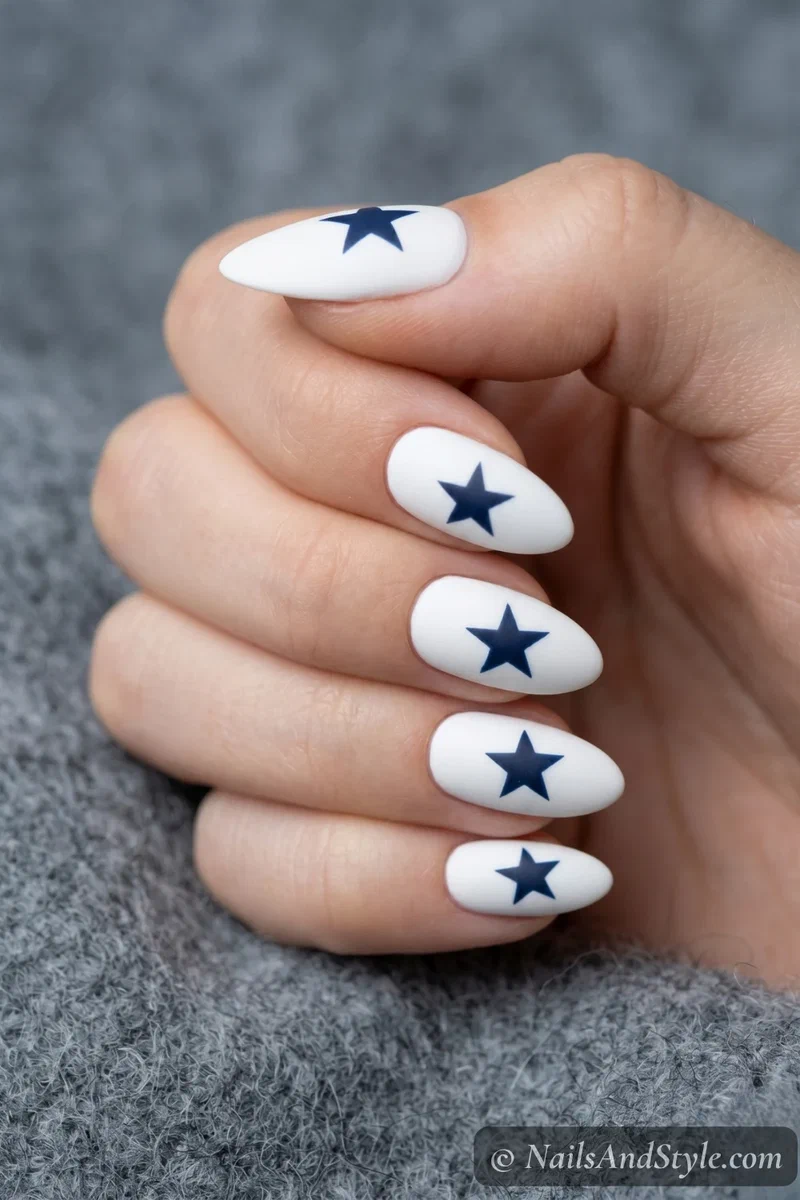
White base with a single navy star on each nail, slightly off-center. Use a thin brush or a star stencil if you’ve got one. The asymmetric placement makes it feel modern, not crafty. Matte finish keeps it understated.
12. Navy Stripe With Gold Anchor Combo#
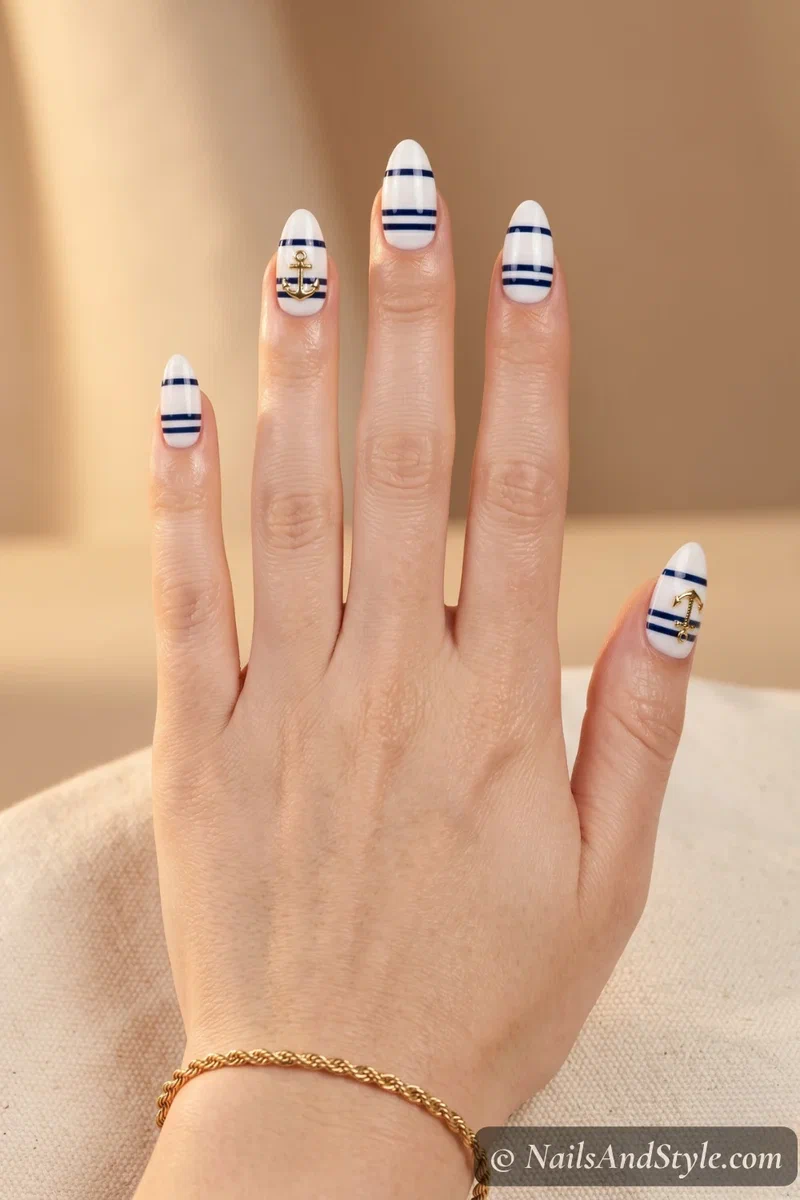
Okay this one combines two ideas and it just works. White base with two thin navy stripes across each nail, then a tiny gold anchor between the stripes on one or two nails. Layered details without being over the top. Glossy finish.
13. Red Accent Nautical Nails#
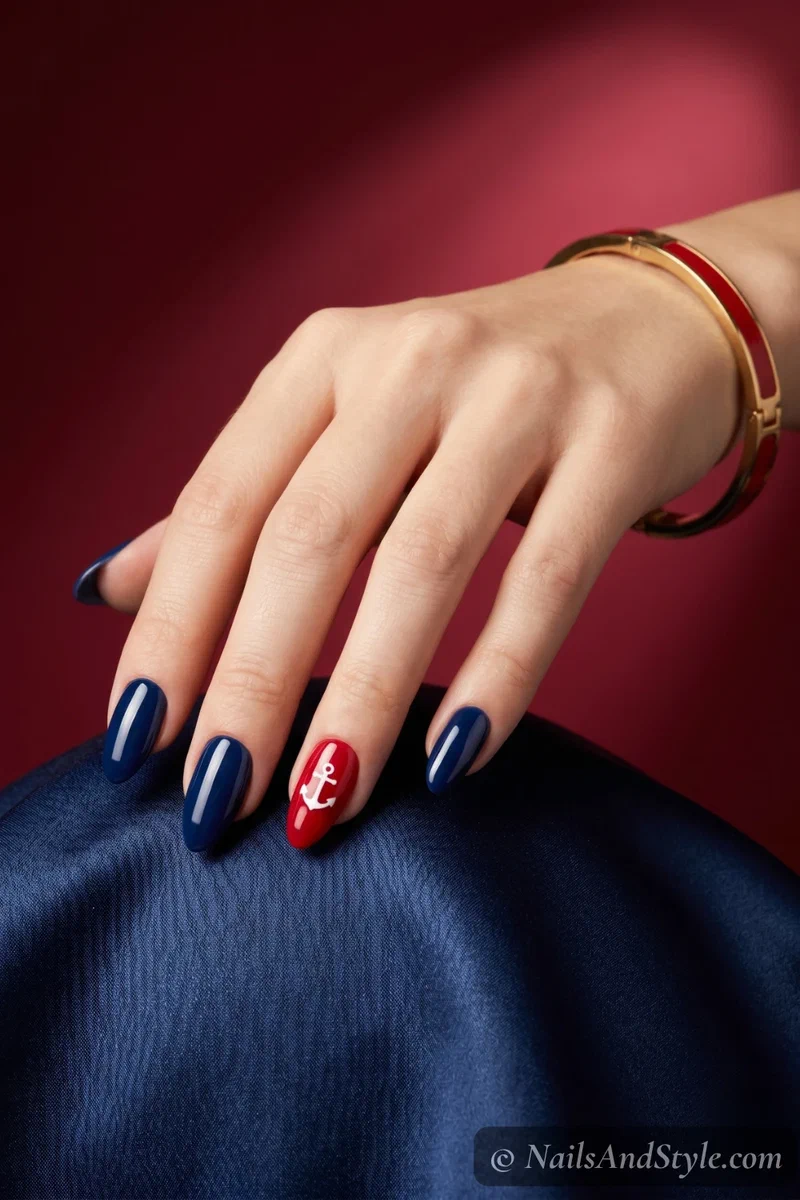
Most nails in navy, but your ring finger in bright red with a white anchor. The color pop breaks up the navy in such a good way — it’s unexpected but totally cohesive. Use a dotting tool for the anchor’s ring at the top. Glossy.
14. Porthole Dot Nails#
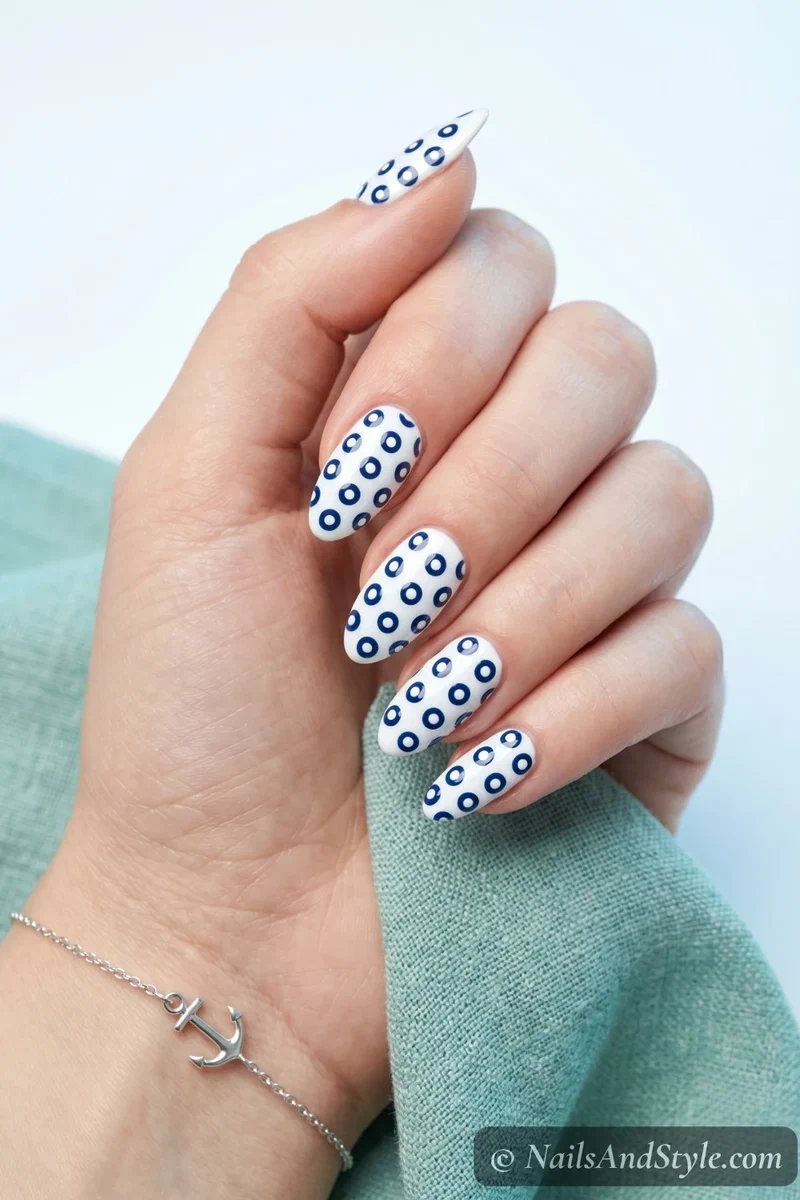
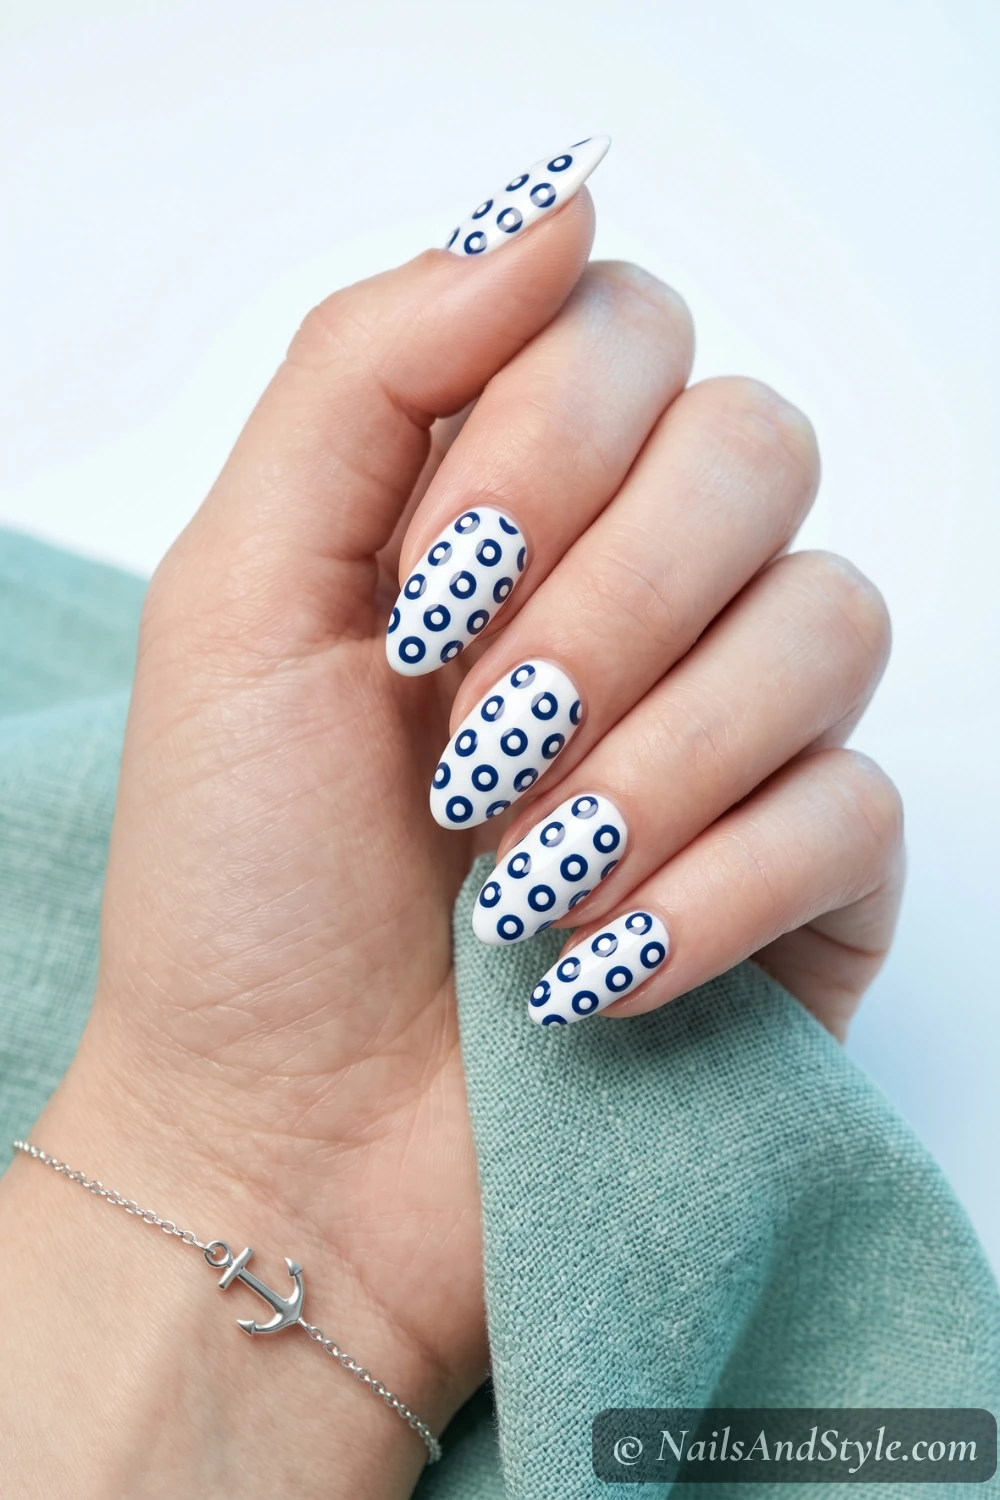
White base with navy circles arranged in a grid — they look like tiny portholes. Dotting tool makes this insanely easy. Add a smaller white dot inside each navy circle for that window effect. Glossy top coat keeps the dots crisp.
My nail art with toothpick for beginners post goes deeper on this whole vibe if you want to keep going.
15. Chrome Nautical French#
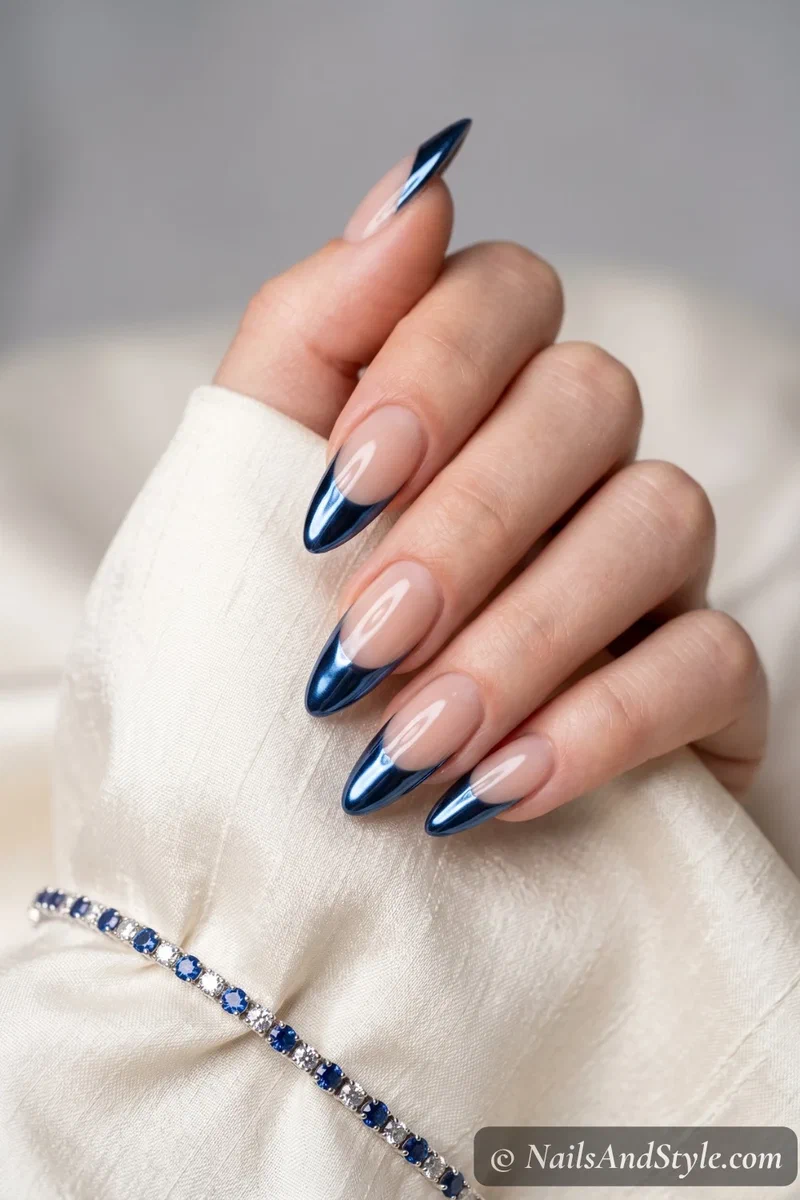
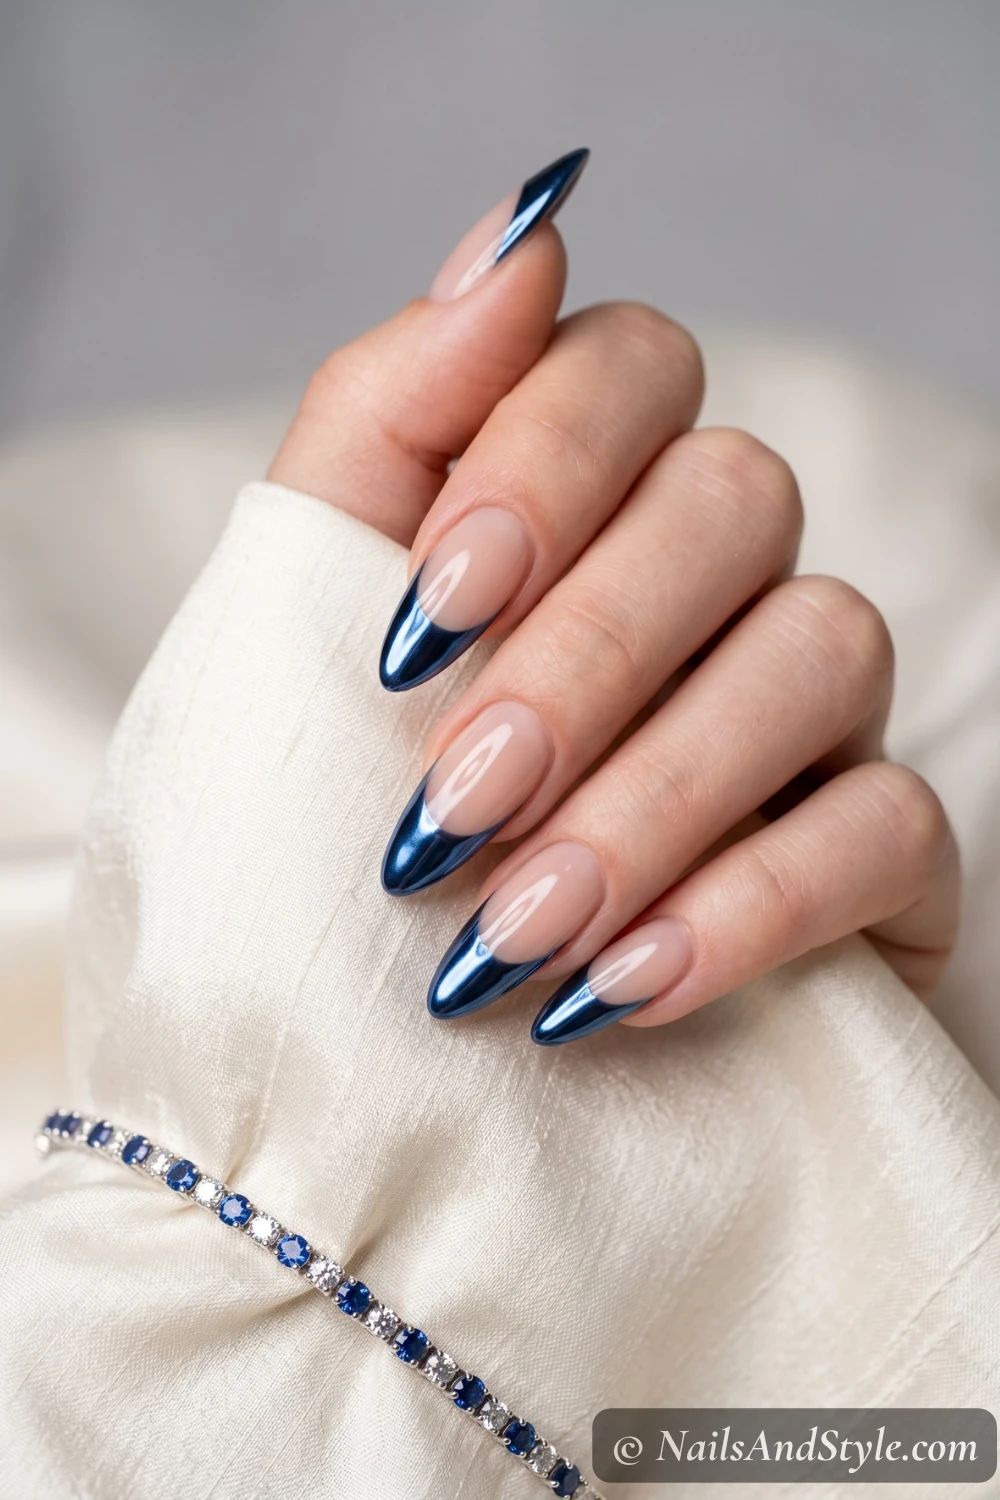
Nude base with chrome navy tips — the metallic finish gives classic sailor vibes a futuristic edge. Apply navy gel polish on the tips, cure, then rub navy chrome powder over the surface. The mirror-like shift is honestly stunning. Seal with gel top coat.
Nautical Nails on Short Nails#
Can we talk about how good these look on short nails? Stripes, dots, and small accent art actually read better on a shorter canvas because the proportions stay tight. You don’t get that stretched-out look that sometimes happens on longer nails.
A Few More Short Nail-Specific Ideas#
- Sailor stripes — thin stripes on short nails look crisp and intentional, not crowded
- Single anchor accent — a small anchor on a short nail is the right scale, no resizing needed
- Porthole dots — a couple dots per nail is plenty and it still reads as nautical
- French tips — even a narrow tip in navy or red instantly gives that maritime vibe
- Gold foil — works on literally any length and looks expensive no matter what
Simple Step-by-Step: How to Do Nautical Nails at Home#
- Prep your nails — remove old polish, trim to your preferred length, file into a round or almond shape, and gently push back cuticles
- Buff lightly — a quick pass with a buffer gives polish something to grip
- Apply base coat — especially with dark navy polish, this step is non-negotiable for preventing stains
- Paint your base color — white, nude, or navy depending on the design you’re going for, two thin coats
- Add your design — lay down striping tape for stripes, use a thin brush for anchors and details, or press on foil for the easier looks
- Layer extra details — gold accents, red hearts, chrome powder, or stamped motifs go on once the base design is dry
- Clean up edges — dip a small angled brush in nail polish remover and tidy any wobbles
- Top coat and dry — one generous layer of glossy (or matte) top coat, then let everything cure fully before using your hands
How to Ask Your Nail Artist for Nautical Nails#
Nautical designs have a lot of fine details — anchors, stripes, compass roses, ropes — so reference photos and clear direction make a huge difference at the salon.
- Bring 2-3 reference photos showing the specific motifs (anchor versus compass versus rope) and the level of detail you want
- Specify your color story — classic navy + white + red, or modern navy + gold, or pastel sailor stripes
- Almond or round shapes carry stripes best; squoval works for chrome navy and porthole dots
- Mention hand-painted vs stamping vs decals — anchors and compasses stamp beautifully, stripes use tape, rope twists are freehand
- Choose gel polish for navy and chrome — both stain and chip quickly on regular polish, gel keeps the navy crisp for two weeks
Tips to Make Your Nautical Nails Last Longer#
- Thin coats over thick ones — two or three thin layers dry faster and chip less than one gloopy coat
- Seal the free edge — drag the polish and top coat over the very tip of each nail to lock the design in
- Wait before getting hands wet — give your nails at least an hour before washing dishes or showering
- Wear gloves for chores — cleaning products are murder on fresh polish
- Reapply top coat every 2-3 days — this alone can add several days to your manicure
- Cuticle oil daily — keeps everything looking fresh and your nails healthy underneath
- Don’t pry things open with your nails — just use a knife or a key like a normal person
Quick FAQ#
Are nautical nails hard for beginners?#
Most of these are surprisingly doable. Stripes are the easiest starting point — just use tape or striping tape as guides. Anchors and compass designs take a steadier hand, but a dotting tool and thin brush get you pretty far.
What colors work best for nautical nail designs?#
Navy blue, white, and red are the classic combo. But you can branch out with gold accents, soft sky blue, grey, or even coral for a modern twist. Keep at least one neutral in the mix so it doesn’t get too busy.
Can I do nautical designs on natural nails?#
Absolutely. Natural nails are great for this — the designs actually pop more on shorter lengths because the patterns stay proportional. Just use a solid base coat, keep your layers thin, and seal with a good top coat.
Shop the Look#
Everything you need to recreate these nautical looks at home:
 BaseBase + Strengthener CoatDeep navy stains without a base coat — don't skip it
 ShineGlossy Top CoatMakes stripes crisp and seals gold accents in
 Navy & redEssie Navy & RedStyle Cartel navy, Really Red, Bikini So Teeny sky blue
 Crisp whiteOPI Alpine SnowA true white for stripes, stars and anchors
 ChromeSilver Chrome PowderBuffs into a mirror navy chrome French tipNo freehandAnchor Stamping PlateStamps crisp anchors in seconds — no steady hand needed
 Dots & detailDotting Tool SetFor portholes, compass roses and anchor rings
Final Thoughts#
Nautical nail art is one of those styles that works for basically every summer scenario — a day on the water, a beach picnic, a backyard barbecue, or honestly just a Tuesday when you want your nails to feel put-together. The 15 looks here range from dead simple (gold foil, sailor stripes) to a bit more detailed (compass rose, rope twist), so there’s something no matter where your skill level sits.
Save the ones that caught your eye, pin them for later, and start with whichever one makes you want to grab your nail polish first. Mix up the colors, swap glossy for matte, throw in some chrome — make it yours. Your nails are about to have the best summer yet.