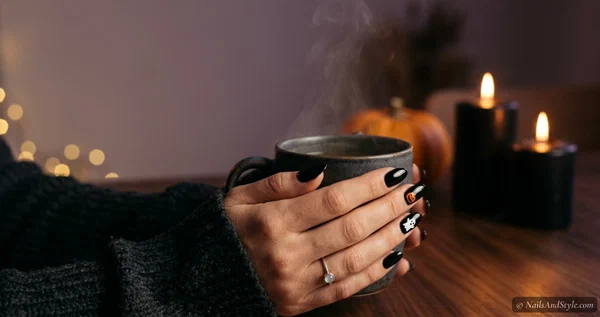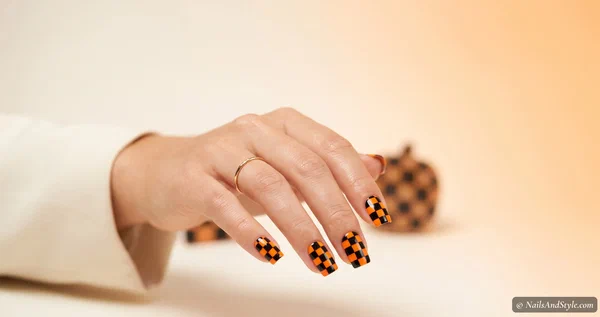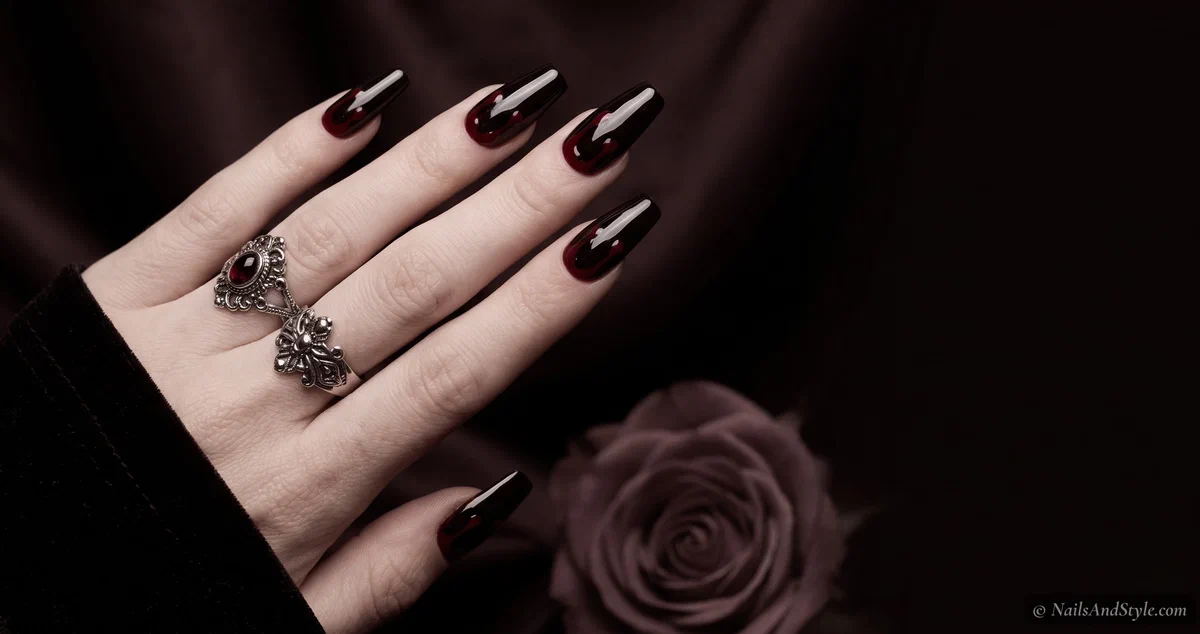
Some people want a cute little ghost. You want the kind of nails that make someone flinch. Good — you’re in the right place. These spooky nails go all in on the creepy side of October: gore, skeletons, vampires, spiders, and eyes that follow you around the room.
Most of these you can absolutely pull off at home, even if a few need a steady hand and a horror playlist for focus. They work on short and medium nails too — honestly, gore looks even nastier packed onto a shorter nail.
I’ve split them into five creepy categories so you can pick your poison. If this ends up being a little much, my full Halloween nail ideas roundup has gentler options. Everyone else — let’s get disturbing.
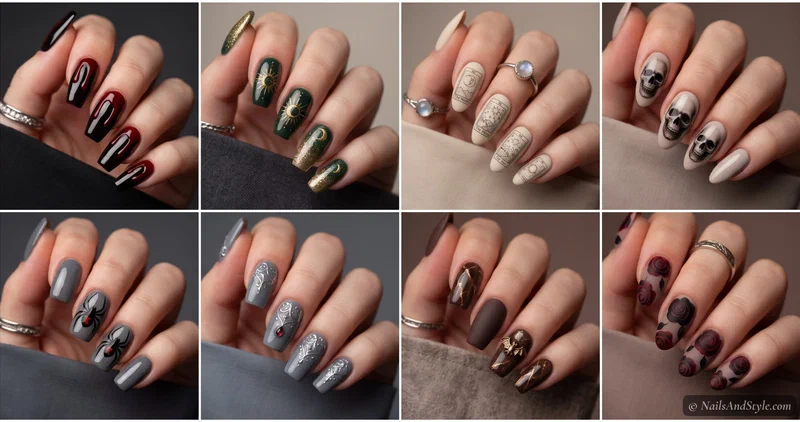
Why Spooky Halloween Nails Hit Harder Than Cute Ones#
Cute is safe. Spooky is a statement. There’s something so satisfying about glancing down mid-conversation and seeing blood dripping off your fingertips — it’s a whole mood, and it commits in a way a little pumpkin never will.
The trick with scary nails is restraint, weirdly. One gory detail done well beats ten half-hearted ones. A single realistic eye, one clean skeleton hand, a few convincing drips — that’s what makes people do a double take. These carry costume parties, horror marathons, and “I dressed up for zero reason” Tuesdays equally well.
A Few Things to Keep in Mind Before You Start#
- Build your dark base. Black, bone white, and a deep brownish-red are your core. Add sickly green or plum depending on the vibe.
- Darker red reads as blood. Bright cherry looks like candy; a deep, slightly muddy red looks like the real thing.
- Detail needs a thin brush. Skeletons, spiders, and filigree live or die by a fine liner brush or a nail-art pen.
- Base and top coat, always. Base stops the dark shades staining; a high-gloss top coat is what makes gore look wet and alive.
Quick Pick: Which Design Should You Try?#
| If you’re looking for… | Try these designs |
|---|---|
| Easy but still creepy | Blood Splatter Nails, Blood Moon Nails |
| Full horror commitment | X-Ray Skeleton Hand Nails, Demon Face Nails |
| Gothic and elegant | Gothic Rose Nails, Victorian Vampire Nails |
| Genuinely unsettling | Bloodshot Eye Nails, Creepy Doll Nails |
Blood & Gore Nails#
We’re starting with the classics of creepy. Blood is forgiving to paint — it’s supposed to be messy — which makes this the most beginner-friendly of the scary bundles.
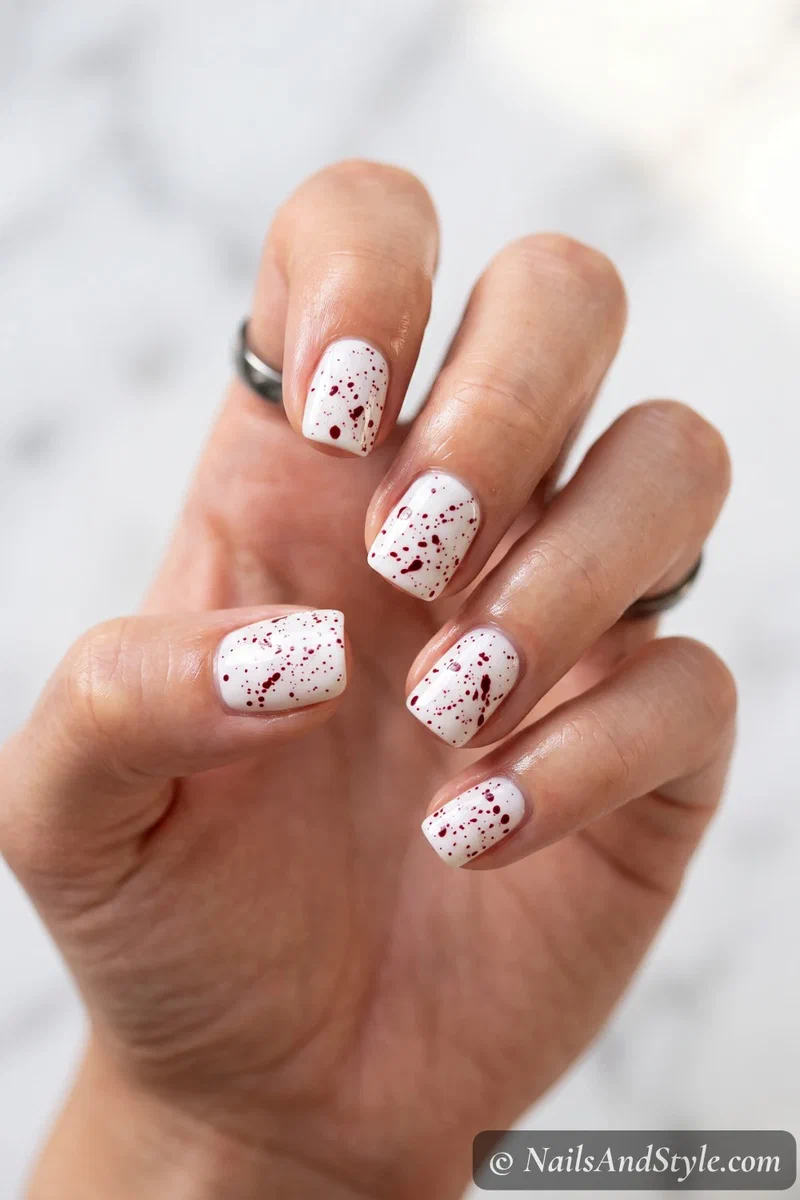
1. Blood Splatter Nails#
Like you walked out of a slasher film unbothered. Flick deep red polish across a white or nude base for a fine crime-scene splatter. Dip an old thin brush in red and tap it against your other hand to fling tiny specks onto the nail — messier is better here. Seal glossy so it looks fresh.
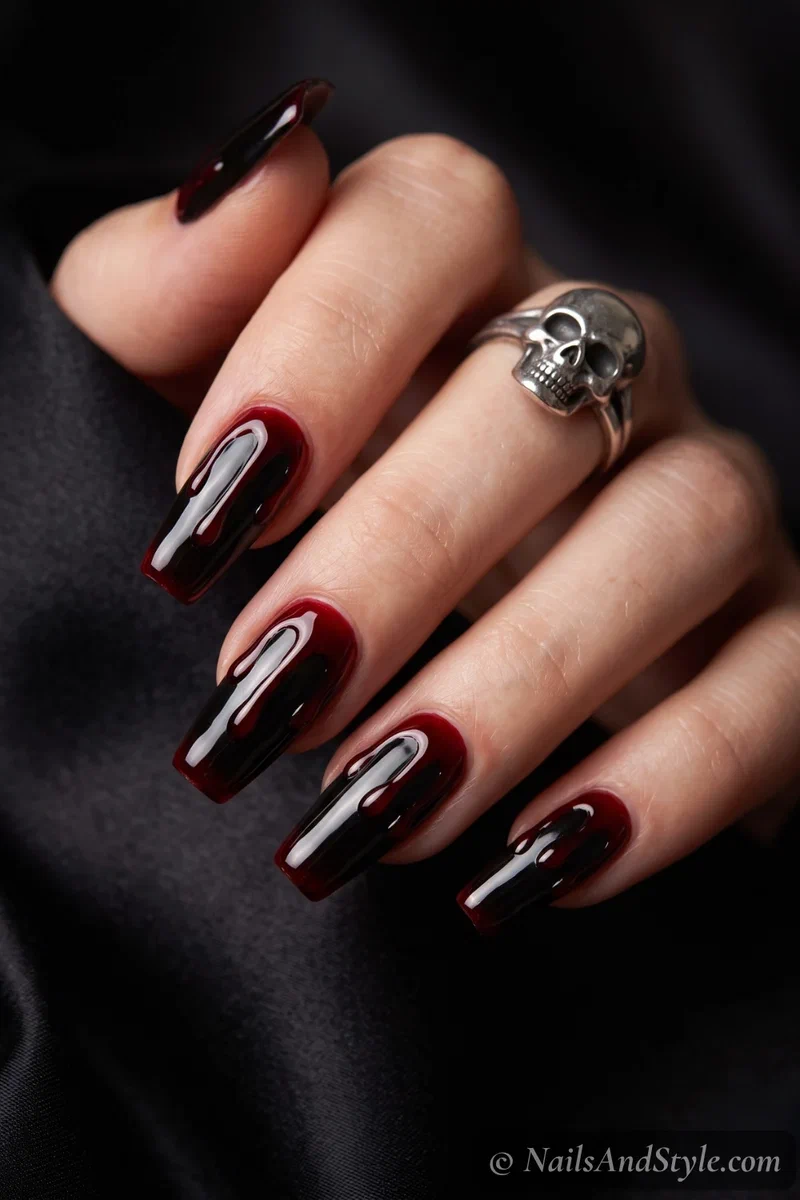
2. Dripping Gore Nails#
The full gory drip, turned up to eleven. Thick red running down from the cuticle over a black base, pooling heavy at the tips like it’s still wet. Load a small brush with dark red and drag uneven drips downward, letting a few clump thicker at the ends. A glassy top coat makes it look genuinely sticky.
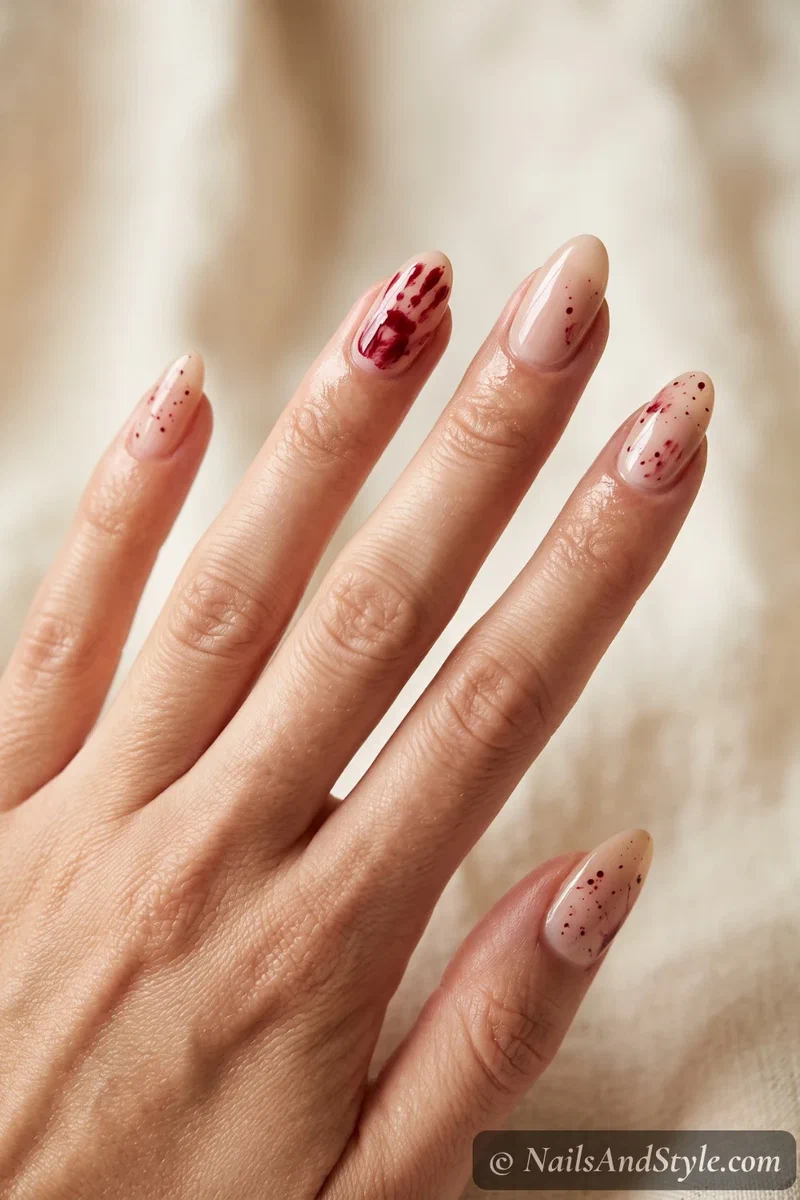
3. Bloody Handprint Nails#
Like something grabbed you. A smeared red handprint or drag mark across a pale base is unsettling in the best way. Use a small sponge or your fingertip to smudge dark red in a streaky swipe, keeping it uneven and half-there. The imperfection is exactly what makes it creepy.
4. Bloody Bandage Nails#
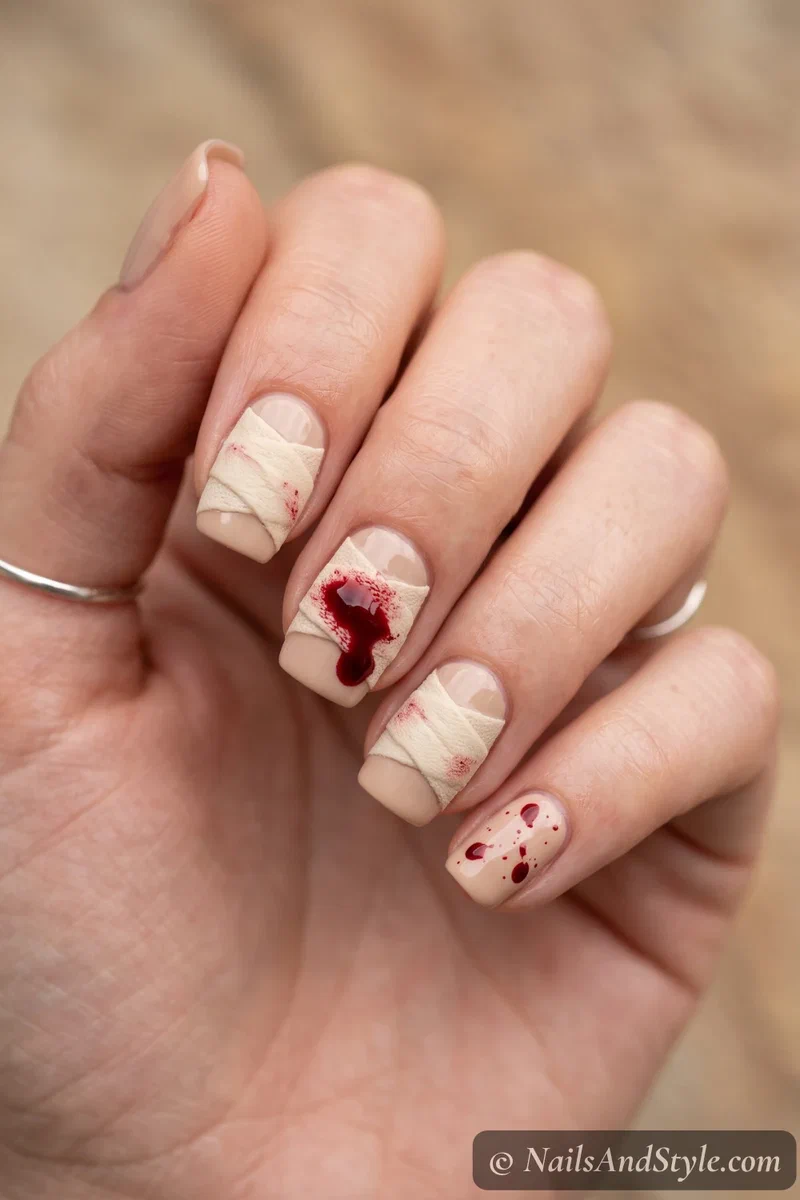
Wounded-mummy energy, way past cute. Cream bandage wraps over a beige base, but this time soaked through with red where the “wound” is. Paint uneven bandage lines, then dab dark red bleeding through a section of them. Matte top coat on the bandages, glossy on the blood, for that gross contrast.
5. Bleeding Heart Nails#
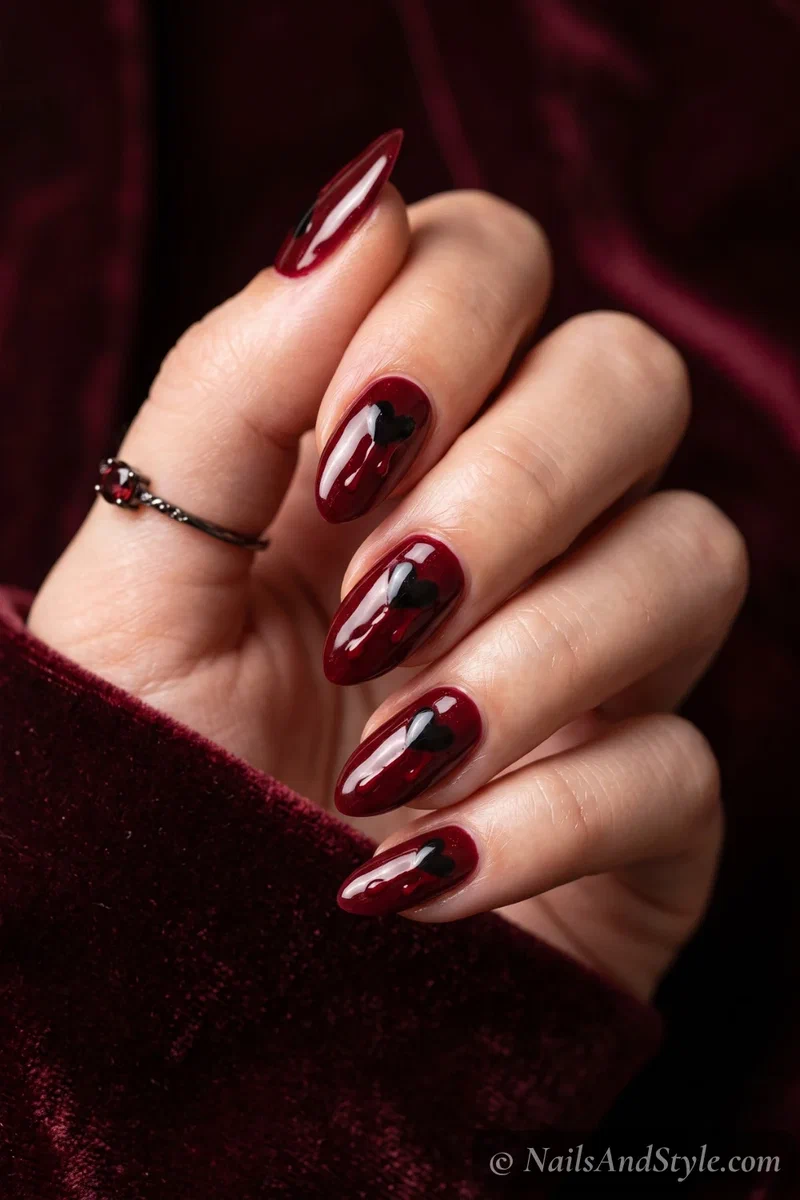
Gothic and a little heartbroken. A small black or red heart on one nail with a thin trickle of blood dripping from the point. Paint the heart, then pull one or two fine drips down from the bottom with a liner brush. Over an oxblood base it reads dark-romantic rather than gory — my pick for a moodier take.
Skeleton & Skull Nails#
Bones are peak Halloween, and there’s a version for every skill level here — from a single skull to a full anatomical hand across all five nails.
6. X-Ray Skeleton Hand Nails#
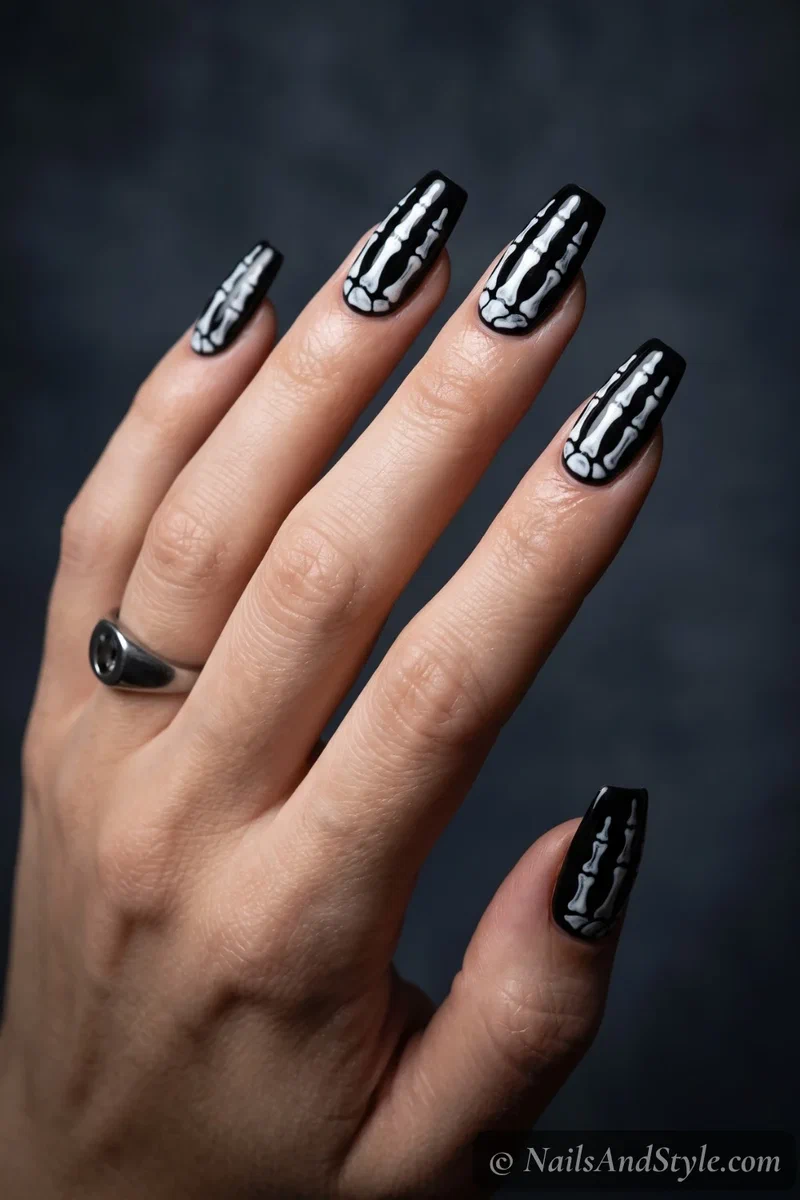
The showpiece. Painted right, your whole hand looks like an X-ray — finger bones running down each nail, knuckle joints and all. Bone-white lines over a black base, drawn with a thin brush, one nail at a time. This is a sit-down, take-your-time design, but the payoff is unreal. Worth every minute.
7. Sugar Skull Nails#
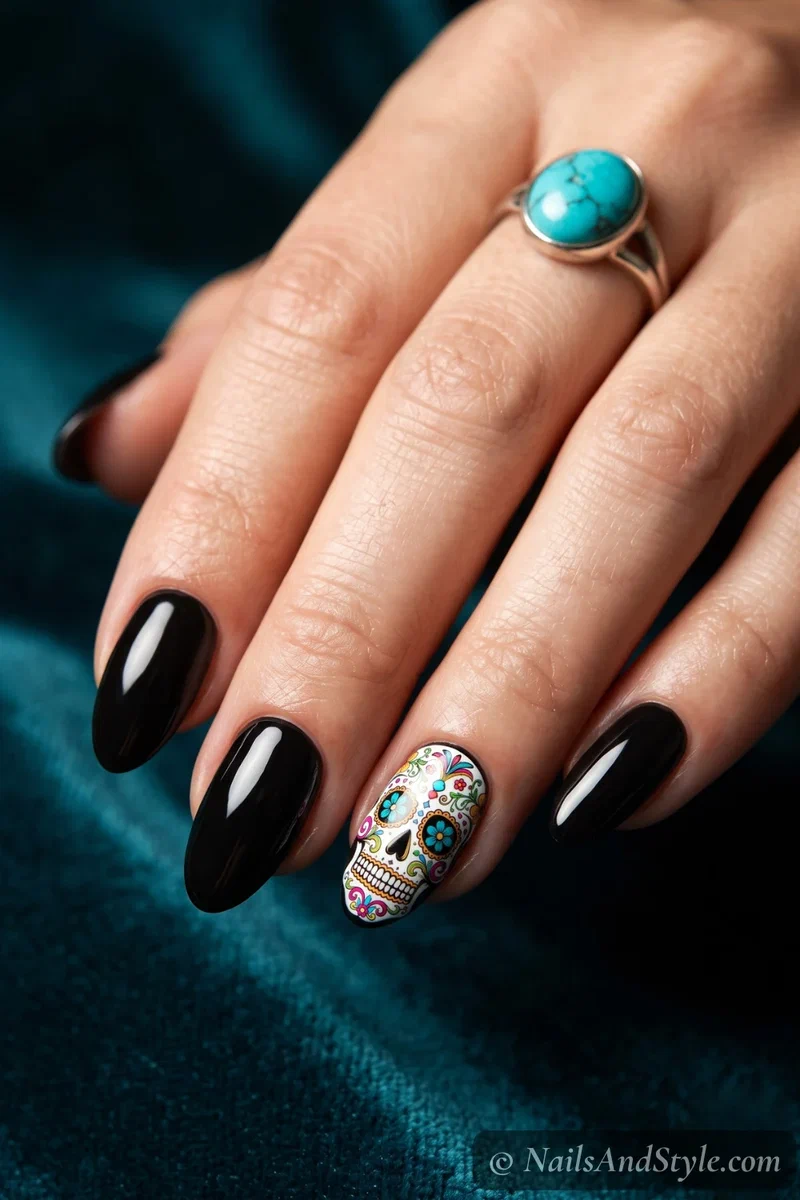
Día de los Muertos meets nail art — ornate, colorful, and gorgeous rather than gruesome. A decorated sugar skull with swirls, dots, and little flowers on an accent nail. Paint the white skull base first, then layer color details with a fine brush and dotting tool. Bright colors on black make it pop.
8. Screaming Skull Nails#
Less pretty, more nightmare. A skull mid-scream, hollow eyes and a gaping jaw, on a bone-grey base. Paint the skull shape, then dark shadowing in the eye sockets and mouth to give it depth. Keep the shadows heavy — that’s what turns a cute skull into a scary one.

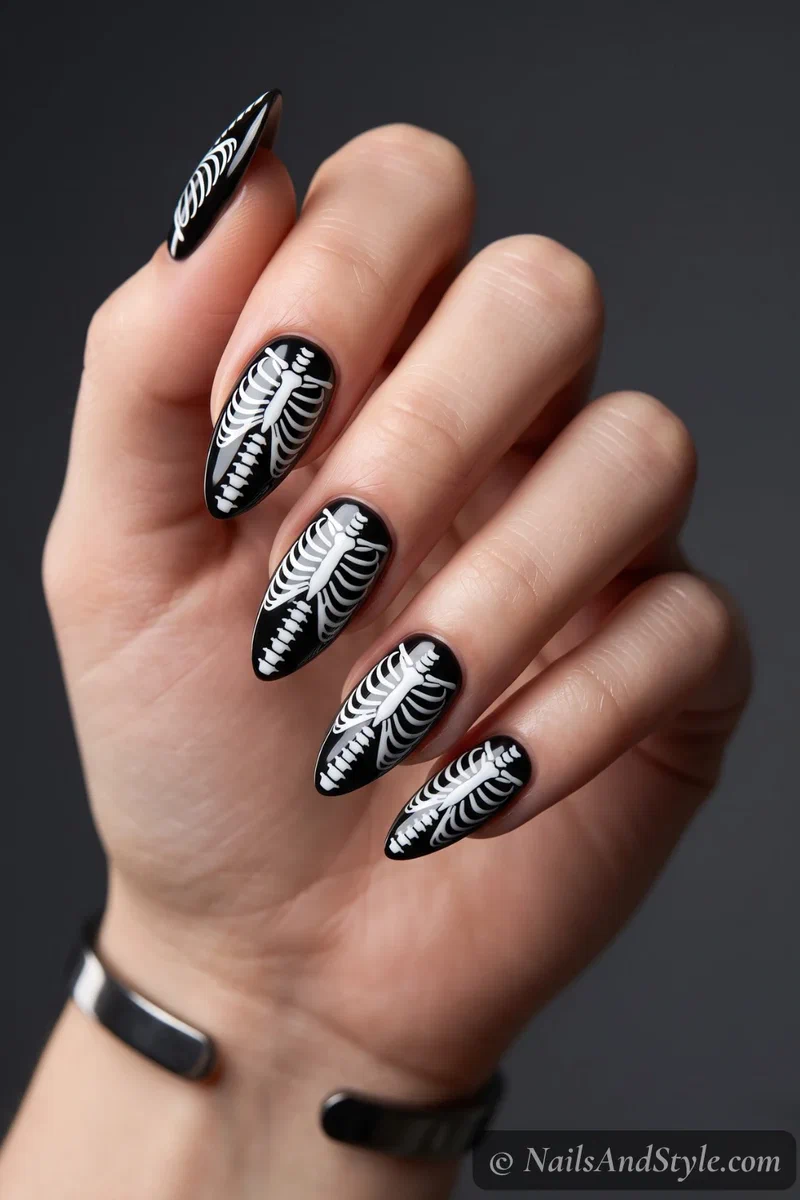
9. Skeleton Ribcage Nails#
An unexpected placement that looks incredible. A ribcage curving down the nail, like your finger is see-through. Paint a spine line down the center, then curved white ribs branching off it over black. It’s simpler than a full hand but reads just as anatomical and eerie.
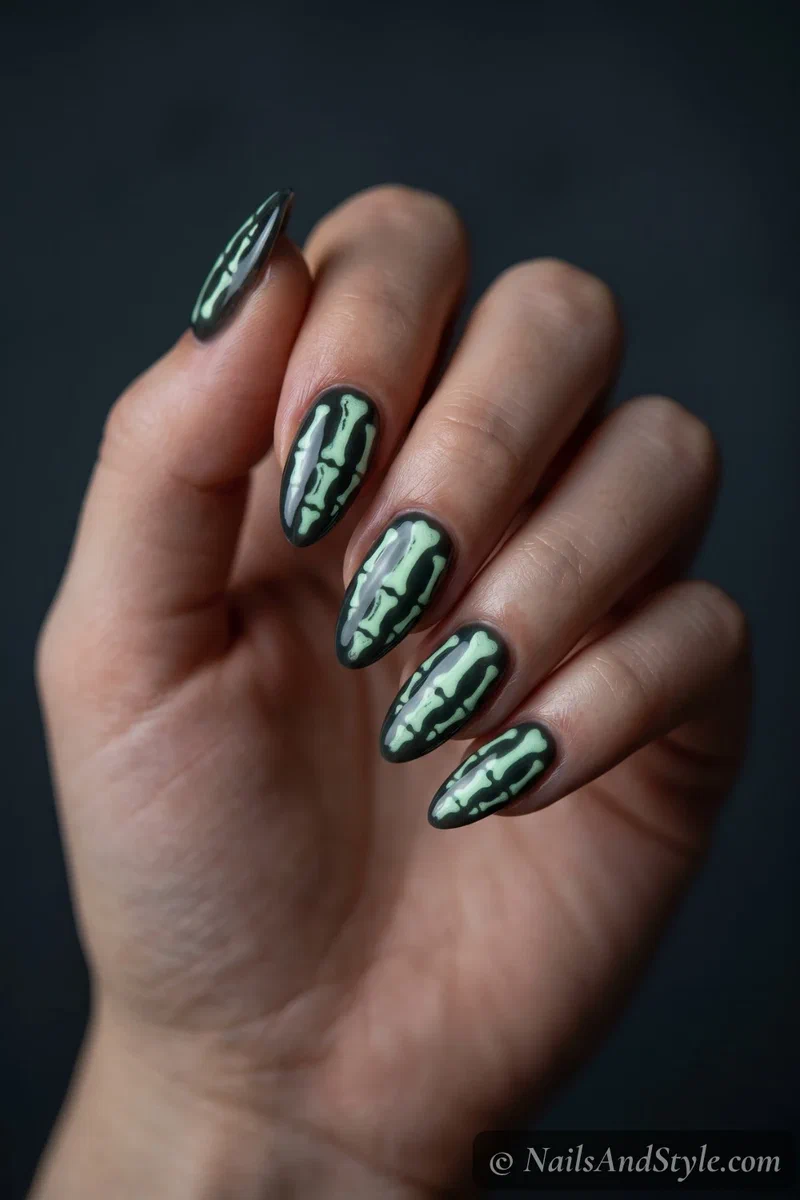
10. Glow Skeleton Nails#
Bones by day, glowing horror by night. A simple skeleton design that lights up eerie green when the lights drop. Paint your bones in glow-in-the-dark polish (or top them with a glow coat), then charge under a lamp for a minute. The reveal at a dark party is unbeatable.
Vampire & Gothic Nails#
The elegant end of spooky — dark romance, deep reds, ornate detail. These lean chic-creepy, so they work well past October if you’re into the gothic look year-round. My dark plum nail ideas live in the same moody world.
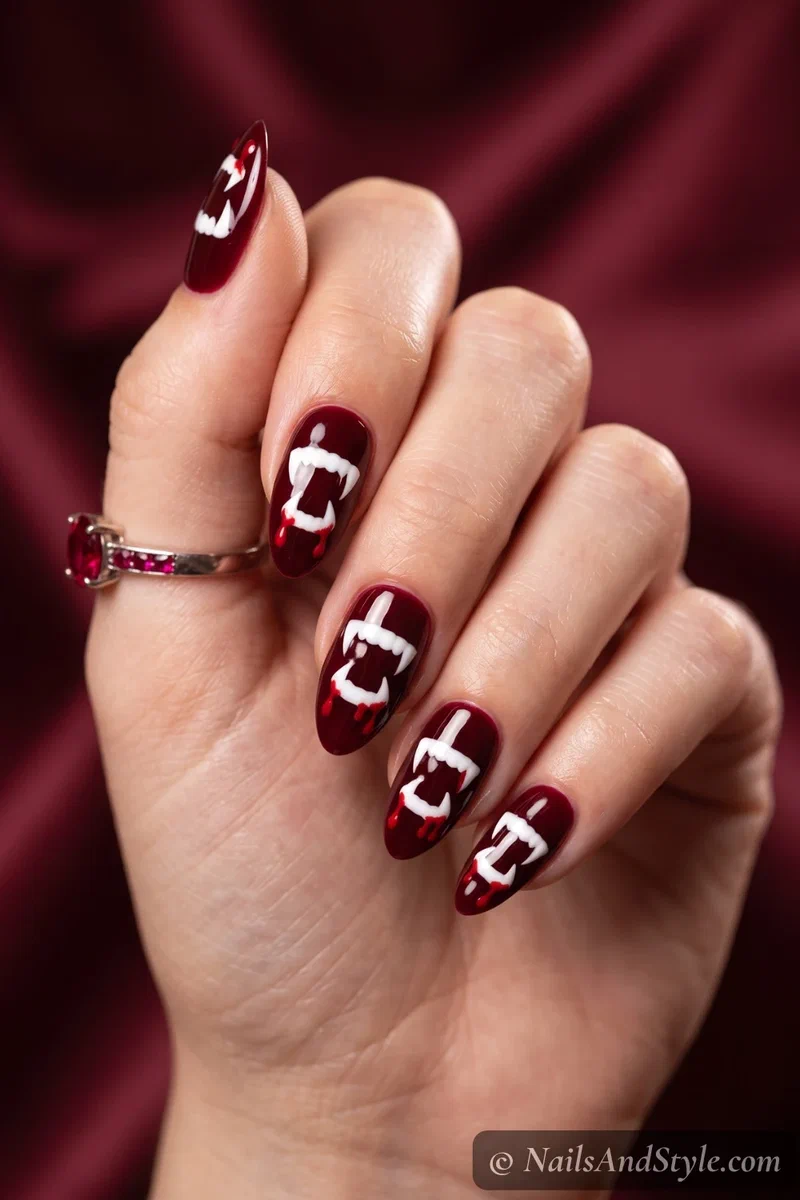
11. Vampire Fang Nails#
Just been bitten. Two fangs and a fresh trickle of blood on a deep base — sharper and gorier than a simple bite mark. Paint two white fang shapes near the tip, then a couple of red drips beneath them. On a dark red base it looks like the aftermath of a very bad date.
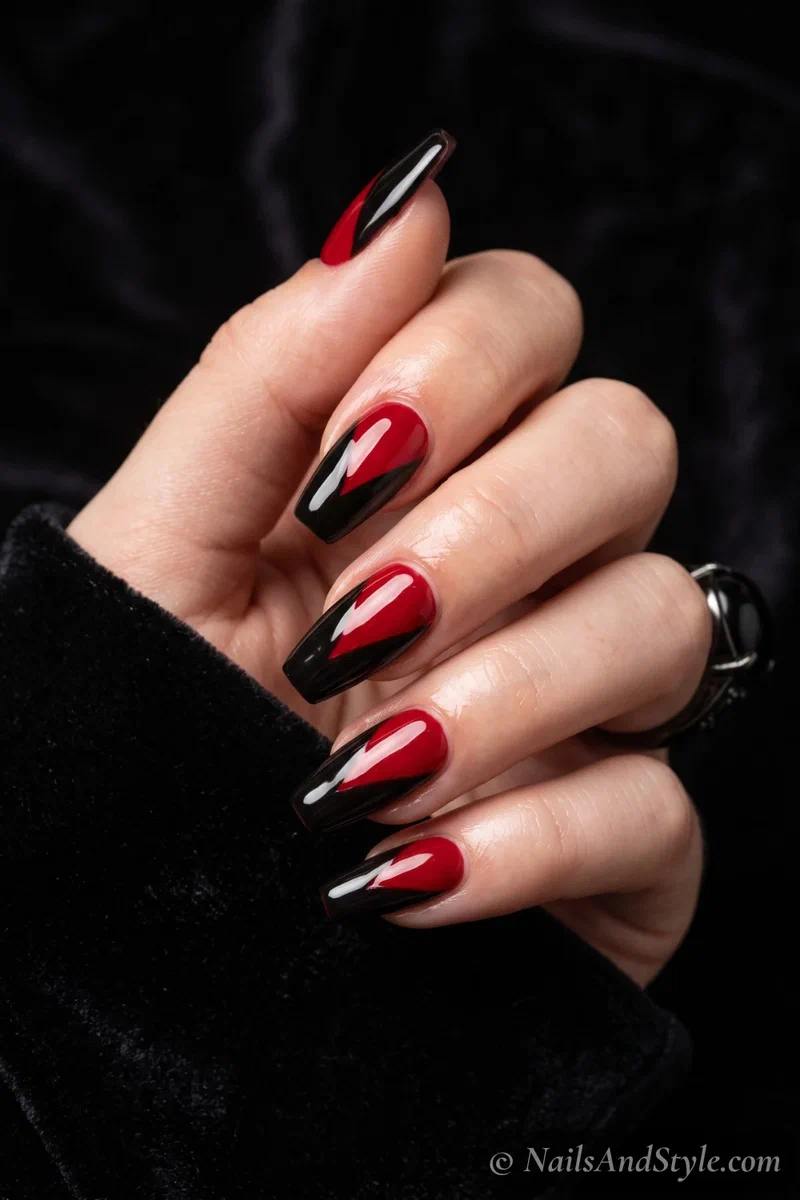
12. Dracula Cape Nails#
Theatrical and fun. A high black cape collar rising up from the base of the nail with a blood-red lining peeking through, very old-Hollywood vampire. Paint the black cape shape with its pointed collar, then a thin red edge inside. Dramatic without needing tiny detail work.
13. Gothic Rose Nails#
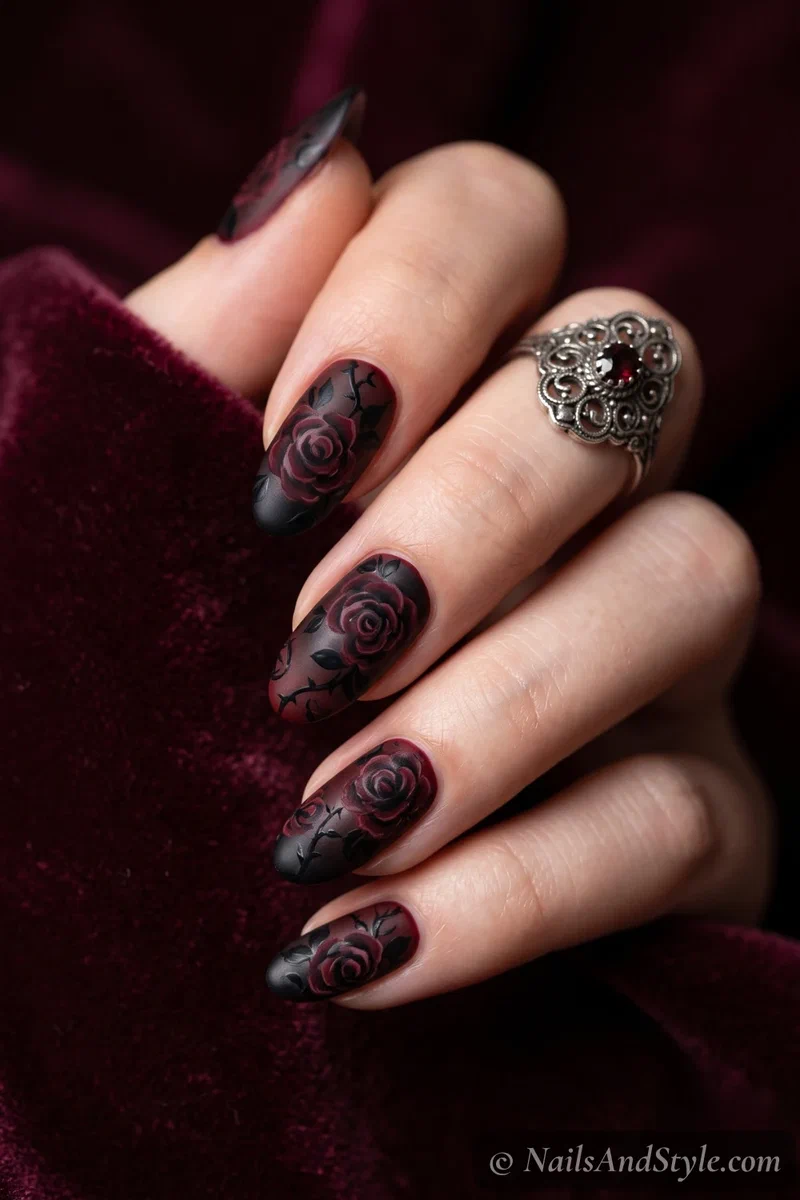
Dark, romantic, and honestly stunning. Deep blood-red and black roses over a moody base — the kind of thing a vampire queen would wear. Paint loose rose shapes with a small brush, layering dark red petals and black shadows. A matte top coat makes them look like pressed velvet flowers.
14. Blood Moon Nails#
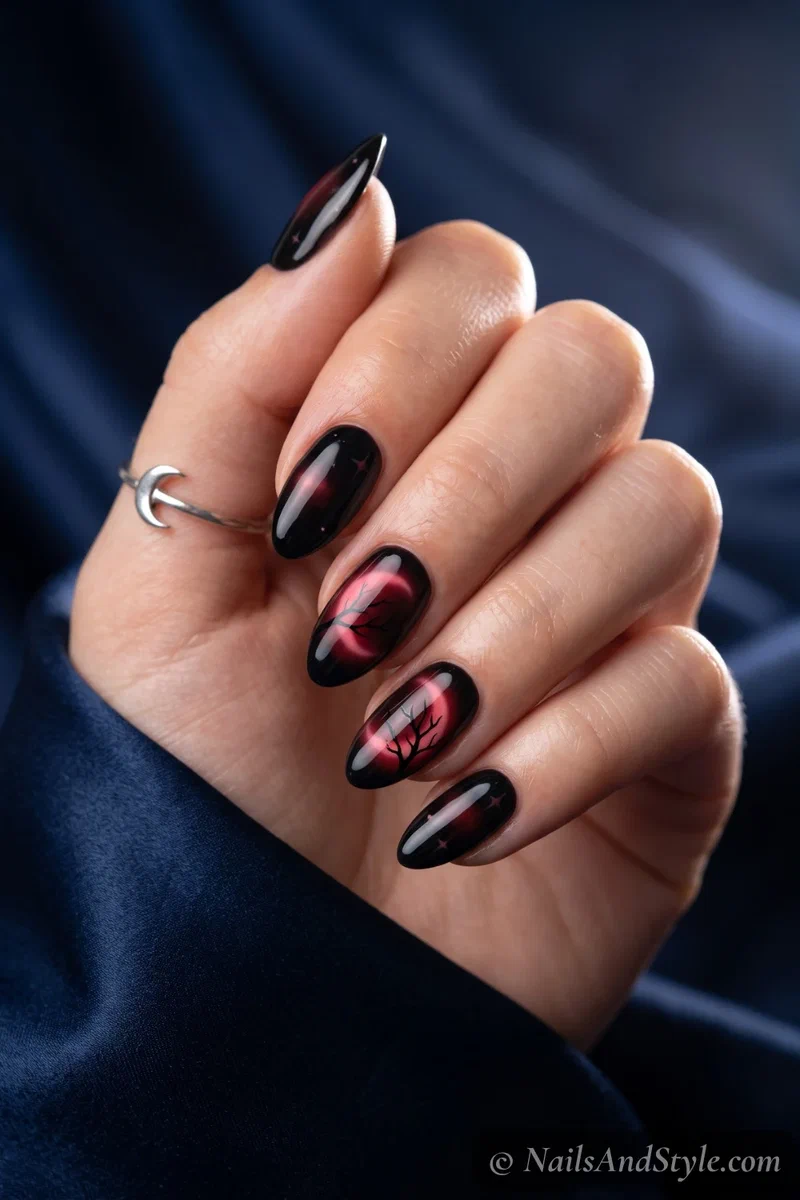
Eerie and minimal. A deep red moon glowing against a black night sky, maybe a bare branch crossing it. Sponge a dark red circle onto a black nail and blur the edges for a glow, then add a thin black branch silhouette. Simple, moody, and it photographs like a movie poster.
15. Victorian Vampire Nails#
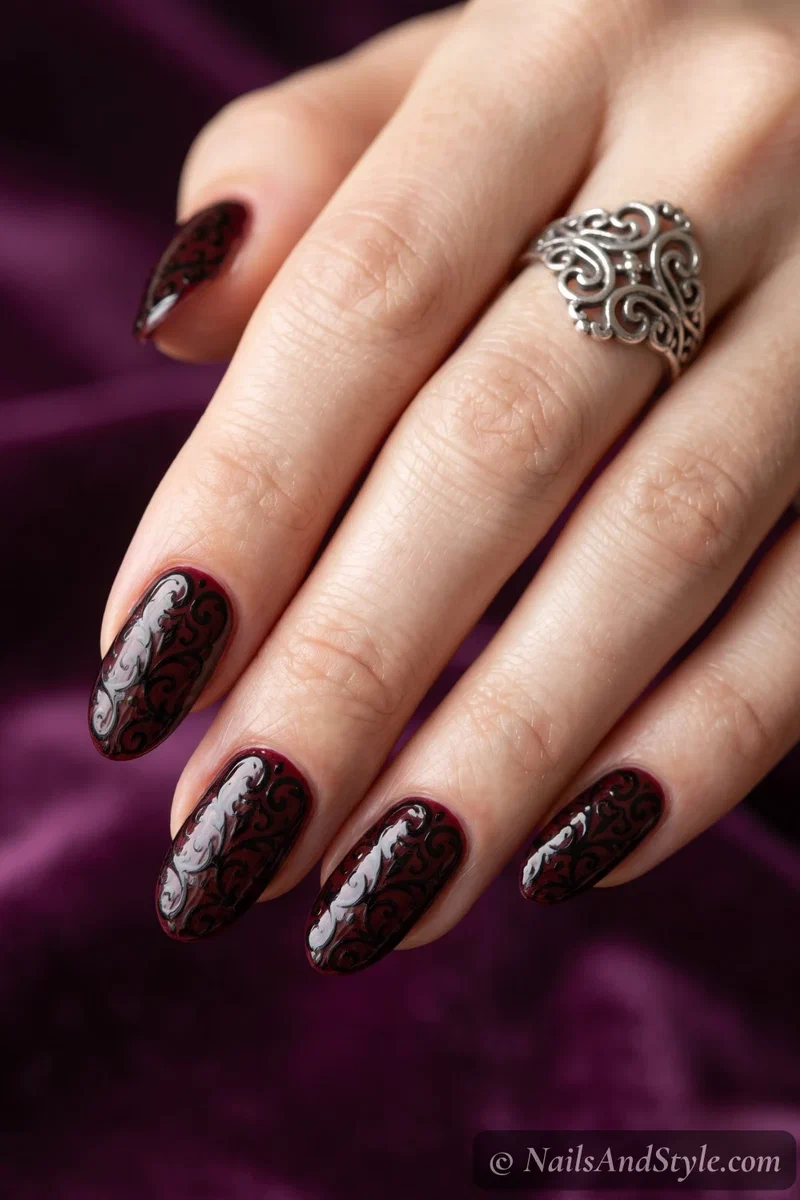
Peak gothic elegance. Ornate black filigree — swirls, lace-like scrollwork — over oxblood or deep plum, like antique wallpaper in a haunted manor. Use your finest brush or a stamping plate for the scrollwork. It’s intricate, so take it slow. Pairs beautifully with lace nail ideas if you love the detailed gothic look.
Spider & Web Nails#
Not the cute cartoon kind. These spiders are realistic enough to make someone recoil — which is exactly the goal.
16. Realistic Spider Nails#
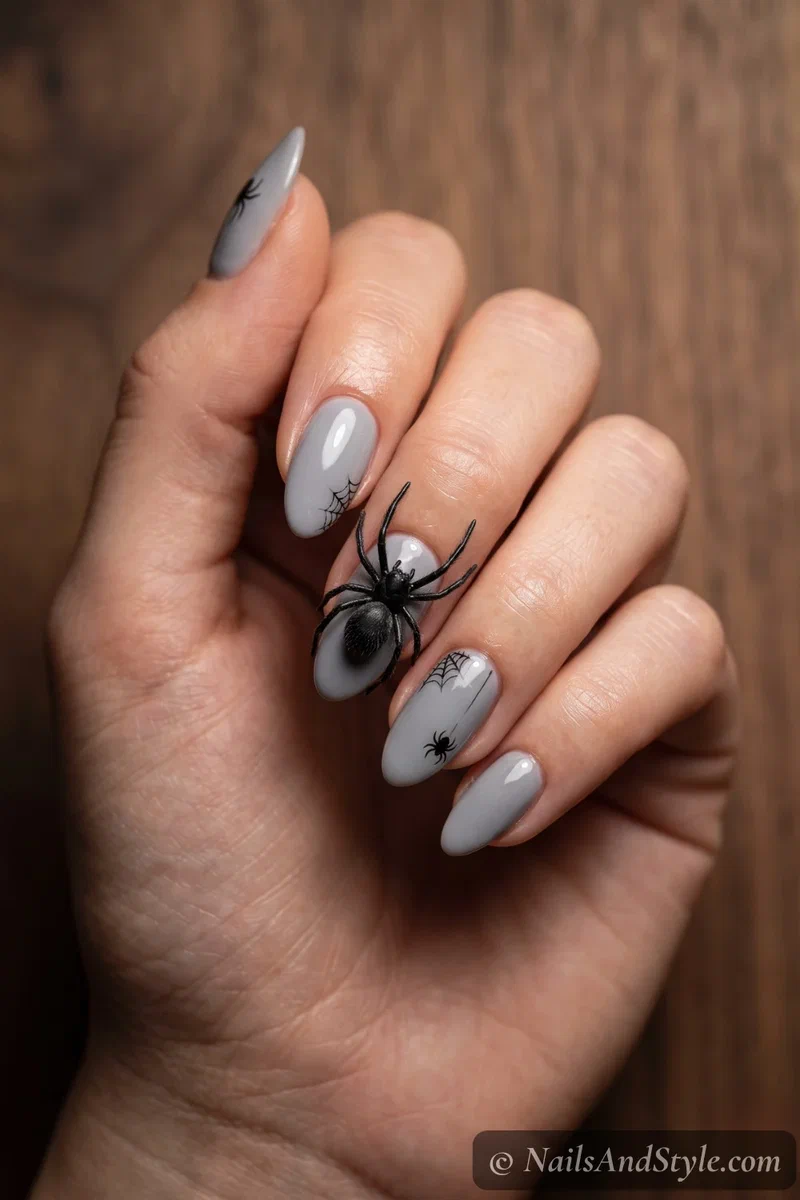
The one that gets a reaction. A detailed, slightly hairy spider crawling across a couple of nails, painted with actual dimension. Build the body in black, add fine leg segments and tiny highlights so it looks three-dimensional. Place it climbing toward the cuticle for maximum “is that real?” energy.
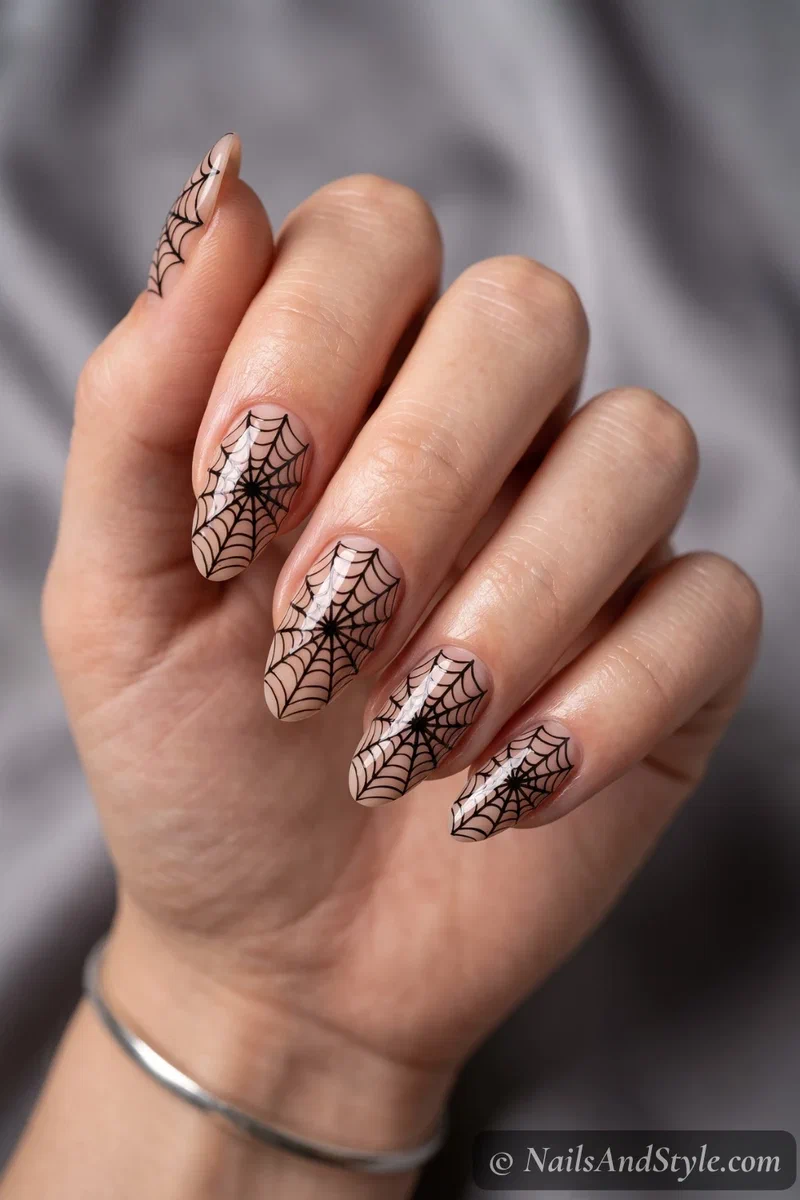
17. Full Web Nails#
An intricate web taking over the whole nail, not just a corner. Fine black lines radiating from a center point with connecting curves, dense and delicate. Start with the spokes, then link them with curved threads, working outward. A silver or glow accent web is a cool twist. Patience is the whole skill here.
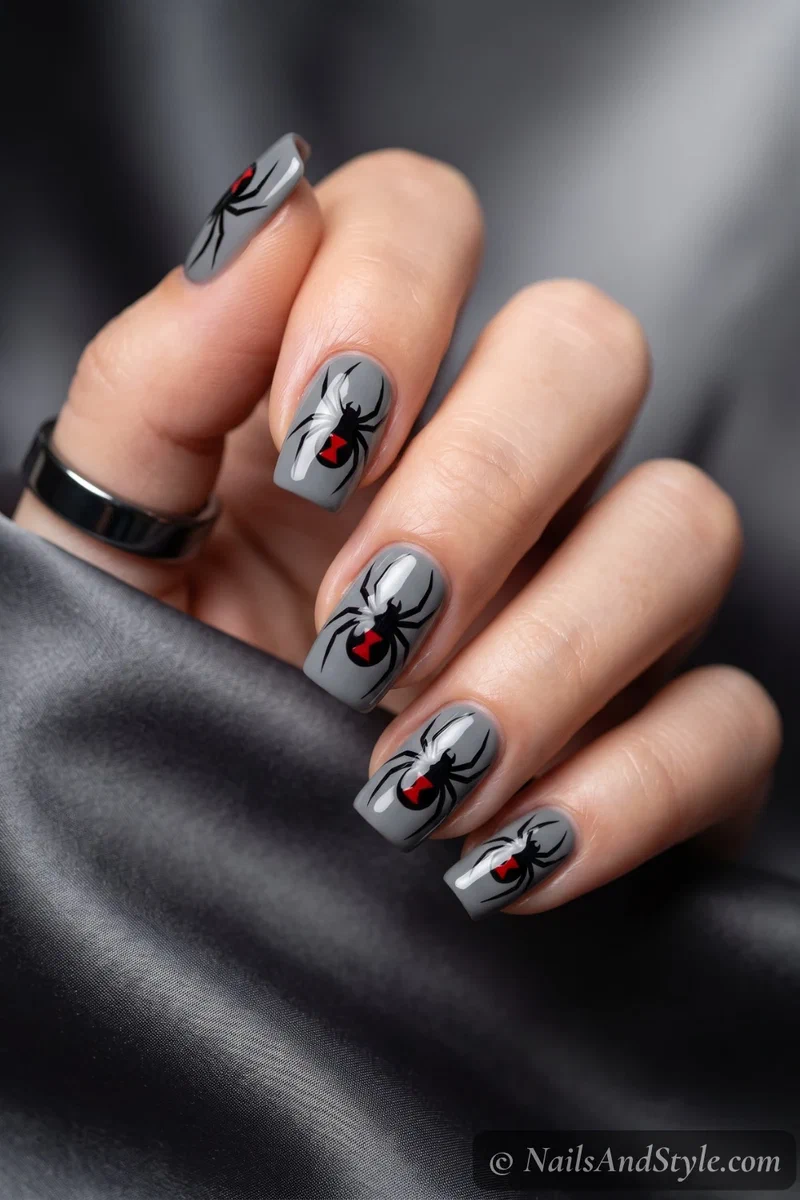
18. Black Widow Nails#
Danger with a red hourglass. A glossy black widow spider with the telltale red mark on its back, sitting on a grey or black base. Paint a rounded black body, thin legs, then a small red hourglass shape on the abdomen. Menacing, iconic, and not as hard as it looks.
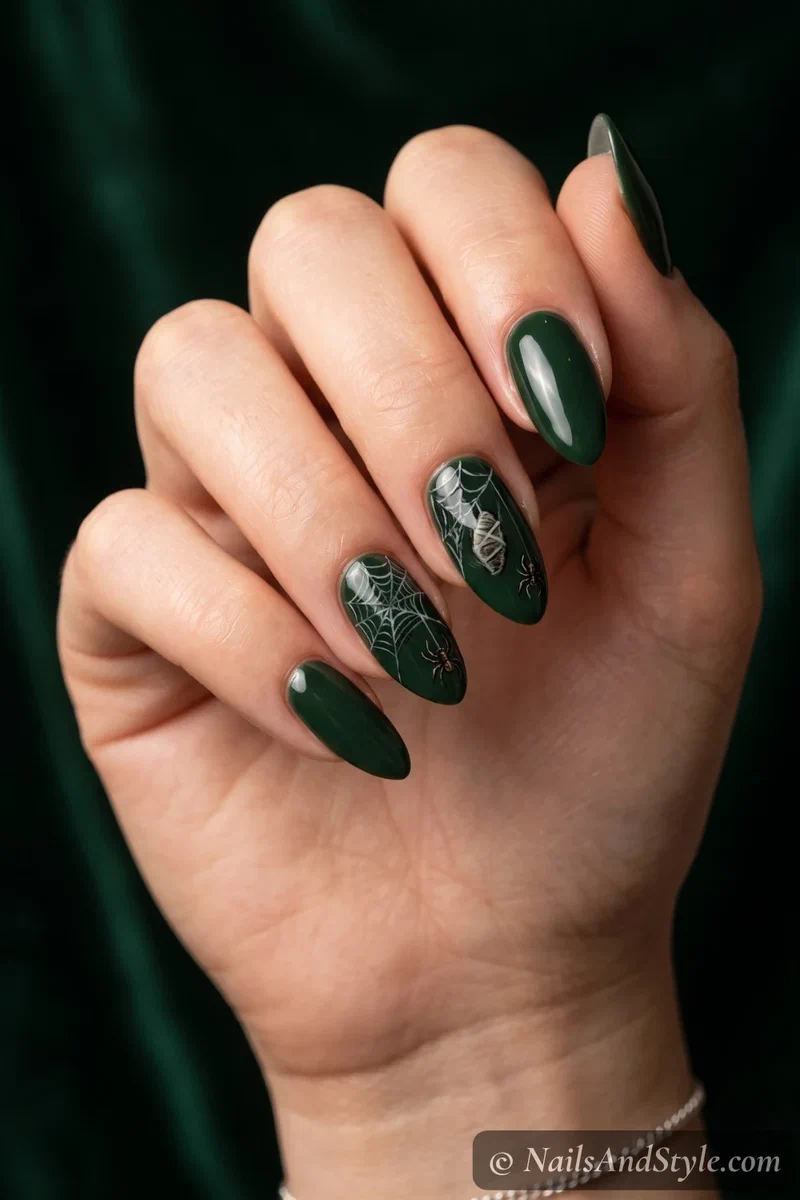
19. Web & Prey Nails#
The full creepy scene. A web with something wrapped up in it — a little cocooned fly or bug the spider’s saving for later. Paint the web, then a small wrapped bundle stuck in the threads with a spider nearby. It tells a tiny horror story on your nail, which I’m obsessed with.
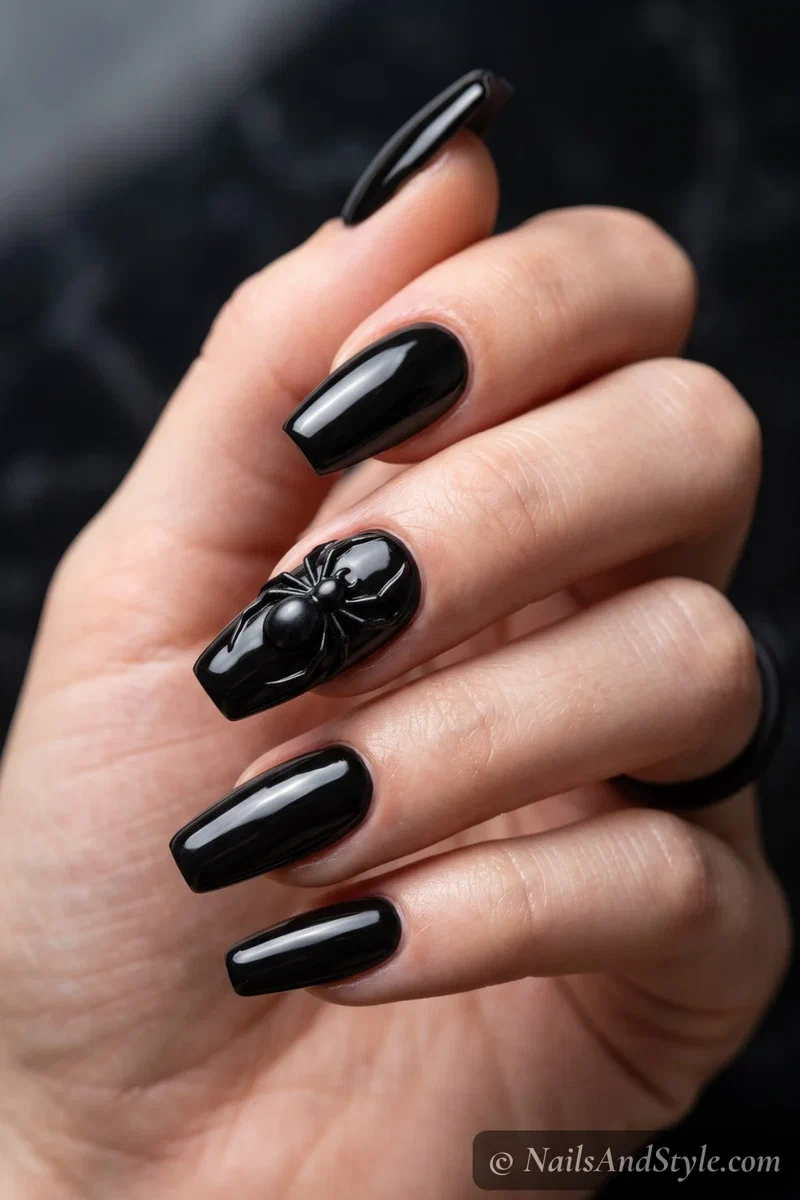
20. 3D Spider Nails#
Spiders you can actually feel. A raised, three-dimensional spider built up with gel or acrylic so it sits off the nail. Sculpt a small domed body and legs with builder gel, cure, then paint black and gloss. Detailed art like this holds up best on a sturdy base — my guide on how to do acrylic nails at home helps if you want length to work on.
Creepy Eyes & Monsters#
The uncanny bundle. Eyes that stare, faces that shouldn’t exist, skin that’s clearly not okay. This is where spooky tips into genuinely unsettling.
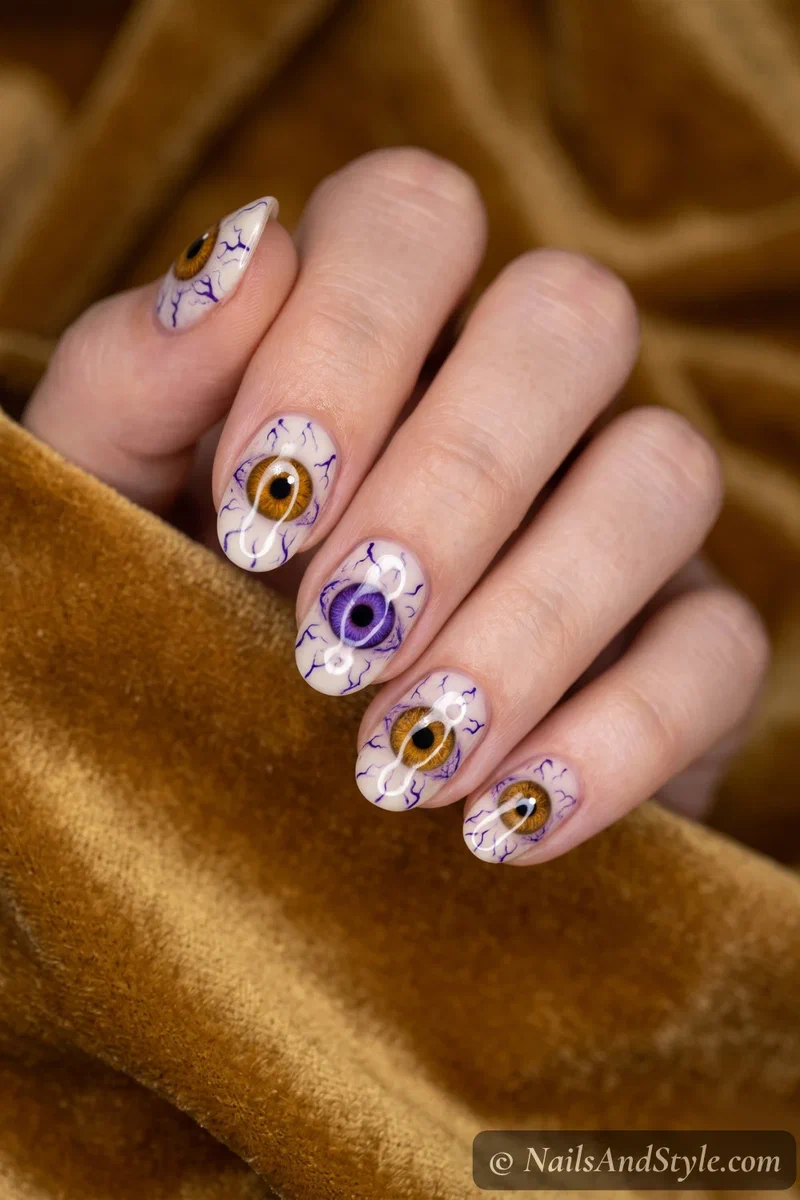
21. Bloodshot Eye Nails#
An eye so detailed it feels like it’s watching you. Veiny, wet, wide open on an accent nail. Paint a white eyeball, a colored iris and black pupil, then fine red veins creeping in from the edges and a glossy shine over the top. One is plenty. Trust me, one is plenty.
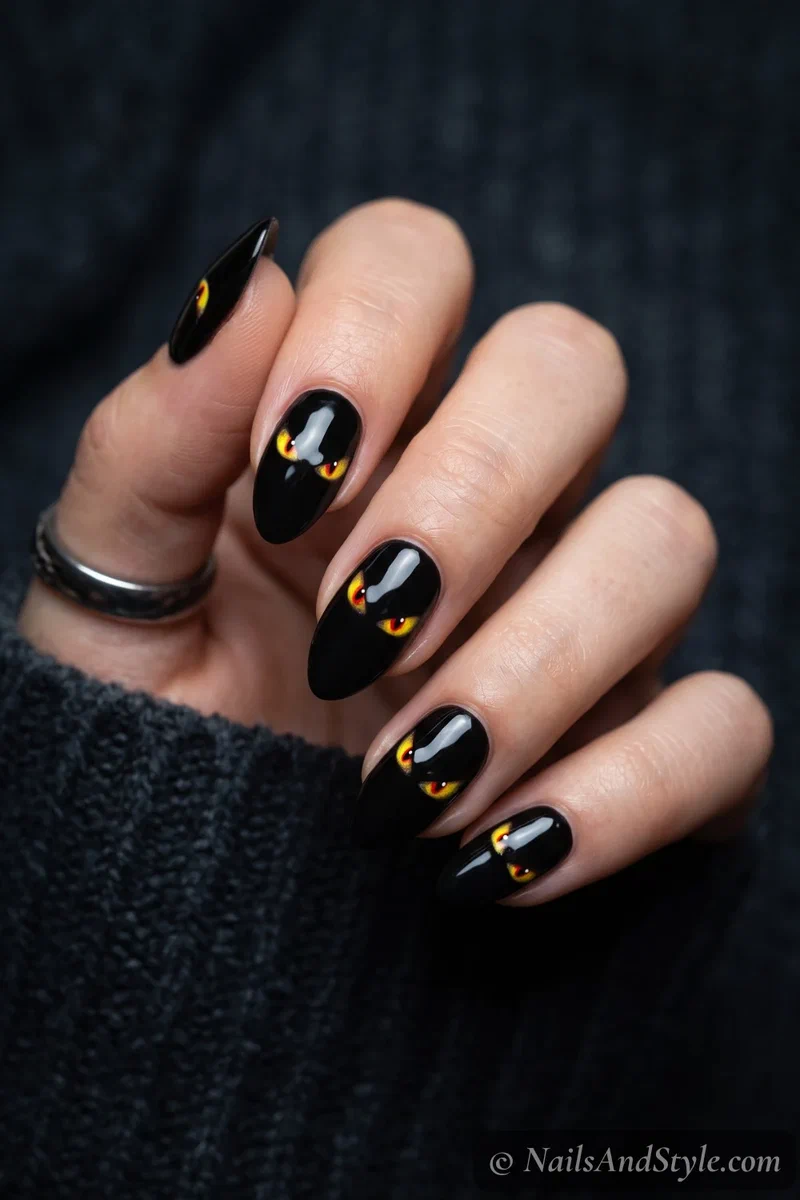
22. Evil Eye Nails#
Glowing eyes peering out of the dark, like something’s in the closet. Pairs of narrowed, menacing eyes on a black base, glowing yellow or red. Dot and shape the eyes with a thin brush, leaving them half-hidden in the black. The less you show, the scarier it reads.
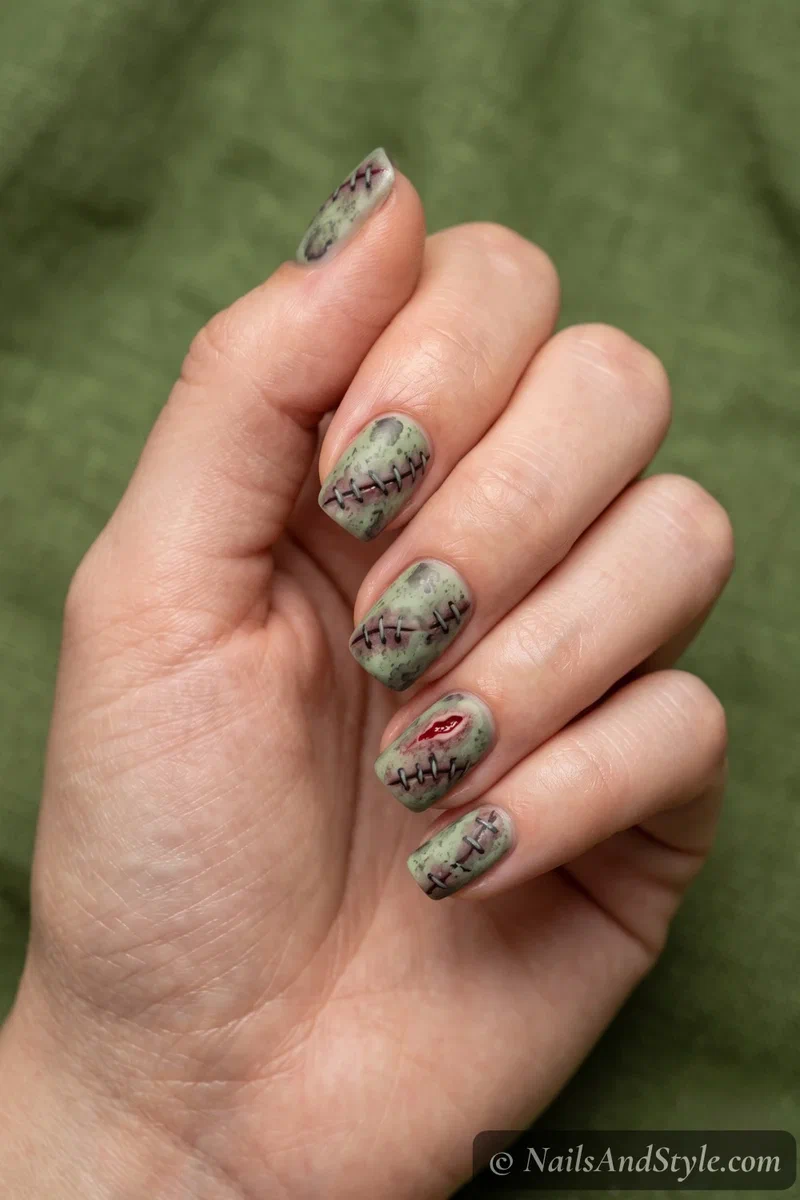
23. Zombie Skin Nails#
Rotting and proud of it. A sickly greenish-grey base textured to look like decaying flesh, with a few stitches and a gash for good measure. Sponge patchy green and grey together, then add dark stitch lines and a red wound with a thin brush. The blotchier and grosser, the better.
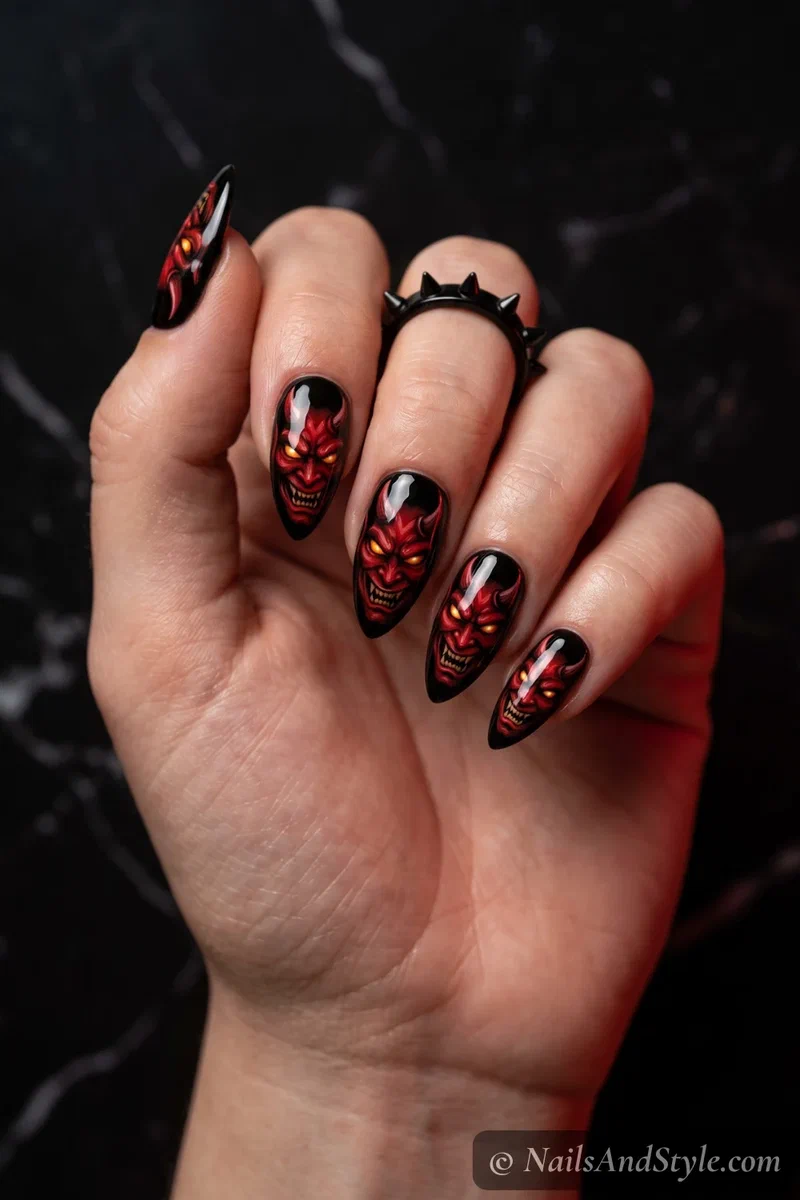
24. Demon Face Nails#
Straight-up nightmare fuel. A snarling red demon face with horns, glowing eyes, and a wicked grin. Paint the red face on a black base, then black shadows, sharp horns, and bright menacing eyes. Keep the expression aggressive — soft features ruin it. Not for the faint of heart.
25. Creepy Doll Nails#
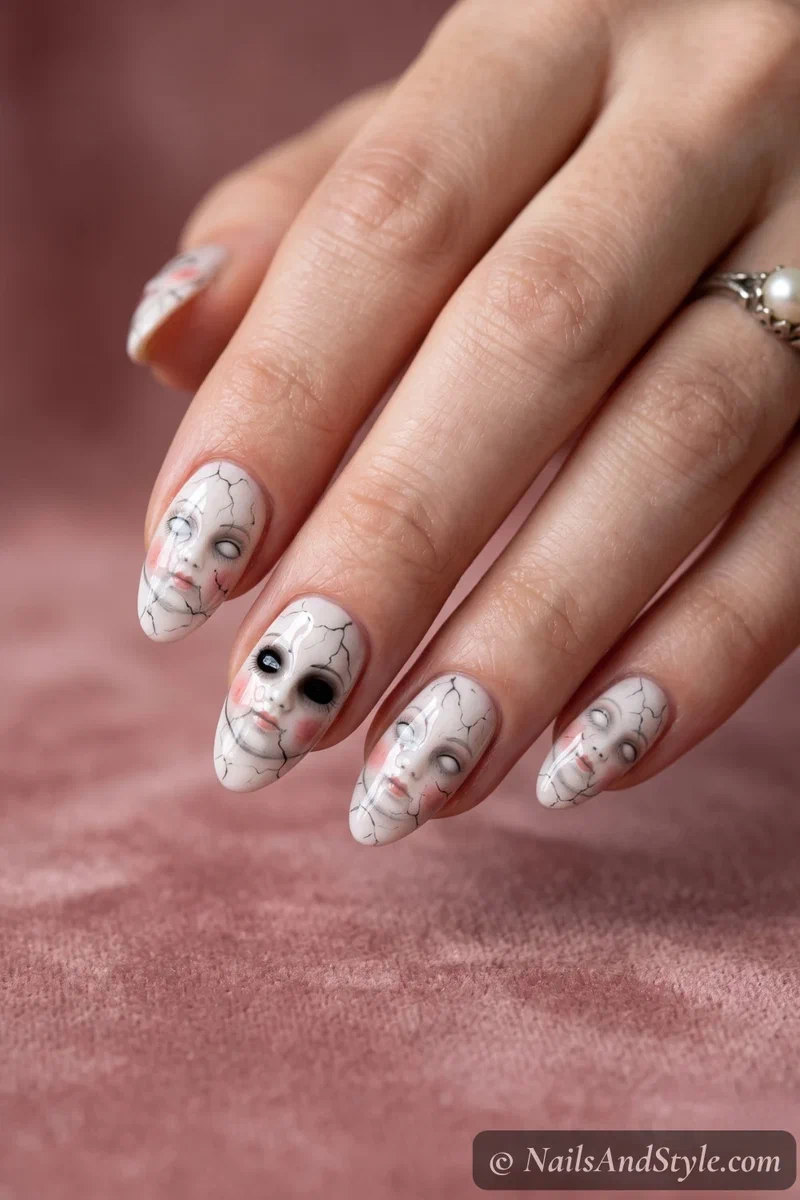
The quietest scary one, and maybe the worst. A cracked porcelain doll face — rosy cheeks, blank staring eyes, and a spiderweb of cracks across it. Paint a pale doll face with cute features, then ruin it with thin grey crack lines and one blacked-out eye. Uncanny is the whole point.
Spooky Halloween Nails on Short Nails#
Here’s a secret: gore looks even better on short nails. Blood drips, splatter, and single creepy details pack tighter and read nastier when they’re not spread across a long canvas. A bloodshot eye or a screaming skull fills a short nail perfectly, no wasted space.
Save the big scenic designs — full skeleton hands, web-and-prey stories — for your longer nails or an accent, and let the short ones carry the punchy single motifs. Short nails also survive the whole night of grabbing drinks and adjusting costumes without a chip. Practical horror.
A Few More Short Nail-Specific Ideas#
- Single blood drip — one gory drip on a short nail is clean and brutal.
- Tiny screaming skull — a short nail frames one skull face without crowding.
- Splatter accent — a few red flecks across short nails is instant creepy, zero skill.
- One evil eye — a single staring eye on a short accent is deeply unsettling.
- Black widow on the thumb — the short, wider nail is the perfect spot for one detailed spider.
Simple Step-by-Step: How to Do This at Home#
- Prep your nails. Clean, trim, file, and gently push back your cuticles.
- Buff lightly. A soft buff helps everything grip — don’t overdo it.
- Apply a base coat. Crucial with black and red, which stain natural nails fast.
- Paint your dark base. Two thin coats of black, bone, or oxblood, fully dry before art.
- Build the creepy design. Thin liner brush for bones and filigree, a sponge for bloody smears and gradients, builder gel for anything 3D.
- Add the gory details. Drips, veins, stitches, glowing eyes — layered on last for the most impact.
- Clean up the edges. A small brush dipped in remover tidies any stray color off your skin.
- Seal it. High-gloss top coat over blood and gore for the wet look; matte over gothic roses and bones for a flatter, eerier finish. Dry fully.
How to Ask Your Nail Artist for Spooky Halloween Nails#
Some of these are genuinely advanced, so a good salon can take them further than you might at home. A little direction gets you the horror you’re picturing instead of a watered-down version.
- Bring clear reference photos. “Spooky” is broad — show whether you mean gothic-elegant or full gore so they match the intensity.
- Name the finish per detail. Glossy for blood, matte for bones and roses — mention it, since it changes the whole feel.
- Ask about hand-painting time. Skeleton hands, realistic spiders, and filigree need real freehand time, so book a longer slot.
- Mention 3D if you want it. Raised spiders or drips need builder gel — flag it so they bring the right products.
- Go gel for the detailed sets. Gel keeps fine, dark, intricate art crisp and chip-free far longer than regular polish.
Tips to Make Your Nails Last Longer#
- Keep layers thin so detailed art doesn’t stay soft and smudge.
- Seal the free edge with color and top coat so tips don’t chip mid-scare.
- Skip hot water right after painting — it wrecks a fresh, layered design.
- Wear gloves for chores; intricate art hates dish duty.
- Refresh your glossy top coat every couple of days to keep gore looking wet.
- Use cuticle oil daily so nails flex instead of snapping.
- Don’t pick at a lifting design — you’ll take half a skeleton with it.
Quick FAQ#
Are spooky Halloween nails hard to do at home?#
It depends on the design. Blood splatter, drips, and a single skull are forgiving — messy even helps. The detailed looks, like a full skeleton hand or a realistic spider, need a steady hand and a thin brush, so work up to those once you’re comfortable.
What colors work best for scary Halloween nails?#
Black is the foundation, with blood red and bone white doing most of the work. Sickly green sells zombie and slime looks, deep oxblood and plum give you gothic vampire vibes, and a little cold silver adds that eerie glint.
How do I make blood look realistic on nails?#
Reach for a deep, slightly brownish red instead of bright cherry — real blood is darker than people think. Keep the drips uneven, let some pool thicker, and finish super glossy. The wet shine is what makes it convincing.
Final Thoughts#
The best spooky nails aren’t about cramming on every scary thing at once — they’re about one gory, well-placed detail that makes someone look twice. Whether you go full skeleton hand or just a single dripping eye, these spooky nails do the heavy lifting of your whole costume for you.
Save the ones that gave you a little thrill, pin them for your next horror-movie night, and don’t be afraid to mix the gore with the gothic — a bloody rose, a cracked-doll accent, whatever unsettles you most. And if you decide you want a break from the scary, my cute Halloween nails are right there when you need something a little softer.